
DIY: What a Difference Architectural Details Make
>> Saturday, November 21, 2009
Good morning. I was up at five today -- partially because I'm incredibly nervous and full of energy, partially because I still haven't packed . . . and we're leaving at 8AM. But I wanted to share this project with you all. Last month we were paid a visit by the 88-year-old previous owner of our home. Actually, she lived here for over 60 years, from the time the house was built in the late 1940s. We were super scared to have her tour the place. After all, we've changed basically everything in the short year and a half that we've been here. And I've seen far too many of those shows where the previous owner visits, breaks down, and cries like a baby because his or her favorite unicorn mural has been washed over with antique white.
Or whatever the case may be.
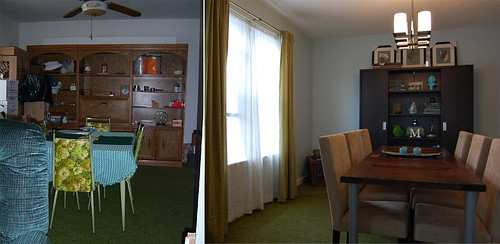
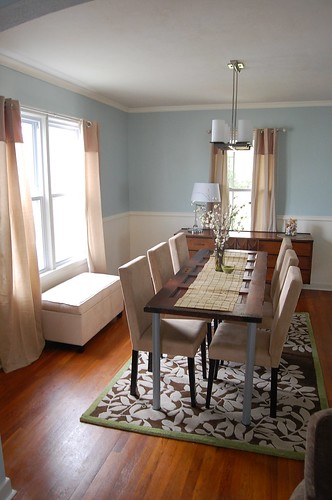
So, the dining room started out (and this is a photo from when we toured the place before putting down an offer, so those neon-green plastic-y chairs aren't ours, unfortunately) like in the top left photo. When we moved in, our furniture made the place look like the top right photo.
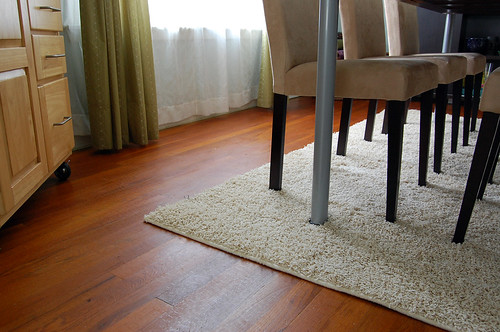
But something was definitely missing. Lacked character, really. At first, we didn't know what to do, so we simply changed the decor a little. Oh, and we also removed the carpet, which was a tremendous help.

But the room needed more to get it looking the way we wanted. Enter the architectural details from this post's title. We were strolling around Home Depot (or was it Loews?) one day, when I got distracted from our original mission (to purchase a new ceiling fan for the guest room upstairs) and found myself browsing around the molding section. In particular, I was drawn to the composite (in other words, the not-wood -- almost like a really strong foam?) moldings, as they are light-weight, and seemed to be a breeze to install.
This project, truth be told, was really done in two stages. First, we bought chair rail. We installed it one weekend . . . and then the next weekend (or the one after that), we bought the matching crown molding. The weekend after that, we decided to paint the bottom portion of the room to create a paneling effect.
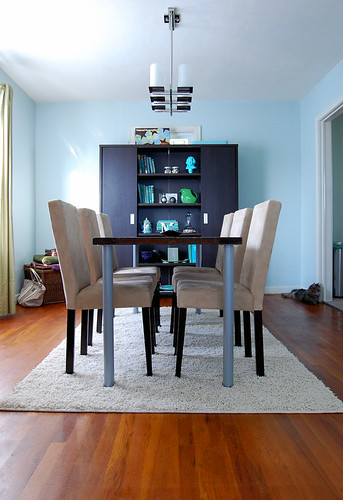
In essence, the room went from this . . .
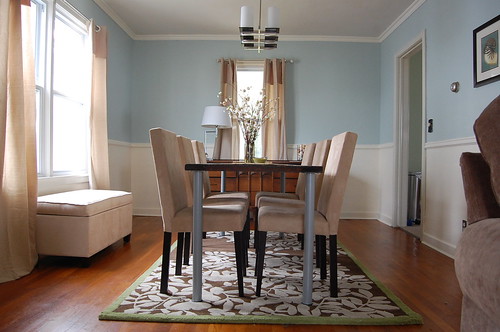
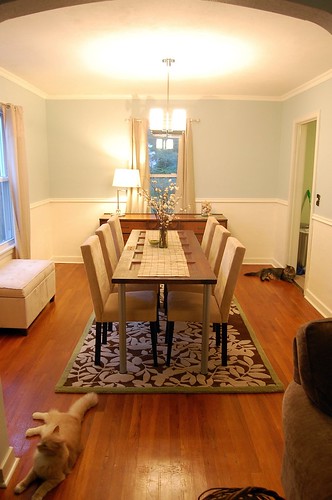
To this . . . in relatively little time.
Now, I won't even begin to pretend we wrote the book on the installation of this stuff. In fact, we made great use of the DIY Network's online tutorials (How to Install Chair Rail and How to Install Crown Molding), and then adapted them to work with our specific material (again, the composite), our unique home challenges (hello, plaster walls!), and our energy levels.
To install, you need to learn to love your miter saw. You need to measure twice and cut only once (we know this from sloppy experience). I'd recommend painting the molding before installation. We didn't do this, and it was, in a word, annoying. And you need patience. You also need to be OK with little imperfections. For example, our corners aren't perfect. I'll just put it out there. But my parents say it makes the place look like the stuff's always been there. So, that's good, I guess.
The work, the sore arms -- it's all worth it! Just look at these after photos!!!

Like what you just read? You can subscribe to the feed of these posts and be the first to know what the (never home)makers are up to. And we’ll love you forever <3>


