
Banana Cake: Stephen's Favorite
>> Monday, December 7, 2009
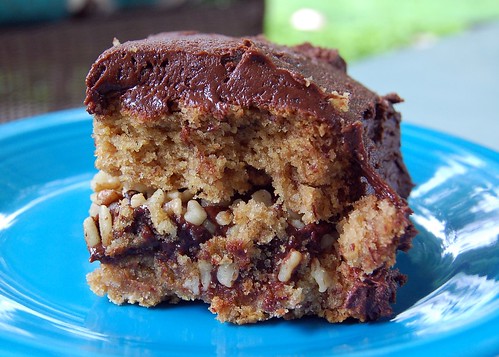
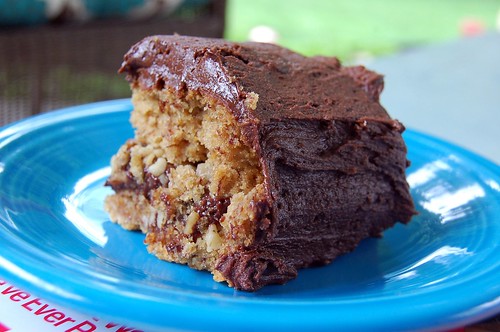
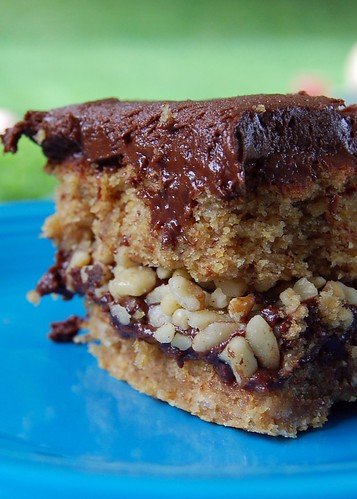
There are very few cakes/cookies/desserts that Stephen will eat and actually enjoy. Banana cake is one of them. This recipe yields a moist, dense cake with some of the best chocolate frosting EVER. And don't go easy on the walnuts -- they're the best part! Oh, yeah. And it's vegan.
What you'll need . . .
- 1/2 cup vegan butter (I like Earth Balance), softened
- 1/2 cup raw sugar
- 1/2 cup dark brown sugar
- 1 teaspoon vanilla extract
- 2 medium bananas
- 1/3 cup applesauce
- 1 and 1/2 cup wheat pastry flour
- 1/2 cup instant oats
- 1/2 cup cornmeal
- 1/2 teaspoon baking powder
- (soy milk, if batter is too dry)
Method . . .
- Preheat oven to 325 degrees F. Grease an 8 inch square pan (I used a glass one).
- Cream sugar and butter together until light and fluffy.
- Add bananas, applesauce, and vanilla extract. Mix until well combined.
- Add flour, oats, cornmeal, and baking powder. Mix. Add soy milk if batter is too dry.
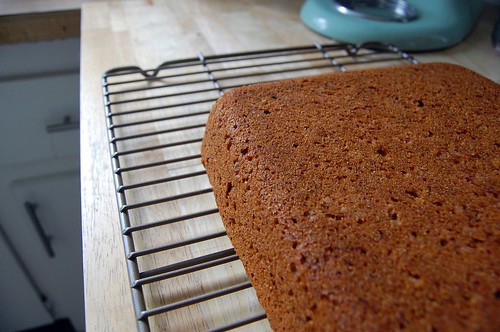
- Pour mixture into the pan . . . and then bake for 35 to 40 minutes (until a toothpick inserted in the middle comes out dry).
- Let cool completely before frosting (also, I cut mine in half to make a layer cake).
CHOCOLATE FROSTING
What you'll need . . .
- 6 tablespoons vegan butter (Earth Balance)
- 2 teaspoons vanilla extract
- 3 cups vegan confectioners' sugar
- 3/4 cup cocoa powder
- 1/3 cup soy milk (or your favorite non-dairy substitute -- I think it'd be interesting to try coconut milk)
Method . . .
- Cream the butter and vanilla together with an electric mixer on low to medium speed.
- In a separate (large) bowl, combine the confectioners' sugar and cocoa powder with a whisk.
- Add dry ingredients to the wet until fully integrated. Slowly add the soy milk to the mix until you have reached the desired consistency. (I found that I thought I'd added too much milk . . . because the frosting was dense and heavy . . . but actually I needed to add a few more splashes, and it turned out fine. Just add the milk s-l-o-w-l-y.)
- Spread onto cake -- and I added some walnuts to my middle layer.


