
Vegan Stuffing: It's Not Just for Thanksgiving Anymore
>> Wednesday, December 2, 2009
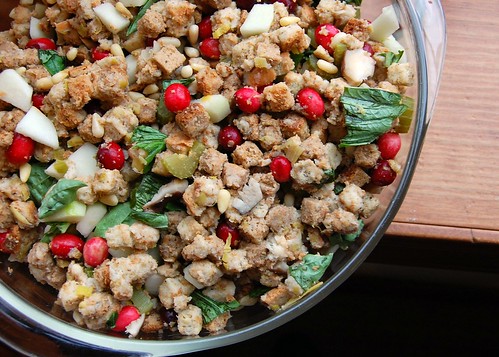
I'll be honest. This stuffing is far from traditional. And if you're not into trying new things, you likely won't enjoy it. Now that we have that out of the way, if you're up for an adventure: try this recipe. Not only does it look impressive (full of color and texture) atop your holiday spread . . . it tastes good, too!
What I like best about stuffing is how easy it is to make. You throw a bunch of stuff in a bowl, bake it, and -- here's the best part -- you can adjust easily to meet your taste. Keep this whole adjusting thing in mind when giving this one a try. If you don't like cranberries, don't add them . . . or add less of them. If ginger doesn't thrill you, consider another spice. Etc.
Be creative. After all, it's your stomach.

What you'll need . . .
- 1 package whole wheat stuffing crumbs (the kind you just buy at the store -- it's easy)
- 1/2 medium onion, chopped
- 2 to 3 celery stalks, chopped
- Fresh ginger, finely chopped (to taste -- a little goes a long way)
- 1/2 to 1 cup shiitake mushrooms, chopped
- 1 to 2 medium apples, skinned and chopped (Granny Smith works best)
- 1 cup fresh cranberries
- 8 large basil leaves, chopped (I ripped mine and thew them in)
- 1/2 to 1 cup pine nuts
- 2 to 3 (or 4, depending on how soft you like your stuffing) cans vegetable broth

Method . . .
- Preheat oven to 350 degrees F.
- In a medium pan over medium heat, saute the onion, celery, and ginger in a bit of vegetable broth until glassy.
- Add in the mushrooms, apples, and cranberries (also add a bit more vegetable broth, if necessary) and cook until just soft.
- In a large bowl, toss in your stuffing crumbs. Then add the onion-celery-ginger-apple-mushroom-cranberry mixture. Toss in the pine nuts and basil . . . and mix with your hands.
- Transfer to-be stuffing to a 9 by 13 inch glass pan.
- Pour your veggie broth over the mixture one can at a time. You can always add more -- even after you've started baking it -- so do this part with some restraint.
- Cover with foil and bake for 1 hour. I checked mine every 15 to 20 minutes or so and adjusted the moisture level to our taste (not too soft, not too stiff).
Like what you just read? You can subscribe to the feed of these posts and be the first to know what the (never home)makers are up to. And we’ll love you forever <3


