
DETOX: Day 6 -- Going Strong
>> Saturday, January 2, 2010
Break from the detox food today, though I'm happy to report I'm off to a great start this morning. We got back from the race an hour or so ago. It's this 10k that is run each Saturday this month . . . the January Freeze Series. And it definitely earned the Freeze title today with temps in the teens, windchill in the negative digits, winds gusting to 30 MPH, and snow . . . all over the ground. Stephen finished in 38:50 and I came in around 50:20. Not a day for a PR, but with these times, we're pretty confident that with perfect conditions, we would have rocked our previous 10k times.
The best part, of course, was the people who also dragged themselves out of bed this morning to put themselves through the pain. Many of them, like me, were wearing two pairs of running tights, two hats, gloves, three fleece jackets . . . layers upon layers . . . so many we could hardly move. Stephen was a bit dismayed to learn that many of those who beat him were wearing spikes in their shoes to power through the snow. No fair!
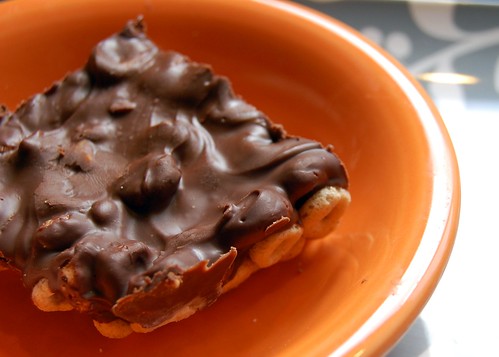
I'm almost done with my gigantic mug of tea and a huge bowl of black-bean and corn chili, but I wanted to hop online to share with you a quick and easy no-bake recipe that combines some of my favorite ingredients: chocolate, peanut butter, and Cheerios!
What you'll need . . .
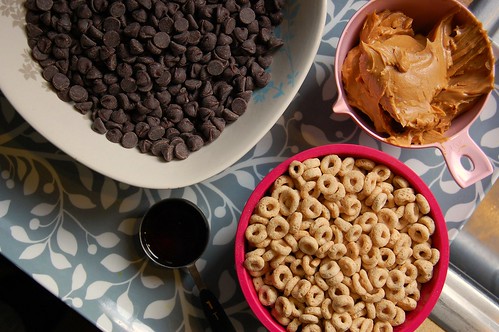
- 1 package semi-sweet chocolate chips (we used Sunspire semi-sweet chocolate chips)
- 1 cup creamy peanut butter
- 2 cups Cheerios
- 1 tablespoon vanilla
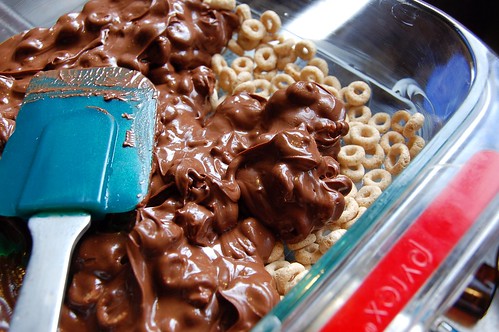
Method . . .
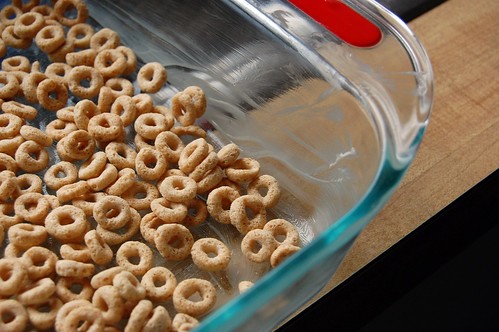
- Get a 9x9 inch square pan and grease it up with some Earth Balance or butter.
- Spread some of the Cheerios at the bottom -- this will further prevent the bars from sticking to the bottom.
- In a small bowl, melt together the chocolate and peanut butter in the microwave (or double boiler). Mix until fully incorporated.
- Mix in the vanilla. Then transfer to a larger bowl, add Cheerios and mix everything until well covered.
- Pour into your square pan and spread until even. Place in refrigerator for 1 to 2 hours.
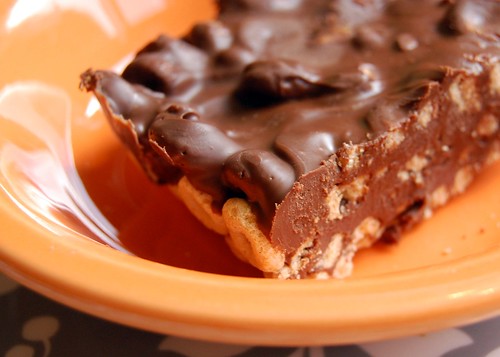
- Cut, serve, and enjoy!
Like what you just read? You can subscribe to the feed of these posts or follow us on Twitter to be the first to know what the (never home)makers are up to. And we’ll love you forever <3


