Showing posts with label crafts. Show all posts

Lately + Hello Fresh Winner(s)

>> Wednesday, June 8, 2016

Stephen and I went out for what we think might be our last date for a while on Friday night. We hit up a restaurant that has tons of beer on tap and some pretty cool BBQ foods (with tons of vegetarian options). I even got an alcohol-removed malt "beer" beverage because, well, I miss the ritual of it all.

We snapped this photo which has all my friends and family thinking the baby is so low that I will go a.n.y day now. I assure you, though, it's got to be an illusion. Though I carry low to begin with, it's not exactly as intense as this photo makes it seem! (I decided to preregister with the hospital for delivery just in case.)


The next day, when we asked Ada what she'd like to do for a family date, she immediately screamed "Chuck E. Cheese!!!" You're just as surprised as we were! I guess she heard about it from friends and we pass it on the road quite often. So, we sent tons of dollar bills down the token machine and played games. In the end, I think we spent like $30 and she "won" a cheap slinky I could have bought at the dollar store. (Oh, and she broke it already. LOL.)

But she had fun! And I am really good at this game:


The next day, I got pretty crafty. More nesting, I suppose.

I had been seeing all these photos of hospital door hangers, and it gave me the idea to do door hangers in the upstairs hallway for my girls (!!!). We piled in the van and headed to the craft store. Ada helped me pick out the flowers, prints, and ribbons. Then during nap time, I gave myself a ton of burns with the glue gun.


I love how they turned out.


Oh, and today I am also announcing the winner of the Hello Fresh giveaway. I decided to choose TWO winners -- CONGRATS!

Sarah N. says "I would love to try a meal service like this but they are so expensive I haven't been able to justify it. I can see it being useful during an especially busy or stressful time though. The meals look delicious and just a few meals from a service like this might be enough to get my cooking creativity going again and break me out of a dinner rut."

Angie L. says "I have never tried a food service like this, but I'd love to! I'm also pregnant and losing motivation to make and create meals. This would be so helpful!"

I am planning to do a review of last week's box sometime soon -- hopefully tomorrow or Friday. I liked it even better than the first. Some of you were also asking about the size box we get. We do the one for two people versus four and then we do supplement (very little) to make it feed the whole family.

Happy Wednesday!

Read more...

DIY Craft Kits for Kids

>> Tuesday, May 31, 2016

I'm going to start moving some posts from our old family blog over to (never)homemaker. We had a lot of goodies in there -- so I don't want them to fade away. If you want to know more about why we closed that blog, click here.

I keep seeing those clever + colorful craft boxes popping up on blogs and sidebar ads. I mean, they're cute and all, but I just can't see allocating that type of money for an activity -- art -- that can be so simple an inexpensive. And at Ada's age, I also don't care to follow directions. It's all about exploration and expression. Imagination.

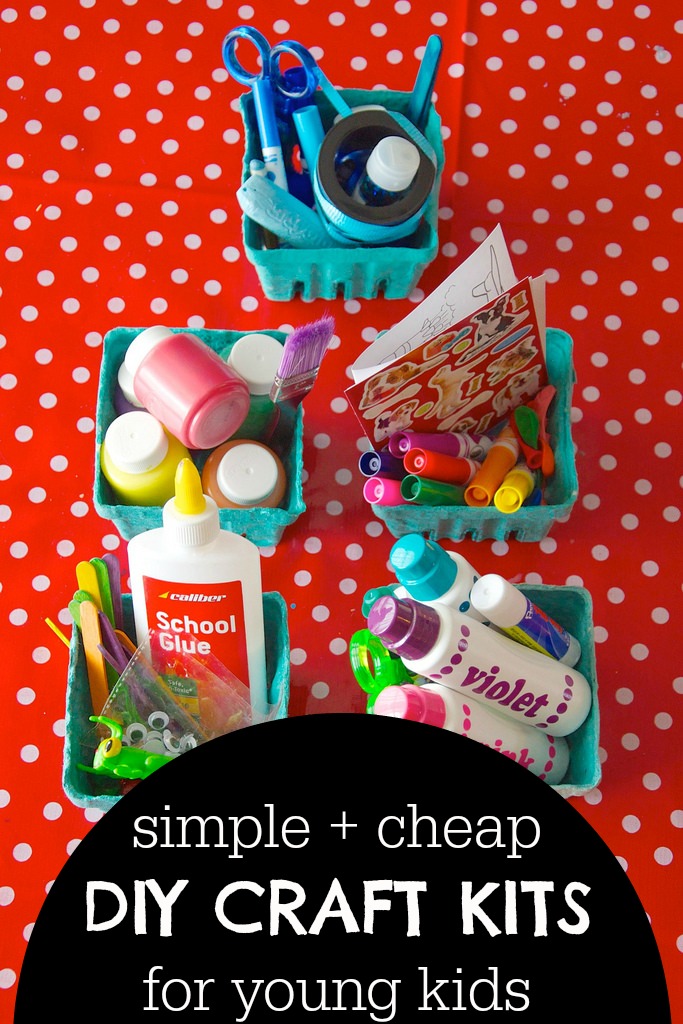
Still, I see value in thinking ahead of time to plan an activity versus letting it become a chaotic mess. (Well -- let's be honest -- crafting with young preschoolers is a recipe for a mess!) So, I decided to try out a few of my own DIY craft boxes.


// DIY CRAFT KITS


First: I don't think these produce containers are perfect for this purpose. Any leftover small boxes or zip bags might hold more stuff and contain it better. In the future, I'll go for function over form in this regard. These collections of goodies aren't the whole story either. The idea is that I'll pull out a box along with our collection of assorted paper so Ada can make whatever her little heart desires.

Let's dive in and see what we're got.


The BLUE BOX: 

Ada knows her basic colors by now, but I think it's fun to focus on one color and its various shades. I just put in everything I could find that was blue in our supplies. I'll probably give her a glue bottle for the sparkles and help out with teaching her how to cut shapes out of paper with the plastic scissors (they work surprisingly well!).


The RAINBOW BOX: 

Markers, stickers, and even balloons! This box is bursting with all the colors of the rainbow, as well as a couple simple "stencils" (Play-Dough cutouts) to try out tracing. I can see pulling out a huge piece of paper and drawing big shapes to color in and stick with the stickers. Oh, and those stickers you can color yourself are really fun!


The STICKS + STONES BOX:

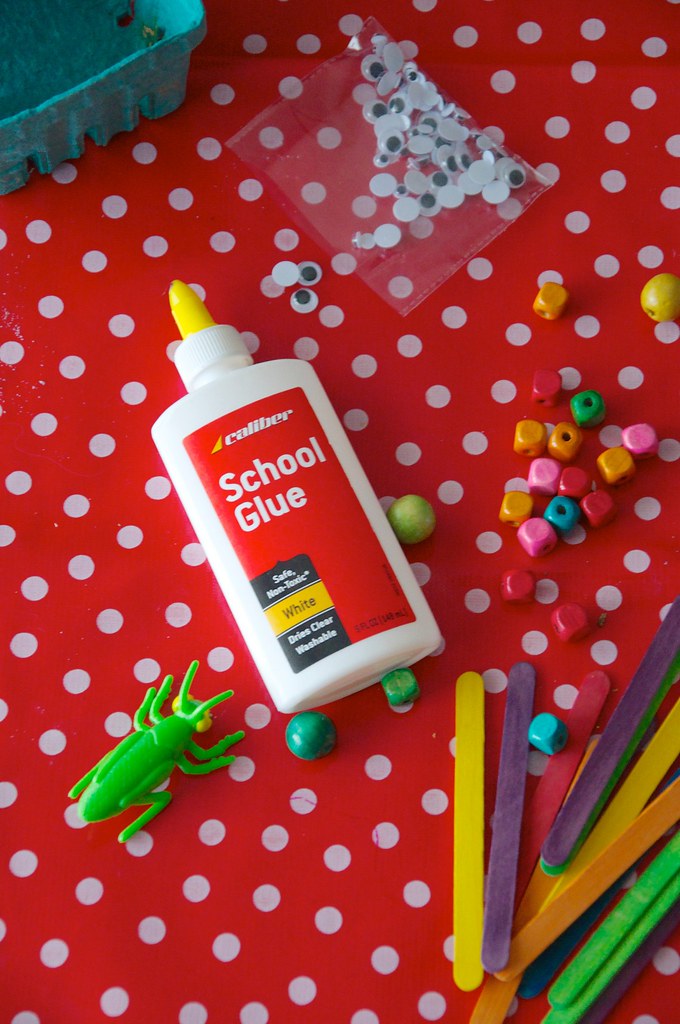
This collection is all about touch and feel. Popsicle sticks are fun for a variety of activities. The wooden beads will be fun to glue. And what kid doesn't love Googly eyes? I picture us cutting out shapes from thick card stock, glueing to the sticks and making tiny masks or something like that.


The DOT BOX:

My friend Leslie introduced me to these gigantic dot markers, and Ada's hooked. We practice writing numbers (in dot form) and drawing pictures. Or just having fun. Some crayons for coloring and plastic scissors. The glue stick is one of Ada's favorites. Cutting bits of paper and pasting to a larger base is always fun. Don't forget the Mr. Sketch smelly markers!


The PAINT BOX:

Pretty basic, right? Just a collection of Crayola Washable Paint and a big brush. What you paint is up to you. We've been trekking to our backyard creek to collect flat rocks for painting lately -- Ada can't get enough!


// SUMMARY


As you can see, there's nothing particularly smart or creative or mind-blowing about the groupings of these craft supplies. But by dividing them out into little containers, your kid will get 10,000 times more excited to create something. You also give them the power of choice.

And don't worry, most young kids don't care if they actually MAKE something that resembles anything in real life. The fun is in the process, not the product!


Like what you just read? Browse more of our posts + recipes on Pinterest. You can subscribe to the feed of these posts, chat with us on Twitter or Facebook. And you can always email us with your questions and comments.

Read more...

This Week . . .

>> Sunday, September 4, 2011

We're moving stuff around once again. Pretty soon, we're going to need to update our house tour. Here's a sneak peek:


I've been working on a project for baby A. It involves embroidery. So, thankfully there are only six letters total in her first and middle names.


I'm 28 weeks!


Maple-Almond Cookies. Vegan. Only six ingredients. And perfect for the transition from summer into fall.


And tons more. But that's just some of what's been going on this weekend. Now, off to enjoy my next two days off. Tonight is sort-of like another Friday for me!

Like what you just read? You can subscribe to the feed of these posts or follow us on Twitter or Facebook to be the first to know what the (never home)makers are up to. And we’ll love you forever!!

Read more...

Crafty Ornaments: How To

>> Tuesday, December 1, 2009


I had the best of plans to make this post a video post. Not only because I'm incredibly witty and gorgeous when I'm crafting, but also because it's just plain easier to explain the whole process in moving form than it is to struggle with the written word. For some reason, though, we cannot find our Flip! How do two responsible adults lose a video camera? It's ridiculous! Some intense searching will happen tonight, I assure you.

Anyway, lots of decorating posts are floating around in blogland today, so I thought I'd add mine. We made these crafty ornaments last year. The story goes: I was browsing the net, drooling over Anthropologie, as usual, when I came upon their holiday decor section. Among the many (many, many) pretty things to bling out your tree where these artful, felt & yarn ornaments. Problem was, they were like $50 each. At that rate, our tree would get more gifts than we would on X-mas.


Unacceptable!

But after some planning and quick trip to Michael's, we were set with all we needed to make over 12 ornaments for the price (or less) than one!


What you'll need . . .

  • Several skeins of yarn in different colors
  • Styrofoam balls in different sizes
  • Beads, sequins, buttons, etc.
  • LOTS of pins (see below)
  • Felt, if desired
  • Ribbon
  • Scissors


STEP 1: Take one styrofoam ball & wrap it with yarn.

  • How? Tie one end of the yarn into a knot and use the T-shaped pin to anchor it to the styrofoam. Start at the top of the ball and wrap tightly the whole way around until it is well covered.
  • Cut the yarn at the end and tie it into another knot. If you can, take out the original T-shaped pin and anchor both ends with it. If you can't, just use another pin.

STEP 2: Take the smaller pins and embellish with your buttons, sequins, and things!

  • There's really no wrong way to do this part. I used the sequins to inspire the "theme" of each ornament. I used the heavier metal & stone beads to class it up. And I mostly created patterns & repeated them.
  • The best part? If you don't like something you did, just take it out! And if you are using buttons and other pieces with large holes (that the pins tend to slip through), just put a sequin ahead of where the pin anchors everything.


STEP 3: Finish everything off with a pretty ribbon.

  • Depending on the size of your ornament, take a few inches of colored ribbon and loop it at one end . . . then secure it with another T-shaped pin.
  • I'm sure there are fancier ways to do this part, but our ornaments look great & were secure on our tree despite our cats' many attempts at taking them down.


This weekend, we're looking forward to breaking out the X-mas gear and going wild. I think we even have some supplies left over from last year's ornament fest. This project provided us with a great way to spend an afternoon -- and the mint-chocolate chippers and hot chocolate I made sure didn't hurt anything.


Is it Friday yet?
I know I'm working for the FREEKEND!


Like what you just read? You can subscribe to the feed of these posts and be the first to know what the (never home)makers are up to. And we’ll love you forever <3

Read more...
Related Posts Plugin for WordPress, Blogger...

About This Blog

MyFreeCopyright.com Registered & Protected

© 2009-2014 by the (never home)makers
All content on this blog is copyrighted.

Want to publish our pics, tips, or tricks?
Contact us! [neverhomemaker@gmail.com]

We value transparency. Links on this page may contain affiliates. In addition, please see our disclosure policy regarding sponsored posts.

  © Blogger template Simple n' Sweet by Ourblogtemplates.com 2009

Back to TOP  

Blogging tips