Showing posts with label arts. Show all posts

Owl Jewelry: Too Cute Not To Share

>> Wednesday, January 6, 2010

So, this is a plug for my friend, fellow marathon-obsessed runner Daniele over at Thistle Farm Arts. Not only is she a rock star on the pavement, a dynamo in the kitchen . . . but she also creates the most amazing artsy things!

Take these beautiful owls, for instance. Super cute, and they can be made into earrings, pendants, or even charms! Anyway, go check out her blog and her etsy shop. You won't be disappointed!

<3

If you haven't already, go visit the BLOG LOVE FEST - Jan. 2010. And if you'd like to join in on the link love, just add yourself . . . you have until January 10th. That's four more days!

Read more...

Quick and Personal Art

>> Sunday, January 3, 2010


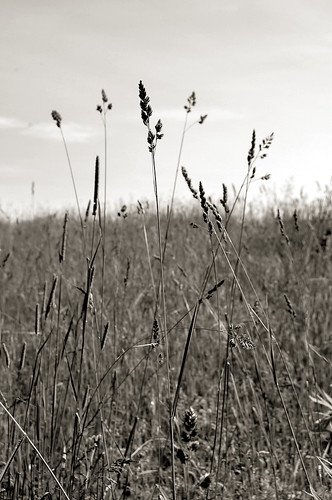
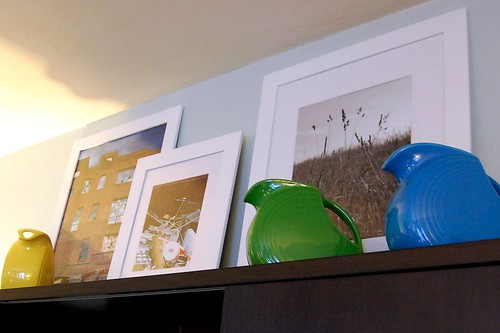
I'm certainly not the best photographer in the entire world. However, I do like some of my shots. And it's strange. Now that Flickr stores absolutely all my photos, I've stopped getting them printed. I've stopped creating physical photo albums. And I've never framed anything of my own.

That is . . . until now. You can do it, too . . . just follow these easy steps!

STEP 1: I picked out three of my better works and enhanced them a bit (even if you don't have photoshop -- Flickr has tools you can use). Mostly added a bit more contrast. Or converted to grayscale . . .


STEP 2: I went to Image Kind and ordered large-format prints. I knew I wanted to group the photos together, so I decided on three different sizes . . . but if you choose to follow these steps, you can do whatever you want (of course). Just make sure to pay attention to the resolution warnings when you order.

If you don't -- you may end up with blurry prints. And if you're not much of a photog, you can also browse the site and buy prints of other members' shots.


STEP 3: I waited. And waited. And waited for affordable frames. Luckily, Kohl's was having a 50% off sale the other day . . . and I snagged three frames for under $50! Best part -- the frames came with great matting . . . and though it didn't exactly match my photo size, it worked well enough for me to display.

I've found that places like Michael's and A.C. Moore often have super awesome sales on frames. So shop around. You'll be glad you did.

Here are some other shots (I took during vacation -- which is almost over . . . boo!) that I'm considering framing:


On another note: If you have yet to add yourself/your blog to the January Blog Love Fest -- do it now! You have until January 10th before the list closes. As well, I'll be posting a sidebar image to give everyone easy access to the growing reading list.

Like what you just read? You can subscribe to the feed of these posts or follow us on Twitter to be the first to know what the (never home)makers are up to. And we’ll love you forever <3

Read more...

Inkjet Transfers: How To

>> Friday, December 4, 2009


First, I'd like to thank those of you joining (never home)maker from METHOD, my last blog. I realize that migrating content over means some duplication for you all -- but it's all good stuff, so I'd like to have it in one place. I appreciate your patience. But I also hope you like the new stuff I've been writing and creating.

Today's post is one of my favorite from the METHOD archives. It's instructions on how to make cheap, awesome art in a method known as the inkjet transfer. To see a whole gallery of these pieces of work, visit the Inkjet Transfer Pool on Flickr. Here, you'll see that mine aren't the best in the world (big surprise!), but it will serve as inspiration . . . and show you what you can really do if you keep with it.


I got into inkjet transfers in the winter of 2007. It's fun, easy, and, well, simply -- I got hooked on it. The results are cool, too . . . and what's best is: Once you get into it, you'll have a ton of unique artwork to hang around your house, give to friends as gifts, and to show off.

What you'll need . . .
  • A smashing digital photo
  • Photoshop (or some kind of photo editing tool that will allow you to play with the exposure of the photo, and -- if you don't have any software like this -- it really is optional)
  • An inkjet printer
  • Watercolor paper, or another smooth, absorbent paper or surface (I've never tried it, but hear some woods work).
  • Copier transparency or used Avery label sheet (so it's smooth & shiny)
  • A damp cloth
  • Patience


Method . . .

Step 1: If you have the photo editing tools, and you want to -- play around with the exposure of your image. I find it's good to make it a bit darker than it was originally. It's also fun to play with the colors (like in my photos above) to make them more vibrant.

Step 2: Print the photo onto the transparency or label sheet (smooth & shiny side).

Step 3: While the photo is printing, lightly press the damp cloth onto your transfer surface (that's the watercolor paper), so it's slightly damp as well. (This part is something you need to play around with -- so your first couple tries might be either too dry or too runny. Keep at it!)

Step 4: Press the inked-up side of your transparency or label paper onto the newly damp transfer surface and smooth over -- gently, now -- with your hand. The key word is gently, as too hard will blur your image (as you begin, you'll likely blur quite a bit -- don't let this discourage you).

Step 5: Again, gently peel the transparency or label paper off your transfer surface and let dry.

Step 6: Admire your work and continue to refine your style!


Go as abstract or as literal as you want. After all, it's art -- so there's really no "wrong way" to do it. Just remember that a wetter transfer surface means blurrier results. The two pictures directly above this blurb are the result of a drier transfer surface. Experiment! And note: Transparency or label sheets may be used again -- but eventually get stained and need to be retired.

Like what you just read? You can subscribe to the feed of these posts or follow us on Twitter to be the first to know what the (never home)makers are up to. And we’ll love you forever <3

Read more...

Crafty Ornaments: How To

>> Tuesday, December 1, 2009


I had the best of plans to make this post a video post. Not only because I'm incredibly witty and gorgeous when I'm crafting, but also because it's just plain easier to explain the whole process in moving form than it is to struggle with the written word. For some reason, though, we cannot find our Flip! How do two responsible adults lose a video camera? It's ridiculous! Some intense searching will happen tonight, I assure you.

Anyway, lots of decorating posts are floating around in blogland today, so I thought I'd add mine. We made these crafty ornaments last year. The story goes: I was browsing the net, drooling over Anthropologie, as usual, when I came upon their holiday decor section. Among the many (many, many) pretty things to bling out your tree where these artful, felt & yarn ornaments. Problem was, they were like $50 each. At that rate, our tree would get more gifts than we would on X-mas.


Unacceptable!

But after some planning and quick trip to Michael's, we were set with all we needed to make over 12 ornaments for the price (or less) than one!


What you'll need . . .

  • Several skeins of yarn in different colors
  • Styrofoam balls in different sizes
  • Beads, sequins, buttons, etc.
  • LOTS of pins (see below)
  • Felt, if desired
  • Ribbon
  • Scissors


STEP 1: Take one styrofoam ball & wrap it with yarn.

  • How? Tie one end of the yarn into a knot and use the T-shaped pin to anchor it to the styrofoam. Start at the top of the ball and wrap tightly the whole way around until it is well covered.
  • Cut the yarn at the end and tie it into another knot. If you can, take out the original T-shaped pin and anchor both ends with it. If you can't, just use another pin.

STEP 2: Take the smaller pins and embellish with your buttons, sequins, and things!

  • There's really no wrong way to do this part. I used the sequins to inspire the "theme" of each ornament. I used the heavier metal & stone beads to class it up. And I mostly created patterns & repeated them.
  • The best part? If you don't like something you did, just take it out! And if you are using buttons and other pieces with large holes (that the pins tend to slip through), just put a sequin ahead of where the pin anchors everything.


STEP 3: Finish everything off with a pretty ribbon.

  • Depending on the size of your ornament, take a few inches of colored ribbon and loop it at one end . . . then secure it with another T-shaped pin.
  • I'm sure there are fancier ways to do this part, but our ornaments look great & were secure on our tree despite our cats' many attempts at taking them down.


This weekend, we're looking forward to breaking out the X-mas gear and going wild. I think we even have some supplies left over from last year's ornament fest. This project provided us with a great way to spend an afternoon -- and the mint-chocolate chippers and hot chocolate I made sure didn't hurt anything.


Is it Friday yet?
I know I'm working for the FREEKEND!


Like what you just read? You can subscribe to the feed of these posts and be the first to know what the (never home)makers are up to. And we’ll love you forever <3

Read more...
Related Posts Plugin for WordPress, Blogger...

About This Blog

MyFreeCopyright.com Registered & Protected

© 2009-2014 by the (never home)makers
All content on this blog is copyrighted.

Want to publish our pics, tips, or tricks?
Contact us! [neverhomemaker@gmail.com]

We value transparency. Links on this page may contain affiliates. In addition, please see our disclosure policy regarding sponsored posts.

  © Blogger template Simple n' Sweet by Ourblogtemplates.com 2009

Back to TOP  

Blogging tips