Showing posts with label italian. Show all posts

Baked Spinach + Ricotta Gnocchi

>> Friday, January 2, 2015

And now for a simple recipe you’ll want to make over and over again. We tend to overdo the pizza in this house. So, I was looking to make something that uses many of the same ingredients we always have on hand -- just in a different way.

If you’ve never had baked gnocchi, you’re in for a treat. The gnocchi (pronounced like this) are super tender yet a hint crisp. You can bake them and eat with any kind of sauce you please (a pesto or brown butter sauce is divine!). I chose to use some store-bought tomato sauce from Aldi and fresh mozzarella. And if you’re into individual portions -- these guys freeze quite beautifully.

Mangia!


SPINACH + RICOTTA GNOCCHI


What you’ll need . . .
  • 15 ounces ricotta cheese (I used part-skim)
  • 1 cup packed spinach leaves
  • 3/4 cup flour*
  • 1/4 cup finely grated parmesan cheese
  • 1 egg
  • 2 tablespoons olive oil
  • 1 tablespoon nutritional yeast
  • salt + pepper
  • Pasta sauce
  • Fresh mozzarella cheese
* I used caked flour because I wanted to see how it would work. All purpose would be a good substitute. I also think this recipe would lend well to gluten-free flours, just play with the amount. To get the right mix. You want the resulting gnocchi to be a bit firm but mostly tender.

Method . . .
  1. Preheat oven to 350 degrees F. Lightly grease two baking pans or dishes with olive oil and set aside.
  2. Blanche spinach leaves in a small pot of boiling water (1 minute). Immediately submerge in cold water to stop cooking. Dry leaves as much as possible using a tea towel and chop finely.
  3. Toss all ingredients into a bowl and mix until you form a wet dough.
  4. Portion out by heaping tablespoonful onto/into greased baking sheets or dishes.
  5. Bake for 20 minutes, until firmed up a bit and slightly golden.
  6. Turn the oven to broil.
  7. Then cover gnocchi with tomato sauce (a lot or a little, depending on your preference) and top with cuts of the cheese. Broil for 5-7 minutes until the cheese browns and bubbles.
  8. Serve immediately.


FREEZE:


  • Spoon onto wax paper lined baking sheets in the tablespoon portions.
  • Put in your freezer until completely frozen -- a couple hours.
  • Store in an airtight freezer bag for up to 6 months. 
  • Then bake as instructed above in whatever size portion works best for you.
I’m going to try to get my new year thoughts out today, but I’m still getting over this pesky sickness. So, whatever the case -- that post is coming next. I hope you enjoy this recipe, though. It’s definitely one that is getting put into the regular rotation because it’s so easy and delicious.

Here’s to more recipes in 2015!

Like what you just read? Browse more of our posts + recipes on Pinterest. Chat with us on Twitter or Facebook. And you can always email us with your questions and comments.

Read more...

10-Minute Heirloom Tomato Sauce

>> Monday, August 19, 2013

A goal I have for this blog is to simplify the foods I feature and to keep it real with regard to what we eat on a day-to-day basis. So, over the coming weeks, I'll highlight a few previously overlooked staples we have in our kitchen. Things that aren't really exciting or masterpieces on their own, but recipes that bring a lot of flavor and vibrancy to the meals we eat.

Which brings us to this delightfully simple tomato sauce, great for use on pasta or pizza or even for dipping. You don't need to use heirlooms, they're just particularly delicious and gigantic. And tomatoes can be switched out with tomatillos, too. I make sauce with whatever we get in our CSA basket.


10-Minute HEIRLOOM TOMATO SAUCE

What you'll need . . .
  • 2 very large tomatoes  (or approx 1-1/2 cups) chopped
  • Minced onion + garlic*
  • Dried or fresh herbs of choice
  • Salt + pepper
  • Red pepper flake
  • 1 tablespoon maple syrup 
  • olive oil
* You can certainly use fresh, but I keep a secret stash of dehydrated onions and garlic by Earth's Pride on hand for quick recipes like these.


Method . . . 
  1. Heat a tablespoon or more of olive oil over medium-high heat, toss all ingredients into the pan, starting with the tomatoes, onions, and garlic.
  2. The salt is important in this recipe for drawing out the moisture from the tomatoes. So, be sure to add that straight away.
  3. Add the spices slowly, though -- remember, you can always add more, but not take away. It's all to your taste, too. Feel free to omit red pepper flakes if you don't like heat or maple syrup if you don't like sweetness. Others to consider adding include oregano, thyme, basil, and even sage can be nice!
  4. Cook + stir continuously and  as moisture is released from the tomatoes, squish them down with the back of your spatula or spoon to your desired chunky consistency. 
  5. Sauce is ready after 10 minutes or less, depending on the use. For pizza, just make sure that it is thick and not watery. 
  6. For a less rustic sauce, run through your food processor until smooth. And feel free to double, triple, etc. this recipe for more sauce!

To make this pizza, flatten dough and bake at 450 for 2 to 3 minutes. Then assemble with the sauce and cheeses and bake for another 12 to 14 minutes. Until cheese is golden brown + bubbly.
  • Use half the yield of the Pumpkin Pizza Dough (we made ours with squash puree)
  • Use the sauce you just made
  • Mozzarella cheese + crumbled honey goat cheese
  • Fresh basil
If you don't have fresh tomatoes on hand, try this Boozy + Bold Sauce made with packaged tomatoes. And if you have a bit more time, try out this Grilled Kalamata Sauce, maybe with Pesto Pizza Dough

Monday is as great a night as any for pizza, don't you think?

Like what you just read? You can subscribe to the feed of these posts or follow us on Twitter or Facebook to be the first to know what the (never home)makers are up to. And we’ll love you forever!

Read more...

Boozy + Bold Chunky Tomato Sauce

>> Thursday, March 28, 2013

I've signed on to take the Pomi challenge and cook a delicious tomato recipe using wine. Oh, please. I don't need a challenge to use wine in cooking. I'm always looking for a chance to add a little beer or other beverage to our eats.

Here's what we're working with -- tomatoes, from Italy, in a box, not a can:


And here's what I did with it:


BOOZY + BOLD CHUNKY TOMATO SAUCE

What you'll need . . . 

  • 1 package Pomi Chopped Tomatoes (or about 28 ounces of your favorite brand) 
  • 2 cloves garlic, minced
  • 1 tablespoon dried Italian seasoning
  • 2 tablespoons olive oil
  • 1 to 2 teaspoons red pepper flakes
  • 1/3 cup white wine (cheap Pinot Grigio like in this recipe)
  • salt to taste


Method . . . 

  1. Put all ingredients in a small pot over medium-high heat. I used our smallest burner on the gas stove.
  2. Bring to a simmer and continue stirring -- never covered -- often for a half hour (chunky pasta sauce) to an hour (chunky pizza sauce).
  3. Store in an airtight container in the fridge for up to a week.

I loosely based this recipe off my Butternut Squash Pizza Sauce recipe, but made it vegan and kicked up a notch with the red pepper flakes. In the past, I didn't pay so much attention to sauce. Usually just threw a few things together . . . but WOW does taking a little extra time/energy make a huge difference.

Please let me know if you try this recipe. If you don't like wine, you could consider adding a little sugar + water to the tomatoes. Or even white grape juice might add a nice flavor.

And never underestimate the power of sauce.

PIZZA, ETC.:
* means VEGAN

Like what you just read? You can subscribe to the feed of these posts or follow us on Twitter or Facebook to be the first to know what the (never home)makers are up to. And we’ll love you forever!

Read more...

Butternut Squash Pizza Sauce

>> Monday, February 18, 2013


We ran out of tomato puree and all other canned tomato products last week. But Pizza Thursday had to go on! Instead of heading to the store, I thought I'd venture around the kitchen and find a suitable replacement.

And now I don't know if I'll use tomatoes for a while because this is way too good!


BUTTERNUT SQUASH PIZZA SAUCE 
enough for two large homemade pizzas -- or even pasta

What you'll need . . . 

  • 16 ounces butternut squash puree (ours was frozen from the fall)
  • 2 tablespoons olive oil
  • 2 cloves garlic, minced
  • 1 tablespoon Italian seasoning (a dry blend is what I used)
  • 1/2 cup water
  • 1/4 cup white wine ($4 Pinot Grigio, baby!)
  • 1/4 cup grated Parmesan cheese
  • salt and pepper  
NOTE: 

You can feel free to use nutritional yeast in place of Parmesan. For the wine, you can just use water, but I'd suggest playing around with vinegars, etc. because it adds great flavor to this recipe. Most of the alcohol cooks off anyway!

Method . . . 

  1. Thaw the puree if you are using frozen. 
  2. In the meantime, pour the olive oil into a medium pot over medium-high heat and saute the garlic for a few minutes. Until fragrant.
  3. Then add in the puree and cook for a few minutes more, stirring constantly.
  4. Continue by adding the water and white wine. Let it incorporate fully in before adding the Parmesan cheese.
  5. Season with the Italian seasoning and salt and pepper to taste and cook for about 10 more minutes to let the flavors mingle, fall in love, if you will.
  6. Add more liquid depending on how you'd like the texture. We had our spread rather thick.
  7. Store for up to a week in the fridge or freeze.
// To use:

Mix up your favorite pizza dough recipe + let it rise -- we actually made the Pumpkin Garlic Knots but replaced the canned pumpkin with homemade applesauce for a sweeter crust.

We always bake our pizza at 425 degrees F with a pizza stone preheating first. Then we spread the plain crust onto the stone and bake one side for 4 to 5 minutes, flip over, and then add the sauce + toppings.

A mix of mozzarella and cheddar 50/50 worked well with the flavors in the sauce and crust. But feel free to experiment or even go dairy-free with lots of roasted veggies and avocado.

Bake until cheese is browned and bubbly. 12 to 15 minutes.


Have you made pizza without tomato sauce? I love white pizza best, actually. Pesto pizza, too! This was a nice change of pace. We'd love some more suggestions for our favorite dinner of the week!

And PS: I made a HUGE batch of Homemade Freezer Waffles this morning. Take a look!


Hope you all had a great weekend. And if you want to check out Writing Chapter Three, you can see Ada's first haircut. That I gave her am still giving her!

Like what you just read? You can subscribe to the feed of these posts or follow us on Twitter or Facebook to be the first to know what the (never home)makers are up to. And we’ll love you forever!

Read more...

Rustic Pizza -- Make it Tonight!

>> Friday, July 9, 2010


There are days when I think we should have started a pizza blog. It seems like at least once or twice a week, we've combined bread, tomatoes, cheese, and basil in another way. We have our favorite pizza doughs -- the original and pumpkin version. Then all the instructions on how to grill pizza. We've also shared a cool new stromboli recipe as well as inspired ways to make your pizza gourmet.

So, just when you thought we were fresh out of ideas -- we created this majestic, browned beast.


This rustic pizza is full of good stuff. It's more like a pie, I guess. And this recipe features one of our new favorite ingredients: heirloom tomatoes. I like how they look -- as unique as you and I. But did you know they're full of enhanced nutrition, too?

Yeah. In fact, heirloom tomatoes are not only far more tasty, juicy, and full-bodied than supermarket tomatoes, but they also pack vitamins and antioxidants that the super-perfectly round and red varieties lack (Source). What vitamins, you ask? According to HealthCastle.com, they're "rich in Vitamin C, Vitamin A, and Vitamin K, and potassium, among many other vitamins and minerals. They're also widely known as a good source of lycopene" (Source).


What I like best about heirloom tomatoes (well, aside from the taste and nutritional benefits) are the names!!! If you'd like a full list of them, check out this site. After taking a look, I think the kinds we bought are maybe Canistrino, Mortgage Lifters, or Brandy Wines. But it's difficult to tell with so many varieties!


RUSTIC PIZZA

What you'll need . . .
  • Pizza dough (see recipes above)
  • 2 medium to large heirloom tomatoes
  • 3 to 4 handfuls kale, sliced
  • 1/2 medium to large onion, sliced
  • Ball of fresh mozzarella, sliced
  • 2 eggs (optional, but highly suggested)
  • Parmesan cheese (to taste)
  • 1 tablespoon balsamic vinegar
  • Pepper (to taste)
  • Fresh basil

Method . . .
  1. Prepare your pizza dough and set aside. Preheat oven to 425 degrees F -- place a pizza stone in the oven while it preheats.
  2. In a large pot, put in a little olive oil and cook kale and onion over medium-high heat. Then, much like with Stephen's crispy kale recipe, add the balsamic vinegar and continue to cook until well done and not soggy.
  3. Roll and stretch out your pizza dough so that it's a large circle -- about 18 to 20 inches in diameter.
  4. In the center of your dough, start filling it with the kale/onion mixture. Make a circle with this ingredient that's maybe 15 inches in diameter (you'll be folding the dough over later).
  5. Then lay your sliced tomatoes on top, just layer until you've used them all.
  6. Layer the fresh mozzarella on that. Sprinkle on some Parmesan cheese.
  7. Fold the excess dough toward the middle and press seams together so it looks like in the photo above.
  8. Place in oven and cook for 10 minutes. Then take out of the oven and crack two eggs over the top of the pizza and raise heat to 445 degrees F.
  9. Keep baking for another 10 to 15 minutes -- watching the dough to make sure it doesn't burn. If it looks like it's headed in that direction, covered the whole thing with aluminum foil.
  10. Cook until the egg is set. Then tear some basil leaves over the pizza for extra taste and add pepper as desired. Slice and enjoy with some hot sauce!

Like what you just read? You can subscribe to the feed of these posts or follow us on Twitter or Facebook to be the first to know what the (never home)makers are up to. And we’ll love you forever!!

Read more...

Veggie Stromboli

>> Wednesday, June 23, 2010


When the kind folks at Pomi offered to send me some of their awesome tomato products to try out, I had to think of something awesome to make. I'm not huge on pasta and some of the other tomato dishes I thought of weren't exactly summer-friendly. But if there's one kind of combo Stephen and I can't get enough of no matter the season, it's bread and cheese. If there's sauce, too, well -- we're in heaven.

Note: At first, this recipe doesn't seem like a typical (never home)maker thing. Instead, it seems rather involved. I assure you, it's not as difficult and time consuming as it looks. It's also well worth the effort! The instructions you see below will yield for you two healthy stromboli (the "i" at the end of a word in Italian already means plural, right?).

Just keep your eye on the prize . . .


To make the pizza dough, follow the directions below. They're from a cookbook Xagave sent over with some agave syrup . . . and after making the stuff, I declare it a tie for my favorite pizza dough (the other is the pumpkin garlic knot dough that can be used for many purposes). The agave and olive oil make it incredibly light and tasty.


Then the Pomi tomatoes come into play. What I love about Pomi (which is an organic tomato brand straight from Italy) is that the tomatoes are just that: tomatoes. No added salt. No added ANYTHING. They taste fresh, too. And I'm a little weird about this, but I like best that you don’t need to worry about BPA contamination from containers or rust (from the cans of other tomato brands).


5 MINUTE TOMATO SAUCE

What you'll need . . .
  • 2 cups chopped tomatoes
  • 2 teaspoons maple syrup
  • 2 teaspoons tahini
  • 1 teaspoon crushed red pepper
  • 1 teaspoon Italian seasoning
  • 1 clove garlic, crushed
  • 1 tablespoon olive oil


Method . . .
  1. Heat the olive oil and cook the garlic until you can smell it (maybe 1 minute or so).
  2. Add in the tomatoes, red pepper, and Italian seasoning and cook over high heat for two minutes, until bubbly.
  3. Stir in the tahini and maple syrup. Continue cooking for another 2 minutes, then lower heat (or turn off if you're ready to use it).
  4. Seriously, even though the combo of tahini and maple syrup sounds kind of weird -- it is delicious! And the Pomi tomatoes are amazing.
If you want to find Pomi, too, you can snag some at Vitacost and other online grocery stores. Oh, yeah. Pomi is also sold nationally in most natural/organic food stores, especially in many Whole Foods locations across the US.


Then you can make your kale/spinach/mushroom filling. There's really no exact measurements for this part. You can include any other veggies you like. We just LOVE kale. It's a power food. And cooking it BEFORE you put everything together is key to getting the moisture out (that would devastate the stromboli in the oven) and making it less difficult to chew.

What you'll need . . .
  • 3 to 4 handfuls of kale
  • 2 handfuls of baby spinach
  • 1/3 cup sliced onions (we used leeks)
  • 3 to 4 white mushrooms, sliced
  • Olive oil

Method . . .
  1. Throw everything into a large pot. Cook until kale is soft, but not completely wilted.
Now for the fun part! Putting it all together and baking. Don't worry, you're almost done! You'll need some shredded mozzarella cheese, by the way. So, don't forget that. You may also wish to top the stromboli with sliced cheese (and sesame, poppy, or other seeds) when you're done. We used a couple slices of pepper jack.


THE ASSEMBLY:
  1. First you'll want to preheat your oven to 415 degrees F. It's helpful if you use a pizza stone -- so preheat that, too, if you have one.
  2. Then, divide your dough into two balls. Take 1 of your dough balls and roll it out into a large oval/rectangular shape on a work surface dusted with flour.
  3. It's critically important to start with a layer of mozzarella on the bottom of what you're doing. You will layer half of the sauce mixture (about one cup) on top of the cheese -- laying down the mozzarella first will ensure no leaky, soggy stromboli.
  4. Once you've laid the cheese and sauce, use half the kale mixture. Layer it on.
  5. Then stretch the dough to get maximum folding power. Fold over one side all the way to the edge of the other side -- seal. Then fold over the top.
  6. NOTE: There will be a lot of dough on the top, but for us -- that worked out wonderfully.
  7. Then repeat this process with the other dough ball/ingredients. Or you may wish to save them for another night.
  8. Make sure you either gently cut or tear a few holes in the top for the steam to escape. Otherwise, your stromboli may explode :)


TO BAKE:
  1. Very carefully transfer your stromboli to the oven. Bake for 10 minutes. You may notice the top starting to burn, cover with tin foil. Then rotate 90 degrees and bake for about another 10 minutes. Until the stromboli is golden brown (you can also test the done-ness of the dough).
  2. If you'd like to cover yours with cheese -- take your stromboli out of the oven. Lay a couple slices of cheese on top. Then switch your oven to the broil setting. Broil until cheese is lightly browned.
  3. Slice and enjoy!


Like what you just read? You can subscribe to the feed of these posts or follow us on Twitter or Facebook to be the first to know what the (never home)makers are up to. And we’ll love you forever!!

Read more...

New School Spaghetti

>> Friday, January 8, 2010


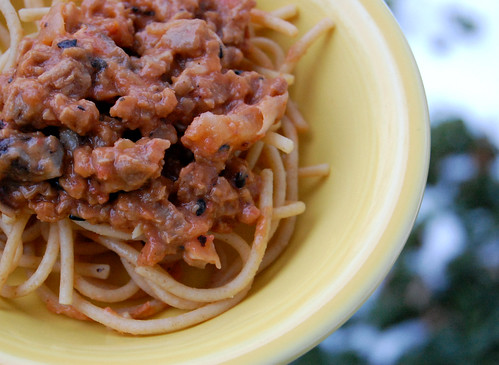
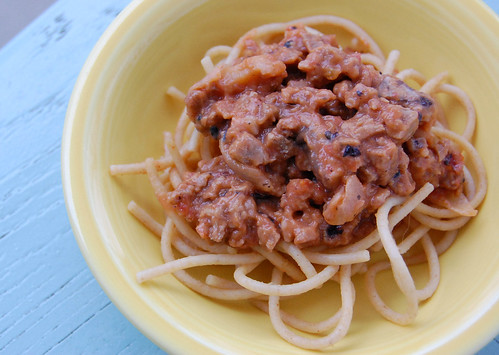
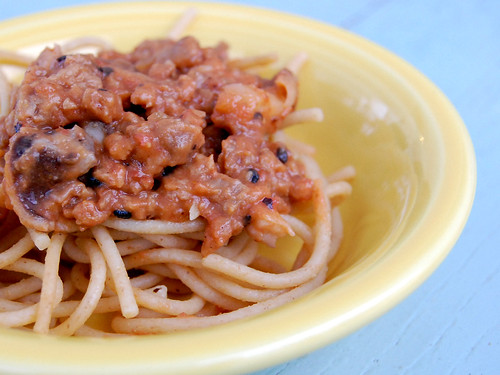
When I was young, my all-time favorite dinner dish was Irish-Italian Spaghetti. Full of ground beef, onions, mushroom and tomato soups . . . it's not exactly something I see myself eating now. However, it's a family favorite -- despite the fact that not one of us has even a drop of Irish or Italian blood in our bodies. I haven't had the meal in years -- we're talking since the early 1990s. So, the other night when we didn't know what to make for dinner . . . I thought it'd be fun to recreate the sauce to meet my new and improved tastes.

The recipe is indeed a winner -- and incorporates even more exotic flavors than the original. As well, I'm thinking it might be a meat-eater pleaser. You'll have to let me know . . .


What you'll need . . .

  • 1 package Boca veggie crumbles (vegan -- found in the freezer section -- or any other ground beef veggie substitute, be careful to read ingredients for vegan-ness)
  • 1/2 cup chopped onion
  • 1 can of fire-roasted tomatoes
  • 1 can of soymilk (I used Silk -- see why it's measured this way below . . .)
  • 1 cup chopped shiitake mushrooms
  • 1/2 teaspoon cayenne pepper
  • 1 teaspoon garlic powder
  • 1/4 teaspoon black pepper
  • dash of salt
  • handful of flour
  • 1/4 to 1/2 teaspoon bottled hot sauce
  • 10 to 12 ounces dried wheat spaghetti
  • 1 tablespoon olive oil


Method . . .

  1. Cook spaghetti according to the package's directions while making the sauce. Set aside when done.
  2. In a large saucepan, add oil and onions and cook over medium heat until onions are translucent.
  3. Add the veggie crumbles and shiitake mushrooms and cook another five minutes, until tender.
  4. Put the can of fire-roasted tomatoes (do not drain and keep the can) into a food processor and blend until smooth. Then pour the tomatoes into the pan.
  5. Fill the can with the soymilk and add it to the pan (you just want equal amounts of soymilk and tomato).
  6. Add the cayenne pepper, garlic powder, pepper, salt, and hot sauce. Bring contents to a low boil, then bring heat down to a simmer.
  7. You will want to add a handful or two of flour to thicken the mixture. Mix well . . . then cover and simmer for 20 minutes. (This allows the veggie crumbles to plump and the sauce to thicken.)
  8. Makes approx. 6 servings. And it tastes good the next day!!!

Like what you just read? You can subscribe to the feed of these posts or follow us on Twitter to be the first to know what the (never home)makers are up to. And we’ll love you forever <3

Read more...
Related Posts Plugin for WordPress, Blogger...

About This Blog

MyFreeCopyright.com Registered & Protected

© 2009-2014 by the (never home)makers
All content on this blog is copyrighted.

Want to publish our pics, tips, or tricks?
Contact us! [neverhomemaker@gmail.com]

We value transparency. Links on this page may contain affiliates. In addition, please see our disclosure policy regarding sponsored posts.

  © Blogger template Simple n' Sweet by Ourblogtemplates.com 2009

Back to TOP  

Blogging tips