Showing posts with label butternut. Show all posts

Apple + Butternut Squash Soup // Slow Cook

>> Tuesday, September 27, 2016

For dinner last night, I decided to go easy on myself and simmer together a soup in the crock pot. I mean, is there anything better in autumn than smelling something yummy cooking all day long? And this soup has a healthy dose of spices that make it extra comforting.

You may have missed all my gushing last year, but I got a new slow cooker. I used to have one of those $10 varieties, and it worked quite well. If you're on a budget, I really recommend going with whatever you can afford because crock pot = easy dinner. My new baby? Still affordable! The Aroma 3-in-1, which is a slow cooker, rice cooker, and steamer in one convenient package.

I recommend using Granny Smith apples in this recipe. They have an extra edge that my McIntosh didn't this time around. But whatever you have should still do the trick.


APPLE + BUTTERNUT SQUASH SOUP


What you'll need . . .

  • 1 medium butternut squash, peeled, seeded, and cubed
  • 2 apples, cored and diced 
  • 1 medium onion, diced
  • 3 cloves garlic, minced
  • 1 cup apple cider
  • 1 cup water
  • 2 teaspoons Better Than Bullion*
  • 1 teaspoon apple pie spice (or mix of cinnamon, cloves, nutmeg)
  • 1 teaspoon smoked paprika 
  • Salt and pepper, to taste
  • 1/2 cup unsweetened soy or almond milk
* Don't have this stuff? Try using 2 cups of vegetable stock in place of the water, cider, and bullion. Also: That price on Amazon is horrible. I linked so you can see what it looks like. Pick it up at your local market.

Method . . .

  1. Toss the butternut squash, apples, onion, garlic, cider, water, bullion, spices, salt, and pepper into your slow cooker. Mix well.
  2. Cook on high for 3 to 4 hours. Then let cool slightly and stir in the soy or almond milk. 
  3. Transfer to your blender in two batches and blend until smooth.


Enjoy!

Read more...

Operation: Cozy Food

>> Thursday, October 8, 2015

I recently wrote an article about the 9 foods you should add to your cart if you want full autumn immersion. Since I haven’t posted much about food in this space lately, I wanted to recap some of my favorite fall recipes for you. I admit the recipe archives aren’t the easiest to navigate, so some good stuff gets lost in the shuffle.

Here are my top 10 picks for fall flavor + coziness.

#1: Pumpkin Hot Chocolate for 1


#2: Butternut Squash Pizza Sauce


#3: Apple Cider Dunkers


#4: Potato-Stuffed Acorn Squash


#5: Apple + Pumpkin Spice Stew


#6: Mini Bittersweet Pumpkin Pies


#7: Savory Corn Pancakes w/ Brussels Sprouts


#8: Apple + Cinnamon Butternut Squash Soup


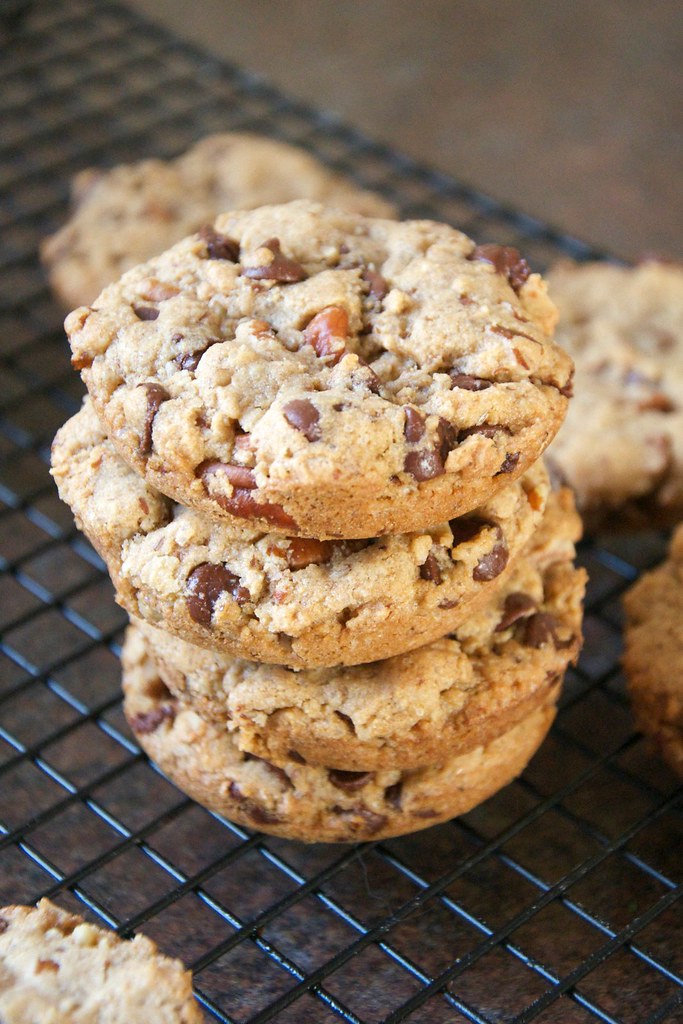
#9: Maple + Pecan Chocolate Chippers


#10: Spiced Applesauce Biscuits


Like what you just read? You can subscribe to the feed of these posts or follow us on Twitter or Facebook to be the first to know what the (never home)makers are up to. And we’ll love you forever!

Read more...

No-Boil Pasta Bake + Food Prep

>> Tuesday, November 4, 2014

This is sure to be your new go-to dinner. A while back, I made this awesome Skillet-Baked Cappellini Pomodoro. The cool part about it was that you didn’t need to cook the noodles before tossing it in the oven. Well, I tinkered and improved on this meal to bring introduce more veggies (we usually roast some with our usual meal prep on Sunday afternoon) and improve the overall flavor.

Here it is!


NO-BOIL PASTA BAKE
Takes just 10 minutes to toss together, 1 hour to cook.

What you’ll need . . .
  • Thin spaghetti noodles
  • Jar of spaghetti sauce (or homemade)
  • Low-fat ricotta (or maybe tofu ricotta?)
  • Shredded mozzarella
  • Spinach or other greens
  • Roasted veggies (any will do)
  • 1/2 to 3/4 cup water
Method . . .
  1. Preheat your oven to 350 degrees F. Get out a 9 x 13 glass casserole dish (or other baking dish of similar size).
  2. Spread a thin layer of spaghetti sauce on the bottom of the dish. Then a layer of the thin noodles. Add some of the roasted veggies (we used butternut squash), spinach, and dots of ricotta. Cover with more of the sauce. There are no right or wrong measurements.
  3. Repeat with another layer in the same way, but this time cover with the rest of the sauce and top with as much cheese as you wish. Some Parmesan works well too. 
  4. Then pour in some water where your pasta isn’t covered by sauce. Just a little here and there is all your need.
  5. Place in your oven covered by tin foil and bake for 45 minutes. Then remove the foil and cook for another 15 minutes.

Meal Prep


And here are some other foods I prepped for us this week!


Slow Cooker Applesauce -- with Honey Crisps.


Honey WW + Flax Loaf -- with some oats tossed in.


Simple vegan breakfast muffins -- recipe tomorrow!


What foods did you prep this week? 

We’re trying to dig deep into our cupboards and freezer drawers to have another $10 grocery week, which I’ll write about very soon. Basically, we’re avoiding buying lots of groceries and trying to use up what we already have hanging around -- only heading to the store for bananas, milk (for Ada), and other essentials.

Like what you just read? Browse more of our posts + recipes on Pinterest. You can subscribe to the feed of these posts or follow us on Twitter or Facebook to be the first to know what the (never home)makers are up to. And we’ll love you forever!

Read more...

Eat Local // Sweet Butternut Squash Soup

>> Monday, October 20, 2014

Would you believe that when I started this blog back in 2009, I had absolutely no idea what it meant to cook seasonally? I’d go to the grocery store, pick up whatever looked good that week, and make whatever recipes interested me at the moment. Instant gratification at its finest. I can’t really blame myself, though. That’s how the store system is set up -- we can have it all if we want, whenever we want.


After I had immersed myself in the food world for a couple years and honed my own cooking skills, I had a sort of awakening. Or maybe it was a pretty fundamental mind shift certainly also sparked by books like Plenty (100 Mile Diet), Animal, Vegetable, Miracle, The Omnivore’s Dilemma, and more. I started to understand where my food actually comes from and why it’s not exactly natural, for example, to slice fresh tomatoes onto my plate in the dead of a Northeast winter. I also discovered the world of CSA shares, local farmers, and buying more eats -- like eggs, honey, milk, etc. -- from nearby sources. 

I can’t say I eat locally 100 percent of the time. After all, we shamelessly stash bananas and avocados in our cart at Aldi on a weekly basis. We favor our local cafes and restaurants, but still go through the Panera drive through in a pinch. And -- yes -- I heartily eat up those supermarket tomatoes for a subpar taste of summer even on the coldest January afternoon. In my opinion, it’s all about balance and trying and budget and trying some more.

This soup was actually inspired by one of those Panera quickie experiences. They have an autumn squash soup on the menu that’s sickeningly sweet -- I knew I could do better at home using local ingredients. The butternut squash, onions, and garlic came from our farm share this week and the biggest, juiciest Honey Crisp apples came from a local orchard. There’s a satisfaction knowing these foods were grown on our native soil. There’s a soulfulness in knowing and caring for the people who work so hard to nourish us throughout the seasons. 

And eating locally just tastes better -- there’s no denying that.


SWEET BUTTERNUT SQUASH SOUP
Makes around 4 quarts -- that’s 16 cups!

What you’ll need . . . 
  • 3 medium butternut squashes
  • 2 large onions, chopped
  • 1 bulb (or 4 huge cloves) of garlic, chopped
  • 2-3 large apples, chopped 
  • Water*
  • Cinnamon, to taste
  • Sea salt + black pepper
*Alternatively, you can use vegetable broth. We’re just out and trying to spend $0 on food this week, which I’ll write more about in another post.

Method . . . 
  1. Preheat your oven to 375 degrees F. Place an safe bowl with a few inches of water in it on the bottom of the oven. 
  2. Wash your butternut squash, then chop off the top, cut in half, and scoop out the seeds. Rub down with olive oil and sprinkle a little salt and pepper before placing halves face-down on a cookie sheet to bake for around an hour, checking periodically for done-ness. (Just needs to be soft enough to scoop out of shells).
  3. Once your have your squash meat set aside, heat some olive oil in a large stock pot over medium-high heat. Add in your onions and garlic and cook until translucent before tossing in apple chunks. Cook until softened.
  4. Since you’re making a large amount of soup, you’ll need to puree in batches. Add around half the squash meat, half the apple mixture, and a few cups of water to a blender and blend until smooth. Repeat with what’s leftover. You can add however much (or little) water as you like. In fact, I leave it up to you since you might also want to reserve some of this puree for baby -- and a bit thicker is nicer for baby food consistency.
  5. Return everything to the stove to season with the salt, pepper, and cinnamon powder. I did around a tablespoon of salt, a teaspoon of black pepper, and a teaspoon of cinnamon. 
  6. You may also wish to stir in additional water at this point to achieve your desired consistency. Just add about a half cup at a time and stir well to incorporate.
  7. Serve with crusty bread on the side. Freeze leftovers using this simple method.


NOTES:


  • Use you can whatever apples you have on hand -- but I’d say the juicer and sweeter the better because you really do taste them in this recipe.
  • As noted above, you can use this soup as baby food as is or even after just pureeing with less water for a thicker consistency. To freeze, portion into 1-ounce cubes and once frozen place in a freezer bag for storage. Let thaw and/or warm before serving.
  • You can also use other winter squashes like delicata and acorn in this recipe -- the size will impact the yield and ratio of squash to apples. So, maybe three to four large delicata and 4 acorn squashes.
  • If you don’t like cinnamon or want to change the flavor, I recommend using curry powder much like we do in our Delicata Mac and Cheese recipe. Curry powder marries well with squash. Smoked paprika, too. Yum!

And head to Writing Chapter Three for a peek into the kitchen in progress. Last weekend, I painted the cabinets white and -- this weekend -- I hand-painted the tile backsplash this weekend. Some notes on how I did it, what I used, and if I like it (or not). Things are certainly coming along! Can’t wait to share the finished kitchen with you guys!

Like what you just read? You can subscribe to the feed of these posts or follow us on Twitter or Facebook to be the first to know what the (never home)makers are up to. And we’ll love you forever!

Read more...

Butternut Squash Pizza Sauce

>> Monday, February 18, 2013


We ran out of tomato puree and all other canned tomato products last week. But Pizza Thursday had to go on! Instead of heading to the store, I thought I'd venture around the kitchen and find a suitable replacement.

And now I don't know if I'll use tomatoes for a while because this is way too good!


BUTTERNUT SQUASH PIZZA SAUCE 
enough for two large homemade pizzas -- or even pasta

What you'll need . . . 

  • 16 ounces butternut squash puree (ours was frozen from the fall)
  • 2 tablespoons olive oil
  • 2 cloves garlic, minced
  • 1 tablespoon Italian seasoning (a dry blend is what I used)
  • 1/2 cup water
  • 1/4 cup white wine ($4 Pinot Grigio, baby!)
  • 1/4 cup grated Parmesan cheese
  • salt and pepper  
NOTE: 

You can feel free to use nutritional yeast in place of Parmesan. For the wine, you can just use water, but I'd suggest playing around with vinegars, etc. because it adds great flavor to this recipe. Most of the alcohol cooks off anyway!

Method . . . 

  1. Thaw the puree if you are using frozen. 
  2. In the meantime, pour the olive oil into a medium pot over medium-high heat and saute the garlic for a few minutes. Until fragrant.
  3. Then add in the puree and cook for a few minutes more, stirring constantly.
  4. Continue by adding the water and white wine. Let it incorporate fully in before adding the Parmesan cheese.
  5. Season with the Italian seasoning and salt and pepper to taste and cook for about 10 more minutes to let the flavors mingle, fall in love, if you will.
  6. Add more liquid depending on how you'd like the texture. We had our spread rather thick.
  7. Store for up to a week in the fridge or freeze.
// To use:

Mix up your favorite pizza dough recipe + let it rise -- we actually made the Pumpkin Garlic Knots but replaced the canned pumpkin with homemade applesauce for a sweeter crust.

We always bake our pizza at 425 degrees F with a pizza stone preheating first. Then we spread the plain crust onto the stone and bake one side for 4 to 5 minutes, flip over, and then add the sauce + toppings.

A mix of mozzarella and cheddar 50/50 worked well with the flavors in the sauce and crust. But feel free to experiment or even go dairy-free with lots of roasted veggies and avocado.

Bake until cheese is browned and bubbly. 12 to 15 minutes.


Have you made pizza without tomato sauce? I love white pizza best, actually. Pesto pizza, too! This was a nice change of pace. We'd love some more suggestions for our favorite dinner of the week!

And PS: I made a HUGE batch of Homemade Freezer Waffles this morning. Take a look!


Hope you all had a great weekend. And if you want to check out Writing Chapter Three, you can see Ada's first haircut. That I gave her am still giving her!

Like what you just read? You can subscribe to the feed of these posts or follow us on Twitter or Facebook to be the first to know what the (never home)makers are up to. And we’ll love you forever!

Read more...

Butternut Squash & Miso Soup

>> Friday, November 2, 2012


As you know well, my favorite cooking method is roasting. So, without really knowing where I was going with a gigantic butternut squash Halloween night, I cubed it and let it roast. At some point during that hour, I decided the best use for it was in soup.

Yes. A nice, peppery butternut squash soup. Problem: I didn't have any vegetable stock or broth. No soy sauce to speak of either (I use a splash or two to flavor water in a pinch). But I did have half a tub of miso left over from my Miso Stew last week.

And that's how this happened:


BUTTERNUT SQUASH & MISO SOUP

What you'll need . . . 

  • 1 large butternut squash, peeled and cubed 
  • 1 white onion, sliced 
  • 1 clove garlic, minced 
  • 1 to 2 tablespoons white miso paste (yellow would work, too)
  • 1 can light coconut milk 
  • 2 to 4 cans-worth of water 
  • Salt, pepper to taste 

Method . . . 

  1. Preheat your oven to 400 degrees F. Place the cubed squash on a rimmed baking sheet, drizzle with olive oil and a pinch of salt and pepper, and roast for an hour, stirring every 10 to 15 minutes.
  2. Once that's done, in a stock pot over medium heat, saute your onion and garlic in a tablespoon or two of olive oil for a few minutes. Until the onions are glassy and fragrant.
  3. Add in the cubed squash. Then the miso paste. Try to break it up so that it's coating the squash.
  4. Then add the coconut milk and water (however much you add depends on how thick you'll want your soup -- we did 3 cans of water). Let cook until simmering. Then simmer for 10 minutes or so.
  5. Let cool for 10 minutes and then blend on low until everything is well incorporated.
  6. Return to stove over low heat and season with salt and pepper.

My kitchen is so dark these days. I attempted to use my iPad to bounce some light. It helped, but not enough . . .


I may need to dig my DIY Light Box out of the attic with the time change coming up. I'll probably be up there quite a bit this weekend, as I have grand plans to clean the house up and down before Ada's birthday party in 15 days. Not that I'm counting or anything.

Hope everyone is doing well as we head into the weekend. I don't know quite how I feel about the NYC Marathon being held despite the destruction. Well, yes I do. This Time article does a good job of expressing my thoughts.

My in-laws are still without power, so they are coming up tonight. I'm hoping they can get gas to make the trek without waiting in line for hours. Thankfully they had only minimal issues with the winds otherwise. So, we'll take this as a nice, unexpected visit!

Like what you just read? You can subscribe to the feed of these posts or follow us on Twitter or Facebook to be the first to know what the (never home)makers are up to. And we’ll love you forever!

Read more...

Baked Autumn Samosas

>> Wednesday, October 3, 2012


I ate Indian food at least twice a week when I was in college. I would pick it up on my way home from the bus stop at this amazing joint in the Commons (I think it's Sangam -- they have a location in Collegetown, too). I call it a "joint" because it was almost like fast food, just way better.

I always bought two samosas with my plate of to-go veggie curry and rice. I'd eat one right away and save the other for later. Potatoes, peas, fried dough, spices. So good. My favorite part of the meal.

This recipe is far from traditional and is baked, not fried. Still satisfies my nostalgic craving, though. I know I'll be making these again soon!


BAKED AUTUMN SAMOSAS

Filling

  • 2 to 3 cups butternut squash 
  • 1 head cauliflower 
  • 1 white onion 
  • 3 large cloves garlic 
  • Olive oil 
  • Salt 
  • Pepper 
  • Curry powder 
  • Smoked paprika 
Crust

  • 1 cup whole wheat flour
  • 1 cup unbleached bread flour
  • Pinch salt
  • 1/2 cup Earth Balance (cold)
  • 1/4 cup olive oil
  • Water (cold)


Method for veggies . . .

  1. Preheat your oven to 375 degrees F. Get a rimmed baking sheet ready.
  2. Chop all veggies coarsely -- into approx. 1-inch cubes. Then place them on your rimmed sheet.
  3. Drizzle with olive oil (a few tablespoons) and then sprinkle with your salt, pepper, and spices. Use as little or as much as you like. I kept ours relatively tame since I wanted to give Ada some of the filling for dinner.
  4. Roast in oven for an hour, stirring every 20 minutes. Then refrigerate until you're ready to make your samosas. If that's right away -- proceed to making the crust.

Method for crust . . . 

  1. In a food processor, combine the flours and salt. Pulse.
  2. Then add in the butter in chunks and the olive oil. Pulse until the mixture resembles coarse meal.
  3. Add water 1 tablespoon at a time -- pulsing again -- until the dough starts to form together.
  4. Then roll into a ball and store in the fridge until you're ready to bake.


Putting it all together . . . 

  1. Preheat your oven to 400 degrees F. Lightly spritz a baking sheet with olive oil. Set aside.
  2. Basically, you roll out the dough between two pieces of wax paper, cut it into a circle using a pot top, cut that in half, fold, fill, and press shut. See this video tutorial for details (as well as for a gluten-free and more traditional samosas recipe). It's exactly how I did it.
  3. Then arrange samosas on baking sheet and prick each with the tines of a fork.
  4. Bake for 15 to 20 minutes. Until the crust is golden.
  5. Let cool and serve with your favorite barbeque sauce.


These photos of the finished samosas aren't really my best, but you might be interested to know I shot them in total, complete darkness. Yeah. We're at that time of year when dinner is eaten long after the sun goes down.

I used my DIY light box to photograph in the past. But now I'm using my bounce flash. Stephen bought it for me for Christmas two years ago, and I'm only now getting around to using it. Not too shabby at all.

Today on Writing Chapter Three, I wrote about the magic hour when Stephen gets home from work. I feel like Ada merely tolerates me all day until she can see daddy again.

Like what you just read? You can subscribe to the feed of these posts or follow us on Twitter or Facebook to be the first to know what the (never home)makers are up to. And we’ll love you forever!

Read more...

Apple-Cinnamon Butternut Squash Soup

>> Monday, November 28, 2011

I think I mentioned a few months ago that we had signed up for a CSA share. It features locally grown foods that have been frozen for use over the winter months -- and our first installment came the week Ada was born. (Thanks to Rebecca for storing it for us!).

We were charged with only one task this Thanksgiving: Cooking a vegetarian/vegan soup to pass around the table. We knew it'd mostly be for us . . . and since we didn't have time to visit the grocery store, we dug into our freezer supply.

Local squash!


Local apples!


We strapped Ada into her swing and got cooking.


APPLE-CINNAMON BUTTERNUT SQUASH SOUP

What you'll need . . .
  • 1/2 large onion, chopped
  • 5 small leeks, chopped
  • 8 apples, skinned and chopped
  • 2 tablespoons brown sugar
  • 1/2 teaspoon ground cinnamon
  • 3 cups cinnamon apple spice tea (use only 1 bag) or you can use another spiced tea or even veggie broth
  • 32 ounces fresh or frozen butternut squash puree (thawed)
  • 19 ounces garbanzo beans, drained and rinsed
  • 1/4 teaspoon thyme
  • Salt and pepper to taste

Method . . .
  1. In a large stock pot, pour in some olive oil and heat over medium-high heat. Add the onions, leeks, and apples. Cook for a few minutes. Then add the brown sugar and cinnamon. Cook a few minutes more.
  2. In the meantime, prepare your tea. We chose to use tea because we were out of vegetable stock and wanted to add some flavor to the soup. It worked quite well! Just boil 3 cups of water and steep a single teabag in it for 5 minutes.
  3. Add the Tea, puree, and garbanzo beans to the mix. Add the thyme, too. Bring to a boil, then simmer for 20 to 30 minutes.
  4. Let cool slightly . . . then process in a blender in small batches. Blend until smooth.
  5. Add salt and pepper to taste. And if you prefer a thinner soup (we're used to thick stews), add water as desired.

The soup was a great addition to our Thanksgiving table, but was also fantastic the day after with some Olive Oil Skillet Cornbread.

Now, if you'll excuse me . . . I'm going to try to sneak in a quick shower!

Like what you just read? You can subscribe to the feed of these posts or follow us on Twitter or Facebook to be the first to know what the (never home)makers are up to. And we’ll love you forever!

Read more...

Best-Ever Homemade Chocolate Glazed Donuts

>> Monday, January 25, 2010


Yet another favorite from the METHOD archives: You need not adjust your screen. What you're seeing is REAL. Homemade donuts -- perhaps one of the only creations better than homemade bagels! I made these puppies for my parents last year, and they turned out about as authentic as possible. So, I'm going to shut my mouth now and give ya'll the recipe.

(Yeah. It's a long one, but well worth the effort!)


What you'll need . . . (for the doughnut part -- inspired by this recipe)

  • One 1/4-ounce package active dry yeast
  • 2 tablespoons warm water (98 degrees)
  • 3/4 cup warm soy milk (or milk)
  • 2-1/2 tablespoons margarine or butter
  • 1 egg
  • 1/3 cup granulated sugar
  • 1 teaspoon salt
  • 2-3/4 cups all-purpose flour
  • 3 cups vegetable or canola oil
  • I also added a bit of food coloring for fun


Method . . .

  1. In a medium bowl, dissolve the yeast in the warm water.
  2. Add the soy milk, margarine or butter, egg, sugar, and salt, and blend with an electric mixer until smooth.
  3. Add half the flour and mix for 30 seconds.
  4. Add the remaining flour and knead the dough with flour-dusted hands until smooth.
  5. Cover the bowl of dough and leave it in a comfy, warm place until the dough doubles in size, about 1 hour. You can tell that the dough has risen enough when you poke it with your finger and the indentation stays.
  6. Roll out the dough on a heavily floured surface until it's about 1/2 inch thick.
  7. If you don't have a doughnut cutter, simply use a drinking glass about the same diameter as a 14-ounce can. You should be able to get about 12 to 14 donuts this way.
  8. Now it's time to get creative -- it's time for the holes! Find the cap to a bottle of lemon juice or Worcestershire sauce, or any other small cap with a diameter of about 1 1/4 inches. Use this to punch out holes in the center of each of your donuts.
  9. Place the donuts on plates or cookie sheets, cover, and let stand in the same warm, comfy place until they nearly double in size (about 30 to 45 minutes).
  10. Heat the vegetable oil in a large frying pan over medium heat (to about 350 degrees). It is easily tested with scrap dough left over from punching out the donuts. The dough should bubble rapidly. I also found it helpful to place a small carrot in the oil while frying -- prevents burning, I've heard.
  11. Fry each doughnut for about 30 seconds per side, or until light golden brown -- the color is key.
  12. Cool 5 minutes on paper towels.


CHOCOLATE GLAZE

What you'll need . . .(NOTE: I found that this made WAY too much glaze, but it's what the original recipe calls for . . . I'd advise making half, but it's up to you.)

  • 5 1/3 tablespoons Earth Balance or butter
  • 2 cups powdered sugar
  • 1/2 teaspoon vanilla extract
  • 1/3 cup hot water
  • 1 cup semisweet chocolate chips


Method . . .

  1. Combine the margarine or butter with the powdered sugar in a medium bowl and blend with an electric mixer.
  2. Add the vanilla and hot water. Mix until smooth.
  3. Melt the chocolate chips in a microwave-safe bowl in the microwave for 30 to 40 seconds. Stir, then microwave another 30 seconds and stir again until completely melted.
  4. Add to the plain glaze mixture. Blend until smooth.
  5. When the donuts have cooled, dip each top surface into the glaze and then flip over and cool on a plate until the glaze firms up, about 15 minutes.


Psssst: Welcome to neverhomemaker.com! Your surfing should be relatively unaffected, but if you aren't receiving updates in your favorite feed reader, you may want to re-subscribe.


Like what you just read? You can subscribe to the feed of these posts or follow us on Twitter or Facebook to be the first to know what the (never home)makers are up to. And we’ll love you forever!

Read more...
Related Posts Plugin for WordPress, Blogger...

About This Blog

MyFreeCopyright.com Registered & Protected

© 2009-2014 by the (never home)makers
All content on this blog is copyrighted.

Want to publish our pics, tips, or tricks?
Contact us! [neverhomemaker@gmail.com]

We value transparency. Links on this page may contain affiliates. In addition, please see our disclosure policy regarding sponsored posts.

  © Blogger template Simple n' Sweet by Ourblogtemplates.com 2009

Back to TOP  

Blogging tips