Showing posts with label indian. Show all posts

Weeknight Meals: Vegetarian Tikka Masala

>> Thursday, January 10, 2019

I keep posting photos of myself making this meal on Instagram, but I don't think I've ever formally written out the recipe on the blog. We make this Tikka Masala in the crock pot at least once every two weeks, if not more frequently. It's highly adaptable, so if you have other veggies on hand that you think would work -- use them!

Oh, and I should note that this recipe is made using sauce from Aldi. Here's where you can find all my other Aldi tips, tricks, and recipes.


VEGETARIAN TIKKA MASALA


  • 1 can chickpeas
  • 1 large onion (approx 1 cup), chopped
  • 1 large sweet potato (approx 1 to 1.5 cups), chopped*
  • 1 to 1.5 cups frozen peas
  • 1 jar Tikka Masala sauce from Aldi


* I often use carrots or white potatoes in place of sweet potatoes.

Then just toss everything in your crock pot and cook on high for 3 hours. If you want to get extra fancy, you can make your own paneer, which is an Indian simple cheese you can easily make at home. And your own naan, which is Indian bread to have on the side.

Related

Homemade Almond Milk
Our Go-To Pizza Dough
Homemade Ciabatta Bread
Homemade Muesli
Adventures in Cereal-Making
Homemade Bagels
White + Whole Wheat No Knead Loaf
Three Seed Crackers
Expanding Our Homemade Pantry
Homemade Flax Crackers
Homemade Pancake/Waffle Mix
Awesome Couscous Crackers
My Favorite Hummus
Stephen’s Homemade Pickles
Homemade Applesauce
Red Curry Kimchi


Read more...

Indian Curry in a Hurry

>> Friday, August 14, 2015

My friend Meg gave me this amazing vegetarian Indian cookbook for my birthday. (For those of you who are interested, it’s Indian Vegetarian Cooking At Your House.) I haven’t cracked the book much yet because we were away last week, but it sparked some major curry cooking in me. We’ve been eating vegetable curry for dinner most every night, and it’s all a variation on this Chickpea Mash recipe from years ago with some tips from the book.

So, I thought I’d give you some tips for how to make this dish work in your house . . . tonight! Well, at least once you gather a few key spices. We make this meal so often, we use whatever we have on hand to make it work. If you only have chickpeas, onions, and potatoes, use ‘em.

And don’t forget the naan (we have many recipes), but I’ll give you an update on that part, too.


VEGETABLE CURRY in a hurry


What you’ll need . . .

  • Mince a couple cloves of garlic
  • Chop one onion
  • Chop one large bell pepper
  • Consider adding a cup of broccoli cauliflower, or other veggies 
  • Use a can (or 1-1/2 cups) chickpeas*
  • Peel and halve 2 medium potatoes or sweet potatoes
  • Consider adding frozen peas
  • Heck, toss in a medium tomato from your garden
  • Add spices!
    • 1/2 teaspoon mustard or coriander seeds
    • 1 teaspoon curry powder
    • 1/2 teaspoon turmeric 
    • 1/2 teaspoon garam masala
    • salt + pepper

* I’ve been using frozen chickpeas. If you’d like to start cooking your own beans, follow these instructions. Works great. Freeze big batches for easy cooking.

PS: I know this seems like a lot, but once you get your spices -- a lot of this is stuff we all have on hand for making other healthy meals. Once you get the hang of cooking it, it’s a breeze. Here’s the process. Read through it once, then make it . . . and you’ll want to do it over and over again.


Method . . .


  1. Start a pot of water boiling on the stove. You’ll add your potatoes to the water and cook until they are softened. Then remove from water and chop into pieces the size of your onions and peppers.
  2. While those are cooking, you’ll heat a couple tablespoons of olive oil in a large pan (sometimes I use my tagine) and add your mustard or coriander seeds. Honestly, either type tastes good in this dish -- so just use what you have/can find. 
  3. Once they start popping, toss in the garlic and cook until lightly browned.
  4. Then toss in the rest of your veggies. You’ll want to cook until the onions are translucent. You can add your spices (all of them) at any point. 
  5. Then toss in the chickpeas and potatoes. Add a few splashes of water and keep cooking over medium heat until everything starts to cook together. The flavors will mingle, the potatoes will soften even more to make everything come together in an almost-mushy texture.
  6. After 10 to 15 minutes of simmering, serve with naan.


5-MINUTE NAAN RECIPE

What you’ll need . . .

  • 1 cup whole wheat flour 
  • 1/2 cup bread flour
  • 1 tablespoons baking powder
  • 1/2 cup water
  • 3 to 4 tablespoons vegan mayo (!!!)
  • Pinch salt

Method . . .

  1. Whisk together the flours, baking powder, and salt.
  2. Add in the water and vegan mayo slowly. You want the mixture to be a nice, soft round, but not sticky. Add more water if it’s too dry or more flour if it’s too wet. 
  3. Divide into four pieces, then follow these video instructions to get cooking.

ENJOY!

Like what you just read? You can subscribe to the feed of these posts or follow us on Twitter or Facebook to be the first to know what the (never home)makers are up to. And we’ll love you forever!

Read more...

Baked Autumn Samosas

>> Wednesday, October 3, 2012


I ate Indian food at least twice a week when I was in college. I would pick it up on my way home from the bus stop at this amazing joint in the Commons (I think it's Sangam -- they have a location in Collegetown, too). I call it a "joint" because it was almost like fast food, just way better.

I always bought two samosas with my plate of to-go veggie curry and rice. I'd eat one right away and save the other for later. Potatoes, peas, fried dough, spices. So good. My favorite part of the meal.

This recipe is far from traditional and is baked, not fried. Still satisfies my nostalgic craving, though. I know I'll be making these again soon!


BAKED AUTUMN SAMOSAS

Filling

  • 2 to 3 cups butternut squash 
  • 1 head cauliflower 
  • 1 white onion 
  • 3 large cloves garlic 
  • Olive oil 
  • Salt 
  • Pepper 
  • Curry powder 
  • Smoked paprika 
Crust

  • 1 cup whole wheat flour
  • 1 cup unbleached bread flour
  • Pinch salt
  • 1/2 cup Earth Balance (cold)
  • 1/4 cup olive oil
  • Water (cold)


Method for veggies . . .

  1. Preheat your oven to 375 degrees F. Get a rimmed baking sheet ready.
  2. Chop all veggies coarsely -- into approx. 1-inch cubes. Then place them on your rimmed sheet.
  3. Drizzle with olive oil (a few tablespoons) and then sprinkle with your salt, pepper, and spices. Use as little or as much as you like. I kept ours relatively tame since I wanted to give Ada some of the filling for dinner.
  4. Roast in oven for an hour, stirring every 20 minutes. Then refrigerate until you're ready to make your samosas. If that's right away -- proceed to making the crust.

Method for crust . . . 

  1. In a food processor, combine the flours and salt. Pulse.
  2. Then add in the butter in chunks and the olive oil. Pulse until the mixture resembles coarse meal.
  3. Add water 1 tablespoon at a time -- pulsing again -- until the dough starts to form together.
  4. Then roll into a ball and store in the fridge until you're ready to bake.


Putting it all together . . . 

  1. Preheat your oven to 400 degrees F. Lightly spritz a baking sheet with olive oil. Set aside.
  2. Basically, you roll out the dough between two pieces of wax paper, cut it into a circle using a pot top, cut that in half, fold, fill, and press shut. See this video tutorial for details (as well as for a gluten-free and more traditional samosas recipe). It's exactly how I did it.
  3. Then arrange samosas on baking sheet and prick each with the tines of a fork.
  4. Bake for 15 to 20 minutes. Until the crust is golden.
  5. Let cool and serve with your favorite barbeque sauce.


These photos of the finished samosas aren't really my best, but you might be interested to know I shot them in total, complete darkness. Yeah. We're at that time of year when dinner is eaten long after the sun goes down.

I used my DIY light box to photograph in the past. But now I'm using my bounce flash. Stephen bought it for me for Christmas two years ago, and I'm only now getting around to using it. Not too shabby at all.

Today on Writing Chapter Three, I wrote about the magic hour when Stephen gets home from work. I feel like Ada merely tolerates me all day until she can see daddy again.

Like what you just read? You can subscribe to the feed of these posts or follow us on Twitter or Facebook to be the first to know what the (never home)makers are up to. And we’ll love you forever!

Read more...

Snow Day and 3-hour Naan

>> Tuesday, March 8, 2011

We got 18 inches of snow in 18 hours Sunday night through Monday morning. Crazy, I tell you! I had absolutely no idea a storm was forecasted -- especially one of such magnitude. The roads were closed Monday . . . so I didn't have to go in to work. It was fabulous.

Now, Stephen (an English teacher) is more than used to snow days.


He's had what seems like at least one day off per week all winter! Lucky guy . . .


OK. I know that isn't entirely true. But it was nice, for once, to enjoy some unexpected time of my own at home. Almost makes me wish I'd chosen teaching as my career.

Almost.


Time off from work means more time for baking. Despite efforts to clean up my eating a bit, I couldn't resist trying a new naan recipe, which I adapted from one I found on AllRecipes.com.

Quite honestly, it's just as good as naan I've had at Indian restaurants.

3-HOUR NAAN
(Pressed for time? Check out the 5-minute naan, too!)

What you'll need . . .
  • 1-1/4 teaspoon active dry yeast
  • 1/2 cup warm water
  • Pinch of coarse Koher salt
  • 2 heaping cups bread flour (about 2-1/4 cups in all)
  • 1 tablespoon maple syrup
  • 2 tablespoons almond milk
  • 1 egg, beaten

Method . . .
  1. In a medium bowl, whisk together the warm water and yeast. Let sit until frothy (about 10 minutes).
  2. I the bowl of an electric mixer, hand-whisk together the flour and salt. Set aside.
  3. Add the maple syrup, almond milk, and egg to the yeast mixture. Mix until well incorporated.
  4. Then add the wet ingredients to the dry and use the dough hook to knead for 5 to 7 minutes. Dough should be elastic and smooth.
  5. Cover the bowl with an oiled piece of plastic wrap for 2 hours.
  6. Then divide dough into 6 to 8 pieces and let rise for another hour.
  7. On your stovetop, spritz a pan with some canola oil and heat over high heat. Take each piece of dough and flatted with your fingers/thumbs/etc.
  8. Then flip and cook until golden. Repeat with remaining pieces.
  9. Use a pizza cutter to cut each piece into 4 triangles.
  10. Brush with butter or Earth Balance, if desired.

This naan goes together famously well with the Thai-Style Vegetable Korma recipe from the other day. Or any other saucy dish that begs for some bread for dipping. We can't get enough!

Like what you just read? You can subscribe to the feed of these posts or follow us on Twitter or Facebook to be the first to know what the (never home)makers are up to. And we’ll love you forever!

Read more...

Vegetable Korma -- Thai Style

>> Wednesday, March 2, 2011

When we want a fast, delicious dinner in a flash, we look to Indian food. Though traditionally, I'm pretty sure most dishes are carefully simmered and fretted over for hours upon hours, you can still make something great in far less time. Like this dish, to which we gave some Thai flair without the fuss -- adding coconut milk and peanut butter.

No, kids. This isn't your mom's vegetable korma. (Excuse the dirty stove-top.)


THAI STYLE VEGETABLE KORMA

What you'll need . . .
  • 1 cup chopped cauliflower
  • 1 cup chopped green bell pepper
  • 1 large onion, chopped
  • 2 cloves of garlic, chopped
  • 1 can chickpeas, drained and rinsed
  • 3 tablespoons olive oil
  • 2 bay leaves
  • 1/2 teaspoon cumin seeds
  • 1 tablespoon shredded ginger
  • 1 tablespoon coriander powder
  • 1/4 teaspoon turmeric
  • 1/2 teaspoon cayenne pepper
  • 1/2 teaspoon garam masala
  • 1 can (1-1/2 cups or so) coconut milk
  • 2 tablespoons peanut butter

Method . . .
  1. In a large pan, heat the oil on medium-high heat until hot. Then toss in the garlic and onions. Cook for several minutes until softened/glassy.
  2. Toss in the spices and bay leaves. Stir around until everything is well coated.
  3. Add the cauliflower, green pepper, and chickpeas. Cook for 8 to 10 minutes until softened.
  4. In a small bowl, whisk together the peanut butter and coconut milk (we used that spicy peanut butter . . . but you can just use regular). Then add the mixture to the pan.
  5. Cook for another 10 to 20 minutes. Then serve and enjoy with naan (new recipe to come!)!
Yeah, that's right. From chopping to eating, this takes around 30 minutes. That's why we love Indian food so much! Well, it's also insanely delicious.


So, it appears the comments section hasn't been working well since last night. Not only that, I just recently discovered that some of you have tricked the system and been able to comment using Blogger versus Disqus. The downside: I don't get to respond to your comments. I just know they're there. And they are much appreciated.

I can't believe to describe the level of frustration I feel! GRRRRRR! Please, dear readers, know you are loved. Your comments are so very, very, very much appreciated. And we'll be working on a better system ASAP.

Promise.

Like what you just read? You can subscribe to the feed of these posts or follow us on Twitter or Facebook to be the first to know what the (never home)makers are up to. And we’ll love you forever!

Read more...

How NOT to Make Paneer

>> Monday, December 6, 2010


Not my most successful afternoon in the kitchen. That's for sure. I had been wanting to make paneer since Emily posted her oh-so creative Naan Pizza with Paneer Cheese a couple months ago. And since our primary mission this weekend was to decorate, relax, and enjoy time off . . . I figured it'd be the perfect time to try it out.

You need whole milk for this recipe. And you need lemon or vinegar to make those strong curds that eventually make up your cheese. (Of course, my try was already doomed at this point by my substitution of lime juice for lemon. More on that later.)


Would you believe me if I told you that the very first time I bought cow's milk for myself was this weekend? It's so very true! Despite our diet -- which is seemingly heavy in the cheese area -- we don't drink milk. Instead, we stock our fridge with almond milk.

Alright. You also need cheesecloth, a colander, and a medium bowl. And if you're interested, the entire process is outlined in full here.


Basically, you just pour 4 cups of milk into a saucepan. Bring it to a rolling boil. Then add a cup of lemon juice (as Emily writes, and I wholeheartedly agree, freshly squeezed is best).

Stir, stir, and stir some more. For 2 to 3 minutes. Until you see curds forming. This is where I knew things weren't exactly going to work out. Mine didn't really have curds. It thickened. But not as much as I would have expected.


You take everything off the stove after you've gotten your curd on. Then, you pour the mix into a colander lined with a doubled-over piece of cheesecloth (you should be able to find it in the supplies section of your grocery store). Make sure the bowl you're pouring into is tall enough so that your to-be cheese isn't sitting in a warm puddle. It needs to DRAIN.

Then, you wait. For 30 minutes or so. While everything separates. When you return for the next step, it should look something like this:


But, if you want a firmer cheese (and I wanted cubes, I tell you, beautiful and firm CUBES!) . . . you need to get creative. First, you'll squeeze a bit more moisture out of your cheese ball. Fold over the cheese cloth. And set it back on the colander (I also emptied the water that had already drained).

Stick a small plate atop your cheese. Then weigh it down with something heavy. Or two things heavy. It's a balancing act, so just be careful. I actually scared myself because right after I left my leaning tower of cheese, it came crashing down in a loud BANG.


Leave everything like this for an hour or two. Again, mine didn't really turn out as expected. I got a thick, spreadable ricotta texture. It tasted like lime cheese. (I think lemons wouldn't be quite as pervasive.)

So, instead of making mutter paneer like I had hoped (cubed paneer with peas in a thick sauce), I mixed it with some egg replacer, paprika, salt, and curry and baked it. We then spread it on some naan with our dinner.


Tasty -- yes. But not at all what I had set out to make. That's OK, though. We still have half of the milk left . . . and some lemon juice. I think I'll be trying this recipe again very, very soon. And if every kitchen creation was a resounding success, it wouldn't be as much fun. See, I learned something! I can't be so cocky with my substitutions. I mean, I have never attempted to make cheese before.

The first time is the best time to follow instructions.

What's your most recent kitchen flop . . . and what did you learn from it? I know you have one! Don't be shy. Just leave a comment or email us at neverhomemaker [at] gmail [dot] com.

Like what you just read? You can subscribe to the feed of these posts or follow us on Twitter or Facebook to be the first to know what the (never home)makers are up to. And we’ll love you forever!

Read more...

Curried Chickpea Mash and 5-Minute Naan

>> Tuesday, November 2, 2010


You don't get a lot of recipes from me. I think the last one was my Bulgar Wheat Salad. Ashley's always the one making crazy things in the kitchen. By crazy, I mean things loaded with bread and cheese (latest example) because that's what we like. Until recently, that's also what we always craved. With all our running, carbs are in high demand.

Now, training is different: Ashley is scaling back her miles on the road due to injury. I'm just experimenting with new workouts and intensities. More on that another time, though.

Ashley cooks. I clean up after her. It's a good system and it works for us. I have my moments, though. Like after we made the Orange Pan-Glazed Tempeh -- I was starving. Tired of cooking, Ashley wanted to indulge her lazy side and eat brownies and peanut butter.

I had other plans involving legumes and spice.


Stephen's CURRIED CHICKPEA MASH

What you'll need . . .
  • 1 large onion, sliced
  • 1 can coarse ground tomatoes
  • 3 garlic cloves
  • 2 tablespoons grated ginger
  • 2 cans of chickpeas, drained and rinsed
  • 2 tablespoons olive oil
  • 2-3 bay leaves
  • 1 teaspoon ground cloves
  • 1 teaspoon cardamom seeds
  • 5-6 peppercorns
  • 1/2 teaspoon turmeric powder
  • 2 tablespoons roasted coriander powder
  • 1 teaspoon cumin powder
  • 2 teaspoons garam masala
  • 1 cup almond milk (or substitute)

Method . . .
  1. In a food processor, combine the onions, tomatoes, garlic cloves, the juice of the grated ginger (just squeeze and discard the pulp) until smooth.
  2. Heat the oil in a large pot over medium-high heat.
  3. Add to the pot the bay leaves, ground cloves, cardamom seeds, and peppercorns. Cook for about a minute.
  4. Add in the onion-garlic-tomato mixture and cook for 5 minutes.
  5. Add the cumin, roasted coriander, tumeric, and garam masala. Cook for another 5 minutes.
  6. Add the drained/rinsed chickpeas to the mix. Stir until covered.
  7. Add a pinch of salt to taste. Add a cup (or more, if you like) of almond milk.
  8. Cook at a simmer -- covered -- for 10 minutes.
  9. Use a potato masher (or big spoon) to lightly mash the chickpeas. You don't want them totally mashed, just somewhat.
  10. Serve warm with naan. And if you like cilantro, add a few sprigs.

Ashley's 5-MINUTE NAAN

What you'll need . . .
  • 1 cup bread flour
  • 1/2 teaspoon baking powder
  • 1 pinch salt
  • 2/3 cup water
  • extra flour for rolling

Method . . .
  1. Whisk together the bread flour, salt, and baking powder in a medium bowl.
  2. Add the water and stir. Then knead with your hands for a minute or two. If dough is too sticky, add a bit more flour.
  3. Dough should be smooth and elastic. Divide into 4 balls.
  4. Roll out each ball until it is about 5 to 6 inches in diameter.
  5. Spritz a frying pan with olive oil and heat over high heat. When hot, place one of the pre-naans on it. Press down a bit with your hands or a utensil. Cook until golden.
  6. Then flip and cook until golden. Repeat with remaining pieces.
  7. Use a pizza cutter to cut each piece into 4 triangles.
  8. Serves between 2 and 4 people. Each piece (divide into 4 triangles) is about 140 calories.

The day we made this meal, we also replaced our kitchen faucet. It stopped working last Thursday (we wrote about it here) and we had been without running water in the kitchen for several days. Pioneer times.

Here's what our old faucet looked like. We don't have many other shots because it wasn't particularly interesting.


Here's what it looks like now. (Note from Ashley: Yes. We love you enough to show you our sink full of dirty dishes!) Goose-necked glory:


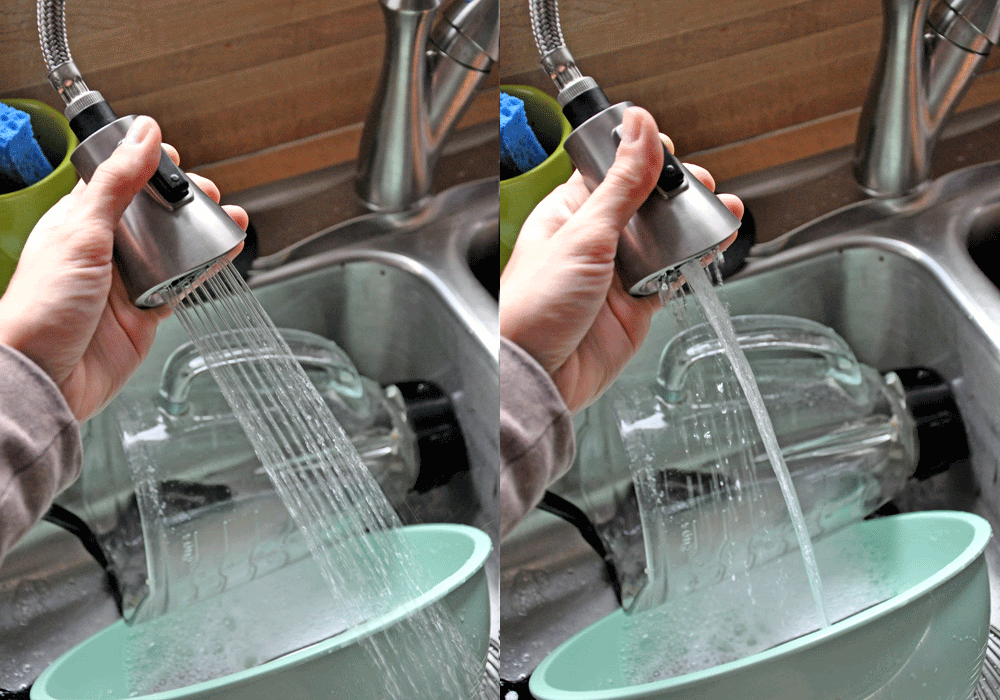
What we like most about it is the easy hose/spray function.


Even small projects can make a big impact. I'm not exactly a home renovation expert, but the project was relatively easy. Taking out the old faucet was much harder than installing the new one. We still haven't invested in our dishwasher, so until we do . . . washing dishes is at least more fun.


Like what you just read? You can subscribe to the feed of these posts or follow us on Twitter or Facebook to be the first to know what the (never home)makers are up to. And we’ll love you forever!

Read more...

Tarka Dhal for Dinner

>> Thursday, June 3, 2010


I see this dish spelled both "Tarka Dhal" and "Tarka Dal" -- so, if I'm making an error in the title, I apologize. No matter how you spell it, though, this recipe is incredible. It's just one version of many dhals that are served throughout India. And since many of these folks are vegetarian, dhals are a key part of the diet there. As a vegetarian myself, I can assure you the same will be the case for me (and Stephen)!


So, in our last post, we covered the beauty of the microwaved sweet potato. You can eat it plain. You can eat it smothered in cheese. And now -- you can eat it covered in spices. With red lentils. And garlic. And eggplant. Etc.


Here's how . . .

What you'll need . . .
  • 2 tablespoons canola or sunflower oil
  • 1 medium cooking onion, sliced thinly
  • 1 teaspoon coriander seeds
  • 2 cloves of garlic, minced
  • 1 teaspoon fresh ginger, minced
  • 1/2 teaspoon salt
  • 1/2 cup (heaping) red lentils, rinsed
  • 1 sweet potato, microwaved
  • 1/2 eggplant, chopped
  • 2-1/2 cups water
  • 1 tablespoon lemon juice
  • 4 tablespoons fresh basil, chopped
  • 1/2 teaspoon garam masala
  • 1/2 teaspoon chili powder


Method . . .
  1. Poke holes in your sweet potato with a fork and microwave on high for five to six minutes. Remove from microwave, and gently scoop the potato out of its skin. Mash 1 tablespoon of it . . . and chop the rest into soft cubes.
  2. Heat 1 tablespoon of the canola or sunflower oil in a large pan and add the onions. Cook for 2 to 3 minutes over high heat, then add the coriander seeds. Cover pan until the seeds begin to pop. (You'll hear it.)
  3. Remove the lid from the pan and add the garlic, ginger, and salt.
  4. Stir once and add the lentils, 1 tablespoon of the sweet potato mash, and water. Bring to a boil, then lower heat to a simmer for 10 minutes, stirring occasionally.
  5. Stir in the sweet potato cubes, chopped eggplant, lemon juice, and basil and let simmer for another 10 minutes. (Until lentils are tender.)
  6. Remove from heat and serve into bowls.
  7. Mix together the other 1 tablespoon of oil with the garam masala and chili powder (this is a topping). Pour over the tarka dhal and enjoy!

Like what you just read? You can subscribe to the feed of these posts or follow us on Twitter or Facebook to be the first to know what the (never home)makers are up to. And we’ll love you forever!!

Read more...

It's Thursday . . . Have some Naan!

>> Thursday, January 28, 2010


From the METHOD archives . . . A few nights ago, I set out to make naan, and I planned to use it in two dinners. Both worked beautifully. Some history . . . I have quite a love affair with naan. When I was in college, one of my housemates and I used to frequent this little Indian food joint, and I'd always get the same thing: one order of vegetable curry, one order of veggie samosas, and two -- count it -- TWO orders of naan. I'd eat one with the meal and save the other for the next day. Problem was, I've since moved, and I've been missing the meal ever since.

What I found out this week is that naan is both incredibly versatile AND super easy to make. In fact, you "bake" it in a cast iron skillet! So, I thought I'd start you all off with the basic naan recipe. It goes great with this morning's slow-cooker sweet potato/pea/cauliflower curry. That was meal one I made with the stuff. Meal two was a "breakfast" pizza atop the naan. It's pretty self explanatory, but tomorrow I'll give you my favorite breakfast pizza topping combination, as well as some tricks for avoiding a soggy result.

Also note: The naan I made isn't exactly traditional. I mixed some different flours in because I mostly have wheat pastry flour at my house right now. Having just returned from vacation, I'm low on other supplies too. So, below is the original recipe and in (parentheses) are my substitutions. 

Oh, yeah. And this recipe makes enough for TWO meals. So, you'll want to either freeze half of the dough for another night in the distant future . . . or refrigerate for up to three days.

BASIC NAAN
What you'll need . . .
  • 3-1/2 cups bread flour (I used 2 cups wheat pastry, 1-1/4 cup white, and 1/2 cup cornmeal)
  • 1/2 teaspoon salt
  • 1 tablespoon instant yeast (Fleischmann's Active Dry worked just fine)
  • 1-1/2 cup warm milk (I used regular soy milk -- I heated it up in the microwave for 30 seconds, stirred, and heated for another 20 or so)
  • 1 tablespoon sugar
  • 1/2 teaspoon oil (I used olive oil)

Method . . .
  1. Heat the milk in the microwave as instructed above. Then dissolve the yeast and sugar into the milk by whisking and letting sit for 10 minutes until frothy.
  2. Mix the flour(s) and salt together in a large mixing bowl.
  3. Use your fist to make a hole in the middle of the flour -- this is where you'll put in the milk mixture.
  4. Pour the milk mixture into the bowl with the flour, trying to keep it all in that hole you made. Also pour the oil into the mix.
  5. Then with a spatula, gently start to incorporate everything. After a while, you may find it easier to use your hands. You'll also want to add more flour if you find the resulting dough too sticky. It should instead be soft and elastic.
  6. Cover the bowl with a piece of lightly oiled plastic wrap. Let rise until doubled in a dark place (approx 1-1/2 hours).
  7. Divide dough into two sections. Freeze or refrigerate one section for another meal (each section makes about five large pieces of naan, so you may use it all if you have more people to feed).
  8. Otherwise, divide one section into five small balls.
  9. Generously flour a work surface and roll each ball until it is very flat/thin. Don't worry -- it'll bubble up and expand once you get it onto the skillet.
  10. Heat an iron skillet on high heat (or regular shallow cooking pan) until it is VERY hot. If you have spray oil, that works best, so spray oil on the skillet and place on your first piece of to-be naan.
  11. Once the dough is on the skillet, use you hand to sort of swirl it around and make sure it doesn't stick. You will start to see it bubble a bit at this point -- let it bubble, that's the best part.
  12. Cook the first side for around a minute, or until you notice it start to brown. You may want to turn down the heat just a bit after the skillet is sufficiently hot, but not too low. You still need it very hot.
  13. Flip the naan and cook until the other side is lightly browned.
  14. Then brush each piece with some butter or Earth Balance, and serve.
Like what you just read? You can subscribe to the feed of these posts or follow us on Twitter or Facebook to be the first to know what the (never home)makers are up to. And we’ll love you forever!

Read more...
Related Posts Plugin for WordPress, Blogger...

About This Blog

MyFreeCopyright.com Registered & Protected

© 2009-2014 by the (never home)makers
All content on this blog is copyrighted.

Want to publish our pics, tips, or tricks?
Contact us! [neverhomemaker@gmail.com]

We value transparency. Links on this page may contain affiliates. In addition, please see our disclosure policy regarding sponsored posts.

  © Blogger template Simple n' Sweet by Ourblogtemplates.com 2009

Back to TOP  

Blogging tips