Showing posts with label homemade. Show all posts

Expanding Our Homemade Pantry

>> Tuesday, August 22, 2017

If you follow me on Instagram, you’ve seen my many food adventures this month. Stephen and I are trying to continue out frugal accomplishments by making more and more of our foods from scratch. Many of you have been interested in the recipes and methods we follow, so I figured a post was in order.

Today I’ll cover the more frequent items we’ve been cooking up. But I’m sure I’ll add to this list in the future. And be sure to check the links at the end for a more comprehensive list of the things we regularly make to stock our homemade pantry.

Yogurt


Ah, yes. Yogurt. I waited years to try making this on my own because the idea of it was daunting to me. Thing is, you can easily make yogurt in your slow cooker. A gallon of milk costs me around $1.65 to $2 and yields 8-9 cups of the stuff.

I currently follow this recipe in my crock pot. It is for Greek-style yogurt . . . but that really just hinges on how much you strain it. I tend to do a slightly thicker than regular and thinner than Greek consistency. That’s the beauty with homemade yogurt -- it’s customizable.

Now, I am investigating a few more that might create less waste and yield even more result. I hear if you use powdered milk, it thickens the batch so little straining is necessary. I began my batch by using a cup of the Siggi’s plain yogurt as my starter. The first batch was very similar to the Siggi’s and later batches (using homemade starter) have been more sour. But you can sweeten them up with honey, maple syrup, or -- my favorite -- peanut butter.

Also: I always use non-fat milk.

// Mozzarella Cheese


Mozzarella was also on my bucket list for many years, but actually buying vegetable rennet made the whole thing feel like a production. Oh, and I suppose I should also mention that I only very recently bought a rapid-read food thermometer, which has been a game changer for making all things dairy. Oh, and cheesecloth. Lots of cheesecloth, though the less-waste in me has started experimenting with nut milk bags.

I follow this recipe for mozzarella (the image is also from this site -- I somehow deleted mine). You simply heat the milk, add in the rennet and citric acid, strain curds, knead, etc. Then you get this delightful ball in less than half an hour. I’ve made this a few times now. With practice it becomes much more automatic. There’s nothing cooler than looking at a ball of fresh cheese you’ve made from scratch.

Also: I always use whole milk.

// Paneer 


Speaking of cheese, I am addicted to paneer. One way we’ve gained some independence from takeout meals is by making our own Indian food. I buy the simmer sauce at Aldi and make the cheese a day or hour ahead of time. It’s even easier than making mozzarella. All you need to curdle the milk is something like vinegar or lemon juice.

From there, it’s all about pressing. Here’s the recipe I follow for perfect paneer. I’ll be making it tonight -- with whole milk.

// Ghee


After making paneer, ghee was a natural next step, right? It’s wonderful on homemade naan (getting there in a minute -- just you wait!). It’s also great for cooking stir-fries, eggs, etc. I’ve only made one batch so far, but it’s was super easy.

Here’s the recipe I followed. It keeps on the counter for a few weeks to a month. I used unsalted butter.

// Naan


You guys know I’ve been making my own naan-like creations for years. It all started in college when I lived with a graduate student named Aggrey. He used to roll out these unleavened dough balls and cook them on the stove-top like he did back home growing up in Africa. I slowly developed my own version of a flattened, more savory pancake.

My favorite recipes include the following. We make different kinds according to our moods.

// Sandwich Bread


I searched far and wide for a suitable sandwich bread recipe. Something reminiscent of store-bought, but oh-so much better. And about a month ago . . . I found it. The perfect white bread recipe. It turns out flawlessly every single freaking time. My only sub is that I use canola oil in place of butter inside the bread. I may start brushing the top with ghee.

I’d like to slowly modify this to include more whole grains, but bread can be tricky. I’ll report back soon.

// Jarred veggies in brine


We’ve started jarring + pickling lots of veggies in the fridge -- from zoodles to jalapeños and more -- and I basically just chop them up and pour in this brine. The instructions say to wait until the brine is cool to add it to the veggies, but I actually like it hot with things like jalapeños. It makes them so soft and delicious.

// Seitan


It had been years . . . but we dusted off the old seitan recipe.

Now we make this stuff weekly. So much less expensive than buying Field Roast. I’ll have to do an updated recipe, too. We’ve been seasoning it in all different ways. We’re still making seitan dogs, too. And the other night, Stephen made a pulled-pork-esque thing with BBQ sauce! Did you know that vital wheat gluten is full of protein? It’s true.

// More pantry goodies


Homemade Almond Milk
Our Go-To Pizza Dough
Homemade Ciabatta Bread
Homemade Muesli
Adventures in Cereal-Making
Homemade Bagels
White + Whole Wheat No Knead Loaf
Three Seed Crackers
Homemade Flax Crackers
Homemade Pancake/Waffle Mix
Awesome Couscous Crackers
My Favorite Hummus
Stephen’s Homemade Pickles
Homemade Applesauce
Red Curry Kimchi

Read more...

Frugal Accomplishments // 1

>> Monday, August 7, 2017

I’ve run into many accounts of “frugal accomplishments” by different bloggers. I always enjoy reading what other families are doing to save money and avoid consumption. And I thought I might like to start making my own lists on this space from time to time. I’ll try to keep them to just five bullet items. Maybe these things will help inspire you like they do for me. It’s always nice to get a nudge in the frugal direction, especially if you find yourself struggling.

There are always areas to improve upon, right?


#1: Added to our homemade pantry


We’ve been beefing up our homemade pantry with more goods we’ve made from CSA ingredients and otherwise. This weekend, Stephen and I both made a batch of jarred jalapeños and some pickled zucchini noodles. Both seem to be tasty so far, and they should last in the fridge for a good month (though we’ll surely eat them before this date!). For the brine, we followed the directions on this recipe. All the produce came from our CSA, though we should have a good showing of zucchinis in our backyard garden soon enough.

Along with these foods, I have started testing out recipes for a sandwich bread I hope to replace store-bought bread with. My first two attempts were tasty, but not quite the right texture. Stay tuned on that one. Stephen has also started up his yearly batch of pickles. He’s also brewing more kombucha. And while we’re at it and thinking of bread, I should probably try to get another sourdough starter going. I cannot seem to keep it alive long enough. Any tips on that?

#2: Started back-to-school shopping


I have made my rounds at the local thrift shops to start Ada’s school wardrobe for this fall. I cannot believe it’s almost time for classes to start back up! Anyway, I was lucky enough to find a lot (4) of Hanna Andersson dresses for $2.99 each in her size (well, the one that she’s currently growing into). I ask found a like-new pair of Hanna Andersson clogs for $8 at Once Upon a Child, where I had a 15% off coupon, making the total $6.80! Ada actually has quite a good number of clothes that stuff fit her well from last year, so we’ll resist buying new and go with what we have.

Side note: I really like Hanna Andersson because these clothes hold up very well. Ada has many more dresses in other sizes that should be in near-perfect condition for Eloise when she’s bigger. Gotta love being a girl-mom. Hand-me-downs!

#3: Scouted out a new thrift shop


Along with my school clothes shopping, I also found a new second-hand store that’s less than a mile from my house. It isn’t in the most desirable location, but everything in the store is $2 or less. I pawed my way through everything and was able to find a couple like-new Cat + Jack pieces for Ada’s school wardrobe. I also found a tank + cardigan set -- a SET -- of FLAX (here’s why I love FLAX) for $2! So, that means each piece was just $1. It’s my new favorite thrift spot based on price alone. Can’t beat it.

I’ll be adding this place to my regular rotation, though I don’t think it has as many treasures as my beloved Thrifty Shopper up the road.

#4: Visited the library


I always have the best intentions to check out materials from the library versus buying them on-demand. So, I set out in August with a new intention to think ahead and really use my library card versus ordering books for instant gratification. The library can be such a treasure trove for free entertainment, especially in the colder months. I have a hold on Ariel Levy’s memoir The Rules Do Not Apply. I also need to head back to examine some of the local calendars for different classes/groups that meet there.

I’ll be returning at the end of the month to sign up Eloise for the September story hour group that meets once a week.

#5: Found a new playground 


File this one under free entertainment. We spend a lot of time in our own backyard. But Eloise doesn’t have a lot of age-appropriate toys to ram around on now that’s she’s in full toddler mode. When I was out for my long run this week (8 miles -- yahoo!), I happened to do a lap around a nearby elementary school. To my pleasure, there was a small playground in the back for younger children with all sorts of toddler toys scattered about. We headed there last night with Eloise and Ada to play, and it’s basically the perfect setup. Ada is a fan of monkey bars these days, so she had at it on those. Eloise crawled around in the tunnels, play house, and went down the tiny slide. We even found some of those painted rocks everyone has been talking about.

I will be relying more and more on free places to go and things to do as cross country season heats up. What kind of places do you like to take your little ones for some free things to do?


What are some of your own recent frugal accomplishments?

Read more...

In the Kitchen // Vegan Protein Waffles

>> Wednesday, January 25, 2017

Hey, friends! So, here's that waffle recipe I've been promising for a few days. I've written about my love for Kodiak Protein Waffle mix, but the $5 price tag (about 50 cents per waffle)? I didn't love that so much.With our new budget stuff on the horizon, I figured I should figure out something homemade.

But how to get 14 grams of protein into delicious waffles?

Well, you can see how I figured it out -- in a vegan recipe with no protein powder!


INSTRUCTIONS 


To make 4 waffles . . . 
  • 1 cup whole wheat flour
  • 1/4 cup white flour
  • 1/2 cup peanut butter powder
  • 1 tablespoon coconut sugar (or plain sugar)
  • 1 tablespoon cacao powder (or cocoa powder)
  • 2 teaspoons baking powder
  • 1/2 teaspoon salt

Whisk all ingredients together in an airtight container for storage.  

You can easily double this recipe to make 8 waffles.

And all you need to do to make the waffles is combine a half cup of mix with a half cup of either soy milk or water -- whisking works best. Then fire up your waffle maker* on its higher setting, spritz with just a little cooking spray, cook, and you're done. That's all.

* I have a ceramic Oster Belgian waffle maker -- it was less than $25 and I end up using it daily either for waffles or pressed sandwiches (grilled cheese!). You definitely don't need to go fancy with this appliance. And when you're cooking these waffles, even if the green light turns on indicating it's "done" cooking, I like to wait another full minute to get it a bit crisper.

BTW: These waffles end up being 7 Weight Watchers points if you use unsweetened soy milk. (You can also use water if you don't care as much about hitting 14.5 grams -- the mix alone has 11-ish grams.)

And I broke out how much these waffles cost each and it's about 40 cents. No, that's not a HUGE savings on the Kodiak mix (and the cost would be lower if I used plain sugar and cocoa powder), but if you consider I eat one of these waffles almost daily, that's 10 cents a day or the potential savings of $36 a year.

That's a month of internet (at least after yesterday's switch).

Every little bit counts!

Read more...
3-Ingredient DIY Face Scrub Vlog

>> Friday, January 15, 2016

Happy Friday, friends! Here’s a weekend project you can knock out in only a couple minutes, but the reward will last much, much longer. I love exfoliating scrubs for my face. My combination skin requires both gentle and more powerful cleansers, though. Since a lot of scrubs on the market contain those plastic microbeads, I started making my own at home.

This recipe is safe for pregnancy, contains just three ingredients, and will last a good month or more in an airtight container. Don’t forget to subscribe to my YouTube Channel to get more fun videos like these! (Oh, and don’t mind my wicked-awful roots. Going blonde before pregnancy wasn’t the smartest idea, right?)


BASIC DIY FACE SCRUB


You’ll need . . . 

  • 1/2 cup baking soda
  • 1/2 cup sugar
  • 1 cup unrefined coconut oil

TO MAKE: Just mix together everything in a food processor, pour into an airtight container, and love your skin! For best results, use only once a day (or less frequently) and scrub gently.


Here’s some facial scrub inspiration:

* One thing I forgot to mention in the video is that the feel of the scrub, especially after rinsing your face, does take some adjustment. It initially leaves an oily residue that comes off 90% when you towel dry. The hint of oil left behind provides some nice moisturize -- especially this time of year.


More homemade beauty products, etc.:

Like what you just read? You can subscribe to the feed of these posts or follow us on Twitter or Facebook to be the first to know what the (never home)makers are up to. And we’ll love you forever!

Read more...

DIY Silhouettes // $10

>> Thursday, October 1, 2015

I’ve been slowly transforming our house through cleaning and decor to make it a calmer place to spend time. After all, this is my home and my office, so I spend a ridiculous number of hours under this roof. We’ve always been clean (wiped down counters, scrubbed toilets, steamed floors) . . . but definitely messy (mountains of clean laundry on the floor, toys everywhere, piles of mail).

With all the stuff we’ve been going through, I’ve found cleaning and decluttering to be this weird therapy of sorts. Like, I’d rather spend a couple hours cleaning than reading or watching TV. I even skipped working out on Thursday last week and cleaned for a couple hours instead. And the other night I took a good half hours to wipe down the washer + dryer that were honestly not left in the best condition from our previous owners over a year ago.

Do you think I’m crazy? Maybe I am.


Our decor is making a shift, too. I want cohesiveness. I want simplicity. Neutrals. Country and rustic to remind me of my hometown. Corner by corner, we’ve been doing little projects to make our home a place that feels really cozy and lovely. But as the fall and holidays seasons are approaching, we’ve stopped any heavy lifting (I so badly want to add beams to our living room!) to focus on the light stuff, like art and textiles.

Here’s a fun DIY art project you can make in a weekend for less than $10. There are lots of tutorials you can find online, but it’s a pretty intuitive process. In fact, my second grade teacher made silhouettes of all my classmates way back in the day by shining light on our heads and tracing the outline with pencil. This is that project, just kicked up a notch + improved with some technology.

Here’s my inspiration:


STEP 1: Take Your Photo


Take a selfie or have someone else take a photo of your profile on a plain background. You can use a wall or even fabric backdrop. Some tutorials I came across even suggested using a window, but I found the light made it tricky to get all the right detail.


STEP 2: Edit + Order


Convert your image to black and white and up the contrast using a photo editing site like Pic Monkey. There’s no right or wrong. You just want to make sure you’re clearly able to outline your features. Oh, I took our photos in square cropping, so I had to overlay them onto a 4x6 backdrop with black so they would print out well. Does that make sense?

Then order prints at a place like Walmart. I got a couple in 4x6 and 5x7 because I wasn’t sure which size I wanted. (And they were super cheap per print, so it wasn’t a big deal to have a couple extras.) For our silhouettes, I ended up using the 5x7 of my photo and Stephen’s. We used the 4x6 of Ada so she’d be a bit smaller.


STEP 3: Cut it Out


You can use sharp scissors or an X-Acto knife, but go slowly! Get the divot where your bangs hit your forehead. Keep that stray piece of hair. Don’t chop off where your glasses hit your nose. Basically, cut as closely to the photo as humanly possible because the more little details you get -- the more it will actually look like you.


STEP 4: Spray It Black 


Again, a lot of tutorials had different instructions for making your silhouettes black (or whatever color you want!). I decided to use some matte spray paint we had hanging around in the basement -- and it was SO EASY this way.

Just a few spritzes, dry time, and they were done with an extremely smooth, flat finish.


STEP 5: Mount on Paper


So, you’ll need frames for this next part. Cut out a piece of paper (I used plain white and some paper bag paper) to the size of your frame. Use a bit of glue and stick the photo onto the paper. You can write your name, the date, or anything else, or just leave it plain.

STEP 6: Frame


Stick your artwork in your frame and admire your project! I love the look of oval frames for silhouettes, but I couldn’t find any for instant gratification. So, I ended up picking up a mixed lot of frames because I want to add to our collection in the future, but I don’t want to be limited by the type of frame so they would all match.

The frames I got were around $7 a piece, the paint was free because we already had it, and the prints were like less than a quarter. So, you can easily do this project for $10 or less, depending on what frames you use.


This isn’t how I plan to have them displayed in the long run (see my inspiration, above!). I want them on the wall, but I want to add a bunch more first. So, I’ve put them on the ledge for the time being. I need to mix in some more dark frames, too. But I’d love to do the cats and maybe some full-length silhouettes. We shall see.

Have you tried this project before? 

Please let me know if you do!

Psst: For more cheap DIY decor, check out the 5-Minute Fall Wreath.

More fall essentials:


Like what you just read? You can subscribe to the feed of these posts or follow us on Twitter or Facebook to be the first to know what the (never home)makers are up to. And we’ll love you forever!

Read more...

Homesteading // Spring Is Near

>> Friday, March 13, 2015

We had over two feet of snow on the ground just a few days ago. It’s melted to less than six inches, and I’m starting to see brown blades of grass peeking out. Along with the earth’s thawing, my own body and mind are warming up to the idea of being outdoors again. After the winter we’ve had, it doesn’t even seem real that we’ll soon be able to walk around without all the bulk. And I certainly have a lot I want to do with our “land” (errr, backyard) and there are tons of other projects that extend indoors as well.

I plan to share some of our spring goals soon, but I thought I’d first give you an update on how we did with our winter homesteading goals . . .


Research Chickens: I did some good reading about chickens and feel like I have a handle on the things that are involved with finding them, making a place for them to live, caring for them, etc. That being said, I think this year isn’t the time to get started with the endeavor because our attention is definitely sucked in too many other places. My conclusion is that raising backyard chickens isn’t something to take lightly, so I think we’re going to push out the timeline a couple years.

Make Soap: Instead of making soap, I opted to get friendly with beeswax, making candles and ornaments, and all different types of lip balms and salves (like Natural Vapor Rub). I’m even considering making the ornaments for sale next year because I had so much fun and friends + family seemed to really like them. Since I had spent a chunk of money on getting supplies for these projects, I figured I’d wait on the soap stuff -- maybe I’ll add this one to my spring list.

Make Cheese: I did make cheese! Just not mozzarella. We love Indian food, so in an effort to stop eating out as often, I tried making paneer at home using this recipe. It worked out pretty well, but didn’t hold together quite as I had hoped. It kind of reminded me of when I tried making it a few years ago except it was in more solid form. Overall, I’m excited to try some different cheeses.

Plan Garden: This year I’m going to stick to the confines of our current raised bed garden which is about 6 feet by 10 feet. I found a nice garden layout guide that I’m going to loosely follow. Right now I’m starting my seeds indoors versus buying plants like we’ve done in the past. I’ll be honest, I’m worried nothing will grow indoors or that the cats will eat any sprigs that do pop up. Only time will tell! At least the seeds were all 50% off.

Knitting, Etc.: I had a lot of fun knitting with my Martha Stewart Loom Kit this winter. I made two hats for myself, one for Stephen, and a hat and cowl set that Ada wore to school most every day. It was sort of amazing that we all actually wore the stuff I made because I’ve knitted in the past but just never finished anything. I think I’ll probably slow on the knitting when we’re outdoors more, but I’d like to extend my skills next year into some more intricate stitches and projects.


And don’t miss . . .


Related Posts


Cleaning With Baking Soda Basics
Cleaning With Vinegar Basics
Homesteading Stuff You Can Buy at the $1 Store
DIY Natural Lotion Cubes
10 Smart Ways to Use Epsom Salts
Powerful DIY Laundry Detergent
5 Green Cleaners That Work
5-Minute Homemade Deodorant
8 Ways We've Eliminated Plastics
Cleaning Produce The Natural Way
Chemical-Free Clean With Castile Soap

* Here’s the image source for the 1800s garden above.

Like what you just read? You can subscribe to the feed of these posts or follow us on Twitter or Facebook to be the first to know what the (never home)makers are up to. And we’ll love you forever!

Read more...

Peanut Butter Hearts

>> Monday, February 9, 2015

Happy Monday, friends. This “snow storm” is rather disappointing. Stephen has a two hour delay (update: school is now closed and Stephen’s jumping up and down like a little boy), which usually causes more stress than it’s worth. Anyway, I wanted to thank you guys for your thoughts, suggestions, and support with the next steps in our TTC process. It’s overwhelming, but I know we’re doing the right thing.

Now for something fun: My mainstream candy weakness? Reese’s Peanut Butter Cups. Not just the cups, though, I love this gigantic pumpkins, trees, hearts, and eggs that only come out on special occasions. The ratio of peanut butter to chocolate is optimal. And I’ve seen copycat recipes in the past, but most contain a load of confectioners sugar for sweetness.

So, I got to think about the flavors I like most in the candy. When they’re very fresh, there’s almost this hint of coconut I taste. It could be all in my head, but I taste coconut. Immediately, I knew what I needed to do. These guys are vegan, gluten-free, and contain more nutrients than the real deal.

#nom:


REESE’S COPYCAT PEANUT BUTTER HEARTS


What you’ll need . . .
  • 1/2 cup natural peanut butter
  • 2-3 tablespoons coconut sugar*
  • 2-3 tablespoons coconut flour*
  • 2-3 tablespoons maple syrup
  • 1/2 cup semi-sweet chocolate chips
  • 1 tablespoons coconut oil

Method . . .
  1. Combine your peanut butter, coconut sugar, coconut flour, and maple syrup in a food processor. I’ve made this recipe a few times now and have played with the ratios to suit my taste. For a slightly stiffer cup, I used 3 tablespoons of both coconut sugar and flour and just 2 tablespoons maple syrup. Another time, I used 2 tablespoons coconut sugar and flour and 3 tablespoons maple syrup. See what you like best for consistency and adjust as necessary.
  2. Then pulse to combine until mixture rolls into a ball. Take the ball out of your processor and place it on a piece of wax or parchment paper. Divide into 8-10 balls and roll.
  3. Then shape into whatever you like. I did some messy hearts and eggs. You can also just leave them as balls, but I think the coating part is easier when they’re a bit flattened out.
  4. Place hearts in your freezer for an hour or more. Before removing, make your chocolate coating.
  5. In a small saucepan, heat the chocolate chips and coconut oil on low, stirring constantly until melted together. Remove from heat.
  6. Take your hearts out of the freezer and then -- one by one -- place in the slightly cooled chocolate mixture. Coat all sides and then return to the wax or parchment. Repeat with all hearts.
  7. Return everything to the freezer (you can spoon any extra chocolate onto the tops of the hearts) and let rest until set.
  8. I store the eggs in my freezer to keep them fresh and also to deter me from eating ALL of them at once.

* Nutiva sent me samples of their Coconut Flour and Coconut Sugar to try. I’ve actually used their brand in the past with coconut oil, so it was neat to check out the other products in their line. I see they also carry hemp, chia, and red palm stuff -- but I’m all about the coconut.

Yum:


If you’ve never tried these ingredients, coconut sugar contains potassium, magnesium, zinc, iron, and B vitamins. It’s also reported to be lower GI than other sweeteners, which is why I’m favoring it these days. Coconut flour is much the same, with lower GI than standard flours and high fiber. Tip: When you’re using coconut flour in baking, use it for up to 1/3 of the flour. It tends to absorb a lot of liquid.

Have you made candy at home?

A while back, I had whipped up some Peanut Butter Twix, definitely time consuming but fun. I’ve also made Basic Peanut Butter Cups using a special blend of graham crackers + Homemade Peanut Butter.

Disclosure: Nutiva sent me the flour and sugar you see above, but I received no other compensation. My opinions are my own. And I hope you enjoy the peanut butter cup recipe! It’s a good one!

Like what you just read? You can subscribe to the feed of these posts or follow us on Twitter or Facebook to be the first to know what the (never home)makers are up to. And we’ll love you forever!

Read more...

Homemade Holiday: Cranberry + Almond Chunks

>> Thursday, December 11, 2014

So, I just finished off another mug of the DIY Drinking Chocolate (with almond milk) -- I can’t wait to experiment with different blends and flavorings. And my favorite way to drink it is mixed with coconut milk from the can. Yum. Now onto a fun Cranberry + Almond Energy Chunk you can mix together and give to family + friends with just a few instructions included.

And these are great to give to yourself as well!

CRANBERRY + ALMOND ENERGY CHUNKS (MIX)


What you’ll need . . .

(Dry Ingredients To Package)
  • 1/3 cup dried cranberries (or raisins)
  • 1/3 cup almonds 
  • 1 cup rolled oats 
  • 1/4 cup flax meal 
  • 1 tablespoon chia seeds 
  • 1/2 teaspoon cinnamon 
  • pinch sea salt
(Wet Ingredients To Supply With Instructions)
  • 1/2 cup nut butter (I like using peanut or almond butter)
  • 1/3 to 1/2 cup maple syrup (or honey) -- start with less and add more as necessary
  • 1 teaspoon vanilla extract
Method . . . 
  1. Put almond in a food processor and pulse until they are broken up but still chunky.
  2. Then combine all the dry ingredients in a bowl and put in whatever container you plan to give your gift in. (Ball jars work great, but you can sometimes find some unique glass containers are thrift shops, etc.)
  3. Then write your instructions and include it with the gift. Along with the ingredients, just explain that you pour the mix into a bowl and add the wet ingredients. Mix until well incorporate. Then spoon by heaping tablespoons onto plates or a baking sheet and put in the fridge for around 1 hour before eating (firms them up). Store in airtight container for a week or so. Makes 18.

Well, that’s all from me today. We got just enough snow to cancel Ada’s preschool (again) today, but not enough to keep Stephen home with us. So is the life of a work-at-home mom. Be sure to check out the latest installment of the guides -- 30 Gifts Under $30 for Baby as well as my latest TTC-lite update over on Writing Chapter Three.

If you hop onto (never)homemaker, you may also notice things look a little different. I’m slowly trying to wrap my head around merging the blogs, starting with a very minor redesign. If you care about this sort of stuff, I’d love your thoughts!

Like what you just read? You can subscribe to the feed of these posts or follow us on Twitter or Facebook to be the first to know what the (never home)makers are up to. And we’ll love you forever!

Read more...

Homemade Holiday: DIY Drinking Chocolate

>> Wednesday, December 10, 2014

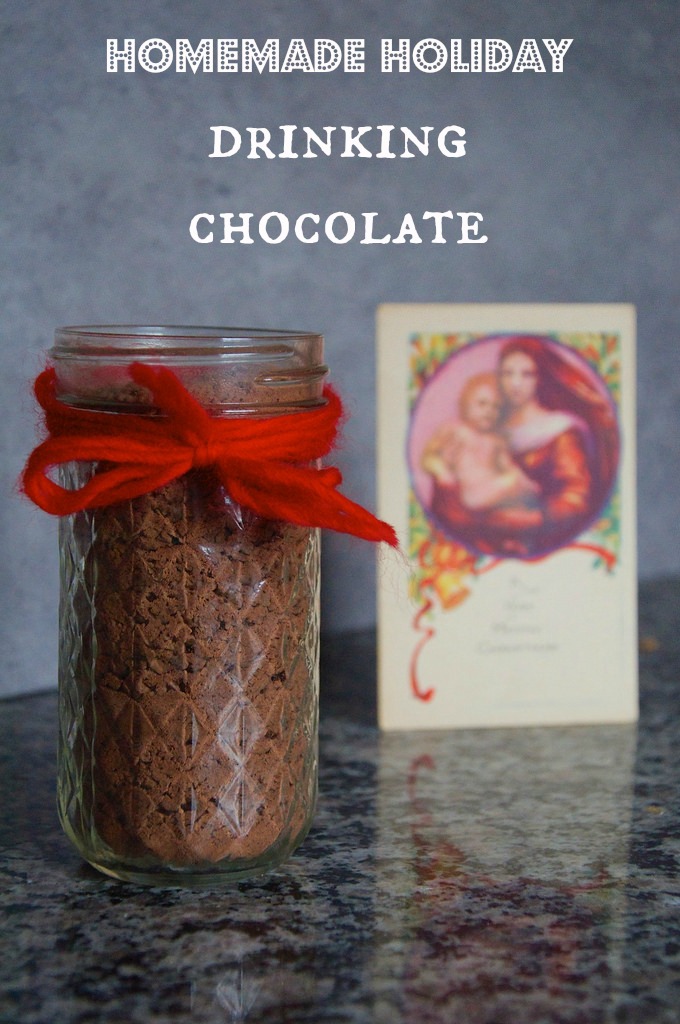
Along with all the gift lists I’ve put together, I’d like to share some homemade presents you can give (and make for yourself!). First up is this divine vegan drinking chocolate that comes together in just a few minutes, but will keep your friends + family warm all season long. You can customize it by adding spices or leave it be.

Then just heat, mix, and enjoy!


HOMEMADE DRINKING CHOCOLATE


What you’ll need . . .
  • 3/4 cup bittersweet chocolate chips
  • 1/4 cup semi-sweet chocolate chips
  • 1/4 cup raw sugar 
  • 2 tablespoons unsweetened cocoa powder 
  • 1/2 teaspoon cinnamon (optional) 
  • 1/4 teaspoon cayenne pepper (optional)
Method . . . 
  1. Put all ingredients in a food processor and pulse until coarse, but incorporated. 
  2. Pour into a glass container and decorate for gifting.
  3. Add instructions that 2 tablespoons does well with a standard mug. You’ll just fill your glass with whatever milk you like (almond, soy, coconut, cow, etc.) and then pour that amount into a small pan on the stove with the chocolate mixture. Whisk over medium-low heat until melted and warm. Serve immediately.

Stay tuned for the Baby Gift List that I just finished last night. I’ll probably post it later today. But I have another couple edible gifts to share before the week is up. All are friendly for a variety of dietary restrictions. (By the way, I plan on making this drinking chocolate to give . . . but it’s also really nice to have the “test” version in my own cabinet!)

Happy Wednesday!

Like what you just read? You can subscribe to the feed of these posts or follow us on Twitter or Facebook to be the first to know what the (never home)makers are up to. And we’ll love you forever!

Read more...

5 Winter Homesteading Goals

>> Thursday, November 20, 2014

Now that winter is almost here, my homesteading projects have slowed considerably. I used to spend quite a bit of time outdoors gathering up our garden’s tomatoes. I’d also spend hours in the kitchen on the weekend making recipes to fill our freezer with or otherwise preserving our CSA foods for the season ahead.

With the cold, we’ve retreated. But that doesn’t mean I’ve stopped my progress toward my goals. Instead, they have shifted to stuff I can do indoors. I’m sure I’ll have more to add to this list, but for right now, I’m trying to keep the focus simple and plain. If you have experience with any of these items, I’d love to hear from you! Sharing knowledge and skills is one of the greatest (and FREE!) gifts we can give one another.


1. Research Chickens


This may be premature, as I haven’t yet checked with our town for local ordinances, but I’d like to consider raising a few backyard chickens. We eat so many eggs each week, though I have read that the price and upkeep of the chickens doesn’t necessarily save lots of money on eggs. I also think the experience would be worth it. There are a lot of pros and cons, so this winter I’d like to do the initial research to see if chickens might be a good fit for our family and our goals. Friends who have chickens (and I know quite a few!), I’ll likely be pecking at your brain for ideas!


2. Make Soap


Along with the DIY Lotion Cubes, Natural Vapor Balm, Homemade Deodorant, Green Cleaning Supplies, and other things I’ve been mixing in the kitchen, I’d like to try my hand at making soap. And after I get the hang of basic soap, I’d love to expand the idea to make my own shampoo bars!


3. Make Cheese


I had everything ready and set to start making cheese in the fall, and the weekend I planned to do it got swallowed up in a house full of sickness. There are few ingredients needed, it’s mostly the time and attention that I need. With so many months indoors, I’m sure I’ll finally get my chance. Here’s the recipe for homemade mozzarella I planned to start with.


4. Plan Garden


We have a small raised bed garden in our new backyard. This year, the previous owners had planed the thing full of mostly cherry tomatoes. We enjoyed them, but next year I’d like to expand and diversify. Several of you have recommended the book Square Foot Gardening, so I’ll be picking up a copy to aid in my education on the matter. I think we’ll still keep the operation somewhat small this year, but hopefully grow as we learn more. Of all veggies, I’m most interested in sprouting up some dinosaur kale!


5. Knitting, Etc.


If you follow my other blog, you know I recently picked up the Martha Stewart Loom and Weaving Kit. Of course, most of my occupation with the thing is just a hobby. But I’d love to learn how to create more than basic scarves and hats. I found this cool mitten tutorial on YouTube, and I even have aspirations of stitching together a sweater someday. Wool is my favorite fiber, and I’d love to create a homemade stock of woolen items for all these chilly months we experience every year. Plus, it’s relaxing!

And don’t miss . . .


Related Posts


Cleaning With Baking Soda Basics
Cleaning With Vinegar Basics
Homesteading Stuff You Can Buy at the $1 Store
DIY Natural Lotion Cubes
10 Smart Ways to Use Epsom Salts
Powerful DIY Laundry Detergent
5 Green Cleaners That Work
5-Minute Homemade Deodorant
8 Ways We've Eliminated Plastics
Cleaning Produce The Natural Way
Chemical-Free Clean With Castile Soap

* Here’s the image source for the 1800s garden above.

Like what you just read? You can subscribe to the feed of these posts or follow us on Twitter or Facebook to be the first to know what the (never home)makers are up to. And we’ll love you forever!

Read more...

Homesteading: Natural Vapor Rub

>> Tuesday, October 21, 2014

You may have noticed that I started writing about essential oils much more frequently in recent months. They’re something that’s always sort of been in my arsenal of home stuff, but the way I use them has broadened much beyond simple defusing. Now, I haven’t gotten into consuming essential oils or learning the specific combinations for medicinal purposes, but I’m slowly educating myself.

Like anything that’s slanted toward the natural -- I’d rather try home remedies and comforts than the store-purchased alternative. It’s also pretty cool when I discover something that actually soothes me. Empowering, I guess. (Note: I gladly take the Z-pack when I get mega-sick. Thank you, modern medicine!)

Though, I’m pretty sure Veggie Pho cures all!


So, along with slowly learning to make my own baking soda deodorant and soft skin lotion cubes, I’ve been venturing deeper into other DIY skincare territory. This time, of a more medicinal nature. I’m a huge fan of vapor rubs for cough and cold. I figured -- like everything else -- this was the kind of thing I could whip up in my own kitchen. And I was right.

There are lots of recipes on the web. Here are just a few.
Of all recipes, I favor the simple beeswax with oil and essential oil combination. I know a popular cure-all blend is Thieves, which was apparently used by these French guys who robbed people during the Plague. At least that sounds mysterious and probably moves oil. Regardless, it’s hailed for fighting germs and helping with chest congestion, etc. The major oils in it are cloves, rosemary, eucalyptus, lemon, cinnamon -- if you’d like to make your own to use in place of the oils in my recipe, go ahead!

I decided to go with two that I already own -- eucalyptus and peppermint -- because they are the stars of my favorite Badger Balm (Breathe Easy). And what’s awesome is that the balm this recipe makes is almost identical in texture and scent, just for a fraction of the price.


DIY VAPOR RUB
Use the smaller essential oil amounts for a baby + kid-strength variety.

What you’ll need . . .
Method . . .
  1. Combine your carrier oil and beeswax in a small, heat-safe bowl. Heat a small pot of hot water on the stovetop and then place your bowl inside to let everything melt together. Mix.
  2. Then take off heat and add your essential oils. Mix.
  3. Pour into a glass container for storage and place in the fridge to harden quickly. You don’t need to store it in there, though. I was just impatient and wanted it to quickly firm up.

I rub this stuff on my chest when I have coughs. I let it linger on my throat when it’s sore. I slather it under my nose when it’s stuffy. I even do that trick of putting it on Ada’s feet when she’s under the weather. At very least, it’s comforting and does provide at least some relief, in my humble opinion and experience.

Have you ever made a balm like this one? 

What’s your favorite combination of ingredients? 

Whenever it comes to homemade stuff, I like to stick to as few ingredients as possible. It keeps the cost down and keeps it simple + easy to remember. I’m also trying to learn more about the use of essential oils during pregnancy. Though I’m not pregnant yet, most of the bottles of oils I have say not to use (or to consult with a physician) if you’re pregnant. Do any of you know more on that topic?

And speaking of homesteading stuff, I also mixed together another 5 gallons of DIY Laundry Detergent today! Now that we’ve moved, it’s working so much better with our new water (it’s a bit harder -- so, go figure!). Instead of the ratio of 1/2 cup borax to 1 cup washing soda, I did 1:1, so I’ll be sure to let you know if it improves or hinders the power.

Like what you just read? You can subscribe to the feed of these posts or follow us on Twitter or Facebook to be the first to know what the (never home)makers are up to. And we’ll love you forever!

Read more...

Homesteading For Beginners

>> Monday, October 6, 2014

So, some of you might be wondering why I’m delving deeper and deeper into homesteading territory. No, I haven’t turned into some underground prepper stockpiling supplies for the zombie apocalypse. Instead, I’m striving to be more self-sufficient in our everyday lives. It’s empowering. It’s smart, too -- I like using the resources we already have at our disposal.

Plus, many of the projects we’ve been involved with have helped us save money all while catering better to our family’s specific needs. We’ve created all our own green cleaning supplies, for example, and they are certainly healthier and safer than even the most “natural” store-bought alternative. With each new idea or project, we learn something useful for the future.

Since I’m still relatively novice to this way of life, I thought I’d share some of the resources I’ve been using to guide my path. I’ve discovered through writing about homesteading that many of you are interested in dipping your toes in the waters.

Good news: It’s not an all-or-nothing adventure.


Getting Started With Homesteading


This comprehensive beginners guide via Common Sense Home has info about anything from gardening to raising animals to smarter food storage. I especially like this post on involving young kids in the process. But, just like me, you can skip over anything that doesn’t fit your lifestyle or goals.

Advice From 9 Modern Homesteaders 


I love this article in Mother Earth News about self-sufficiency from some homegrown “experts” in the area. What you’ll gather as you read is that you start the process using whatever tools you already have. For some, maybe you actually grew up canning or on a farm. For others, everything might be entirely new. You’ll be happy to know there’s no prerequisite -- you can start wherever you find yourself on this spectrum.

Little House in the Suburbs


As much as I dream of moving back to my hometown in the mountains -- it looks like we’re here to stay in our current digs in the suburbs. At least for a while. So, we’re trying to take advantage of the things we can do versus dwelling on what we can’t. The book Little House in the Suburbs is a great jumping off point if you’re in a similar situation. There are canning techniques, homemade household item recipes, backyard gardening tips, and -- my favorite -- community building ideas.

How Homesteading Makes You Happier


I found this post on Pioneer Settler early on about the 12 ways becoming self-sufficient can make you a happier person. For us, even this early in our process -- many of these ideas hold true. I love saving money, feeling more in control of our home, and there’s this tremendous feeling of satisfaction I get from all of it.

Made From Scratch


Another book I’ve enjoyed reading is Made From Scratch which helps readers discover the “pleasures of a homemade life.” I like the review on the back of my copy by Deseret News, which explains how “this book isn’t about having a farmhouse or acres of land, or a barn full of livestock, but about being home open to learning the simple skills most of us have forgotten.”


And Much More . . .


If you want to follow along with different articles and resources as I find them, follow my Homesteading Pinterest Board. I try to put on there things that I want to try, others that I find a little crazy, and general inspiration for moving ahead with our own self sufficiency.

Related Posts


Cleaning With Baking Soda Basics
Cleaning With Vinegar Basics
Homesteading Stuff You Can Buy at the $1 Store
DIY Natural Lotion Cubes
10 Smart Ways to Use Epsom Salts
Powerful DIY Laundry Detergent
5 Green Cleaners That Work
5-Minute Homemade Deodorant
8 Ways We've Eliminated Plastics
Cleaning Produce The Natural Way
Chemical-Free Clean With Castile Soap

* Here’s the image source for the 1800s garden above.

Like what you just read? You can subscribe to the feed of these posts or follow us on Twitter or Facebook to be the first to know what the (never home)makers are up to. And we’ll love you forever!

Read more...
Related Posts Plugin for WordPress, Blogger...

About This Blog

MyFreeCopyright.com Registered & Protected

© 2009-2014 by the (never home)makers
All content on this blog is copyrighted.

Want to publish our pics, tips, or tricks?
Contact us! [neverhomemaker@gmail.com]

We value transparency. Links on this page may contain affiliates. In addition, please see our disclosure policy regarding sponsored posts.

  © Blogger template Simple n' Sweet by Ourblogtemplates.com 2009

Back to TOP  

Blogging tips