Showing posts with label art. Show all posts

DIY Beeswax Ornaments

>> Monday, December 19, 2016

One of my favorite things about the Christmas tree is our wax ornaments we made a few years ago. I wrote about them soon after I made them, but I never quite explained the process. With still a good six days until Santa comes, you surely have enough time to try this out. They make wonderful gift wrapping toppers, too!

Here's some from our collection:


Beeswax Ornaments 


What you'll need . . .

  • Beeswax, of course*
  • Old pot and glass bowl (or double boiler)
  • Molds
  • Spray oil
  • Twine or yarn or ribbon
  • Something sharp to poke holes

* Alright, with the beeswax, you can definitely head to your local craft supply store and get it either by the block or in little pellets. Don't forget to take one of those 40% off coupons with you to save on it. The pellets are easier to work with, but we've used block wax with no issue either. 

If you think ahead next year, consider heading to a local apiary for wax or ordering some online. I've ordered beeswax on Amazon that I use for ornaments, but also for different DIY things, like natural lotion cubes, zero-plastic food wrap, and 5-minute homemade deodorant.


How to:

// 1: Lay out all your supplies. Wax sets rather quickly, so you'll want to have the molds ready when it's time to pour. Clear out some space in your fridge, too. I liked putting mine in there to cool.

// 2: Fill a pot halfway with some water and place the glass bowl inside the pot to create a double boiler of sorts. Toss in some shaved wax an melt it over medium heat. I never got too detailed with how much wax. I just did a bunch (a pound) and if I didn't need it all, it would cool a bit while I waited for everything to set. I could re-melt it or store again for later use.

// 3: For my ornaments, I used simple candy molds made from plastic. Though I don't think this is the best practice, it got the job done. Some people use Brown Bag Cookie Molds, and they are gorgeous, but expensive. I'd love to find some of these on thrift for the future. I think silicone molds would work out wonderfully (and be easy to take ornaments out of).

In the end, you just need anything to mold. I got creative and used a decorative dish. Whatever you use, you'll want to spritz just the slightest bit of oil on it. At least that is what I did. Not too much or it might affect your end result. But just enough to help the wax slide out/off when it is set.

// 4: So, once your wax is all melted, slowly pour it into the mold (that's on a level, flat surface). It should start cooling right away. Very carefully transfer your molds to the refrigerator and wait a good 10 minutes before taking the ornaments out.

Just FYI -- I've even experimented with adding glitter and other texture to my ornaments (see image below). I've used green rice to make a wreath, etc. It's fun. Play around. My favorite ornament is the one I put very large flakes of hexagonal gold glitter inside of.


// 5: Once they are out of the mold and completely set (you may need to shimmy a bit), poke a hole where you'd like to thread some twine, ribbon, or yarn. You can even use a paper clip in a pinch. Just make sure you're not too close to the edge or it might break off.

// 6: Storage. Once you're done using the ornaments for the year, I like to store them in plastic wrap. They can break, so use care that they don't have pressure placed on them. I read once if your ornaments get a bit cloudy looking, you can quickly blast them with a hair dryer to make them a bit shinier. I haven't tried that trick myself.

So, there you go! It's a bit late, I admit. But -- honestly? I think these ornaments would be a fun activity you could do in the week AFTER Christmas to save until next year. Or even to make for other holidays. I have to say, they're one of my favorite DIY projects to date.

Oh! And they also add this nice, natural scent to the room that goes well with your tree's aroma. You could even put a couple drops of essential oils in them for good measure.

The countdown begins! Have you finished your shopping? There's a couple more days. Don't forget to check out my 2016 gift lists!

Read more...

DIY Silhouettes // $10

>> Thursday, October 1, 2015

I’ve been slowly transforming our house through cleaning and decor to make it a calmer place to spend time. After all, this is my home and my office, so I spend a ridiculous number of hours under this roof. We’ve always been clean (wiped down counters, scrubbed toilets, steamed floors) . . . but definitely messy (mountains of clean laundry on the floor, toys everywhere, piles of mail).

With all the stuff we’ve been going through, I’ve found cleaning and decluttering to be this weird therapy of sorts. Like, I’d rather spend a couple hours cleaning than reading or watching TV. I even skipped working out on Thursday last week and cleaned for a couple hours instead. And the other night I took a good half hours to wipe down the washer + dryer that were honestly not left in the best condition from our previous owners over a year ago.

Do you think I’m crazy? Maybe I am.


Our decor is making a shift, too. I want cohesiveness. I want simplicity. Neutrals. Country and rustic to remind me of my hometown. Corner by corner, we’ve been doing little projects to make our home a place that feels really cozy and lovely. But as the fall and holidays seasons are approaching, we’ve stopped any heavy lifting (I so badly want to add beams to our living room!) to focus on the light stuff, like art and textiles.

Here’s a fun DIY art project you can make in a weekend for less than $10. There are lots of tutorials you can find online, but it’s a pretty intuitive process. In fact, my second grade teacher made silhouettes of all my classmates way back in the day by shining light on our heads and tracing the outline with pencil. This is that project, just kicked up a notch + improved with some technology.

Here’s my inspiration:


STEP 1: Take Your Photo


Take a selfie or have someone else take a photo of your profile on a plain background. You can use a wall or even fabric backdrop. Some tutorials I came across even suggested using a window, but I found the light made it tricky to get all the right detail.


STEP 2: Edit + Order


Convert your image to black and white and up the contrast using a photo editing site like Pic Monkey. There’s no right or wrong. You just want to make sure you’re clearly able to outline your features. Oh, I took our photos in square cropping, so I had to overlay them onto a 4x6 backdrop with black so they would print out well. Does that make sense?

Then order prints at a place like Walmart. I got a couple in 4x6 and 5x7 because I wasn’t sure which size I wanted. (And they were super cheap per print, so it wasn’t a big deal to have a couple extras.) For our silhouettes, I ended up using the 5x7 of my photo and Stephen’s. We used the 4x6 of Ada so she’d be a bit smaller.


STEP 3: Cut it Out


You can use sharp scissors or an X-Acto knife, but go slowly! Get the divot where your bangs hit your forehead. Keep that stray piece of hair. Don’t chop off where your glasses hit your nose. Basically, cut as closely to the photo as humanly possible because the more little details you get -- the more it will actually look like you.


STEP 4: Spray It Black 


Again, a lot of tutorials had different instructions for making your silhouettes black (or whatever color you want!). I decided to use some matte spray paint we had hanging around in the basement -- and it was SO EASY this way.

Just a few spritzes, dry time, and they were done with an extremely smooth, flat finish.


STEP 5: Mount on Paper


So, you’ll need frames for this next part. Cut out a piece of paper (I used plain white and some paper bag paper) to the size of your frame. Use a bit of glue and stick the photo onto the paper. You can write your name, the date, or anything else, or just leave it plain.

STEP 6: Frame


Stick your artwork in your frame and admire your project! I love the look of oval frames for silhouettes, but I couldn’t find any for instant gratification. So, I ended up picking up a mixed lot of frames because I want to add to our collection in the future, but I don’t want to be limited by the type of frame so they would all match.

The frames I got were around $7 a piece, the paint was free because we already had it, and the prints were like less than a quarter. So, you can easily do this project for $10 or less, depending on what frames you use.


This isn’t how I plan to have them displayed in the long run (see my inspiration, above!). I want them on the wall, but I want to add a bunch more first. So, I’ve put them on the ledge for the time being. I need to mix in some more dark frames, too. But I’d love to do the cats and maybe some full-length silhouettes. We shall see.

Have you tried this project before? 

Please let me know if you do!

Psst: For more cheap DIY decor, check out the 5-Minute Fall Wreath.

More fall essentials:


Like what you just read? You can subscribe to the feed of these posts or follow us on Twitter or Facebook to be the first to know what the (never home)makers are up to. And we’ll love you forever!

Read more...

Super Cool Canvas Art // Gallery Direct

>> Friday, July 31, 2015

I spend a lot of time moving furniture and painting rooms to get our house looking more like a home. One area that I haven’t paid much attention to until recently is the art hanging on our walls. I’ve been rocking the same posters and prints we had in our apartments just after college. (Yes. Even the whole “Keep Calm, Carry On” thing -- yikes!)

Slowly, we’ve been adding some fun art pieces to our collection. For example, my parents gave me an awesome vintage map of my home area for my birthday this year. They got it professionally framed and matted -- it was the perfect gift. We also recently picked up a unique wooden art piece for our dining room.

GALLERY DIRECT


Since I’m an amateur photographer, I also love the idea of getting some of my photos printed. We’ve given canvas prints as gifts many times before, but have never snagged anything for our own walls. So, when the folks at Gallery Direct in Austin, TX, contacted me about their fine art and canvas wrap services, I was super excited to check them out.

Here’s my print:


This is a photo I took of the Pine Creek Gorge (a.k.a. Pennsylvania Grand Canyon).

It’s a slice of home right in my living room.


I actually think we’ll be hanging this piece in our family room (with the map of my home area), but the lighting is better in this space, which is why I photographed it here. My piece is a huge 40 inch by 27 inch size that’s awesome for hanging over a couch or other large piece of furniture.

Oh, and here’s how to create your custom print with text!

  • Just take the full resolution (biggest) of the photo and put it in an editing program (I used PicMonkey). 
  • It’s great if the photo has some good white space and I chose to convert mine to black and white.
  • Then find a quote and type it onto the image. 
  • Play around with fonts and sizes until you get it just right.

I went from this:


To this:


More info:

You can learn about Gallery Direct on their website. I was particularly impressed with the quality of my canvas print. Like I said, we’ve ordered ours from drug stores and big box stores . . . and the quality is adequate. But this was a huge step beyond. The print even came ready to hang on the wall.
  • All pieces are made with love and shipped in Austin, TX.
  • Art is printed on state-of-the-art HP printers atop top-of-the-line canvas, paper, birchwood, aluminum, and acrylic.
  • The process is completely customizable -- if you dream it, they can print it.
  • Turn around (from experience) is extremely fast. No 4 to 6 week turnaround time like with many other companies.
  • If you order a print from their site, you’re supporting small artists.
  • And check out the amazing reviews on Resellerratings.com.
I personally had a wonderful customer service experience. I wasn’t sure if my photo was high resolution enough to print in such a large format. But they helped me figure it out every step of the way.

INFO + GIVEAWAY [CLOSED]


Think you have something you’d like to print on canvas? 

Visit Gallery Direct’s Photo Upload Page!

The site is running an amazing sale TODAY through MONDAY (8/3) where you can get 75 percent off uploads on canvas gallery wraps and a whopping 45 percent off site-wide!

Better yet, I have a #giveaway for you guys. Leave a comment below telling me what you’d print off for a chance to win a $200 gift card to spend on the site. You can choose a piece from their photography or art galleries or print your own piece. It’s up to you!

This giveaway is open to anyone. And -- this is important -- I need you to leave an email address (or other contact info) so I can send you the code if you win. The winner will be announced on Friday, August 7th.


CONGRATS TO GRACE, commenter #19, for winning the giveaway. 

I’ll be in touch with you soon regarding your prize.


You can also follow Gallery Direct on FacebookInstagramTwitter, or Pinterest for the latest news, inspiration, and deals.

Thanks to Gallery Direct for sponsoring this post and providing such an awesome giveaway.

Good luck + happy Friday!

Like what you just read? You can subscribe to the feed of these posts or follow us on Twitter or Facebook to be the first to know what the (never home)makers are up to. And we’ll love you forever!

Read more...

Stay Fit and Healthy Always Poster

>> Wednesday, April 14, 2010


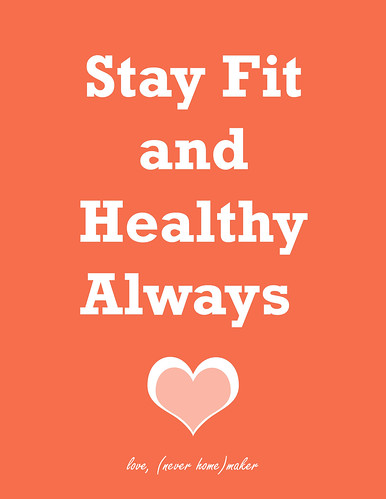
To celebrate reaching 900 subscribers (906, actually -- thanks to those of you who subscribed yesterday!), I "designed" a little poster. I have this bad habit of putting the word "little" before things, but in this case, it's true. It's an 8.5 x 11 poster inspired by the Keep Calm and Carry On ones that are everywhere, it seems.

Our message? Stay Fit and Healthy Always.

If you'd like one for your very own, here are the instructions for download and print. (They're easy, I promise.) I'd recommend printing onto a piece of white cardstock using an ink-jet printer. For darker results, a laser printer will do just fine, but I haven't tested it on one.
  1. Visit our Flickr Page and click on this image. Then click the "All Sizes" icon just above the image.
  2. Download the large size of the image (it's the one that will pop up when you click "All Sizes"). Save it onto your desktop or somewhere else you'll easily remember.
  3. Go to the image on your computer, and then choose to print it full page. The poster is only designed for 8.5 x 11 printing, so if you choose to make it larger, it'll be pixel-y.
  4. Pass on this link to family, friends, acquaintances -- anyone you think will dig the message (and enjoy a pretty poster).
I'm planning to frame mine and put it in our office. Just as a reminder of what my ultimate goal is, for example, if I can't finish a run or don't PR or some other "catastrophe." I was thinking about it the other day. And no fitness/diet program fits everyone. We all have different ways we do things, but our goal really is the same: To stay fit and healthy always.

You all know that I'm a vegetarian and I run. But what is YOUR method? How do you work toward this common goal? Just leave us a comment or email us at neverhomemaker@gmail.com.


And if you haven't already -- go check out this month's Blog Love Fest. It's a special edition because we're not only sharing the links in a list this month. We're creating a categorized blogLOVEroll. For all the gooey details, just visit the BLF post.

Like what you just read? You can subscribe to the feed of these posts or follow us on Twitter or Facebook to be the first to know what the (never home)makers are up to. And we’ll love you forever!

Read more...

Passionate Affair Come and Gone: My Relationship with Embroidery

>> Tuesday, April 6, 2010


I must admit that I'm writing this post more for myself than for all of you. Last year, I had a short love affair with embroidery. It was passionate, and my fervent desire to create gorgeous pieces of art with needle and colorful thread was indeed all-consuming. And then one day, I just stopped. Kind of like when Forrest Gump reached Monument Valley and simply stopped running. I don't know if any of you have taken the Myers-Briggs personality type test. I have on several occasions -- and I'm an ENFP, tried and true.

Perhaps THAT's why I can never stick with any of my side-projects: "An ENFP needs to focus on following through with their projects. This can be a problem area for some of these individuals. Unlike other Extraverted types, ENFPs need time alone to center themselves, and make sure they are moving in a direction which is in sync with their values. ENFPs who remain centered will usually be quite successful at their endeavors. Others may fall into the habit of dropping a project when they become excited about a new possibility, and thus they never achieve the great accomplishments which they are capable of achieving." (Info from www.personalitypage.com.)

Wow. A window into the essence of my very being. Haha. Or, just something that is a reality in my life notwithstanding. Back to embroidery. I enjoy it. But, like with knitting, I can never truly relax. I have made two projects since last year. The first is this bird with a cage. The second is an A letter monogram.


Looking at these photos is enough to make me want to take a sick day, stay home, and learn the stitches again. Er, maybe just devote some time over the weekend. Have any of you ever dabbled in craft -- only to find yourself completely forgetting how to do it a year later? Well, that's what this post is about for me. If embroidery is something that captures your interest, you only need a few things to get started.

What you'll need . . .
  • Needle
  • Colorful floss thread
  • Fabric of some sort
  • Fabric marker
  • Embroidery loop
  • Pattern (or not -- but I find it helpful)
  • Patience
  • Time
  • Sticktoitiveness

Method . . .
  1. Really, you just get a piece of fabric that is relatively thin enough so you can trace your pattern onto it with a fabric marker. Try a simple design. Or even draw your own. Go rogue, if you dare.
  2. Go online (and how convenient -- because you're online right now!) and learn some basic stitches. (Back stitch, running stitch, chain stitch, etc. -- all can be found with a swift Google search.)
  3. Consider purchasing (or going to your local library to acquire) an embroidery book. I have Doodle Stitching by Aimee Ray. Along with being a gorgeous book to leaf through, it's "full of practical and whimsical projects that are neither boring or stodgy" (from Amazon).
  4. Take 5 or 10 minutes each day to devote to your project. This way, you avoid burnout. It's going to be my new method (kind of like No Workout is Too Short or Slow, remember that?)
I think that last tip is going to be the key for me. As you see, ENFPs "are basically happy people. They may become unhappy when they are confined to strict schedules or mundane tasks. Consequently, ENFPs work best in situations where they have a lot of flexibility, and where they can work with people and ideas. Many go into business for themselves. They have the ability to be quite productive with little supervision, as long as they are excited about what they're doing." (Again, from www.personalitypage.com.)

So, do you have a story like mine? Any half-finished projects hanging out in your closet? Anything you feel like resurrecting? Any other ENFPs out there? Or other Myers-Briggs types? I find it fascinating, really. Because, at least for me, a lot of the description is right on!

Like what you just read? You can subscribe to the feed of these posts or follow us on Twitter or Facebook to be the first to know what the (never home)makers are up to. And we’ll love you forever!

Read more...

Announcing the (never home)maker Print Shop . . .

>> Friday, January 8, 2010


See this new & crude logo-ish thing on the right-hand column? Well, this is the link to our new PRINT SHOP! After my post about my newly-framed photos . . . I got to thinking. If I like them up on my walls, maybe some of you (or one of you? maybe?) would as well!

So, short post. If you're feeling like a little e-shopping for some wall art, check it out: http://www.etsy.com/shop/neverhomemaker

Like what you just read? You can subscribe to the feed of these posts or follow us on Twitter to be the first to know what the (never home)makers are up to. And we’ll love you forever <3

Read more...
Related Posts Plugin for WordPress, Blogger...

About This Blog

MyFreeCopyright.com Registered & Protected

© 2009-2014 by the (never home)makers
All content on this blog is copyrighted.

Want to publish our pics, tips, or tricks?
Contact us! [neverhomemaker@gmail.com]

We value transparency. Links on this page may contain affiliates. In addition, please see our disclosure policy regarding sponsored posts.

  © Blogger template Simple n' Sweet by Ourblogtemplates.com 2009

Back to TOP  

Blogging tips