Showing posts with label vegetable. Show all posts

Seasonal Veggie Wrap

>> Thursday, July 24, 2014

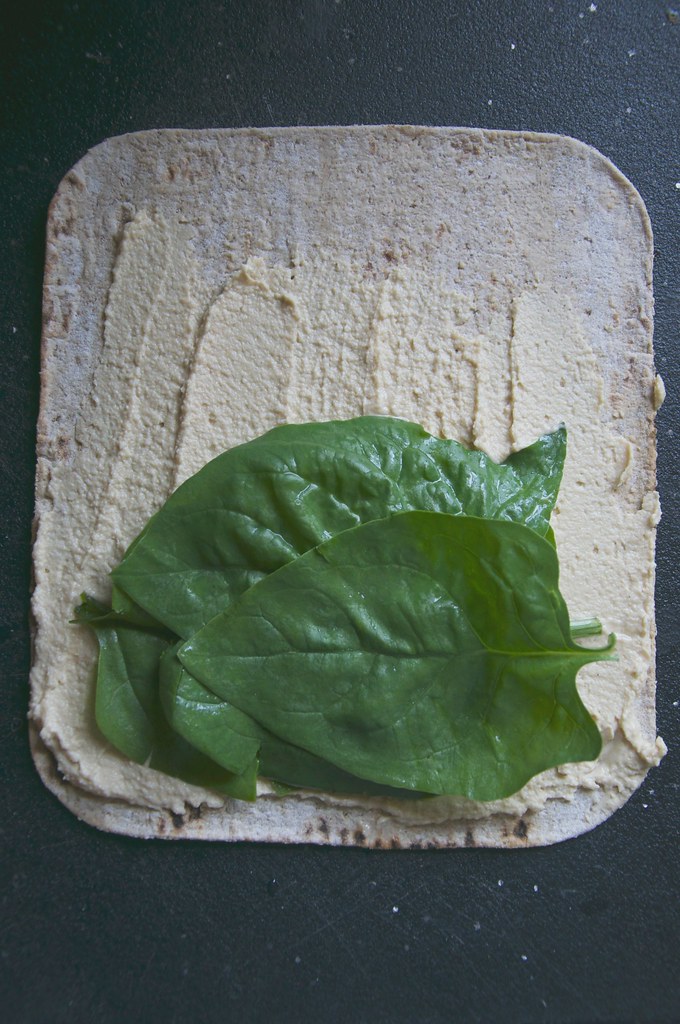
I've been eating this crunchy wrap for lunch often. I use whatever we have on hand from our CSA basket, whatever leftovers might be in the fridge, and a good dressing. I've actually become quite obsessed with dressings lately, but that's a topic for another day.

Let's take a look!


And now . . . the closeup!


SEASONAL VEGGIE WRAP

What you'll need . . .
  • A wrap -- I buy mine (multigrain) at Aldi
  • A green -- I used spinach
  • Something(s) crunchy -- I used carrots and bell peppers
  • A spread -- I made some Tahini-Free Hummus*
  • A bean or grain -- I had some leftover farro
  • Cheese -- this is honey goat cheese**
  • Dressing -- this is Brianna's Poppy Seed Dressing
  • Drizzle -- I like to use hot sauce or even Inglehoffer Sriracha Mustard
* Tahini-Free Hummus is just 1 can of chickpeas -- drained + rinsed -- blended in your food processor with a clove of garlic, a couple tablespoons olive oil, and then 1/4 to 1/2 cup water (until you reach your desired consistency). Season with salt and pepper.

** Omit to make this "recipe" vegan.

Method . . . 
  1. Assemble the ingredients as I did above. There are no rules, so feel free to put them on your wrap in whatever order makes the most sense to you. I find it helpful to cut my crunchy veggies into thin strips for easy eating.
  2. Hunt in your refrigerator shelves for more leftovers (rogue beans make a good fit) to toss on. Really, this "recipe" is a great way to eliminate food waste.
  3. Dress and drizzle for flavor. Then roll into a loose wrap. Everything will be heaping, so you won't have an airtight seal by any means.
What's your favorite seasonal fruit or vegetable?

I'm most excited for TOMATOES to come into full bloom (here's why!). I love Caprese Salads, homemade BBQ Sauce, slow roasted tomatoes, and quick-to-prepare Pasta Sauces.

Like what you just read? Browse more of our posts + recipes on Pinterest. You can subscribe to the feed of these posts or follow us on Twitter or Facebook to be the first to know what the (never home)makers are up to. And we’ll love you forever!

Read more...

Vegetable Dumplings: Dinner IN A FLASH!

>> Monday, February 1, 2010


This is yet another dinner IN A FLASH post where I offer a quick and tasty recipe with HORRIBLE photography to show it off. Last month's post was a hearty vegetable soup with hubbard squash puree for some extra flavor and nutrition. Today's recipe is one of our favorites because it's just one of those things you never think you can make yourself: Vegetable Dumplings!

Let's get to it, then.


What you'll need . . . (for the dough)
  • 1-1/2 cups organic white flour
  • 1/2 to 3/4 cup water
  • Pinch of salt


What you'll need . . . (for the filling)
  • 1/2 cup shredded red cabbage
  • 1/2 cup shredded carrots
  • 2-3 cloves minced garlic
  • Some onion (if you like)
  • And feel free to add mushrooms or whatever else you'd like . . .
  • Sesame oil (for frying)


Method . . .
  1. Shred and cut all ingredients for the filling. Mix together. Set aside.
  2. In a medium-sized bowl, combine water and flour to make a dough. Adjust water/flour until dough comes out only slightly sticky. Knead for about 5 minutes.
  3. Take a heaping tablespoon amount of dough (or slightly more) and roll it into a circle about 3 inches in diameter and 1/8 inch thick. Set on a clean work surface and roll with a rolling pin.
  4. Put a spoonful of mixture inside (in the middle), and fold in half -- pressing edges together.
  5. Continue following these instructions until either the dough or mixture runs out (we had a bit of dough left over).
  6. Heat sesame oil in a wok or large pan on medium high heat. Coat dumplings in the oiled pan and cook until browned on each side (flip often while on the stove to evenly cook).
  7. When they're browned . . . add about 1 tablespoon of water to the pan and cover for one minute -- turning down the heat to medium.
  8. Serve with soy sauce (we added garlic and ginger powder to ours).


Like what you just read? You can subscribe to the feed of these posts or follow us on Twitter or Facebook to be the first to know what the (never home)makers are up to. And we’ll love you forever!

Read more...

Roasted Eggplant Lasagna

>> Saturday, November 14, 2009

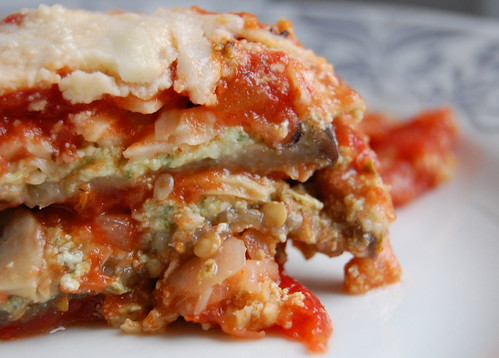
I'm not even one-sixteenth Italian. And this lasagna recipe hasn't been in my family for generations. In fact, I doubt my parents (or grandparents for that matter) would enjoy this dish for its lack of meat, noodles, etc. But we like it quite a bit. It's healthy and full of the nutrients needed to keep us going. Too bad she doesn't photograph well . . . or you'd see her delicious layers of roasted eggplant, gooey ricotta, tomatoes, and spinach.

Good news, though. You can see her for yourself! Why not Sunday night? It's a date.

What you'll need . . .

  • 3 1-pound eggplants, peeled, cut into 1/4-inch thick pieces
  • 2 tablespoons olive oil
  • 2 pounds part-skim ricotta cheese
  • 2 handfuls baby spinach
  • 1/2 cup chopped shallots
  • 1 tablespoon chopped fresh rosemary
  • 1 to 2 containers sauce (we used Newman's Own Roasted Garlic and ended up using a bit of a 2nd container)
  • 8 ounces shredded mozzarella
Method . . .
  1. Preheat oven to 375 degrees F. Brush two baking sheets with olive oil.
  2. Prepare your ingredients.
  3. Transfer eggplant to prepared sheets. Toss with 2 tablespoons oil. Roast eggplant until tender, about 25 minutes, flipping once halfway through. Set aside.
  4. Mix ricotta cheese, spinach, shallots and rosemary in a food processor. Pulse only until incorporated. Season with salt and pepper.
  5. Oil 13 x 9 x 2-inch glass baking dish. Spread 1/2 cup tomato sauce in dish. Arrange 1/3 eggplant "noodles" in single layer in dish. Spread half of ricotta mixture over noodles. Spoon about 1 cup sauce over that. Now 1/3 of the mozzarella. Arrange another 1/3 of eggplant over that. Add another layer of the ricotta mixture. Spoon another 1 cup sauce over. Arrange another 1/3 of the mozzarella over the sauce. Repeat layering 1 more time. Spread remaining sauce over. Sprinkle with remaining mozzarella. Cover tightly with lightly oiled foil.
  6. (Can be prepared a day in advance; just be sure to chill properly.)
  7. Bake until lasagna is heated through, about 45 minutes. Uncover; bake until cheese begins to brown and sauce is bubbling slightly at edges, another 15 minutes.
  8. Let stand 10 minutes before serving.

Like what you just read? You can subscribe to the feed of these posts and be the first to know what the (never home)makers are up to. And we’ll love you forever <3

Read more...

Related Posts Plugin for WordPress, Blogger...

About This Blog

MyFreeCopyright.com Registered & Protected

© 2009-2014 by the (never home)makers
All content on this blog is copyrighted.

Want to publish our pics, tips, or tricks?
Contact us! [neverhomemaker@gmail.com]

We value transparency. Links on this page may contain affiliates. In addition, please see our disclosure policy regarding sponsored posts.

  © Blogger template Simple n' Sweet by Ourblogtemplates.com 2009

Back to TOP  

Blogging tips