Showing posts with label carrots. Show all posts

January Foods + Carrot Boost Soup

>> Thursday, January 5, 2017

If you click over to the website, you'll see that I'm playing around with some new design. I also want to make things easier to find. With limited time, this might be a long process. So, please be patient! If there's a feature you'd like to see on neverhomemaker, let me know! If there's something that isn't working for you, please let me know that as well.

Let's jump in with my favorite foods for January. I'm hoping to make this a monthly video feature where I rummage through my cupboards and refrigerator and share with you the stuff I'm loving to eat that particular month. As mentioned yesterday, I'm doing Weight Watchers -- so some of these foods are particularly friendly for that program.

JANUARY FAVE FOODS


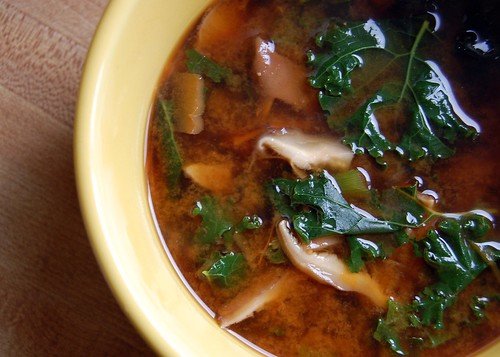
// If you aren't watching the video: PB2 Premium Chocolate, Kodiak Cakes in PB Protein, Grillo's Pickles, Republic of Tea Gingerbread, carrot soup (below), and Poor Gal's Kombucha.

Our family has r.e.a.l.l.y taken to this carrot soup. It's full of immune-boosting ingredients. Stephen has been making a carrot soup for quite some time, actually. In a way, this is his recipe. Ada and I keep getting sick. And I decided I wanted to see what I could add to the mix that might help matters.


Immunity-boosting ingredients, according to Healthline:

  • Ginger
  • Garlic
  • Lemon
  • Turmeric  
We actually made a TRIPLE batch of this soup recently. Feel free to play with the recipe and make more if you want to stock up. Though I'm still new at it, I'm thinking this soup has only 1 point for WW people who are tracking. We ate the first bit for dinner and then packed the rest for lunches. It's easy to sip down soup even when you have a Velcro-baby.

See?


CARROT BOOST SOUP


What you'll need . . . 

  • 1 medium onion, chopped
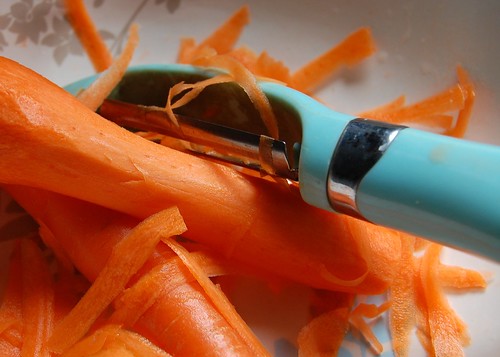
  • 2 pounds organic carrots, scrubbed and chopped into 1-inch coins
  • 2 tablespoons olive oil
  • 3 large cloves garlic, chopped
  • 1-2 inch piece of ginger, peeled and grated
  • 1 teaspoon ground turmeric
  • 1/2 teaspoon ground cinnamon
  • 5-6 cups water, depending on how runny you like your soup
  • Juice of one lemon 
  • Pinch salt and pepper
Method . . . 

  1. Heat oil in a large stock pot over medium-high heat. Add in onions and cook until softened.
  2. Add in the garlic, ginger, and spices. Cook for a minute or so. 
  3. Then add your carrots and water. Increase heat and bring to a boil.
  4. Lower to a simmer and cook for 30 minutes. 
  5. Then let cool for a little while before blending until smooth. Feel free to add more water, if necessary.
  6. Return to stove to season with the salt and pepper + stir in lemon juice.
Enjoy!

Read more...

Food (Finally)

>> Wednesday, June 10, 2015

Wow. I haven’t written about food or recipes in a while. Sorry about that. I have really been enjoying writing more about, well, life in general. Sharing what we’re doing in real time. But I miss sharing good eats with you guys for a few reasons. Strangely enough, I feel like I eat better (more variety, healthier meals, etc.) when I come up with recipes to share on a regular basis. Maybe that isn’t strange, it actually makes perfect sense!

So, today I wanted to dive right in with a quick and easy lunch you can make with lots of raw veggies. I’ve never tried subbing romaine or other leafy greens like chard in for my wraps or bread -- and I was pleasantly surprised at how full I felt after eating this meal. It’s salad for people (like me) who hate salads.


VEGGIE-FUL WRAPS


What you’ll need . . . 
  • Romaine lettuce (spring for organic)
  • Hummus*
  • Sliced carrots
  • Sliced cucumber
  • Hot sauce
  • Parmesan cheese (optional)

Method . . .
  1. Lay out washed and dried romaine leaves and spread generously with hummus.
  2. Load with chopped veggies (I’d love to add crispy bell peppers and even avocado!).
  3. Top with hot sauce and Parmesan shake (alternatively, you could use nutritional yeast).

ENJOY!


* Homemade hummus is best and much less expensive.
Like what you just read? You can subscribe to the feed of these posts or follow us on Twitter or Facebook to be the first to know what the (never home)makers are up to. And we’ll love you forever!

Read more...

Miso + Peanut Noodles

>> Monday, April 6, 2015

When I lived in Ithaca, there was this awesome shop at the farmers market that sold these delicious peanut lime noodles. And I was absolutely hooked. Saturday morning would come, we’d hop on our bikes to go shopping by the shore of Cayuga lake, and I’d always get those noodles.

It’s funny how when you go through something difficult in life, you resort back to your comforts from old times. Food is a big one for me. I finally got my appetite back (I feel like a new person), I wanted to create something similar in my kitchen. I used to eat these noodles a decade ago, but the flavors are still on the tip of my tongue.


MISO + PEANUT SAUCE


What you’ll need . . .
  • 1 large clove garlic
  • 1/2 cup smooth peanut butter
  • 1 heaping tablespoon white miso paste
  • 1/2 cup hot water
  • 2 tablespoons lemon or lime juice
  • 1 tablespoon apple cider vinegar
  • 1 tablespoon low sodium soy sauce
  • dash ginger powder
  • dash red pepper flakes

Method . . .
  1. Pulse the garlic to mince in your food processor. Then add the peanut butter, miso paste, and hot water and blend until smooth.
  2. Add the rest of the ingredients and blend until well incorporated.
  3. Alternatively, you can mince the garlic and then whisk together the peanut butter, hot water, and miso paste. Then whisk the rest of the ingredients in until smooth.
  4. Store in an air-tight container for up to one week.

// To make the noodle dish:

I simply boiled half a package of Ezekiel 4:9 spaghetti (you can use similar noodles -- even soba would be great -- at around 8 ounces) and shredded a couple carrots and half a small onion. I mixed those tougher and then dumped 5 big spoonfuls of the sauce on top. Eat hot or cold. I even like my noodles super al dente.

Peas, cubed tofu, even raisins would be good add-ins as well.

Serves 2-4, depending on appetite.

Like what you just read? You can subscribe to the feed of these posts or follow us on Twitter or Facebook to be the first to know what the (never home)makers are up to. And we’ll love you forever!

Read more...

Seasonal Veggie Wrap

>> Thursday, July 24, 2014

I've been eating this crunchy wrap for lunch often. I use whatever we have on hand from our CSA basket, whatever leftovers might be in the fridge, and a good dressing. I've actually become quite obsessed with dressings lately, but that's a topic for another day.

Let's take a look!


And now . . . the closeup!


SEASONAL VEGGIE WRAP

What you'll need . . .
  • A wrap -- I buy mine (multigrain) at Aldi
  • A green -- I used spinach
  • Something(s) crunchy -- I used carrots and bell peppers
  • A spread -- I made some Tahini-Free Hummus*
  • A bean or grain -- I had some leftover farro
  • Cheese -- this is honey goat cheese**
  • Dressing -- this is Brianna's Poppy Seed Dressing
  • Drizzle -- I like to use hot sauce or even Inglehoffer Sriracha Mustard
* Tahini-Free Hummus is just 1 can of chickpeas -- drained + rinsed -- blended in your food processor with a clove of garlic, a couple tablespoons olive oil, and then 1/4 to 1/2 cup water (until you reach your desired consistency). Season with salt and pepper.

** Omit to make this "recipe" vegan.

Method . . . 
  1. Assemble the ingredients as I did above. There are no rules, so feel free to put them on your wrap in whatever order makes the most sense to you. I find it helpful to cut my crunchy veggies into thin strips for easy eating.
  2. Hunt in your refrigerator shelves for more leftovers (rogue beans make a good fit) to toss on. Really, this "recipe" is a great way to eliminate food waste.
  3. Dress and drizzle for flavor. Then roll into a loose wrap. Everything will be heaping, so you won't have an airtight seal by any means.
What's your favorite seasonal fruit or vegetable?

I'm most excited for TOMATOES to come into full bloom (here's why!). I love Caprese Salads, homemade BBQ Sauce, slow roasted tomatoes, and quick-to-prepare Pasta Sauces.

Like what you just read? Browse more of our posts + recipes on Pinterest. You can subscribe to the feed of these posts or follow us on Twitter or Facebook to be the first to know what the (never home)makers are up to. And we’ll love you forever!

Read more...

Beet + Carrot Juice: A Better Balance

>> Wednesday, February 5, 2014

A lot of our juicing experience so far has been dictated trial and error. We toss in what we have in the fridge and just hope it will taste good. Often, this method works out just fine. I mean, taste is definitely a huge part of juicing, but I guess we let the health benefits overshadow at times.

I've been trying to use less and less fruit in our juices, too. For example, I squeezed together this blend of some sweeter vegetables -- with only a couple fruits -- to make strides toward lower sugar, higher nutrient content.


(I added half a lemon, too, for some bright flavor.)

BEET + CARROT JUICE
  • 3 large carrots
  • 2 large beets
  • 2 Granny Smith apples
  • 1 inch (or so) ginger
  • 1/2 to whole lemon, with rind
  • Filtered water
//  HOW TO:

Wash all fruits and vegetables. Run all ingredients through your juicer. Then fill juice container to top with filtered water -- or to taste. The water in this recipe is to thin out the juice so it isn't quite as intense, better balanced. Mix (stir in the froth -- don't separate!) and serve immediately.

The magenta beets totally take over the color. No surprises there!


I'm hoping to write a recap of how we're approaching our juicing in the next week or so. We definitely aren't making it every day or even every week. The early weeks in January, we were excited and went a little overboard, but I think we're striking a better balance, especially where the budget is concerned!

Want more juice recipes?

I'd love to make an entirely veggie blend, any palatable suggestions?


And don't miss our 90 healthiest recipes of 2013! Lots of delicious, wholesome foods for breakfast, lunch, dinner, and beyond. Includes both vegan and vegetarian recipes to please the entire family -- even toddlers!


Like what you just read? Browse more of our posts + recipes on Pinterest. You can subscribe to the feed of these posts or follow us on Twitter or Facebook to be the first to know what the (never home)makers are up to. And we’ll love you forever!

Read more...

Red Curry Kimchi

>> Tuesday, August 13, 2013

Every year I say I'm going to learn more about preserving foods. Then the peak season comes and goes, some of our produce ultimately spoils, and -- in the end -- I've only frozen a couple things and made a few rockin' batches of homemade applesauce. Not this year. I'm trying to be more intentional in everything I do, food included.

Our garden is bursting with pak choy of all things. For me, it falls flat in stir-fries. So, we decided to do something fun and, at least for us, educational. Just as with Stephen's annual pickles, this recipe came (in part) from Put 'Em Up!: A Comprehensive Home Preserving Guide for the Creative Cook.

For the rest, I sampled some methods from an article I found on The Kitchn. Oh, and since we were missing most everything for the spice paste, I reached deep into the refrigerator to grab a heaping tablespoon of leftover red curry paste. Some garden-grown chives to replace scallions, too. We still have several more days till it's "done" and ready for consumption, but already this red curry kimchi smells incredible.


Reading and learning more about preserving foods and all the different methods for doing so has unlocked this whole new appreciation for cooking in me. I think bloggers can get bogged down by the frantic day-to-day need to create the hottest, most pinnable recipe. We forget to continue our culinary education (for which I'm homeschooled, right?).

I can't get over how gorgeous this batch looks in jars. I guess it will last three weeks in the refrigerator. If it lasts that long at all. I've been known to polish off a jar of kimchi in one sitting.


I'm feeling good with all this motivation coursing through my veins. And with this recipe, I'm working toward one of my goals with food. Cook more, appreciate food for its flavor and not so much impact on my weight. Use seasonal ingredients in new ways. Learn new techniques. (Which reminds me that I want to get going on a new + improved starter for fall's sourdough adventures!)

I also uncovered another book I'd like to pick up on this subject while researching an article I'm writing for Wise Bread. It's Kevin West's Saving the Season: A Cook's Guide to Home Canning, Pickling, and Preserving. It's a cookbook, but I guess West weaves in a great deal of storytelling (personal essays, etc.). I like thinking of the intentional preservation of food as a way of life and not just for the joy of my stomach.

Today on Writing Chapter Three, I wrote about another one of my goals: To get a handle on the mess in my house (and -- let's be honest -- inside my head). Everywhere I look, I'm seeing how the little things I do -- every 2 minutes of my time, in fact -- can have a huge impact on my everyday life.

It's been good slowing down and paying attention, however long it took me to get to this place.

What new cooking methods have you tried lately? What else do you want to learn?

Like what you just read? Browse more of our posts + recipes on Pinterest. You can subscribe to the feed of these posts or follow us on Twitter or Facebook to be the first to know what the (never home)makers are up to. And we’ll love you forever!

Read more...

Garbanzo Bean Salad

>> Wednesday, May 26, 2010


I'm loving that you are all enjoying my food diary! I wasn't sure how it'd go, but I'm enjoying it, too. It's one thing to write down the things I eat in a day. And -- confession time -- sometimes in the past when I simply wrote down my intake, I'd LIE to myself. Trust me, it doesn't make sense to me either, but I'd conveniently leave out things like . . . well . . . five cookies. Hahah.

So, the photos are keeping me honest. And in the spirit of honesty, I need to add an 80 calorie serving of bittersweet chocolate chips to yesterday's mix. (I ate them after the post.)

And if you've missed Day 1 and Day 2 of my food diary, feel free to check them out ASAP.


Anyway, lots of you want the garbanzo bean salad recipe. I anticipated this. After all, a good lunch recipe can make your day (just like it did mine). This dish packs around 600 to 650 calories. Sounds like a lot, but when you consider that it keeps you full all day (and who says you need to eat it all in one sitting? I picked at it throughout the day), it's worth trying out.

What you'll need . . .
  • 1 can of garbanzo beans (chickpeas), drained and rinsed
  • 2 carrots, scrubbed and chopped
  • 1/4 cup fresh basil leaves, chopped
  • 1 tablespoon tahini
  • 1 tablespoon agave nectar (I used Xagave, but you could also use honey)
  • 1 tablespoon almond milk (or other substitute)
  • 1 tablespoon unsweetened coconut flakes
  • Pepper (to taste)

Method . . .
  1. In a medium bowl, toss garbanzo beans, carrots, basil, and coconut flakes.
  2. In a small bowl, use a fork to whisk together the tahini, agave, and almond milk.
  3. Add sauce to veggies/etc., toss, and season with pepper as desired.
The only critique I have of this recipe is that it packs 45% of your daily sodium intake. I guess I didn't realize canned garbanzos have so much salt in them! The good news is that my salt intake yesterday -- not counting this recipe -- was minimal. I'm trying to be more conscious of adding salt to everything (which I started to do this year for some reason). However, the next time we hit the store, I'm going to pick up some dried chickpeas and use them. From now on. After reading this info, I want to use less of the canned variety. There's so much more nutrition when you take a little more time to revive the dried.

So, whatever you choose, I hope you enjoy this recipe. It's immensely tasty. Incredibly easy. Unique in flavor. And easily adaptable -- try it with other veggies and fruits (raisins would be a nice addition), and let me know all about it! Just leave a comment or email us at neverhomemaker@gmail.com.

Like what you just read? You can subscribe to the feed of these posts or follow us on Twitter or Facebook to be the first to know what the (never home)makers are up to. And we’ll love you forever!!

Read more...

Rutabaga-Carrot Soup

>> Tuesday, April 27, 2010


Another simple soup recipe to round out the afternoon. And what's best is that I can show you how to transform something ugly it into something beautiful (and yummy, too). I'd never eaten a rutabaga (also known as a yellow turnip) before. In fact, I don't even know if I'd ever stopped to look at one until last weekend. But there I was. Walking around the produce aisles at Wegmans . . . when I discovered they'd run out of asparagus.

Then this thing caught my eye. It was calloused, bruised, waxy, and misshapen. Almost like a diseased toe . . . or something equally grotesque.


Image Credit

I hear you can make a mashed rutabaga. Originally, that is what I set out to do. However, we had a bunch of carrots we needed to use up. Then I got the idea to make soup. The taste of it is actually VERY good. In fact, it may be the best soup I've ever made. Give rutabagas a chance if you haven't already. You'll be pleasantly surprised. As well, you'll benefit from enhanced nutrition.

What you'll need . . .
  • 1 large rutabaga, peeled and chopped into 1/2" pieces
  • 3 large carrots, peeled and chopped
  • 1/2 large white onion, diced
  • 1/2 cup vegetable broth
  • 2 cups soy milk (or regular milk)
  • Salt and pepper to taste
Method . . .
  1. If you have a slow cooker, throw in the rutabaga, carrots, onions, and vegetable broth. Cook on high for approx. 3-1/2 hours or until the rutabaga and carrots have softened enough to mash.
  2. If you don't have a slow cooker, soften the rutabaga, carrots, and onions in a large pot of boiling water until the are soft enough to mash and all the veggie broth later.
  3. Lightly mash the softened veggies. Then, throw them in a blender and add the soy milk -- first add 1 cup, then 1/2 cup at a time until you reach your desired consistency.
  4. Transfer the soup to the stove to heat and add the salt and pepper to your liking.

And if you haven't already -- be sure to enter our giveaway, which ends this evening at 9PM EST.

Like what you just read? You can subscribe to the feed of these posts or follow us on Twitter or Facebook to be the first to know what the (never home)makers are up to. And we’ll love you forever!

Read more...

The "Sack" Method: Eat Your Veggies

>> Monday, April 12, 2010


Getting my daily intake of fruits and veggies is a struggle for me. I've been vegetarian for over 14 years, but I hate salad. How is that even possible? I'm not really sure, but I'm just not a fan -- especially of lettuce. And I have trouble getting myself around in the morning (we covered this last week in the chocolate-peanut butter oats post), so crafting an on-the-go veggie feast is somewhat difficult.

I surfed over to Fruits and Veggies Matter (http://www.fruitsandveggiesmatter.gov/) and discovered that at my age and sex (26/F) and activity level (over 60 minutes per day), I should be consuming 2 cups of fruit and 3 cups of vegetables every single day.

Compared to people who eat only small amounts of fruits and vegetables, those who eat more generous amounts -- as part of a healthy diet -- are likely to have reduced risk of chronic diseases. These diseases include stroke, type 2 diabetes, some types of cancer, and perhaps heart disease.

Eating your 2 cups of fruit and 3 cups of vegetables a day is easier than you think.

Easier than I think, eh? Yeah, I realize I'm just being lazy. I could choose to make meals ahead of time. I could create a salad with ingredients I like, like spinach and beans. But I came up with another method that suits my current situation well. I call it (drum roll, please) The Sack Method.


The Sack Method is just that: A ton of raw veggies -- chopped and thrown into a sack. Two of my favorites have been radishes and carrots because they crunch. They also go well with that super-easy hummus recipe from last week. And when I bring a gigantic sack of the good stuff to work with me, I'm less tempted to hit the vending machine or coffee kiosk for a late afternoon snack (of cookies and candy bars). I almost always have leftovers that can carry over to the next day.

But, you might be thinking, what counts as a cup?

One cup refers to a common measuring cup (the kind used in recipes). In general, 1 cup of raw or cooked vegetables or 100% vegetable juice, or 2 cups of raw leafy greens can be considered as 1 cup from the vegetable group. One cup of fruit or 100% fruit juice, or ½ cup of dried fruit can be considered as 1 cup from the fruit group (from http://www.fruitsandveggiesmatter.gov/). To find out more, check out this chart.

You're just dying to know, I'm sure. Exactly how many fruits and veggies you need daily? Just check out the handy-dandy calculator on Fruits and Veggies Matter. And tell us: How do you get in your daily requirement? Any tips to share with the group? Just leave a comment or email us at neverhomemaker@gmail.com.


In other news, Stephen and I ran a half marathon in Ithaca, NY, yesterday morning. I PRed and Stephen maintained his lightning-fast pace -- and we weren't even racing. Stay tuned for a full race report, as well as our upcoming race calendar! We signed up for a crazy one over the weekend!


ALSO check out this month's Blog Love Fest. It's a special edition because we're not only sharing the links in a list this month. We're creating a categorized blogLOVEroll. For all the gooey details, just visit the BLF post.

Like what you just read? You can subscribe to the feed of these posts or follow us on Twitter or Facebook to be the first to know what the (never home)makers are up to. And we’ll love you forever!

Read more...

DETOX: Day 2 -- Miso Soup

>> Tuesday, December 29, 2009


Day 2 of the detox, and we're doing swell. OK. For Stephen our "diet" is pretty much normal eating. For me, it's a bit different. I think we've been over it already, but I eat WAY too much sugar. All the time. Last night I got my first real craving. So, I broke out some cocoa-covered popcorn (this really tasty, "guilt-free," vegan kind made by Lesser Evil) . . . seemed to do the trick.

What exactly HAVE we been eating? Here's the breakdown:

  • Breakfast: First, a huge mug of tea with 1/2 lemon squeezed into it. Later, a fruit smoothie (though I may do a few green smoothies, too) . . . and we've been adding some whole grain cereal for energy for running.
  • Snack: Fruit or veggies.
  • Lunch: SOUP. Today I'm giving the recipe for miso soup. Ours is more of a stew because we throw tons of kale and shiitake mushrooms into the mix. We also add a piece of whole wheat bread with some almond butter and a piece of fruit (blood oranges, anyone? -- they're my favorite!).
  • Pre-run snack: raw coconut-carob chip "cookies".
  • Dinner: Steamed broccoli and brown rice with a mixture of sesame oil and soy sauce on top. This isn't really filling us up, so tonight we're going to make it a stirfry with some tofu.

That's pretty much it. Now, again, it isn't a detox in the true sense. Our friend Kevin and his brothers came over to visit last night, and we all split a fancy beer. So, basically -- we do what we can. I think any effort to eat better is a good step for me at this point.

Today's recipe is for the miso soup we ate yesterday . . . and likely will eat again today. I recommend using lighter miso -- like a white -- but we used barley miso, so just go with what you like.

MISO SOUP

What you'll need . . .

  • Handful shiitake mushrooms, thinly sliced
  • 4 to 6 scallions, chopped
  • 2 cups kale, chopped
  • 1 large carrot, shaved
  • 6 cups water
  • 1/4 cup miso paste


Method . . .

  1. Put water and all veggies/mushrooms into a large stock pot and bring to a boil over high heat.
  2. Drop the heat down to a simmer and set your timer for 10 minutes.
  3. Take pot off heat and stir in the miso. This part can be tricky -- you need to make sure it all dilutes.
  4. Serve and enjoy (makes about 4-5 servings).

Like what you just read? You can subscribe to the feed of these posts or follow us on Twitter to be the first to know what the (never home)makers are up to. And we’ll love you forever <3

Read more...

Stephen's Bulgar Wheat Salad

>> Wednesday, December 9, 2009


While we were in NJ for Thanksgiving, we had the opportunity to work out at this amazing gym. Not only did this place have HUGE group classrooms (we took yoga two days after the marathon), a special "tech-gym," a spa, pool, whirlpool, indoor track, etc., etc., but it also had this fantastic Whole Foods-esque deli counter. We in upstate NY don't have anything quite like it.

Stephen's favorite activity at the gym wasn't working out or even getting his massage. No, he mostly enjoyed consuming that deli's bulgar wheat salad. Every time we went there.

On the way back from our break, we stopped at the grocery store . . . and when we finally arrived home and got more settled, I noticed a huge bowl of bulgar wheat salad sitting proudly in the refrigerator. From where did it originate? You guessed it . . . Stephen.

And now you can have some, too!


What you'll need . . .
  • 1 cup dry bulgar wheat (you can get it in the bulk foods section)
  • 2 cups water
  • 3 handfuls of kale, shredded
  • 2 large carrots, peeled and chopped
  • 1/2 white onion, diced
  • 1/2 cup raisins
  • 1/2 cup pine nuts (he just used raw)
  • 1 whole orange, juiced (you'll only used the juice)
  • 1 tablespoon of lemon juice
  • 1 tablespoon of vinegar
  • 2 tablespoons olive oil
  • Dash of cayenne pepper
  • Salt and pepper to taste

Method . . .
  1. Start by putting the water and bulgar wheat in a medium stock pot and bringing it to a boil. Once the water is boiling, turn down to a simmer and wait between 6 and 8 minutes until done.
  2. While you're waiting for it to boil, prepare your kale: Saute the kale in 1 tablespoon of the olive oil over medium-high heat. Add the vinegar and some pepper to the mix, and after about 5 minutes (when the kale has wilted a bit), take off heat and set aside.
  3. The bulgar wheat is likely done cooking by now, so set aside in a large bowl (the one you'll eventually put everything in) and toss with another tablespoon of olive oil and the orange and lemon juices.
  4. Add the diced onion, chopped carrots, raisins, pine nuts, and kale to the large bowl.
  5. Toss everything together and add the cayenne pepper, salt, and pepper. Test by tasting.
  6. Keep refrigerated. Stays good for 3 to 5 days.
Like what you just read? You can subscribe to the feed of these posts or follow us on Twitter to be the first to know what the (never home)makers are up to. And we’ll love you forever <3

Read more...

Vegan Summer Rolls: Try Them This Weekend

>> Thursday, December 3, 2009


The month may be December . . . and the temperatures may be dipping far into the lower digits, but that sure as heck doesn't mean you can't enjoy fresh, flavorful summer rolls made in your very own kitchen! In college, my good friend Meg made a batch for lunch one day . . . and I was absolutely astounded that she was able to fashion together such an impressive meal. What may seem like a daunting process is really not so bad once you break it down. Oh yeah, and once get the hang of folding those delicate rice paper wrappers.

Fear not, though. I'm here to guide you!

Ingredients vary from recipe to recipe -- so what I suggest to use isn't the exhaustive list of possible components. Think of it as a build-your-own taco station, or something like that. It's fun, custom, and delicious -- and, if you plan it right, can be a great FREEKEND meal (making use of all those leftover carrots and bean sprouts).


STEP 1: Assemble Your Ingredients


What you'll need . . .

  • 1 package udon noodles (see photo above)
  • 1 package spring roll/ rice paper wrappers
  • Bean sprouts or regular sprouts
  • 2 to 3 carrots, shaved
  • 1/2 block tofu, pressed and cut into small-ish rectangles (see photo below)
  • 10 fresh basil leaves
  • Splash sesame oil
  • Splash low sodium soy sauce
  • Sesame seeds (we used some black sesame seeds that we picked up at a local Asian food market)
  • Hoisin sauce


STEP 2: Prepare Your Ingredients


Method . . .

  1. Fill a large stockpot with water (and a splash of salt) and bring to a boil.
  2. Cook udon noodles until soft -- about 7 or 8 minutes (but keep checking to make sure they aren't TOO done). Drain and pour cold water over them to cool.
  3. In a small bowl, mix carrot shavings with sesame oil, soy sauce, and sesame seeds.
  4. Lay out all ingredients to make assembly a breeze.
  5. Fill a large bowl (large enough to fit the rice paper) with hot water.
  6. You may need to dump and refill with hot water during the process (it gets cool quickly).
  7. Also lay out a clean kitchen towel. This is where you'll assemble everything.


STEP 3: Assemble Your Summer Rolls (and don't make fun of my hair -- I was growing it!)


Method . . .

  1. Dip in one rice wrapper into the hot water at a time -- keep submerged in water for about 15 - 20 seconds (this really is trail and error if you're a first-timer -- you may destroy several wrappers, but that's OK -- keep trying, and keep your method delicate).
  2. Transfer softened rice paper to your clean kitchen towel (it may tear a bit, but that's OK) and add ingredients into the middle of the circle in this order: udon noodles, sprouts, carrot mixture, tofu, and basil leaf.
  3. Roll rice paper tightly around filling (first fold the left side over, then roll it to the right) and then fold over the top and bottoms.
  4. Put finished summer rolls on plate and, when you're ready to eat, serve with the hoisin sauce.


Like what you just read? You can subscribe to the feed of these posts or follow us on Twitter to be the first to know what the (never home)makers are up to. And we’ll love you forever <3

Read more...
Related Posts Plugin for WordPress, Blogger...

About This Blog

MyFreeCopyright.com Registered & Protected

© 2009-2014 by the (never home)makers
All content on this blog is copyrighted.

Want to publish our pics, tips, or tricks?
Contact us! [neverhomemaker@gmail.com]

We value transparency. Links on this page may contain affiliates. In addition, please see our disclosure policy regarding sponsored posts.

  © Blogger template Simple n' Sweet by Ourblogtemplates.com 2009

Back to TOP  

Blogging tips