Composting
>> Tuesday, June 23, 2015
We had a pretty good composting operation set up at our old house. So, when we moved last year, we knew we wanted to start up again. It took us a while to get started, but we finally installed our new backyard composter a couple months ago. Here’s some notes on how we organize the process.

#1: Garbage Bowl
We started off with a Garbage Bowl in the kitchen to collect all our organic food scraps. You can use anything for this bowl, but there are also specific garbage bowls on the market. The idea here is making it easy to save the scraps from the trash while you’re cooking. After a while, it becomes mindless.

Usually we try to keep our food scraps chopped up pretty small because they decompose faster that way. Sometimes a spoiled apple or something bigger sneaks in, though. I know that some people prefer to keep their bits + pieces in the freezer, especially during the cold months.
#2: Indoor Bin
We also have a small compost collector in our kitchen which is the staging area before everything heads outdoors. We cook a lot with a lot of whole foods, so we need multiple options. You can buy containers with carbon filters to keep your kitchen smelling nice. Since we take ours out daily, I found a cute galvanized ice bucket (+ scoop) with a plastic bin in it. It works great and looks nice.

#3: Outdoor Bin
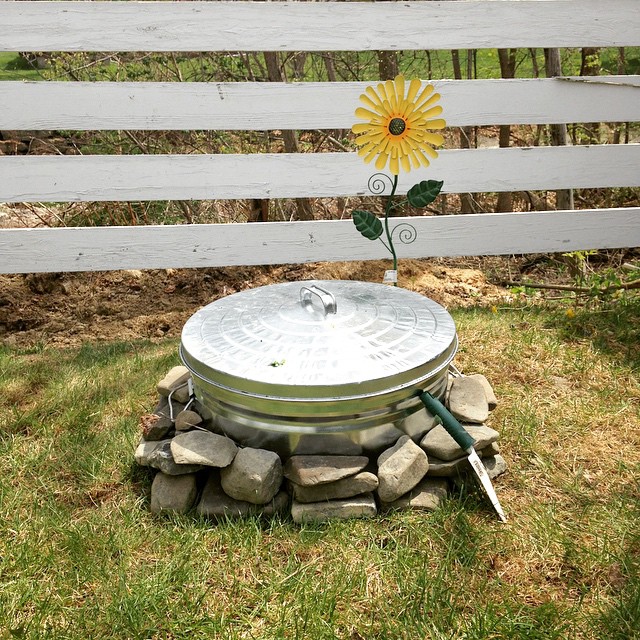
From there, everything goes into our outdoor composter. We bought a galvanized garbage can, drilled holes into the bottom half, dug a deep hole in the yard, and snugged it in. The holes allow worms to enter and break the food down. It was also one of the least expensive (and more attractive) composter solutions I have come across.
#4: Starter
To get our compost started, we actually bought some compost starter this year at the suggestion of a friend. It fast forwards the microorganism activity and breaks down the food scraps faster. We happened to have a lot of veggie and fruit scraps in a short period of time, so it would have taken a while to break all that down otherwise.
#5: What’s Inside
We compost everything from fruit and veggie scraps to eggshells to Stephen’s endless supply of coffee grounds. Yard waste -- grass clippings, leaves, etc. -- too. If you’re new, here’s a great chart for the DOs and DON’Ts of what goes into the bin. After you add a batch of “fresh” scraps, you always want to cover with some brown matter (newspaper, leaves, straw, sawdust, etc.). The brown stuff gives your compost more air and carbon, which are two essentials to the process.
#6: How/When to Use
We have yet to use any of the compost in our garden. You know your batch is “ready” when it’s nice and dark and breaks up easily. It just looks like incredibly rich, awesome soil. The amount of time it takes to get to this point can vary greatly, so be patient. Here’s some more information about using compost.
I’d love to hear about your composting process!
Leave your thoughts in the comments.
Related Posts
Cleaning With Baking Soda Basics
Cleaning With Vinegar Basics
Homesteading Stuff You Can Buy at the $1 Store
DIY Natural Lotion Cubes
10 Smart Ways to Use Epsom Salts
Powerful DIY Laundry Detergent
5 Green Cleaners That Work
5-Minute Homemade Deodorant
8 Ways We've Eliminated Plastics
Cleaning Produce The Natural Way
Chemical-Free Clean With Castile Soap
Like what you just read? You can subscribe to the feed of these posts or follow us on Twitter or Facebook to be the first to know what the (never home)makers are up to. And we’ll love you forever!


