
Our Hand-Painted Backsplash
>> Tuesday, September 20, 2016
This is one of my favorite DIY projects. So, I'm re-posting it for those of you who might be interested in doing the same thing in your home. I'll hopefully get an updated kitchen tour up soon, too. We have done a lot more since two years ago!
I mentioned in my last kitchen post that I was thinking of jazzing up our tiles with some painted designs. And after we started getting up all the white doors, the white tile was looking rather plain and ordinary.
First, let’s take a look at where we started.

And in progress:

Let me back up. Our tile backsplash was painted white by the previous owners. It was plain Jane. I knew eventually we’d want to liven it up. And when was browsing around, I found all these cool Moroccan-inspired tile prints. I liked the ones most where they’d mix and match the tiles for a crazy sort of look. And since I like taking risks, I figured a few tubes of craft paint and hours of my time would be worth the experiment. If I totally hated it, I thought, I could always just cover it over with metal backsplash like we did in our previous kitchen.
So, I started. And immediately I thought I made a mistake.

Several hours of work -- and over 130 tiles later -- it really came together. At least in my opinion. I think once I can get full kitchen makeover photos up, it’ll look even better. All the clutter and crap is just out of frame in these photos, but the impact the print has on the room with tying together all the colors is big.
And with so many patterns together, you can’t tell quite as well that I’m not at all an artist. At all. Instead, it’s a beautiful chaos.


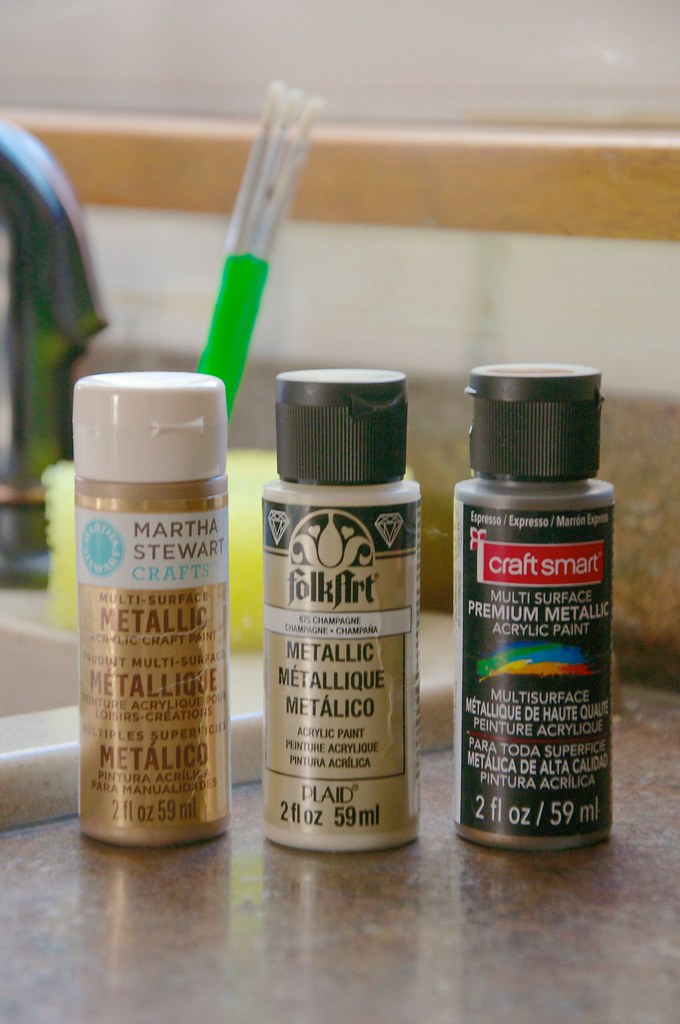
I started by copying a few of the prints I liked on this backsplash, but soon decided to go rogue and create my own. I used the following metallic craft paints (paint + brushes cost less than $10 for this project) -- one in a color that went with the trim, another with the counters, and the other with the cabinets. I would have loved to do bright, vibrant colors -- but since the counters and sink are earthy tones, I didn’t think it would go as well.
I tried three different brands of paint and you really do get what you pay for. The Martha Stewart Paint colors were the best, it was the easiest to work with. The Folk Art and Craft Smart was kind of runny. But they all did just fine in the long run. I think after I let them dry fully, I’ll probably cover with some clear topcoat for extra durability.
I know this look isn’t for everyone.
It’s fun, though, and fit well within our budget.

Looking forward to sharing more of the transformation. Initially, I know that our ultimate goal has been achieved -- the white cabinets make the space a lot brighter despite the lack of windows in the room. That’s the biggest help! The fun tile is just the icing on the cake.
What risks have you taken with your home decor?
Like what you just read? Browse more of our posts + recipes on Pinterest. Chat with us on Twitter or Facebook. And you can always email us with your questions and comments.


