Showing posts with label diy. Show all posts

Kitchen Refresh for $325

>> Wednesday, May 1, 2019

I've been sharing bits and pieces of home stuff over on Instagram and many of you were asking for more details on what we've done and what we've used to refresh our kitchen. First, let's start with a little history.

Here's our kitchen when we moved into our house almost five years ago:


After a little while, I painted the backsplash and then the cabinets.

So, this is essentially how the kitchen looked until recently:


And here's how it looks now -- almost finished:


COUNTERS


We used contact paper. Yes, contact paper -- specifically DC-Fix Grey Marble -- to give our countertops a new look. I was a as skeptical as you might be, but after watching countless YouTube tutorials (search "contact paper countertops") and reading (and hearing from some of you) how they actually do hold up . . . I figured the low cost of the materials might be worth giving it a try.

Basically, you clean your counters very well and make sure there aren't any rogue pieces of dust before starting in one corner and slowly applying the contact paper like a sticker. You push any air bubbles out as you go. The videos I watched made it seem super easy but there's definitely a learning curve and I did waste an entire roll because we messed up.

Corners are especially tricky.


I'm still glad I did it because the end result is gorgeous!


Note: I personally chose the width of 26" because it allowed me to have the fewest seams and install the contact paper horizontally versus vertically. That said, installing it in larger pieces is significantly harder!

I used three rolls total for a cost of around $40. But I did mess up, so the total project ended up costing $53. We also had to use some white caulk to help streamline the edges. Much less expensive and less wasteful than replacing perfectly functioning countertops.

Oh, and if you don't like these -- the company also makes other colors, including this Brown Marble, Black Marble, White + Black Marble, different faux granite finishes, etc.

BACKSPLASH


I had planned to try wrapping the backsplash in the contact paper as well. A friend suggested I try using self-adhesive backsplash panels from Home Depot. The only problem is that for four tiles, it was $26! I put this idea on the back burner . . . and then was happy to see that they were on sale for $16. I ended up spending $200 on this part.


The sale is no longer going on but I have since found a very similar product on Amazon -- Subway STICKTILES -- that I actually think I may have liked better because it has darker "grout" lines and is currently $20 for four but there's also a $2 coupon you can apply at checkout, making it $18/4-pack. There are a variety of colors and shapes of adhesive tiles, too. I personally love this Modern Grey variation, though it wouldn't have matched out kitchen.

As for installation, it went up so quickly. Just cut with normal scissors and stick on like a puzzle. Even the corners and funky areas were very quick to cover over. I would say that I did this project by myself in an hour and a half. It is holding up nicely and as such a nice sheen like real tile. Not bad because it went over the old stuff. Almost zero prep-work was needed!

CABINETS


We still have the same old cabinets as always. I painted them white at one point a few years ago. If you want to read more about that, check out this post. Once we changed the backsplash and the counters, the kitchen was just TOO white for Stephen's taste. I actually thought it was fine, but he wanted to get more depth in there. So, I decided to paint the lower cabinets. Not sure if that's still a style people like . . . but I like it. found some great paint at my local craft store -- Americana Decor Stain Enamel paint in Grey/Taupe.

I considered working with chalk paint, but this stuff is self-sealing, so it didn't require wax or any other coat to finish. This stuff must be quite popular because it was nearly out at my store and I did have to buy more online. The other color I considered was a bit darker, Smoke Grey. I wish they had had a color in the middle. I thought about mixing the two but then got impatient!

I'll do before/after photos when we have completely finished painting. I only need two containers to paint the lower cabinets. I got the first one at Michael's with a half-off coupon for $5 and purchased one online for $10 (they were't getting anymore in the store soon). Total cost was $15.

HARDWARE + LIGHTS


Last, we decided to change out the hardware on part of the cabinets because I've always loved the farmhouse look. Our hardware looks black, but it's actually bronze. So, I picked up 15 of these Amerock Bronze Cup Pulls for a cost of $30. I only needed 14, so I used the last one up in our bathroom. I love them!

We also added six wireless under cabinet lights -- Moston Magnetic Under Cabinet Lights. I got two 3-packs (set me back $40 because they were on sale) and I don't regret getting so many. I'm obsessed with these guys because they charge via USB and can even be motion-activated. I use them daily for several hours and they only need to be juiced up once a week.

Here's the difference.


It's less noticeable in these photos than in person. It makes a huge impact in our really dark kitchen even in the daylight to have these on. Installation was super easy, too. You just install a magnetic plate where you want them with sticky tabs (all provided). Then the actual light sticks up there, again, magnetically.

Anyway, I hope these notes are helpful to you! I think a lot of this stuff is also renter-friendly. For a total cost of $325, I think the changes are quite dramatic and worthwhile. BTW: I did mess up on the contact paper, and that meant I had to rip it up. The formica underneath was completely fine after doing so.


I'll get more beauty shots when the entire kitchen is completely painted and styled! For more of my home improvement-related posts, click here.

Read more...

Simple Cleaning Lessons

>> Thursday, August 9, 2018

My house is tidy. Mostly picked up . . . most of the time. But it's actually quite dirty. Like, stuff-stuck-on-the-floors, soap-scum-residing-in-the-tub-for-months, need-to-scrub-all-the-toilets sort of dirty. I go in waves with my enthusiasm for cleaning. Right now in the third trimester? It's exhausting just thinking about getting on my hands and knees to do the work.

I've read all sorts of articles on embracing the madness. That a messy home is a home full of love. And all that stuff. But I've also hit the nesting stage and it's bothering me -- BIG time. I would like my house clean. At least sort-of, kind-of clean. And I think there's a happy balance to be had.


Nerd alert: I spent a good deal of Eloise's nap looking up cleaning videos on YouTube yesterday afternoon. Yes, I have a writing deadline I should have been working on. Yes, I could have probably better used that time to actually get off my butt and clean. But I'm desperate. I am trying so hard to figure out a better way to keep my house clean, not just picked up.

There are a few things I learned, and I thought I'd share them here. Because I was THISCLOSE to calling a cleaning company, which is a luxury I think to be totally worth it if you have the funds. I cannot allocate money in that direction right now, so figuring out a way to simplify my cleaning practices is key. That said, we may be saving up some dollars and cents to hire occasional cleaning in the first few months after baby comes this time around. Because no new, breastfeeding-constantly-always mama has time (OK. maybe time, but desire!) to scrub with three kids and a husband who's gone six days a week.

// 1: Stop zone cleaning. 

This was interesting to me. Several articles and videos I watched said to stop approaching the house from a "clean the living room" or "clean the bathroom" perspective. Instead, do tasks like dusting throughout the entire house first, then move on to cleaning windows and mirrors, then move on to wiping down surfaces/scrubbing toilets/etc. and then to floors. I've never tried cleaning my house this way, so I am intrigued.

// 2: Prioritize. 

Stephen and I have really different cleaning styles. I get bogged down basically taking a toothbrush to every microscopic area that could be gone over. He goes really fast and glosses over a lot. We need to marry these approaches, at least sort of. Like I could be LESS detailed and he could be MORE detailed. But we need to prioritize the areas we want the cleanest together. Generally things like kitchen surfaces and toilets/tubs are big priorities. Dusting the tops of the kitchen shelves and ceiling fans might not be something that makes it as high up the list.

// 3: Gather together. 

I don't have one of those cleaning buckets or baskets. My cleaning supplies are scattered in different areas by room. Because as I mentioned before, I used to clean by room. But if you do tasks, it makes more sense to gather everything in a basket or cardboard box -- whatever -- and take it to the areas you're cleaning in that moment so you aren't running around the house like a crazy person.

// 4: Enlist your kids.

This is something I have just started doing recently, and I'm seeing how it goes. Ada is old enough now to help with more cleaning tasks. Since my belly has kept me from wanting to bend over, I'm taking full advantage and asking her to do more. For example, after dinner ends up all on the kitchen floor . . . I ask her to go through with our hand vacuum each night and suck it up. No, she doesn't do a perfect job. But I don't have to do it. I have also asked her to start picking up toys (which is easier having gotten rid of so many!) with Eloise. Their top motivator is playing cleanup songs on YouTube. Yes, I could have started that way sooner, but I am a control freak and often figured it would be faster if I just did it.

// 5: Set a timer.

This is my own tip, because otherwise I think I may spend the next year cleaning without any breaks. I am planning to set a timer each day for 15 minutes to dedicate to cleaning. On another day each week, I may set it to 30 minutes or -- alternatively -- 15 minutes, twice that day. And then on the weekend, I may set it to 45 minutes or 15 minutes, THREE times in a day (with the whole family's help that day). I have trouble setting out to clean and having no set start or end time. If I break it into chunks, I think it will feel more manageable. I don't want to spend hours cleaning, but I am hoping by dedicating time each day -- even just 15 minutes -- I'll be able to power through better.


Do you have any cleaning tips to share?

I've seen so many "rhythms" and methods for taking each day to zone clean . . . but none of them have ever worked for me.

And if you're curious, my favorite cleaning YouTuber is Clean My Space. She uses VERY simple DIY cleaners. Mostly baking soda, vinegar, and water with microfiber cloths. No fussy recipes. She also gives tons of tips for fast cleaning and more deep cleaning.

Read more...

Our Stock Tank Pool: Part I

>> Monday, June 4, 2018

You may remember the pool we set up last year in the backyard. It was absolutely perfect. Around 7.5 feet by 9.5 feet and just around 2 feet deep. The kids had so much fun splashing around all summer in those 870 gallons of H2O. The setup worked well, and it was relatively inexpensive. If you're interested, I would highly recommend these Bestway pools as a first step into learning how to care for a pool.

But we had a mouse issue in the fall and they got to the pool. So, we needed a solution for this year . . . and hopefully for many years to come. I've seen so many articles about stock tank pools crop up in recent years. I was always too intimidated by the process of getting a huge galvanized tub to my house, so it was on the back burner.

This year, we decided to pull the trigger.


For those of you who have been asking me questions (and there are many of you!): We picked up our 8 foot stock tank at Tractor Supply. It's 24 inches deep. Our store does not do delivery, so we asked a friend to help us get it home. It wasn't too bad a process -- aside from one roadside adjustment -- and ended up being much easier than we anticipated. When we got it home, we gave it a good scrub because the store had been displaying plants inside it.

From there, it was all about re-leveling the area we had dug out last year.


Surprisingly, it took a few hours to get the area absolutely perfect. Last year, we settled with level-ish. But one benefit of getting this type of pool is that you can leave it out all year. We're hoping to leave it in place, so taking our time was in our best interest.

When that was done, we put it where we want it to go and got to work on the landscaping. Mostly rocks that we bought at the store and pulled up from the creek area behind our house.


I love how it looks! So much prettier than the bold blue with white supports from last year.


This stock tank holds around 700 gallons of water, so it is smaller than last year's. I had to buy a new filter pump that we are going to drill/hook up tonight. That will be part II of my posting. But if you're interested in doing a similar project at your home, I highly suggest checking out the number of really helpful tutorials I found online.

Here are some of my favorites:

DIY Stock Tank Pool: Everything You Need to Know
How to Make a Stock Tank Pool
Stock Tank Swimming Pool Ideas

Just a budget breakdown. We ended up getting the tank for $349 plus tax at the store. They're usually $399, but we got it on a Memorial Day sale. The new filter we bought was $35 on Amazon. The rock was around $30 because we already had some leftover from last year. It's not the least expensive upgrade we could have done, but I am hoping it will pay off in the long run.

Why didn't we go with a larger option? Well, partially because we didn't want to eat up our yard with a pool the whole year. Or have a big hole when it's cold outside. I like that it's shallow enough that Eloise's head is well above the water. But yet it's big enough to still get in as an adult and cool down. It looks nice, though I understand the style isn't for everyone. And we are hoping that the galvanized steel is durable and lasts for many years.


If you have further questions, I'd be happy to answer them either in the comments or on Instagram!

I'm going to do another post once we get it up and running to talk about any issues we run into or any tips I have. But I won't be writing out a full tutorial. Again, I highly recommend the links I provided above. We're learning as we go.

Happy Monday!

Read more...

DIY Mermaid Sensory Board

>> Friday, February 23, 2018

We have a children's space totally dedicated to sensory play where I live. It has all sorts of cool things to touch and see. One of my favorites has always been these little frames filled with that mermaid flip sequin fabric. I don't think that's what it's called, but you get me. They are around six inches to a foot in size and are anchored to the walls for kids to play with.

Naturally, I wanted to bring this idea home.

In a BIG way . . .


I actually bought the fabric for this project before Christmas and just never got around to finishing it. Not that it takes long at all. And I kind of winged the execution, so this "tutorial" is more of a "see what I did, try it and maybe improve upon my method" kind of thing. In its current iteration, it works great. But I'm sure it could be refined.

First, you need your sequin fabric. I bought mine on Amazon, though I'm sure you may be able to find this stuff at your local craft shop. I chose the classic mermaid blue/green and black. It comes in an impressive array of shades, though, so you could get this to match any decor. You know, because this will be living in your living room, most likely.

So, a yard is 36" x 47". Massive.


All I did with the fabric is stretch + mount it inside a cheap plastic poster frame I had bought at Target eons ago. So, for me this project only cost the amount of the fabric. You can get a similar frame for around $10-$15. Alternatively, you could also put the fabric on the wall and then frame around it with wood trim, if you are extra handy.

There really was no trick to stretching it. I just placed the clear plastic frame insert (that would go over the poster) in the center of my fabric. I pulled the fabric taught around it and folded the extra pieces flat. I then put it in the frame and put the backing of the frame over top of the folded pieces. Then I pressed down all those tabs on the back of the frame to keep everything in place.

Note: Keeping the folded pieces there wasn't just laziness -- it helps hold everything tight. You could also cut the fabric to size and glue it to the clear insert. I'm sure there are many ways that would work.

And then we got to playing:


Again, this isn't a very technical tutorial. Ada and Eloise love this thing equally. And it's big enough that they can both play with it at the same time. I think we'll end up putting it in the play room, attached to the wall. But it's also nice to place on a table or the floor.

Oh! If you don't feel like going to all this trouble or spending much money, you can also get those sequin fabric pillows to toss about. They're super fun, too. And most cost around $7. Boom!

Let me know if you try this project! I was incredibly surprised how easily it came together.

HAPPY FRIDAY!

Read more...
Frugal Accomplishments

>> Tuesday, December 12, 2017

I popped into Walmart this weekend because I needed sugar and was traveling in that part of town. I had a couple last-minute things on my Christmas list too, so I had to trek over to the toy section. I was absolutely flabbergasted with the number of people trolling the aisles. They were basically ripping toys away from one another in the quest of getting their shopping done. I mean, I get it. We all want to be done shopping, but being rude to a stranger about a plastic doll isn't going to magically make it all better. But that's not really the point.


In this time of excess, I'm trying to keep a level head. We're still dealing with a good deal of debt and always striving to be more frugal than not. So, here's some of the things I've done lately to stay in the green, so to speak.


IMG_8289


// Thrifted Decorations, etc.

One of the best places you can find holiday decor is at the thrift shop. Sometimes you'll luck out and find stuff that's brand new. I got a tree topper for a dollar and a package or ornaments for a couple bucks. I also found some cute beaded Santa boxes to use as wrapping/gifts. Ninety nine cents each. A steal, right?

I didn't need too much, but I found nativity scenes, outdoor decorations, garlands, faux trees, and more. It's definitely worth a look if you want to add a bit more cheer on a dime.

// Thrifting Running Apparel

Speaking of thrifting, I've been looking for a decent running coat to add to my collection. I have a bunch of old ones that don't fit well anymore. I was able to find a nice, basic fleece Columbia number for $4.99 that also happened to be 70 percent off. No holes, rips, stains, or other defects. The only catch is it's a weird shade of green. I run mostly in the evening, so that doesn't matter!

I decided to take a look around and found a new Nike running top (short sleeve -- so for treadmill time) for just $3.99. I also snagged a nice pair of yoga pants for a few bucks. Now my athletic clothing is refreshed! I wish my motivation would do the same . . . 

// Lice Spray

Last year there was this little girl in Ada's class who ended up having lice the entire year. I decided to mix up a batch of homemade lice spray . . . and, guess what?! Ada didn't get lice once. I've made it part of our morning routine now, and I have to say it's working. Ada has my type of hair -- very fine and stands straight up with static. I had lice often as a kid despite being well groomed and taken care of. 

Anyway, I'd say a spray bottle of this stuff lasts several months. I just spritz it through her hair each morning before she goes to school. Bonus is that I swear is makes combing her hair easier.

Combine:
  • 10-15 drops lavender essential oil
  • 10-15 drops rosemary essential oil
  • 10-15 drops tea tree oil
  • 5 drops peppermint oil
  • Fill the rest with water
Combine everything in a small spray bottle. Mine is 4 ounces -- an old lavender room spray bottle. FYI: I use all Aura Cacia essential oils that I buy either on Amazon or at Wegmans. I've used them since I was in college!

// DIY Table Runner

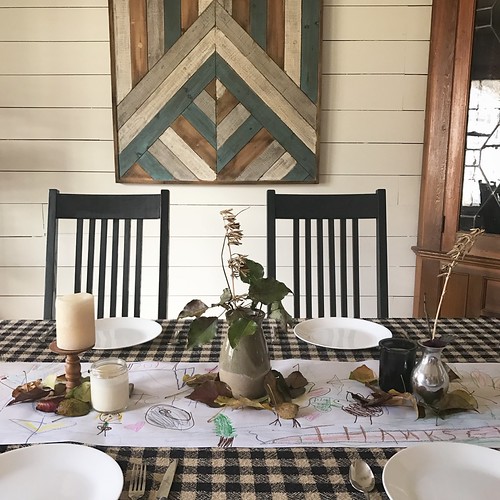
I wanted to mention this frugal thing I did at Thanksgiving. We don't have tons of fancy linens and such to use when we celebrate holidays. I wanted to dress up the table a bit, but also make it fun for the kids. So, I rolled a bit of paper lengthwise across the table and gave Ada a bunch of markers and crayons. She drew pictures, wrote little sayings, and it kept her occupied while we cooked. I plan to do the same thing for Christmas. 

You can use any paper (see my photo, above), but we happened to have a roll of Melissa + Doug easel paper on hand. It was perfect!

// TTC Tricks

Oh, gosh. If you've ever been deep in TTC (which I'm not yet this time around -- just saying from experience) and spent literally #allthemoney buying pregnancy tests, ovulation strips, supplements, and other stuff -- save yourself. Since I take progesterone, I have to pinpoint my ovulation day, which means either taking my basal body temperature or using ovulation strips. I choose to do both, as my temperatures are quire erratic (thanks to waking up often at night -- my own doing, Eloise sleeps great).

Anyway, I finally bought one of those sets with 50 LH strips and 20 pregnancy tests for just $20. I used to spend that much just buying a couple pregnancy tests. It seems like a silly thing, but I know many of you are trying to conceive, and month after month . . . it gets expensive. Do yourself a favor. The LH strips work really well for me -- I get clear positives (line darker than control) and the pregnancy tests are apparently as sensitive as First Response. I personally got a positive on one last time around when my HCG was like 12 coming down from my D&C.

I love sharing frugal accomplishments. What are some of your most recent wins?

Till next time! 

Read more...
DIY Christmas // The Dress-Up Box

>> Wednesday, December 6, 2017

This is a re-post of a blog entry I wrote when Ada was two! I am thinking of making something similar for Eloise for Christmas. And if you need more gift ideas for kids, check out my 2017 gift guide. I share exactly what we're getting the girls this year, not just random stuff.

The highlight of Ada's birthday party was her gift, the dress-up box. Now, this isn't really a tutorial so much as it's an inexpensive gift idea for toddlers and little kids. I thought of making this box for Ada when I noticed she liked going around the upstairs + rummaging through drawers. She'd put on socks and shoes and tights and mittens and scarves. Anything and everything she could get her hands on.

The beauty of this "project" is that it can be completely free if you have things around your house to use. It can be low-cost if you want to use thrifted items or even use (or sew!) your own. And if can also be all sorts of fancy if you have the budget to make it that way.

The choice is yours.


STEP #1: Find a nice box.

You can use one you already own or buy new. I had this zippered hat box I received a gift in years ago that had been sitting in our attic. I was at the crossroads of either getting rid of it or finding a new use. And actually that's how this whole gift idea started to take shape. I like having a box that closes well -- Ada knows how to use the zipper, but I can hear her before everything gets thrown about the entire house.  

I also think it'd be cool to somehow place a mirror or reflective surface inside the box. So, keep that in mind. Ada loves dressing up, but seeing herself in her fun outfits gets even more smile points.

(Bonus points if kid can fit inside the box.)


STEP #2: Find stuff to put in the box.

You can buy brand new clothing or actual dress-up clothing + costumes at a store, if you want. I opted to hit up thrift stores for some cheaper finds. It means the clothes don't really coordinate and are of various sizes and styles -- but it's perfect for a toddler.

I ended up getting . . .
  • 5 poofy skirts
  • 2 long scarves
  • 2 bandanas
  • 2 fisherman hats
  • 1 fuzzy "leopard" poncho
  • 1 reversible vest
  • 1 pair of sunglasses
  • 1 extremely ridiculous clown sweater
 = $12.50 total 


STEP #3: Maintain the box.

Though this step is one I have yet to follow myself, I've decided that I'm going to wash the clothing in the box once a month -- unless something gets really dirty, which I'm sure is bound to happen. I sort of thought everything would just stay clean, but painting + markers and then snacks + milk happened. It's just like regular clothing.

As well, I might add different items as I find things and cull through my own scarves and such. Or if I see something fun at a thrift store or online and the price is right.


TIPS + TRICKS:
  • Buy clothing at least one size larger than your child wears. They wear this stuff over their regular clothing, so it makes sense. Sizes for Ada (who is just starting to get into the 2T size) range between 3T to 6. It all goes back to thrift store tips -- sometimes clothing shrinks or just fits different needs.
  • Wash absolutely everything before putting it in the box. I've heard some thrift stores spray clothing with a chemical (could be urban legend -- but I believe it), so it's just not worth risking.
  • Pick crazy things versus just normal everyday clothing. You can this stuff to look ridiculous, but also appeal to the insane style choices of a toddler. The weirder, the better, at least in my opinion.
  • Think beyond play. This whole dress-up thing is also a chance to teach kids how to dress and undress themselves, which is a real life skill. Try to choose clothing that facilitates that development -- bigger neck openings on shirts, for example, make it easier for little hands to navigate these learning waters.
Does your toddler like playing dress-up?

Read more...

DIY Bathroom Refresh

>> Tuesday, October 24, 2017

This is the story of our bathroom renovation.


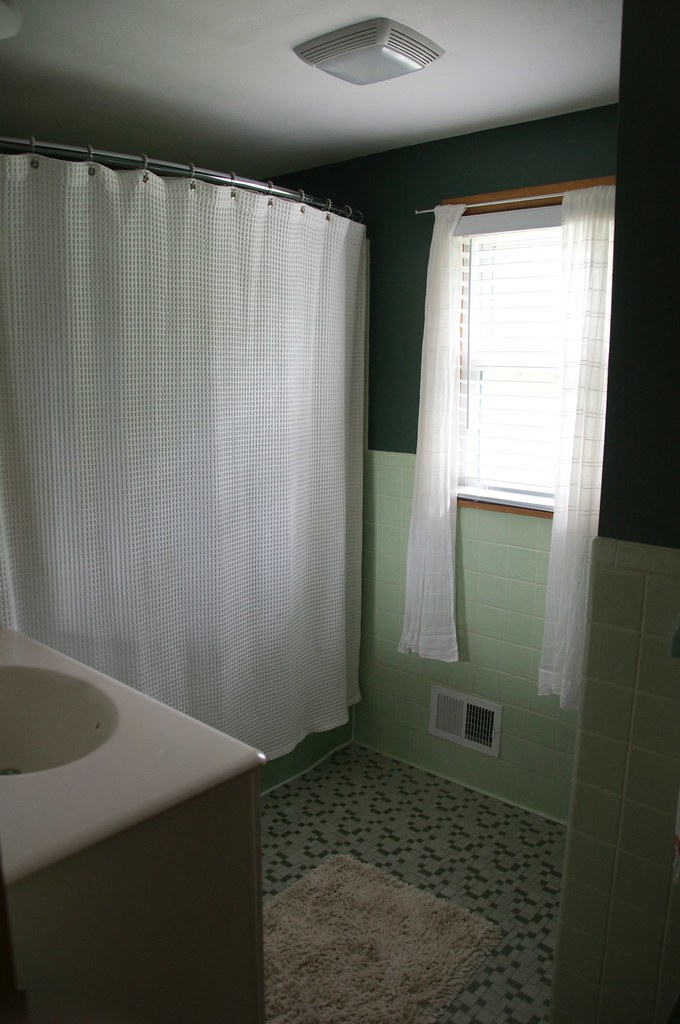
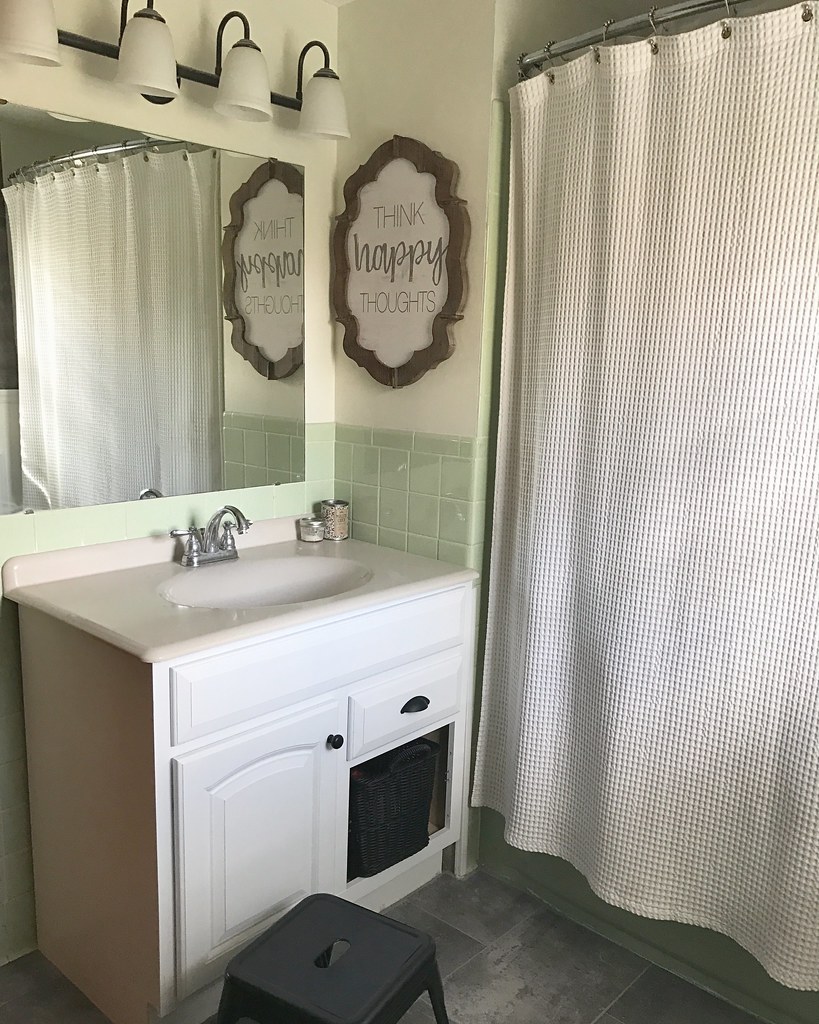
I don’t have many photos of our upstairs bathroom to serve as a before. Regardless, it’s the main bathroom for all our showering/bathing. We do also have a shower in the basement, but it’s a bit of a dive. We left the old green tiles from the 1960s these last several years because they were in great condition. We also knew we eventually wanted to knock down this little half wall that divided the space, and it would definitely destroy the tile.

Anyway, here’s a before from the day we moved in.


We didn’t have a ton of cash to spend on this project, but I was getting sick of trying to clean all the grout on the floor . . . and I also just get bored without a project. We allotted ourselves $350 to do the work, knowing we also had some materials left over from previous projects.

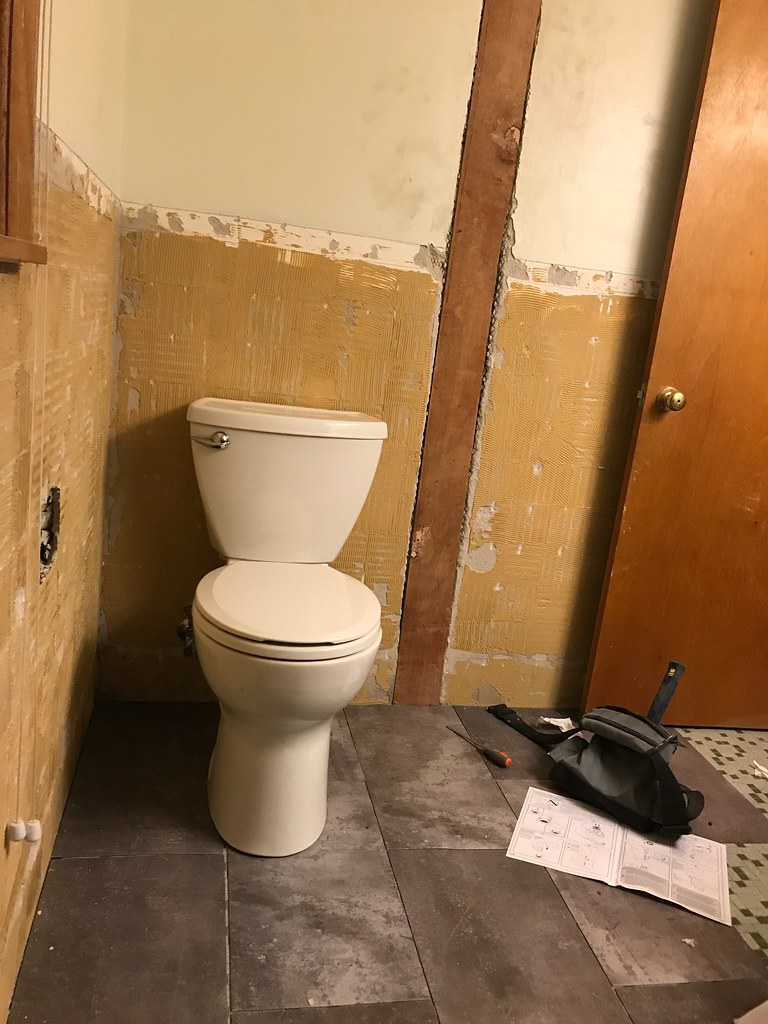
The first step was knocking down the wall. Then came tearing out the tile. In the process we accidentally knocked the toilet tank, cracking it. We decided to keep our current vanity.

Progress photos:


That last one still gives me the chills. There was plaster and tile . . . EVERYWHERE. Three huge garbage cans full of the stuff. It took a long time to clean up and get a blank slate to start with the new stuff.


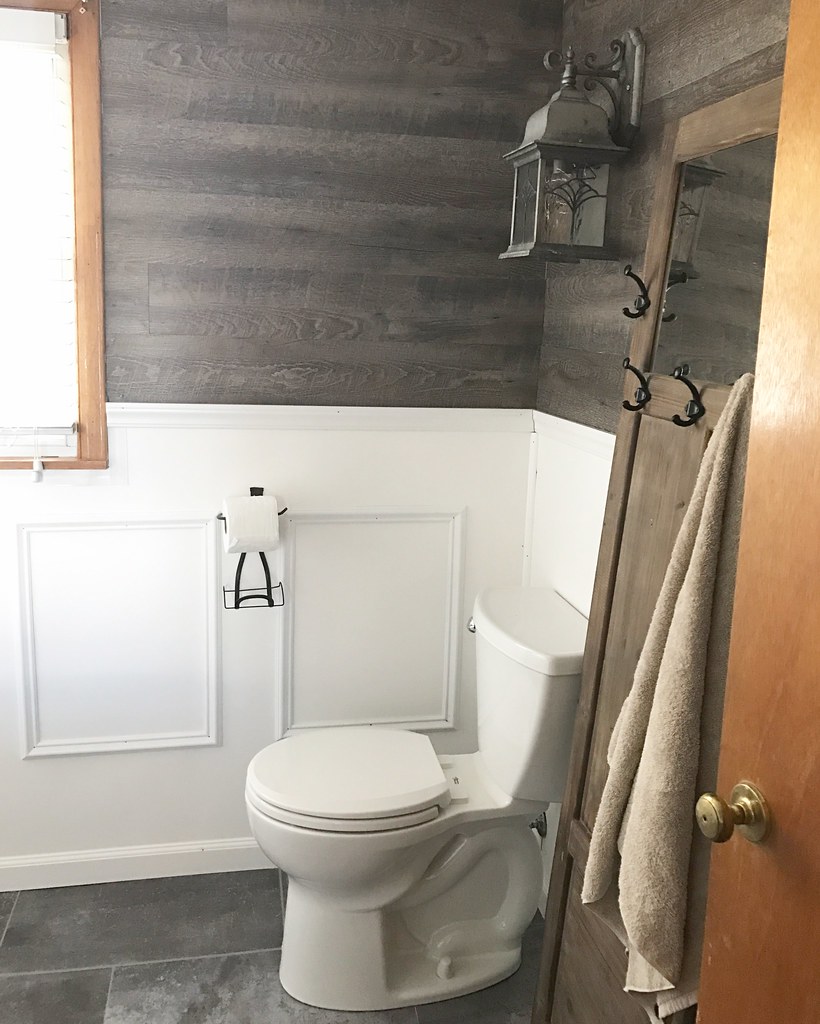
We put down the flooring first and then installed the new toilet. Then we got to the walls. We had some vinyl tile leftover from a project I did in the master bedroom, and I knew I wanted to put it to use. We also bought some plastic/vinyl wall coverings for the bottom half of the walls, as well as a few decorative pieces to dress it all up.

From there, I got a couple knobs for the vanity, a piece of artwork, and a cool door with hooks for towels. I also got a nice sturdy bench to stand or sit on. We left the tile behind the vanity and in the tub area (as well as the tub) the original green color. We eventually want to get it reglazed white. I’ve done a lot of research on this DIY reglazing kits, and it looks like a lot of work that doesn’t really hold up. The tile and tub are in good condition, so I’d rather wait and have it done the right way.

I realize I’m skipping lots of details, but I don’t want this post too long. So, I’ll just post the AFTER photos here. If you have questions, let me know. I estimate this project ended up costing around $400 if you don’t count the stuff we already owned (mostly some adhesives, grout, and the vinyl “wood” wall tiles).


My favorite part is how much space we gained by knocking out the wall. And how clean everything is now! It’s all vinyl basically, so you can just wipe it down with some homemade vinegar cleaner and a rag -- done! I also like the grey and wood tones. I am a huge fan of the vinyl floor tiles -- we also have them throughout our main floor . . . and they have help up well to high traffic.

I’m thinking I may do another post with more details on how we did different things, a cost breakdown, and answering any questions you guys have. Leave a note in the comments!

Read more...
Expanding Our Homemade Pantry

>> Tuesday, August 22, 2017

If you follow me on Instagram, you’ve seen my many food adventures this month. Stephen and I are trying to continue out frugal accomplishments by making more and more of our foods from scratch. Many of you have been interested in the recipes and methods we follow, so I figured a post was in order.

Today I’ll cover the more frequent items we’ve been cooking up. But I’m sure I’ll add to this list in the future. And be sure to check the links at the end for a more comprehensive list of the things we regularly make to stock our homemade pantry.

Yogurt


Ah, yes. Yogurt. I waited years to try making this on my own because the idea of it was daunting to me. Thing is, you can easily make yogurt in your slow cooker. A gallon of milk costs me around $1.65 to $2 and yields 8-9 cups of the stuff.

I currently follow this recipe in my crock pot. It is for Greek-style yogurt . . . but that really just hinges on how much you strain it. I tend to do a slightly thicker than regular and thinner than Greek consistency. That’s the beauty with homemade yogurt -- it’s customizable.

Now, I am investigating a few more that might create less waste and yield even more result. I hear if you use powdered milk, it thickens the batch so little straining is necessary. I began my batch by using a cup of the Siggi’s plain yogurt as my starter. The first batch was very similar to the Siggi’s and later batches (using homemade starter) have been more sour. But you can sweeten them up with honey, maple syrup, or -- my favorite -- peanut butter.

Also: I always use non-fat milk.

// Mozzarella Cheese


Mozzarella was also on my bucket list for many years, but actually buying vegetable rennet made the whole thing feel like a production. Oh, and I suppose I should also mention that I only very recently bought a rapid-read food thermometer, which has been a game changer for making all things dairy. Oh, and cheesecloth. Lots of cheesecloth, though the less-waste in me has started experimenting with nut milk bags.

I follow this recipe for mozzarella (the image is also from this site -- I somehow deleted mine). You simply heat the milk, add in the rennet and citric acid, strain curds, knead, etc. Then you get this delightful ball in less than half an hour. I’ve made this a few times now. With practice it becomes much more automatic. There’s nothing cooler than looking at a ball of fresh cheese you’ve made from scratch.

Also: I always use whole milk.

// Paneer 


Speaking of cheese, I am addicted to paneer. One way we’ve gained some independence from takeout meals is by making our own Indian food. I buy the simmer sauce at Aldi and make the cheese a day or hour ahead of time. It’s even easier than making mozzarella. All you need to curdle the milk is something like vinegar or lemon juice.

From there, it’s all about pressing. Here’s the recipe I follow for perfect paneer. I’ll be making it tonight -- with whole milk.

// Ghee


After making paneer, ghee was a natural next step, right? It’s wonderful on homemade naan (getting there in a minute -- just you wait!). It’s also great for cooking stir-fries, eggs, etc. I’ve only made one batch so far, but it’s was super easy.

Here’s the recipe I followed. It keeps on the counter for a few weeks to a month. I used unsalted butter.

// Naan


You guys know I’ve been making my own naan-like creations for years. It all started in college when I lived with a graduate student named Aggrey. He used to roll out these unleavened dough balls and cook them on the stove-top like he did back home growing up in Africa. I slowly developed my own version of a flattened, more savory pancake.

My favorite recipes include the following. We make different kinds according to our moods.

// Sandwich Bread


I searched far and wide for a suitable sandwich bread recipe. Something reminiscent of store-bought, but oh-so much better. And about a month ago . . . I found it. The perfect white bread recipe. It turns out flawlessly every single freaking time. My only sub is that I use canola oil in place of butter inside the bread. I may start brushing the top with ghee.

I’d like to slowly modify this to include more whole grains, but bread can be tricky. I’ll report back soon.

// Jarred veggies in brine


We’ve started jarring + pickling lots of veggies in the fridge -- from zoodles to jalapeƱos and more -- and I basically just chop them up and pour in this brine. The instructions say to wait until the brine is cool to add it to the veggies, but I actually like it hot with things like jalapeƱos. It makes them so soft and delicious.

// Seitan


It had been years . . . but we dusted off the old seitan recipe.

Now we make this stuff weekly. So much less expensive than buying Field Roast. I’ll have to do an updated recipe, too. We’ve been seasoning it in all different ways. We’re still making seitan dogs, too. And the other night, Stephen made a pulled-pork-esque thing with BBQ sauce! Did you know that vital wheat gluten is full of protein? It’s true.

// More pantry goodies


Homemade Almond Milk
Our Go-To Pizza Dough
Homemade Ciabatta Bread
Homemade Muesli
Adventures in Cereal-Making
Homemade Bagels
White + Whole Wheat No Knead Loaf
Three Seed Crackers
Homemade Flax Crackers
Homemade Pancake/Waffle Mix
Awesome Couscous Crackers
My Favorite Hummus
Stephen’s Homemade Pickles
Homemade Applesauce
Red Curry Kimchi

Read more...

Dining Room Evolution

>> Wednesday, June 21, 2017


Another post! We got a lot of nice birthday wishes for Eloise -- thank you! But I'd also say after posting this photo, I got a ton of requests to talk more about our updates in the dining room. It's definitely been a while since I've written about what we've changed in the house. And we've changed quite a bit. So, let's get to it.

Back up for just a minute. When we moved in, the dining room looked like this:


Then we changed it to this:


And then this:


Then I decided to go full-on Joanna Gaines.

And I think we're finally done with changes.


Changes 


Major changes included added the corner cabinet that I found at an antique shop. I had stalked the piece for years, and it finally went on a super sale. It's just the right height for the room. It looks built in, which I love. The room isn't huge, so it's nice to have a place to stash our nicer pieces and tablecloths.

The next step was doing a faux shiplap on the walls using plywood planks. I am actually going to do a dedicated post on how I did this because I consulted a variety of sources, and it was quite a job! I did it all myself, too. We had a guy cut the plywood into six inch planks, but I did all the measuring, nailing, and shorter cuts at home.

After the planks were up, we painted everything using White Dove from Sherwin Williams. I think it's actually a Benjamin Moore color that I had matched at our local store. I hate painting, and if I'm being totally honest -- I think we need another coat in this room. Maybe Stephen will be generous enough to do that for me this summer.

You may also notice that our dining set changed in these photos. It's the same set, but I used chalk paint to refinish the table in white and the chairs in black. I still need to give the chairs another coat and do the polyurethane. But I am really pleased with how the table turned out. I did some distressing . . . and it is holding up well so far.

My kitchen is a disaster right now, but in my post on how I did the shiplap, I'll try to snap a shot of how this room flows into the kitchen. The two spaces are nicely tied into one another now. Again -- after all these changes in the three years since we've moved into this house -- I think I'm done. I really love this room. It's my favorite in our home right now.

PS: If you want to see what our house looked like back in 2015, be sure to check out the photo tour. It's in dire need of updating, so I hope to do that soon! I cannot believe how crazy the living room looks in these photos! I also stumbled upon the tours I did of our first house. Here and here and here.

PPS: That plank wood art piece came from Home Goods several years ago. We have a similar one in our dining room. They were on the more expensive side for what I spend on art, but I think they were well worth it.

Read more...
Related Posts Plugin for WordPress, Blogger...

About This Blog

MyFreeCopyright.com Registered & Protected

© 2009-2014 by the (never home)makers
All content on this blog is copyrighted.

Want to publish our pics, tips, or tricks?
Contact us! [neverhomemaker@gmail.com]

We value transparency. Links on this page may contain affiliates. In addition, please see our disclosure policy regarding sponsored posts.

  © Blogger template Simple n' Sweet by Ourblogtemplates.com 2009

Back to TOP  

Blogging tips