Showing posts with label kitchen. Show all posts

How to Clean Your Kitchen

>> Friday, May 24, 2019

I wrote recently on Instagram about the radical idea that cleaning my kitchen is a form of self-care. To me, this was kind of embarrassing and even seemed a bit silly. Cleaning. Self care? Seriously? I'm not a neat or tidy person by nature, so getting fire under my behind with organizing my house has been difficult. What I've found is a sense of serenity when thing are in order. And it's this feeling that seems to be filling me up with good vibes, even when everything else in my life seems a bit out of control.

So, I figured I'd share the quick things I'm doing each day to keep this particular space shiny and fresh. Now that I've got a system going, cleaning the kitchen when it's super messy/dirty only takes 10 minutes or so. And that includes getting dishes going AND steaming the floors.

What? I steam the floors? YES, and it's the best feeling ever.


Start with the 5-minute rule


I didn't invent the concept that you should do tasks that take just 5 minutes instead of letting them pile up. But now I'm the biggest cheerleader to this way of living life. Previously, I'd wait on the dishes and counters. They'd get beyond my ability to see the light. And I would feel like cleaning was a hopeless endeavor.

Things that only take 5 minutes or less:

  • Putting dirty dishes into the dishwasher and pushing START
  • Putting everything on the counters in the "right" home
  • Wiping down the counters and appliances
  • Vacuuming and steaming the floors (really! 5 minutes!)
  • Tidying open shelving and dusting containers
  • Taking out the garbage and putting a new bag in the can

Get the right tool and supplies

I use eCloth microfiber cleaning cloths on all surfaces. The company claims you can clean using only water, but I usually use some kind of spray. The advantage with these types of cloths is that they really seem to wipe up well.

I'm also a sucker for pretty and good-smelling cleaning supplies. I've recently become obsessed with anything Method -- especially the Sea Salt and Lime All-Purpose Spray. Their Stainless Steel Spray has also given me life. It's not that vinegar doesn't work. But to get inspired to clean, I needed something a bit flashy, if you will.

And my favorite floor cleaning supplies include my Bissell PowerFresh Steam Mop and Shark Stick Vacuum. Again, you only need to use the steam to clean floors, but the Method Spearmint/Sage Floor Cleaner is divine.

Decant your groceries


This is an idea I got from Erica Flock (who, in turn, got it from another blogger). My pantry tends to be this black hole of craziness. The simple act of pouring my snacks and other foods into clear containers allows me to see how much is left, what exactly we have, and it keeps garbage from piling up. I can't tell you how many times I'd clean the pantry and have like two gigantic bags of trash/recycling to contend with.

Then all you need are flip-top containers. Try getting a set of clear containers that offers different size options, like this set of EAGMAK Food Storage Containers. Another favorite are the tiny containers that have flip-tops you can find at the Dollar Tree. They're similar to the smallest container in this awesome 10-piece Food Pantry Container set. In fact, I think those are the same exact containers I found at my dollar store. 10 pieces for $15.

I also use open baskets to separate out things like applesauces, granola bars, and instant oatmeal. And my bamboo bread box is my new favorite thing.

Clear out pantries and refrigerator weekly


Overwhelming, right? Stay with me.

Once you do an initial purge and start decanting, this step is very easy. When I do my meal planning for the week (or when I simply take a look at what we have before making a mad dash to the store), get rid of anything that is either past its prime (yogurt, I'm looking at you!) or that you don't think you'll ever use.

Example: We're not a pasta-eating family. My mother-in-law kindly gave us a gigantic bulk box of edamame pasta. It was sitting and taking up tons of space for months -- and we're just not going to use it. Stuff like that can go to a food pantry or even a friend.

When you clear stuff out, there's more space for the stuff you use OR there's just more space for your things to breathe.

Move stuff around


You need to make your cabinets work for you. Efficiency is key if you want to keep your kitchen clean and you want to do it FAST. If you don't have specific homes for everything, it's hard to unload the dishwasher in a timely manner. If you have some food in this cabinet and similar food in another cabinet across the room, it's hard to figure out where to put stuff.

Spend some time really mapping out your ideal zones.

Examples:
  • We have a pantry where all the non-perishable food goes. 
  • We have a coffee/tea bar on the counter and right above it, I have the coffee/tea stored away along with Eden's formula (the bottle warmer is right there) and bottles. 
  • I have glass food storage in one drawer and in the drawer beside it are the lids. Separating them made everything so much easier.
  • I have a whole drawer that's down low dedicated to our kid dishes. This allows me to store all the stuff together AND gives my kids some independence.

Think about non-kitchen items


If things are living in your kitchen that don't belong in your kitchen, take them out and distribute to where they belong. It's that simple. Alternatively, if you regularly do non-kitchen things in your kitchen, consider making a special home for those things.

Example: I always do my girls' hair at the kitchen island. So, I now have a little bin of all their hair supplies (hair ties, bows, combs/brushes, detangler) right above the refrigerator. That way, I don't have all that stuff scattered on my countertops.

While you're at it, embrace the junk drawer. It's OK to have a junk drawer. I just polled my Instagram followers and 86 percent of people shared that they have this chaotic space. I recently went to the dollar store and purchased some organizing containers (similar to these) so we can at least categorize the junk. This has been especially helpful for charging cords and batteries. 

Reevaluate your stuff


We had beautiful Fiestaware dishes that we got for our wedding. I did hold onto some pieces, but they were bulky and heavy and annoying to deal with on the daily. So, I replaced them with simple white Corelle Dishes. They are super lightweight, they stack nicely in the dishwasher, and they take up very little space in our cupboard.

We use Ball Jars for food storage and drinking glasses. This is one of the best switches we've made because they can be used interchangeably to suit our needs.

If you aren't using certain appliances much, store them away or get rid of them. I actually don't use my KitchenAid mixer much anymore. I have it stored away in a lower cabinet and pull it out maybe twice a month.

BONUS: When you remove appliances from the countertops, they're easier to clean. (And there's less stuff to wipe down in general.)

Stay on top of it


Once you make some changes, just stay on top of cleaning. That sounds easier said than done, but once you get things organized and start doing 5-minute tasks . . . the momentum starts. And some of those quick tasks become even quicker. Before you know it, you'll be cleaning your entire kitchen in just 10 minutes.

Bigger jobs can come at your convenience. But do them regularly!

For example, I clean the stovetop once a week . . . and it actually only takes 5 minutes but is a bit harder because I have to remove all the grates. I used to just not clean it . . . and then everything would get burned onto the top and take FOREVER.

I try to deep clean the refrigerator monthly. That may not seem like a lot, but I used to only do it maybe twice a year. In fact, that's on my list of things to do this weekend. Monthly makes those stuck-on messes a bit easier to lift.


Anyway, these are some basics that have helped me transform the way I deal with our messy kitchen. I hope you find them helpful. If you have anything to share, please leave it in the comments!

Read more...

Kitchen Refresh for $325

>> Wednesday, May 1, 2019

I've been sharing bits and pieces of home stuff over on Instagram and many of you were asking for more details on what we've done and what we've used to refresh our kitchen. First, let's start with a little history.

Here's our kitchen when we moved into our house almost five years ago:


After a little while, I painted the backsplash and then the cabinets.

So, this is essentially how the kitchen looked until recently:


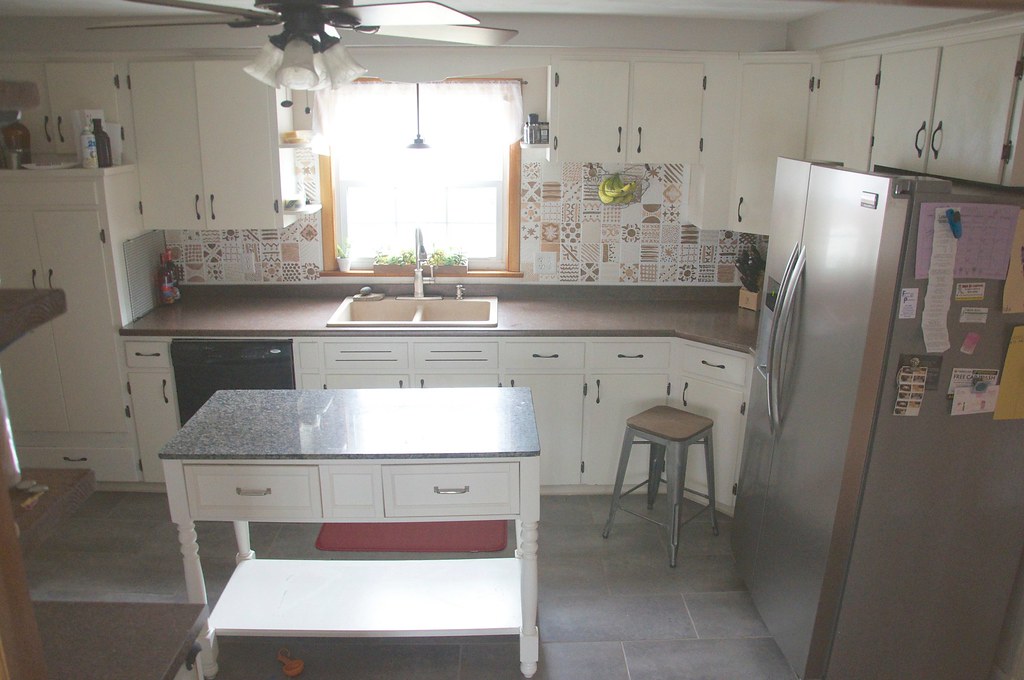
And here's how it looks now -- almost finished:


COUNTERS


We used contact paper. Yes, contact paper -- specifically DC-Fix Grey Marble -- to give our countertops a new look. I was a as skeptical as you might be, but after watching countless YouTube tutorials (search "contact paper countertops") and reading (and hearing from some of you) how they actually do hold up . . . I figured the low cost of the materials might be worth giving it a try.

Basically, you clean your counters very well and make sure there aren't any rogue pieces of dust before starting in one corner and slowly applying the contact paper like a sticker. You push any air bubbles out as you go. The videos I watched made it seem super easy but there's definitely a learning curve and I did waste an entire roll because we messed up.

Corners are especially tricky.


I'm still glad I did it because the end result is gorgeous!


Note: I personally chose the width of 26" because it allowed me to have the fewest seams and install the contact paper horizontally versus vertically. That said, installing it in larger pieces is significantly harder!

I used three rolls total for a cost of around $40. But I did mess up, so the total project ended up costing $53. We also had to use some white caulk to help streamline the edges. Much less expensive and less wasteful than replacing perfectly functioning countertops.

Oh, and if you don't like these -- the company also makes other colors, including this Brown Marble, Black Marble, White + Black Marble, different faux granite finishes, etc.

BACKSPLASH


I had planned to try wrapping the backsplash in the contact paper as well. A friend suggested I try using self-adhesive backsplash panels from Home Depot. The only problem is that for four tiles, it was $26! I put this idea on the back burner . . . and then was happy to see that they were on sale for $16. I ended up spending $200 on this part.


The sale is no longer going on but I have since found a very similar product on Amazon -- Subway STICKTILES -- that I actually think I may have liked better because it has darker "grout" lines and is currently $20 for four but there's also a $2 coupon you can apply at checkout, making it $18/4-pack. There are a variety of colors and shapes of adhesive tiles, too. I personally love this Modern Grey variation, though it wouldn't have matched out kitchen.

As for installation, it went up so quickly. Just cut with normal scissors and stick on like a puzzle. Even the corners and funky areas were very quick to cover over. I would say that I did this project by myself in an hour and a half. It is holding up nicely and as such a nice sheen like real tile. Not bad because it went over the old stuff. Almost zero prep-work was needed!

CABINETS


We still have the same old cabinets as always. I painted them white at one point a few years ago. If you want to read more about that, check out this post. Once we changed the backsplash and the counters, the kitchen was just TOO white for Stephen's taste. I actually thought it was fine, but he wanted to get more depth in there. So, I decided to paint the lower cabinets. Not sure if that's still a style people like . . . but I like it. found some great paint at my local craft store -- Americana Decor Stain Enamel paint in Grey/Taupe.

I considered working with chalk paint, but this stuff is self-sealing, so it didn't require wax or any other coat to finish. This stuff must be quite popular because it was nearly out at my store and I did have to buy more online. The other color I considered was a bit darker, Smoke Grey. I wish they had had a color in the middle. I thought about mixing the two but then got impatient!

I'll do before/after photos when we have completely finished painting. I only need two containers to paint the lower cabinets. I got the first one at Michael's with a half-off coupon for $5 and purchased one online for $10 (they were't getting anymore in the store soon). Total cost was $15.

HARDWARE + LIGHTS


Last, we decided to change out the hardware on part of the cabinets because I've always loved the farmhouse look. Our hardware looks black, but it's actually bronze. So, I picked up 15 of these Amerock Bronze Cup Pulls for a cost of $30. I only needed 14, so I used the last one up in our bathroom. I love them!

We also added six wireless under cabinet lights -- Moston Magnetic Under Cabinet Lights. I got two 3-packs (set me back $40 because they were on sale) and I don't regret getting so many. I'm obsessed with these guys because they charge via USB and can even be motion-activated. I use them daily for several hours and they only need to be juiced up once a week.

Here's the difference.


It's less noticeable in these photos than in person. It makes a huge impact in our really dark kitchen even in the daylight to have these on. Installation was super easy, too. You just install a magnetic plate where you want them with sticky tabs (all provided). Then the actual light sticks up there, again, magnetically.

Anyway, I hope these notes are helpful to you! I think a lot of this stuff is also renter-friendly. For a total cost of $325, I think the changes are quite dramatic and worthwhile. BTW: I did mess up on the contact paper, and that meant I had to rip it up. The formica underneath was completely fine after doing so.


I'll get more beauty shots when the entire kitchen is completely painted and styled! For more of my home improvement-related posts, click here.

Read more...

Sourdough Starter + Other Kitchen Things

>> Friday, August 19, 2016

The two-month shots sort of took us for a loop this week -- sorry for the quiet! I had planned to share a couple recipes, but I'll only manage to start the discussion on sourdough bread. I love baking bread. Specifically, sourdough. But keeping my starter alive has been difficult for me for whatever reason. I get really into it, and then my interest wanes in the warmer weather. I'm sure some of you out there can relate.

So, I decided to get another one going before autumn using the super simple instructions over at The Kitchn. No grapes, no yeast, no voodoo. Just flour, water, and patience.

Oh, yeah . . .


And just like that . . . after only five days . . . she was fed and ready! The first recipe I decided to make was my favorite bread of all time. Do you guys remember this beautiful sourdough loaf from a few years back? I sure do. It was the first time I successfully made bread that was bakery quality.

Like so:


And then I started Googling and discovered that there's way more you can make with starter than I even imagined. Go check out this recipe for Sourdough Chocolate Chip Cookies! They're sweet with a hint of tang and a great texture. I want to try these Sourdough Cinnamon Rolls next with an orange glaze.

While we're on the topic of fermenting, we have a few other things going on in the kitchen as well. Stephen just made his first batch of pickles for the season. We have three gigantic jars of these guys in the fridge just waiting to be gobbled up.


He uses the recipe in Put 'Em Up, if anyone is wondering. That's a great book, and it basically lives in our kitchen in August when the harvest is plentiful. Other preservation books we like include Food in Jars, Preserving by the Pint, and Naturally Sweet Food in Jars (all the same author).


Stephen also made another batch of kombucha, which he says he'll write about for me another day. ( (Do you remember my epic fail when I tried several years ago?) He is relatively new at it (only a year or so), but he's getting on point with flavors. My favorite this time around was a cucumber basil variety he made by juicing some of our CSA produce. Very refreshing.

That's what's going on in our kitchen this week. I hope to get a delicious slow cooker recipe to you early next week (YES! It's hot, but slow cooking season is upon us!).

HAPPY FRIDAY!

Read more...

Green in 15: No More Paper Towels

>> Tuesday, February 9, 2016

I've been meaning to post about our no paper towels system for ages. It's not that it's complicated or fussy. It was laziness on getting a good photo. I figured I need to get over that part and just post about it already! So, here's my latest installment of Green in 15, all about banishing paper towels from your home.

Here you go:


NO MORE PAPER TOWELS


  • Basically, we have 25-35 assorted towels. Some are flour sacks, some are nubby bar cloths, some are tea towels, and there are a few stray rags and washcloths in there, too.
  • We hung a fabric tote (similar to this one) containing all towels using some hooks in the closet right off the kitchen. I think this space was originally a utility closet, but it's quite small. Our vacuum doesn't fit very well, so I like using it for this purpose.
  • Underneath, we have a slim Simple Human Trash Can lined with a diaper pail liner to collect all the dirty rags.
  • You take a clean rag, use it up, and when it's dirty -- toss it into the bin. Easy, right? 
  • When the bin gets full, we grab the liner and take it downstairs to wash everything. We usually have a good stock of towels to use on wash day (and only do laundry once or twice a week).
  • We don't take the time to fold the towels. We simply toss them into the bin. We use the towels for general kitchen cleanup, napkins at dinner, and general cleaning tasks. 
  • Though they're all tossed in together, we use the nubbier cloths to do heavy cleaning, the flour sacks for everyday kitchen spills and even helping bread rise (in place of plastic wrap), and the tea towels for napkins. It's not always perfect, but it works.
  • To wash, we use our homemade laundry detergent and pour some vinegar into the rinse. They don't smell, though some do have stains from heavy use.
And that's really it!

You may already have towels on hand and some of the other supplies you need to get a system like this going. Mostly it's a matter of finding nooks and crannies to store everything into. You could probably sneak something like this on a smaller scale underneath your kitchen sink or in an unoccupied kitchen cabinet.

Those of you who don't use paper towels, what do your system look like?

// RELATED


Green in 15: Revamping Your Cleaning
DIY Natural Lotion Cubes
Powerful DIY Laundry Detergent
Cleaning with Vinegar
5 Green Cleaners That Work
5-Minute Homemade Deodorant
8 Ways We've Eliminated Plastics
Cleaning Produce The Natural Way
Chemical-Free Clean With Castile Soap

Like what you just read? You can subscribe to the feed of these posts or follow us on Twitter or Facebook to be the first to know what the (never home)makers are up to. And we’ll love you forever!

Read more...

Chores + Other Scenes

>> Tuesday, September 8, 2015

I just finished my run, and it’s only 7AM! I’m absolutely not a morning runner, but I guess we’re expected to have temps in the 90s the next couple days. No, thanks. (Fall, where are you?!) I will say that starting my day early with a run certainly has me more productive. I really am a morning person at heart, so I hope the school season will hopefully shift me more back in that direction.

Yeah. Stephen goes back to work today. We’re so lucky to have him home with us for 10 weeks over the summer. I’d say we made the most of our time together. Now that it’s back to the grind, I’ve been preparing with all sorts of chores, organization projects, and other stuff.


I started by creating this yoga nook in our bedroom. It’s really no big deal, but I liked the idea of having a dedicated place to practice. You know, besides in the living room while my preschooler crawls all over me and I have to listen to Octonauts in the background.

I simply gathered up all my mats, blocks, straps, balls, and even a set of light weights and put them in a sturdy basket in the corner of the room. I also removed the old fluffy rug that was there and cleaned up the mirror so I can check my posture. I keep some essential oil room sprays in the shelf (for those of you who were asking, here’s a similar one) to help set the mood.


We ran out of laundry soap over the weekend, so I whipped up a new batch using my favorite recipe + a bar of Kirk’s Castile. I’ll have to let you know if I notice any difference changing soap. Some of you asked how we store our laundry soap (because we do liquid batches, 5 gallons at a time). We use an old Igloo Water Cooler we had in our garage. It works really well. We just make sure to stir everything up every week or so.

We’ve been making our own laundry soap for well over a year now, and I really like it. I will admit that for stinkier loads (exercise clothes -- lots of ‘em), we add an occasional scoop of OxiClean Free. It helps keep the stink at bay in those shorts that might have been in the basket a couple days.


I hung a few hooks in the kitchen door to make a place for my pizza peel and apron to live. Having ingredients, kitchen tools, and other stuff hanging around can look sort of busy. Still, I’ve found the functionality of having everything I regularly use so accessible to be well worth small visual disturbances.

I need to do an updated kitchen tour soon. We also hung this nifty spice rack I found at a thrift shop that was brand new, in the box from the 80s -- and it’s absolutely perfect! I also made the switch from our heavy Fiestaware (most of ours is in Peacock) to Corelle (I went with simple White) dishes for everyday eating. I still love all the colors and the classic appeal of Fiestaware, but it’s so cumbersome.


Speaking of kitchen tools, I gave my beloved spoons and other woodens some love this weekend. For the longest time I was entirely intimidated by wooden utensils and the like. They’d inevitably dry out when Stephen would -- with the best of intentions -- run them through the dishwasher. That’s a huge no-no.

For everyday use, simply rinse the wooden thing with hot water. That should get the majority of gunk off, especially if you do it at once when you’ve finished cooking or baking. I have also collected a few antique items through the years (that blonde rolling pin, for example), so to get that up to speed I use some Dr. Bronner’s soap and hot water. Wash a couple times.

Then -- whatever your method -- let it dry completely (several hours) before applying walnut oil (from my research, one of the only food oils that won’t go rancid) or mineral oil (petroleum-based, but that’s what most of the “cutting board” oils you’ll find that the store are) with a cloth. Let that soak in for 12 to 24 hours before using.

Oh, and I must say that my olive wood utensils fare the best of all.

HAPPY TUESDAY!

Like what you just read? You can subscribe to the feed of these posts or follow us on Twitter or Facebook to be the first to know what the (never home)makers are up to. And we’ll love you forever!

Read more...

Reusable Food Wrap

>> Tuesday, August 4, 2015

I’m researching an article on beeswax, and I found something really awesome to do with the stuff. This tip to make beeswax fabric comes from Mother Earth News -- you may never need plastic wrap again! Oh, and this project is incredibly easy and adorable to boot.

Take a look. It’s yet another way to eliminate the use of plastics in your home!


BEESWAX FABRIC FOOD WRAP 


What you need . . .
  • A couple ounces of grated beeswax
  • 100% cotton fabric (I washed + dried + ironed mine first)
  • Tin foil
  • Baking sheet
  • Clothespins (optional, to hang and set)
  • Pinking shears (optional, to keep from fraying)

Method . . .
  1. Preheat your oven to 170 degrees Fahrenheit. 
  2. Sprinkle grated wax over fabric. 
  3. Bake for around 10 minutes -- until everything has melted and absorbed into the fabric.
  4. Then remove immediately (I used my fingers, but a clothespin works well too) so it doesn’t stick to the pan.
  5. I did find that this project is forgiving. I didn’t add enough beeswax to my first one, so I added a bit more and just left in the oven until everything melted.
  6. Let cool before using.


This food wrap is easy to fold and secure. It forms with the warmth from your hands and even sticks a bit like cling wrap. Honestly, I’m super impressed and can’t wait to make more to lee in my stash. Beeswax is amazing stuff, isn’t it?

I’ll be sure to report back on how this ends up working in the long run. The author of the original tutorial said her batch was going strong several weeks after she made them. Just rinse with cool water -- not hot -- to clean. Use them for sandwiches, cheeses, leftover bowls, and all other stuff you need to cover.

And don’t miss . . .


Related Posts


Cleaning With Baking Soda Basics
Cleaning With Vinegar Basics
Homesteading Stuff You Can Buy at the $1 Store
DIY Natural Lotion Cubes
10 Smart Ways to Use Epsom Salts
Our Composting Arrangement
Powerful DIY Laundry Detergent
5 Green Cleaners That Work
5-Minute Homemade Deodorant
8 Ways We've Eliminated Plastics
Cleaning Produce The Natural Way
Chemical-Free Clean With Castile Soap

* Here’s the image source for the 1800s garden above.

Like what you just read? You can subscribe to the feed of these posts or follow us on Twitter or Facebook to be the first to know what the (never home)makers are up to. And we’ll love you forever!

Read more...

Updated House Tour

>> Friday, June 5, 2015

It’s been a while since I’ve collected photos of our house for a house tour. So far, I only have some photos of the lower level and yard covered. Still, it’s really fun to compare these shots with where we started last year around this time. And then with our old house tour.

Hope you enjoy these photos. These aren’t “DONE” rooms. Everything is always in progress, it seems. With budget, likes/dislikes, and moving stuff around when it makes the most sense. Is your house like this too? Regardless, I can’t believe how much we’ve done in such a short while. It already feels like home to us.

I’ll try to get up some second level photos soon-ish. We’re finishing paining the bathroom right now and doing a few things in the office, so I’d rather finish those first. (OK. You caught me. It’s also a complete disaster zone up there as I organize stuff and switch everything over to summer.)

LIVING ROOM


DINING ROOM


BATHROOM


KITCHEN


YARD


Like what you just read? You can subscribe to the feed of these posts or follow us on Twitter or Facebook to be the first to know what the (never home)makers are up to. And we’ll love you forever!

Read more...

Moen’s Fabulously Functional Hensley Faucet

>> Wednesday, May 6, 2015


One of the first improvements we made in the kitchen in our previous home was switching out the faucet. So, when we moved into our new place last year, I was definitely frustrated with the trade down to a standard faucet. I don’t know about you, but since I cook and bake so often -- my kitchen is regularly a mess. The biggest culprit? Dishes upon dishes that need to be washed after each mix, whisk, and meal.

When BlogHer offered me the chance to try one of Moen’s new faucets, I eagerly jumped at the opportunity. We’ve been slowly updating our kitchen and hadn’t yet made it to the faucet, but we had already considered a Moen because it happens to be the #1 faucet brand in North America. I recently shared with you guys the progress we’ve made, so here’s a photo of the kitchen in its current glory!


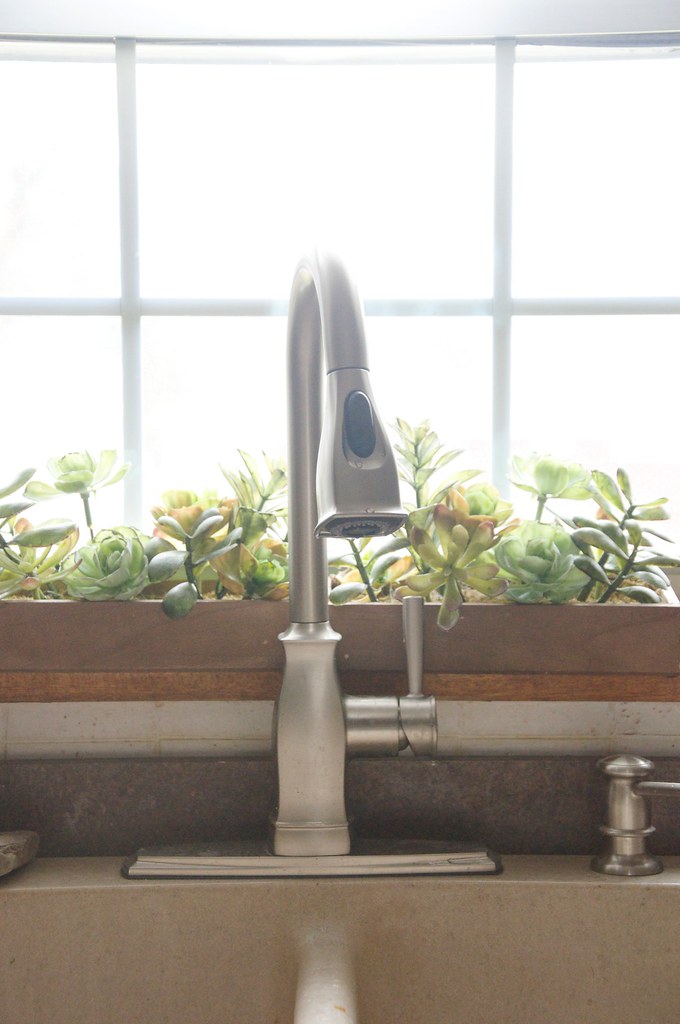
I chose the Hensley faucet for our space. There are tons of awesome designs and options to choose from out of Moen’s fleet. What I like about the Hensley is its classic lines and elegant structure. The brushed nickel goes well with our new refrigerator . . . and -- honestly -- it’s just a lot of fun to use.
  • The sleek design is as functional as it is pretty. I love the high arching neck that allows me to wash a variety of pots and pans without splashing water everywhere. 
  • The hose smoothly retracts back into its original position on its own. Having the spray mechanism right there is so much more convenient than reading for a separate handheld sprayer.
  • While we’re talking about spraying, I love the options of regular flow, spray, and even stop. Whatever I need is just the touch of one button.
  • And the finish has Microban® infused in it, which means it has some serious 24/7 antimicrobial protection. Essential in the sink area, which happens to also be the dirtiest place in the home. 
Besides all the mechanics, this faucet has totally transformed the sink area from a design standpoint. It’s like jewelry or something. Bling. Our old faucet surely had some style, but its profile was quite miniscule. The worst part? The hose was always getting kinked when I’d go to spray my pots and pans.

Here’s the before and after:


In the end, I couldn’t be happier with our newest addition. It’s beautiful, functional, and fabulous. I’d love to know what faucets you have in your kitchens (or on your wish lists!). Do you, like me, think the pull-down sprayer is a must?

Check out the faucets on the Moen website and leave a comment below to enter for a chance to win a $100 Visa gift card!

Entry Instructions:

No duplicate comments.

You may receive (2) total entries by selecting from the following entry methods:
  1. Leave a comment in response to the sweepstakes prompt on this post
  2. Tweet (public message) about this promotion; including exactly the following unique term in your tweet message: “#SweepstakesEntry”; and leave the URL to that tweet in a comment on this post
  3. Blog about this promotion, including a disclosure that you are receiving a sweepstakes entry in exchange for writing the blog post, and leave the URL to that post in a comment on this post
  4. For those with no Twitter or blog, read the official rules to learn about an alternate form of entry.
This giveaway is open to US Residents age 18 or older (or nineteen (19) years of age or older in Alabama and Nebraska). Winners will be selected via random draw, and will be notified by e-mail. 

The notification email will come directly from BlogHer via the sweeps@blogher email address. You will have 2 business days to respond; otherwise a new winner will be selected.

The Official Rules are available here.

This sweepstakes runs from 5/4/15 – 5/31/15.

Be sure to visit the Moen brand page on BlogHer.com where you can read other bloggers’ posts!

Read more...

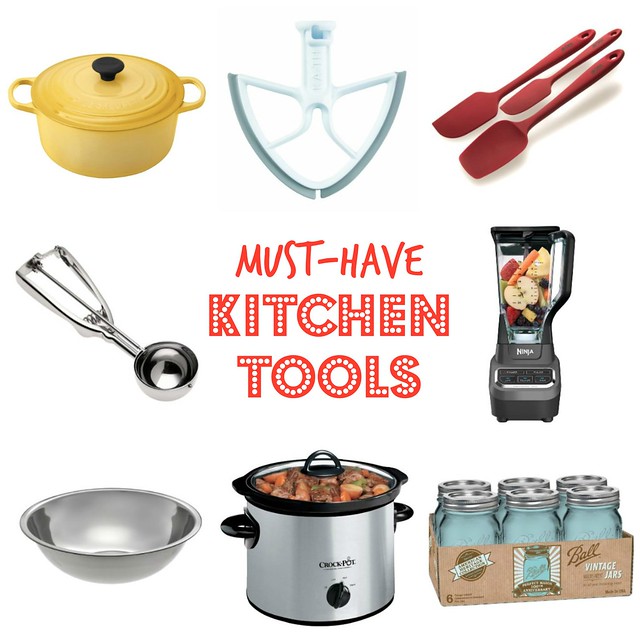
8 Must-Have Kitchen Tools

>> Wednesday, April 15, 2015

I’ve been getting some emails with questions about kitchen and cooking stuff lately, so I thought rather than replying individually, I’ll post the answers here. Today’s “question” is more a conglomeration of different ones about what kitchen tools I use, why, and which are the best buys. Here are my top picks for things I use most every day in my cooking and baking.

(Also check out my list of Useless Kitchen Gadgets!)


BeaterBlade


I bake something almost every day. So, I use my BeaterBlade (sold for 4.5/5 quart + 6 quart mixers) almost as often. I used my KitchenAid mixer’s blade so much the paint started coming off. And I’ve had the BeaterBlade for at least four years -- heavy use -- with no problems.

Ninja Blender


Every food blogger has a blender preference. Healthy living bloggers, in particular, can’t live without Vitamix or Blendtec blenders, and I so wish one of those was in the budget for us. The thing is, we’ve been using our Ninja Blender for the last five or six years . . . and it’s still going strong. I’m able to blend greens, even tough kale, into smoothies. Soups are quite easy to pulse together. I’ve even made juice with my blender, etc. All for hundreds less than the other machines.

Silicone Spatulas 


Whether it’s smoothing out brownie batter or mixing together stir-fries, I use each my silicone spatulas -- I have four of them -- pretty much every day. I got my set at Kohl’s, but wherever you find them make sure to get the ones that are all one piece. That way there are no grooves to catch gross leftovers, and they’ll clean in a breeze. The ones in the link are heat-rated to 450 degrees F -- so check to make sure any you consider can stand up to whatever you plan to create.

Dutch Oven


I waited the longest time to buy a large dutch oven because of the price. It seems like ever since I did, more and more have been popping up at stores like Home Goods, TJ Max, etc. -- at good price points. You can also find some online ranging from the luxury editions (Le Creuset 5-1/2 Quart at $299) to the budget-friendly (Lodge 6 Quart at $70). I make bakery style breads in my dutch oven, along with simmered soups and stews. They’re incredible versatile and should last a lifetime.

Slow Cooker


Of all our kitchen gadgets, the crock pot comes in the most handy year-round. The one we use -- an old Rival pot -- was given to me by my mother-in-law. Nowadays you can get a variety of slow cookers that can be programmed certain ways and others that have more than one pot for cooking or heating multiple meals. As I type this, I can smell the corn chowder I’ve tossed together for dinner simmering beautifully.

Dough Scoop


Somewhere along the way, I picked up a baking/ice cream scoop that I use to portion out my cookies. I also use the scoop to portion veggie burgers and other patty-like edibles. You’ll notice these guys come in different sizes, ranging from 1 tablespoon to 4 tablespoons (mine is the biggie!). Of course, you don’t need this tool, but it sure makes life easy with the sliding band that releases the cookie dough or ice cream or whatever else you’ve mixed together.

Ball Jars


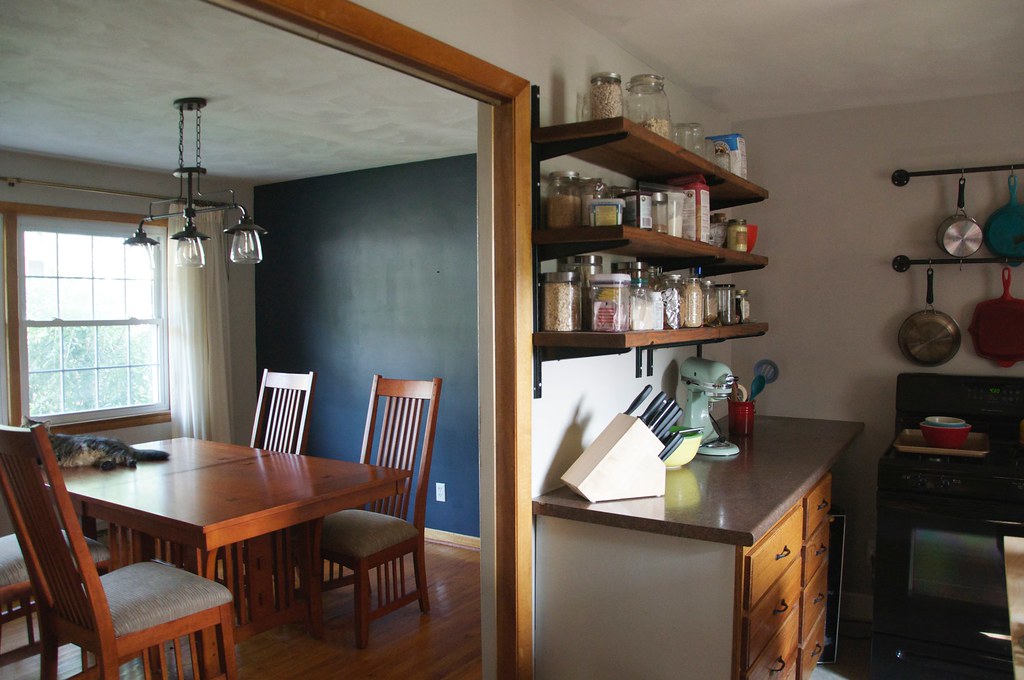
We use our Ball jars of all shapes, sizes, and varieties for a number of purposes in the kitchen. We store a lot of our bulk foods on exposed shelving in extra tall wide mouth jars for easy grabbing. I freeze or put leftovers from different meals into other jars. We even use the jars to drink our water, beer, and tea. They all get washed together and then we have a good stock so we can shift their purpose according to what we need at the moment.

Large Bowl


A nice large, shallow mixing bowl works for so many things. You can hand mix breads and other baked goods. I like to chop up all my veggies and then hand mix my veggie burgers in the bowl. Big salads can be tossed together in a huge bowl. Sometimes we even just use ours to serve.


What did I miss? 

Add your must-haves in the comments!

Like what you just read? You can subscribe to the feed of these posts or follow us on Twitter or Facebook to be the first to know what the (never home)makers are up to. And we’ll love you forever!

Read more...

Kitchen Updates

>> Thursday, April 9, 2015

It’s been a while since I’ve written about our kitchen renovation. We made a few more updates recently that I’m excited to share, and I think the space is coming along nicely. I actually really liked the wooden cabinets when we moved in, but after a while we noticed that the kitchen doesn’t get much light for most of the day. As a result, we were always cooking in the dark unless we flipped on the artificial light.

Here’s the before:


We installed the wooden shelving from our old kitchen (remember the $400 update we did before selling last year? Crazy!) in the new space a few days after we moved into the house. I love having all my bulk ingredient at an arm’s reach, and I think it looks pretty great.  Part of me wants to remove half the wall these shelves are on to open up the kitchen to the dining room, but then I’d lose all the storage.

We also did the floor with vinyl tile + grout.

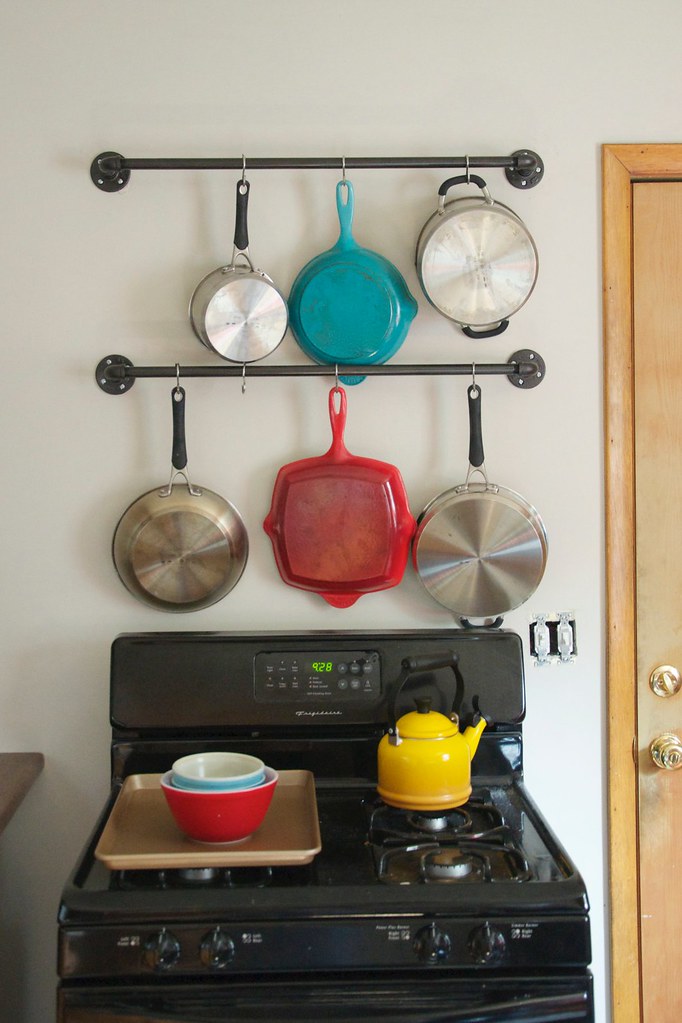
Oh, and we also made a DIY pot rack using plumbing pipes.


After spray-painting the cabinets white . . .

And hand-painting the backsplash . . .

Here’s where we are today:


Two big improvements:

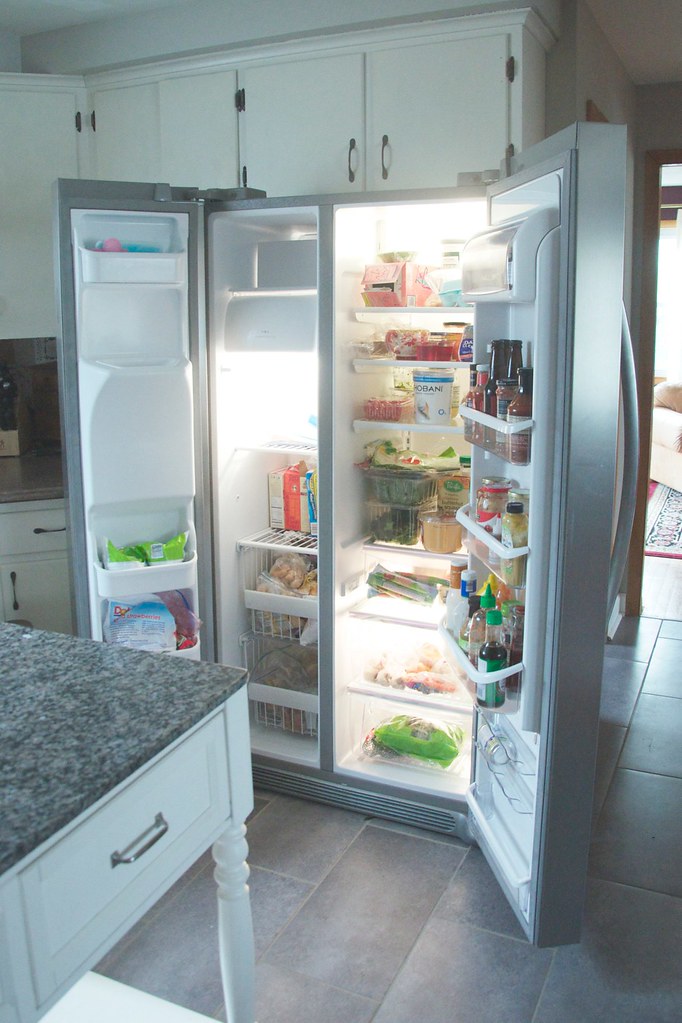
A new faucet (which I’ll write more about soon) and our new counter-depth, side-by-side refrigerator (this one by Frigidaire Gallery). Our old fridge was an off-white color and the freezer handle snapped off long ago. We also have a water softener, so I hate the way our water tastes out of the faucet, we’re planning to hook up the water component soon -- its filter is awesome. I also really like this style of fridge better than our drawer freezer because I do a lot of freezer cooking. Now I can stack my meals and keep stuff better organized.

Here’s a closer look:


So, we’re at this point when the project is nearly “done” -- but our countertop color does annoy me because the rest of the space is relatively cool and doesn’t jibe with the warm brown. I thought the backsplash might tie it all together, but it still looks a bit jumbled. At the same time, they’re totally functional and in excellent condition, so I don’t see changing them anytime in the near future.

I’m hoping to do another couple updates with budget breakdown and then stick a fork in this project. It’s awesome to have the room where we spend the most time so personalized. Especially since we’re planning to be in this house for a long time.

Happy Thursday!

Like what you just read? You can subscribe to the feed of these posts or follow us on Twitter or Facebook to be the first to know what the (never home)makers are up to. And we’ll love you forever!

Read more...
Related Posts Plugin for WordPress, Blogger...

About This Blog

MyFreeCopyright.com Registered & Protected

© 2009-2014 by the (never home)makers
All content on this blog is copyrighted.
Want to publish our pics, tips, or tricks?
Contact us! [neverhomemaker@gmail.com]

We value transparency. Links on this page may contain affiliates. In addition, please see our disclosure policy regarding sponsored posts.

  © Blogger template Simple n' Sweet by Ourblogtemplates.com 2009

Back to TOP  

Blogging tips