Showing posts with label how to. Show all posts

Our Stock Tank Pool: Part I

>> Monday, June 4, 2018

You may remember the pool we set up last year in the backyard. It was absolutely perfect. Around 7.5 feet by 9.5 feet and just around 2 feet deep. The kids had so much fun splashing around all summer in those 870 gallons of H2O. The setup worked well, and it was relatively inexpensive. If you're interested, I would highly recommend these Bestway pools as a first step into learning how to care for a pool.

But we had a mouse issue in the fall and they got to the pool. So, we needed a solution for this year . . . and hopefully for many years to come. I've seen so many articles about stock tank pools crop up in recent years. I was always too intimidated by the process of getting a huge galvanized tub to my house, so it was on the back burner.

This year, we decided to pull the trigger.


For those of you who have been asking me questions (and there are many of you!): We picked up our 8 foot stock tank at Tractor Supply. It's 24 inches deep. Our store does not do delivery, so we asked a friend to help us get it home. It wasn't too bad a process -- aside from one roadside adjustment -- and ended up being much easier than we anticipated. When we got it home, we gave it a good scrub because the store had been displaying plants inside it.

From there, it was all about re-leveling the area we had dug out last year.


Surprisingly, it took a few hours to get the area absolutely perfect. Last year, we settled with level-ish. But one benefit of getting this type of pool is that you can leave it out all year. We're hoping to leave it in place, so taking our time was in our best interest.

When that was done, we put it where we want it to go and got to work on the landscaping. Mostly rocks that we bought at the store and pulled up from the creek area behind our house.


I love how it looks! So much prettier than the bold blue with white supports from last year.


This stock tank holds around 700 gallons of water, so it is smaller than last year's. I had to buy a new filter pump that we are going to drill/hook up tonight. That will be part II of my posting. But if you're interested in doing a similar project at your home, I highly suggest checking out the number of really helpful tutorials I found online.

Here are some of my favorites:

DIY Stock Tank Pool: Everything You Need to Know
How to Make a Stock Tank Pool
Stock Tank Swimming Pool Ideas

Just a budget breakdown. We ended up getting the tank for $349 plus tax at the store. They're usually $399, but we got it on a Memorial Day sale. The new filter we bought was $35 on Amazon. The rock was around $30 because we already had some leftover from last year. It's not the least expensive upgrade we could have done, but I am hoping it will pay off in the long run.

Why didn't we go with a larger option? Well, partially because we didn't want to eat up our yard with a pool the whole year. Or have a big hole when it's cold outside. I like that it's shallow enough that Eloise's head is well above the water. But yet it's big enough to still get in as an adult and cool down. It looks nice, though I understand the style isn't for everyone. And we are hoping that the galvanized steel is durable and lasts for many years.


If you have further questions, I'd be happy to answer them either in the comments or on Instagram!

I'm going to do another post once we get it up and running to talk about any issues we run into or any tips I have. But I won't be writing out a full tutorial. Again, I highly recommend the links I provided above. We're learning as we go.

Happy Monday!

Read more...

Expanding Our Homemade Pantry

>> Tuesday, August 22, 2017

If you follow me on Instagram, you’ve seen my many food adventures this month. Stephen and I are trying to continue out frugal accomplishments by making more and more of our foods from scratch. Many of you have been interested in the recipes and methods we follow, so I figured a post was in order.

Today I’ll cover the more frequent items we’ve been cooking up. But I’m sure I’ll add to this list in the future. And be sure to check the links at the end for a more comprehensive list of the things we regularly make to stock our homemade pantry.

Yogurt


Ah, yes. Yogurt. I waited years to try making this on my own because the idea of it was daunting to me. Thing is, you can easily make yogurt in your slow cooker. A gallon of milk costs me around $1.65 to $2 and yields 8-9 cups of the stuff.

I currently follow this recipe in my crock pot. It is for Greek-style yogurt . . . but that really just hinges on how much you strain it. I tend to do a slightly thicker than regular and thinner than Greek consistency. That’s the beauty with homemade yogurt -- it’s customizable.

Now, I am investigating a few more that might create less waste and yield even more result. I hear if you use powdered milk, it thickens the batch so little straining is necessary. I began my batch by using a cup of the Siggi’s plain yogurt as my starter. The first batch was very similar to the Siggi’s and later batches (using homemade starter) have been more sour. But you can sweeten them up with honey, maple syrup, or -- my favorite -- peanut butter.

Also: I always use non-fat milk.

// Mozzarella Cheese


Mozzarella was also on my bucket list for many years, but actually buying vegetable rennet made the whole thing feel like a production. Oh, and I suppose I should also mention that I only very recently bought a rapid-read food thermometer, which has been a game changer for making all things dairy. Oh, and cheesecloth. Lots of cheesecloth, though the less-waste in me has started experimenting with nut milk bags.

I follow this recipe for mozzarella (the image is also from this site -- I somehow deleted mine). You simply heat the milk, add in the rennet and citric acid, strain curds, knead, etc. Then you get this delightful ball in less than half an hour. I’ve made this a few times now. With practice it becomes much more automatic. There’s nothing cooler than looking at a ball of fresh cheese you’ve made from scratch.

Also: I always use whole milk.

// Paneer 


Speaking of cheese, I am addicted to paneer. One way we’ve gained some independence from takeout meals is by making our own Indian food. I buy the simmer sauce at Aldi and make the cheese a day or hour ahead of time. It’s even easier than making mozzarella. All you need to curdle the milk is something like vinegar or lemon juice.

From there, it’s all about pressing. Here’s the recipe I follow for perfect paneer. I’ll be making it tonight -- with whole milk.

// Ghee


After making paneer, ghee was a natural next step, right? It’s wonderful on homemade naan (getting there in a minute -- just you wait!). It’s also great for cooking stir-fries, eggs, etc. I’ve only made one batch so far, but it’s was super easy.

Here’s the recipe I followed. It keeps on the counter for a few weeks to a month. I used unsalted butter.

// Naan


You guys know I’ve been making my own naan-like creations for years. It all started in college when I lived with a graduate student named Aggrey. He used to roll out these unleavened dough balls and cook them on the stove-top like he did back home growing up in Africa. I slowly developed my own version of a flattened, more savory pancake.

My favorite recipes include the following. We make different kinds according to our moods.

// Sandwich Bread


I searched far and wide for a suitable sandwich bread recipe. Something reminiscent of store-bought, but oh-so much better. And about a month ago . . . I found it. The perfect white bread recipe. It turns out flawlessly every single freaking time. My only sub is that I use canola oil in place of butter inside the bread. I may start brushing the top with ghee.

I’d like to slowly modify this to include more whole grains, but bread can be tricky. I’ll report back soon.

// Jarred veggies in brine


We’ve started jarring + pickling lots of veggies in the fridge -- from zoodles to jalapeƱos and more -- and I basically just chop them up and pour in this brine. The instructions say to wait until the brine is cool to add it to the veggies, but I actually like it hot with things like jalapeƱos. It makes them so soft and delicious.

// Seitan


It had been years . . . but we dusted off the old seitan recipe.

Now we make this stuff weekly. So much less expensive than buying Field Roast. I’ll have to do an updated recipe, too. We’ve been seasoning it in all different ways. We’re still making seitan dogs, too. And the other night, Stephen made a pulled-pork-esque thing with BBQ sauce! Did you know that vital wheat gluten is full of protein? It’s true.

// More pantry goodies


Homemade Almond Milk
Our Go-To Pizza Dough
Homemade Ciabatta Bread
Homemade Muesli
Adventures in Cereal-Making
Homemade Bagels
White + Whole Wheat No Knead Loaf
Three Seed Crackers
Homemade Flax Crackers
Homemade Pancake/Waffle Mix
Awesome Couscous Crackers
My Favorite Hummus
Stephen’s Homemade Pickles
Homemade Applesauce
Red Curry Kimchi

Read more...

Green in 15 // Living a More Sustainable Life

>> Friday, February 24, 2017

When I was deep into my college years, I was taking mostly writing + anthropology classes. I also flirted with a minor in environmental studies. Over and over again, we'd calculate our ecological footprint and then spend a lot of time talking about ways to be more sustainable. It was a practice I completed often. And -- at the time -- my footprint was impressively small.

I've toured pioneering co-housing communities, interviewed people who have built their own straw-bale houses, lived in a town where composting has been mainstream even at restaurants, farmers markets, and beyond for years longer than I've been alive. Where local food and farm-to-table seems like the natural choice.

It's funny how moving an hour or so away can make sure a difference . . . but when you don't have a community set up for cultivating this type of lifestyle, it's much more difficult to do it on your own.


So, I thought I'd revisit this whole activity of calculating my carbon footprint. (Here's how you can, too. It takes less than 15 minutes!) The quiz is sort of difficult and required a bit of estimation on my part. Anyway, our family's result was 35 tons of CO2/year. That's actually pretty good. Apparently 44 percent better than average. Before I pat myself on the back, I think a lot of that has to do with not doing any air travel or travel in general, basically ever.

If you're not thrilled with your results or -- like me -- you just want to do better, there are tons of little tweaks you can make in your routine to get there. These are the absolute basics. Consider it a refresher course. In other words, we ALL know this stuff and just need reminding.

If you eat meat, you can try eating less of it. 


Obviously, this is a vegetarian site, so you know I'm all about loving plant foods and all. I think our family could shift to a more plant-based diet because we do get dairy heavy from time to time. Even people who are hardcore carnivores can make a big impact by going meat-free at least some of the time. If you do choose to eat meat and animal products, try choosing local sources as often as possible.


Do the waste-free thing. 


One of my professors used to carry around a fork and spoon inside of a clean napkin everywhere he went. That way, he wouldn't need to use plastic utensils AND he'd have some easy "packaging" if he wanted to take something home. And the man even used that large napkin to bring salad greens home -- sans dressing, of course.

I've written more about our quest to create less waste, so if you're interested you should give it a read.

Some of my favorite waste-free tools include:


Use your car less often. 


This seems like an obvious, but if you live in an area like we do -- public transportation (or alternative modes, like biking or walking) isn't so friendly. Small communities like Ithaca and large cities have it figured out. But where we live, the routes are spotty (and dangerous) between areas and at times quite inconvenient. Still, this is an area where we could surely improve. I'm trying to group my shopping trips with other errands so we don't need to head out on multiple occasions, for example.

I also try to walk as much as possible to run errands despite not living in a very pedestrian friendly area overall. Our neighborhood, though, does have some spots that are handy and close-by. For example, we've changed our pharmacy to the one that's closest to our home, we use the vet that's closest, we use the doctor (for Stephen and myself) that's closest, we chose the preschool that was closest so I could walk, etc., we often go to the diner that's a half mile away simply because we can walk there.


Turn out the lights.


One thing I always find funny (and I mention this because they're coming today), is that my in-laws are always turning all the lights on in our home. I never notice it being dark or too dim when they aren't here. We just . . . don't turn on many lights. Maybe in the kitchen while we're cooking. Otherwise, I try to rely on the daylight and as few lamps as possible. We've also moved to LED bulbs in many rooms.

Now that the daylight hours are longer, this one is an easy change! At very least, turn out the lights when you leave the room.

Buy less, want less, etc.


This whole minimalism trend (because you have to admit, it's become a trend) does have something worthwhile inside of it. And I know not everyone does minimalism because it's the "cool" thing -- but all the videos on YouTube may make you scratch your head. Anyway, buying less is great for your footprint. Or if you do buy, maybe consider buying more items second-hand. (Poshmark, ThredUp, and other online shops make this easier, too. But I still favor my local stores because they are the least expensive.)

Here's an outfit I wore this week that was entirely second-hand, save the VT-made bag I bought on Etsy from my talented internet-friend Tessa at Foliage.


Of course, always try your best to reuse and repurpose your stuff before buying, too. I'll be back in the future with some more specific ways you can move toward sustainability in your home. If you're new to the blog, check out my Green in 15 series, my homesteading posts, and some of the related links below. There's tons of good reads in the archives!

// RELATED


Green in 15: Revamping Your Cleaning
DIY Natural Lotion Cubes
Powerful DIY Laundry Detergent
Cleaning with Vinegar
5 Green Cleaners That Work
5-Minute Homemade Deodorant
8 Ways We've Eliminated Plastics
Cleaning Produce The Natural Way
Chemical-Free Clean With Castile Soap

Read more...

Budget Life // Monthly Grocery Shopping

>> Monday, February 6, 2017

I shared over the weekend that I did my very first monthly grocery shopping trip. Phew. It took me two hours total -- which included driving from place to place -- so, it was definitely time-consuming. In the end, I think I really like this approach. I am going to need to see how it pans out for our meals this month (and for time savings overall). But this is the fun in sharing along the way.

Today I wanted to just cover some of the planning I did. I think I'll also do a video about the foods and meals we're making, but today I have a pretty bad cold. Nobody wants to watch me talk, sneeze, and sniffle, I assure you.

Money matters:


For those of you who are really interested, I have budgeted $500 a month for food total. I'd like to cut this lower, maybe to $400, but I thought I'd first see how it goes. The $350 goes to the month shop. And the remaining $150 is split up into $35 per week (this is on average throughout the year) for things that spoil.

Step zero: Clean your pantry and refrigerator.


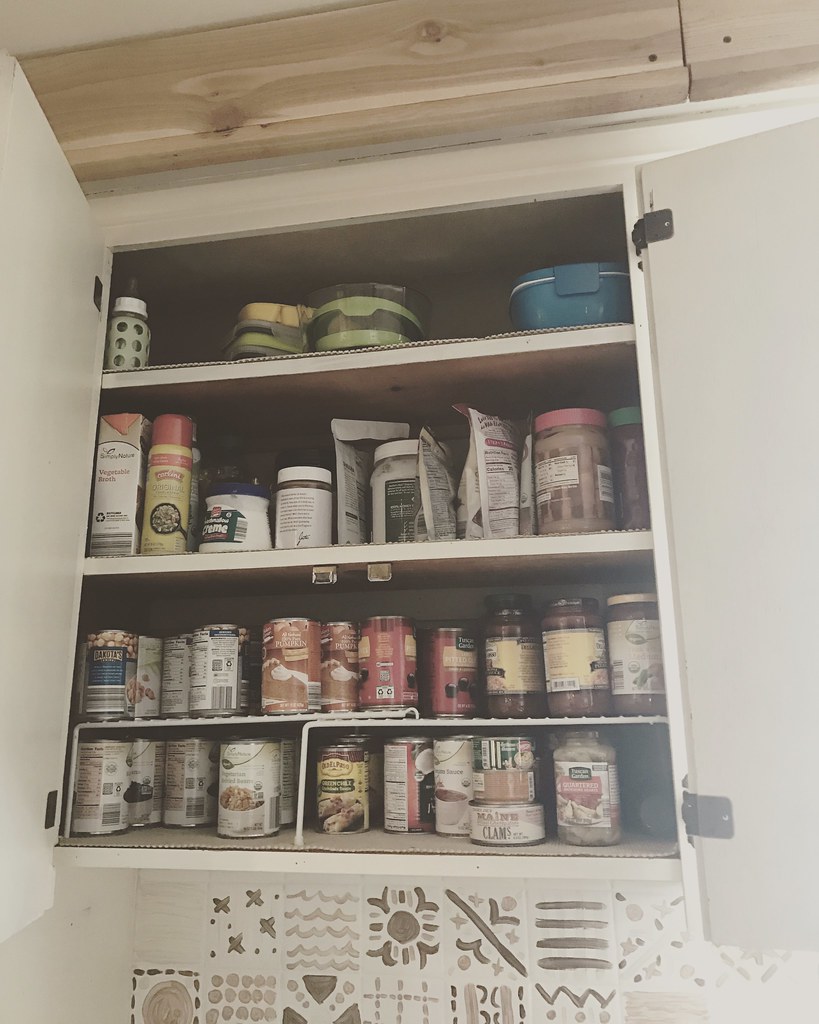
I took out all the spoiled and expired foods and tossed, recycled what needed to go. I also spent a great deal of time organizing my pantry to see what foods we DID already have to put toward meal planning this month. Taking stock like this will help you avoid over-buying and purchasing duplicates.

Here's my current food situation after the shop. I hope to do a quick post on how I organized my pantry by spending a mere $9 at the Dollar Store. (And, no. This isn't looking good for our less waste goal.)


Step one: Plan meals. Loosely.


And I really mean loosely. February has just 28 days in the month. So, I wrote out a menu that would give us breakfasts, lunches, and dinners for four straight weeks. I kept the recipes familiar for this first month. Things that we normally cook and enjoy, where I know the ingredients almost by heart. Some meals are on repeat during the week or month. Others are more free flowing.

I plan to share more about my meal-planning approach when I do my video!

Oh, and I uncovered this older post where I go through and share my favorite 18 vegetarian pantry essentials at Aldi. It's definitely worth reading if you're new to the store or just want to know some of the items I like to buy most every time I shop there.

Step two: Write down all the food you need. 


And it can be dizzying. I discovered that we may actually eat close to 96 eggs a month! That's insane to me (Stephen eats 12 per week, I do about 8 and Ada does about 4)! 60 slices of bread. 8 cups of mozzarella. I mean, it's really just tallying up everything that goes into your recipes and snack and making a gigantic list.

I then organized my list (after this one) by store and by section. It just helped me go through the aisles faster.

(BTW: I mean bucatini noodles down there!)


Step three: Price it out.


Now, here's where I failed this month -- but it wasn't totally my fault. I intend to shop at several different stores to get the best prices on my food. I do know that some of the stuff we like is only at Wegmans. And with some of the family pack foods, they have good prices on larger quantities of things like frozen fruit. Wegmans has a handy app where I had planned to price out my food ahead of time, but for whatever reason, it wasn't working the day I needed to use it.

Alright, but what do you do for stores that don't offer an app? Take scrupulous notes.

I jotted down some prices at Aldi during my shopping trip so I can consult them before next month's trip. It's going to be a lot of trial and error. But the important thing with pricing out stuff ahead of time is so it jibes with the cash system. I don't want to get to the register and suddenly realize I don't have enough money and -- gasp -- have to use my card.

Step four: Go to the store prepared.


One of my Instagram followers promptly pointed out that I didn't bring enough reusable grocery bags on my trip. My bad. Yes. In the very days after posting our desire to be a less wasteful family, I brought home a bunch of plastic grocery bags.

The thing is, I didn't plan ahead. I've never done monthly shopping, though, so I can't be too hard on myself. Now that I do think I enjoy this process, I hopped on to Amazon and picked up this set of mesh grocery bags and some more bulk produce bags to take on my trips. Stephen also accidentally ran over my favorite folding market basket in the garage. So I may need to get another one of those.

Lesson learned.


Step five: Dive in!


I just went for it. I was kind of nervous about how this whole shopping once a month would go. I don't feel like I did my planning perfectly. I worried maybe I wouldn't get enough food. Or maybe I'd buy too much. But I ultimately decided that this was my first time. I was bound to have some successes and some failures. If I didn't try, though, I'd be annoyed.

Also: If you can, try to do this shopping trip alone. I asked Stephen to watch the kids because I wanted to concentrate and get things right. I think if I was wearing Eloise or having to tend to Ada, I may have gotten off track. Our Wegmans has a great kids space with free babysitting I may use in the future if Eloise is napping and Ada wants to come along for some of the ride.


Final notes:


I spent a grand total of $298 of my $350 monthly food budget this weekend. And actually $20 of this was on food for our Weekend Fund, so I still have just about $70 left of the monthly budget along with all of the $150 for the weekly stuff I divide up. I hope to not spend all of this and maybe pitch more to paying off our debt.

I'll be back with more thoughts and a video about the shopping experience -- as well as my review of the new cash envelope system I purchased on Etsy.

Read more...

DIY Beeswax Ornaments

>> Monday, December 19, 2016

One of my favorite things about the Christmas tree is our wax ornaments we made a few years ago. I wrote about them soon after I made them, but I never quite explained the process. With still a good six days until Santa comes, you surely have enough time to try this out. They make wonderful gift wrapping toppers, too!

Here's some from our collection:


Beeswax Ornaments 


What you'll need . . .

  • Beeswax, of course*
  • Old pot and glass bowl (or double boiler)
  • Molds
  • Spray oil
  • Twine or yarn or ribbon
  • Something sharp to poke holes

* Alright, with the beeswax, you can definitely head to your local craft supply store and get it either by the block or in little pellets. Don't forget to take one of those 40% off coupons with you to save on it. The pellets are easier to work with, but we've used block wax with no issue either. 

If you think ahead next year, consider heading to a local apiary for wax or ordering some online. I've ordered beeswax on Amazon that I use for ornaments, but also for different DIY things, like natural lotion cubes, zero-plastic food wrap, and 5-minute homemade deodorant.


How to:

// 1: Lay out all your supplies. Wax sets rather quickly, so you'll want to have the molds ready when it's time to pour. Clear out some space in your fridge, too. I liked putting mine in there to cool.

// 2: Fill a pot halfway with some water and place the glass bowl inside the pot to create a double boiler of sorts. Toss in some shaved wax an melt it over medium heat. I never got too detailed with how much wax. I just did a bunch (a pound) and if I didn't need it all, it would cool a bit while I waited for everything to set. I could re-melt it or store again for later use.

// 3: For my ornaments, I used simple candy molds made from plastic. Though I don't think this is the best practice, it got the job done. Some people use Brown Bag Cookie Molds, and they are gorgeous, but expensive. I'd love to find some of these on thrift for the future. I think silicone molds would work out wonderfully (and be easy to take ornaments out of).

In the end, you just need anything to mold. I got creative and used a decorative dish. Whatever you use, you'll want to spritz just the slightest bit of oil on it. At least that is what I did. Not too much or it might affect your end result. But just enough to help the wax slide out/off when it is set.

// 4: So, once your wax is all melted, slowly pour it into the mold (that's on a level, flat surface). It should start cooling right away. Very carefully transfer your molds to the refrigerator and wait a good 10 minutes before taking the ornaments out.

Just FYI -- I've even experimented with adding glitter and other texture to my ornaments (see image below). I've used green rice to make a wreath, etc. It's fun. Play around. My favorite ornament is the one I put very large flakes of hexagonal gold glitter inside of.


// 5: Once they are out of the mold and completely set (you may need to shimmy a bit), poke a hole where you'd like to thread some twine, ribbon, or yarn. You can even use a paper clip in a pinch. Just make sure you're not too close to the edge or it might break off.

// 6: Storage. Once you're done using the ornaments for the year, I like to store them in plastic wrap. They can break, so use care that they don't have pressure placed on them. I read once if your ornaments get a bit cloudy looking, you can quickly blast them with a hair dryer to make them a bit shinier. I haven't tried that trick myself.

So, there you go! It's a bit late, I admit. But -- honestly? I think these ornaments would be a fun activity you could do in the week AFTER Christmas to save until next year. Or even to make for other holidays. I have to say, they're one of my favorite DIY projects to date.

Oh! And they also add this nice, natural scent to the room that goes well with your tree's aroma. You could even put a couple drops of essential oils in them for good measure.

The countdown begins! Have you finished your shopping? There's a couple more days. Don't forget to check out my 2016 gift lists!

Read more...

How to // Roast Frozen Veggies

>> Thursday, October 6, 2016

My sister-in-law is like the fittest, healthiest person I know. (She's also a Pilates instructor in LA -- so you know she's got some street cred!) We had a brief chat yesterday about health and stuff, and she really inspired me to get my act together.

I have this vision of myself that's sort of, well, incredibly outdated. I was in my twenties, running marathons, lifting weights, and eating clean basically all the time.


Fast forward a good six years later? I have two awesome girls, I still keep at the running, and my diet just never recovered. Overall, I do pretty well keeping active and incorporating good foods into my routine. But also overall, I have a lot I could improve upon that would make me feel a whole lot better.

I exercise like crazy because I love to move. I love running slow and long, fast and short, doing intervals, etc. I try to run 4-5 days a week. Usually 3-5 miles and then a long run. The one area I've neglected for so long is strength. I'm making up for it now with my kettlebell addiction. I have also started incorporating quick and intense workouts by Kayla Itsines into my routine. I try to do either these activities (or Barre3) 4 times a week.

Sometimes I get in a quality 30 minutes. Other times? The nap ends early and I get in a quick 10. But it's better than nothing and I think it's already helping my overall fitness. In other words: Exercise is covered.

The diet portion. Oh, man. Let's just say, I have gotten more than comfortable eating what I like, when I like, and as much as I like. Some of this is good. I don't like the idea of "bad" foods or having things off limits. And I need good sized portions to fuel workouts. That being said, I've needed to cool it with the carbs and sugar for a while. I need these things to support breastfeeding, but the lazy sleep-deprived mom in me just can't get my act together to cook and plan ahead so the healthier stuff can take over.

I mean, when I hear random people say they don't have time for exercise, I sort of definitely roll my eyes. We all have 10 minutes here and there throughout the day to do SOMEthing. Set the alarm earlier, carve out a quickie workout while watching TV, etc. Yet, here I am making a long list of excuses about not having time or motivation to eat well. Oh, the hypocrisy!

// ROAST THOSE FROZEN VEGGIES


I'm trying to do better. Right now, I'm loosely following the Tone It Up 31-day eating challenge. Mostly, I'm using their 5-a-day meal pattern and recipe suggestions to guide myself into better eating. One of the things I learned from these ladies is that you can make a "tray dinner" where you roast a bunch of veggies and a protein all at the same time for a quick and easy meal.

Guess what! I looked up on The Kitchn that you can even roast FROZEN veggies. This is a huge game-changer. It's completely transformed my lunchtime routine. (Make ahead the night before or make it in the moment -- whatever works for you.)


Here's how you do it:
  • Preheat your oven to 450 degrees F. 
  • Place a baking sheet inside that has a tablespoon or more oil on it to preheat.
  • Put on your frozen veggies when the oven is hot. Coat a bit in the oil.
  • Roast 30-45 minutes or so, until browned.
  • I like to add chickpeas or tofu to my mix and cook everything together.  
  • Oh, and I also don't stick to just traditional roasted veggies. I roast stir-fry mixes!
  • Then I like to drizzle on some Mirin, tamari, hot sauce, or whatever else makes sense.
Who's going to try this trick today!?

Also: Who has good protein powder recipes for energy balls, etc.? I tried one and, uh, it tastes like cardboard.

Read more...

Henna Hair Color // Before + After (Video)

>> Tuesday, September 13, 2016

I'm thinking of doing henna on my hair again -- and then I looked for my post on how to do it. It was on my old family blog. So! I'm posting it here again. Also because it was one of the most requested posts on that site, so I don't want to cut off access. Enjoy!

I've been coloring my hair since I was 12 years old. That's 18 21 years! The last time I used my favorite box dye, my scalp felt disgusting and the color washed out super fast. Frustrated, I searched around and decided to give henna a try. I love the idea of a natural, chemical-free "formula" -- all with the added benefit of stronger hair and longer lasting color.

So, I ordered some Lush Caca Rouge red henna color, and I waited through two snowstorms + various shipping delays for it to arrive.


And here's my coloring experience:


// SCENES


Cutting + mixing together the henna wasn't nearly as difficult as I had assumed. It probably took 10 minutes to achieve the "brownie batter" consistency described in the instructions. Slathering it on wasn't terribly different from using my regular hair color, except as the henna dried, it did tend to crumble a bit. I covered everything with a nice layer of plastic wrap and let sit for 2-1/2 hours.

Washing it out had sort of scared me, as other reviewers said it either took out their hair or stained everything, but I didn't have either issue. Overall, I'd say my coloring experience was really positive -- I just didn't like having to wait that long for the color to take hold. I think it's worth it, though, because I'd rather wait than use dangerous chemical developers.

// RESULT


The red color is subtle, yet definitely vibrant, shiny, and noticeable. I'm really happy with how it looks. Not shocking, but certainly a change. My hair feels well conditioned versus dry or broken or just weird. My scalp isn't tingly or injured like it becomes when I use box dye.

In short: I love it!

// WHERE TO GET

I definitely think I'll be sticking to henna from now on, despite the time commitment. I used to think you could only dye your hair red with henna, but LUSH makes several different colors. I know there are cheaper henna dyes out there, but LUSH gets their red henna from a source that has less orange and more true red tones. Very important!

Here's the whole line:
Note: These bars went up in price considerably on Amazon since I first shared this post. Go check them out on the links, but I suggest buying at Lush stores directly.
// QUESTIONS?

If you guys have any questions, I'd be happy to answer them. Obviously, I'm not an expert, though I think after going through the process once, it's pretty easy to catch on. My color is still deepening and becoming richer even hours after, so I'll be interested to see in a week what it looks like!

Mostly, if you regularly color your hair -- either at the salon or at home -- I think it's worth giving more natural colors/methods a try. I'm always trying to make an effort to purge out those nasty chemicals from my life with what I eat, the products I use to clean my house and body, etc. So, I'm surprised it took me so long to try this whole thing out!

Do you dye your hair? How long have you been doing it?

Like what you just read? Browse more of our posts + recipes on Pinterest. Chat with us on Twitter or Facebook. And you can always email us with your questions and comments.

Read more...

Why Organizing Doesn't Work (For Us)

>> Friday, April 29, 2016

Here's a long-overdue spring purge post about why simple organizing just doesn't work to spiff up our spaces. I mean, we're still learning as we go along. I can't believe how many times we've set out to have "this clean" be the "final clean" -- but something was actually different about this time around. Versus organizing the crap we had around the house, we actually got rid of most everything we deemed nonessential.

Getting rid of a large portion of your belongings can be overwhelming. There's this tendency, at least for me, to feel like I'm foolish getting rid of something I might need in the future. I would stow things away for someday, thinking of all the many scenarios where I'd need five different winter coats or all those old issues of Runner's World or six thousand serving spoons. I'd feel guilty getting rid of anything we were given as gifts even if they were broken or just didn't fit out lifestyle.

Here are the three main reasons organizing doesn't work (for us). File this post under opinions. Food for thought. It's not how YOU should approach life or your home. It's just how we've started seeing things, and it's been quite life-changing.


You still have all that stuff. 


Even if you go through, categorize, and put everything away in clearly marked boxes -- you still have things literally hanging over your head in the attic. Or it's in countless bins in the garage or basement. We had over 20 bins of things . . . and when we really took the time to go through the items one by one, we realized that likely most of those things would never make it back into the house.

It took several moves and tries, but finally letting go enabled us to see how foolish we were for schlepping that stuff around. How much energy we spent moving those bins from our old house to the new house. Or moving them from the attic to the basement, etc. How much mental energy we spent on, well, things that we didn't really need anyway.

In my humble opinion, even if your stuff is out and away, it's still stuff. Heck -- we considered getting a storage unit at one time. Why bother?! This is stuff that you might not need for years . . . or, truly, EVER AGAIN.

So, why bother giving it any more of your energy, time, or money?

You're wasting money.


At least we did. I can't even begin to tell you the dollars we have spent on cube organizers, shelving, and other tools to wrangle our crap into better order. It's shameful, really. In the end, it always gets messed up again. We still accumulate too much. It was, for us, a losing battle. The more stuff we got, the more things we needed to store it in. The more places we needed for storage, the smaller we felt our house was, etc.

I feel like so many people think they need these gigantic houses because they need places to hold all their stuff. When I watch HGTV, closet space is like one of the top concerns. The host always jokes that the woman needs that gigantic walk-in closet. Our old house was 1,200 square feet. To be honest, we mostly lived in 1,000 square feet of it because one room was usually storage. Now? We have around 1,900 (1,600 above ground). I love our new house and neighborhood, but I can confidently tell you that living with two kids back at the old place would be totally fine.

Plus, you don't need big closets if your wardrobe is pared down to 50 or fewer items. You can get dressed much more quickly, too. Our old house was really lacking for closets. Somehow when we moved, we filled all these large closets that we didn't used to need. Weird, right?

I also discovered that we were wasting our money because with so much stuff, we always felt like we needed more -- well -- stuff. We were in this really bad cycle of consumption. Perhaps out of all this cleaning up, the biggest lesson we learned is that we needed to stop shopping for mindless entertainment. We needed to examine our priorities. And we needed to stop bringing so much crap home with us. It was draining our wallets and moving us farther from our core values.

You're wasting time.


When Stephen and I sat down together and examined our goals in life, the one that stuck out the most was that we wanted to have more time with one another. You know, time that isn't spent cleaning up toys or wading through excess. Or feeling stressed about money, etc. We just want to be with our little family and live a simple life, whatever that means at this stage.

You'd think organization would make cleanup easier, right? We have two 9-cube toy organizers in our basement, for example. And this is one of the few remaining problem areas of the house. You'd think organizing toys into separate boxes would make spaces clean. Nope. Instead, we filled the boxes. All of the boxes. Family bought gifts that filled all the boxes. All the boxes were overflowing. And with a 4-year-old, unless we spend time each day or week going through them, everything is out of place. A toy-plosion, if you will.

Not only we were wasting time trying to put toys away. Ada, too, was wasting time being overwhelmed by options. When I was younger, I would spend hours just . . . coloring. Or playing with one doll. Somehow, along the way -- toy options have gotten out of control. Kids seem to need everything and . . . they get it from well-meaning parents, relatives, and friends. But it's part of what's fueling the whole over-stimulation thing and, again, that over-consumption.

There's just too much!

More thoughts:


I'm sure you can see how this applies to most every area in your home. If you step into a Bed, Bed, and Beyond -- there are entire walls dedicated to useless kitchen gadgets. When you buy electronics, their lives seem to be ever-shortened, creating a whole junk drawer full of outdated cameras, phones, etc. Life didn't used to be this way.

So, I guess you could say we're rebelling. It's hard. The temptation is strong to go into a Target and walk out with a cart FULL of amazing things. Now that we're gotten rid of a good deal of the bins, the maintenance is our main effort. All it takes is saying NO. Walking away. Waiting to make purchases. Unlinking PayPal from online shopping accounts, etc.

In my next post, I'll do an updated house tour and highlight some problem areas we were able to kick into gear by purging. And as I wrote that last part, I think the how NOT to buy is another good area to write something about. I'm still learning the best methods. 

Is there anything more you'd like to hear about our big spring cleanup? Let me know in the comments!

* Image source

Read more...

5-Minute DIY Glitter Slime

>> Wednesday, April 27, 2016

I cannot believe how much Ada enjoyed this slime making project, you guys. I wasn't even planning to share it on the blog -- but she has been captivated AND it was so incredibly easy to make. Of course, I need to first mention that -- no -- this recipe isn't my own. There are so many slimes and doh recipes out there on Pinterest, right? Why reinvent the wheel?

We followed these instructions on Gillian Bower's YouTube channel and got amazing results. Others we had tried in the past were too hard or sticky. Or they used regular glue with the addition of glitter and just simply didn't turn out as well. The key is using glitter glue from the start. It comes in so many different colors. The rest is all about not adding too much borax.


DIY SLIME


What you need:

  • 1/2 cup glitter glue
  • 1/2 cup water
  • 1 (scant) teaspoon borax
  • 1 cup water
  • Whisk, spoon, bowl, etc.

Method . . .

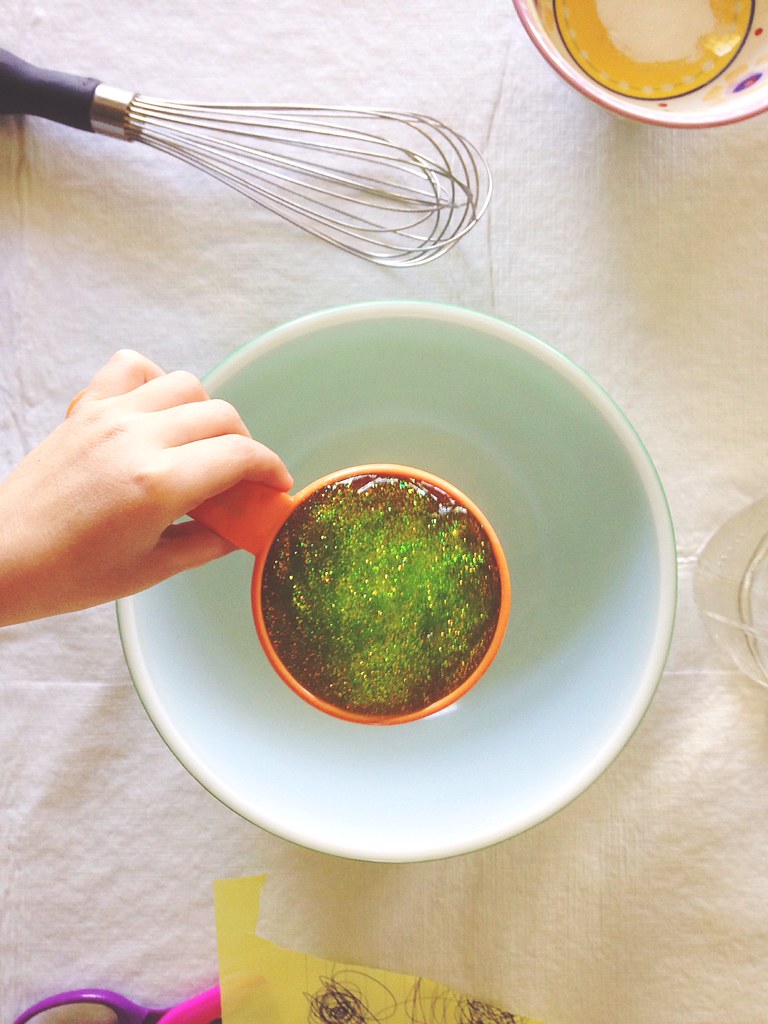
Pour 1/2 cup glitter glue and 1/2 cup water into a bowl and whisk until fully incorporated.


Then mix the borax and cup of water together. Very, very slowly stir some of this into the glue mixture. Maybe a tablespoon at a time. You will have most of the water + borax left, but you can use it to make another batch it you want.

(And -- according to Ada -- we are making more today...)


When the spoon stops working, just pick it up with your hands and knead until it stops sticking. It takes only a few minutes. You can add more borax + water if it is too sticky, but try to find the perfect balance or it'll get too hard.

It's a delicate process.


Once it feels like the slime you know and love, hand it over to your kid for seriously HOURS of enjoyment. We store ours in a zip top bag at the moment. But anything air-tight should do just fine.


That was easy, right?!


What's your favorite DIY slime, doh, or putty recipe?

Like what you just read? You can subscribe to the feed of these posts or follow us on Twitter or Facebook to be the first to know what the (never home)makers are up to. And we’ll love you forever!

Read more...

Our House Cleaning Routine

>> Friday, April 8, 2016

Skipping ahead of myself again to share something I've been meaning to write up for quite some time. Our cleaning routine! And the reason I've wanted to write about it but haven't is because we weren't in a good groove . . . and I thought posting would help push us in the right direction. Well, now that we've cleaned and cleared out in our minimalist efforts, everything is falling much better into place.

Here's how we approach cleaning our spaces, how often we clean what, and what things we tend to leave for longer periods of time. Note: I'm not slating this as some "best practices" kind of post. Just merely sharing what we do. I'd love to hear how you approach cleaning in your everyday life!


Everyday


#1: The kitchen tends to be the busiest spot in our home. I typically cook most of our meals and snacks from scratch to help save money in the budget for other areas. As a result, I use my food processor, blender, stand mixer, slow cooker, and multiple pots and pans almost daily. Holy dishes! Cleaning the kitchen consists of getting the dishes through the washer and putting them away. Cleaning any kitchen tools we've used. Wiping up crumbs and grime from counter tops. Sweeping any big messes off the floor. This isn't a deep clean, it's simply to keep things running smoothly.

#2: Tidying up clutter. I run through the main areas of the house regularly throughout the day and attempt to keep whatever near its "right place." Ada's toys are the things that migrate around mostly. We have a few baskets in the living room to put blocks and a few other quiet toys in. Stuffed animals are her favorite, so I find them everywhere. It's not a big deal if they're around, but there's something so soothing about walking around the house at night and it's all clear for the next day.

Also: We've been getting Ada in on the task because we've put a metal bucket at the bottom of the stairs. In the evenings, we ask her to get anything that belongs in her room and put it in the bucket so we can put it back before bedtime.

#3: Paperwork. This is something new we've attempting to tackle every single day. We noticed that so much of the crap we've been stashing for far too long was junk mail and other documents that could be cleared out almost immediately. I don't know what our hangup was. Now I try to recycle junk mail and take care of other random papers coming into the house the day we receive them. It's a work in progress.


Every Other Day


#1: We vacuum the floor on the main level of the house just about every other day. A lot of this ends up being mess from eating in the dining room, cooking in the kitchen, or general crumbs and dirt from the outdoors.

#2: Laundry. I'd like to get on a better, less frequent schedule with washing laundry. Part of this battle has been paring down our wardrobes. Part of it has been being more patient if favorite clothes are soiled. I think we could be better at waiting longer between loads, but it seems like we're doing at least a few every other day. I wrote a whole article about how we should wash our clothes less often for Wisebread a few years ago, it's an interesting read!

#3: Recycling. We have a huge bin for recycling in our kitchen and we try to empty it into the garage bin about every other day. But here's the problem -- I don't know WHY we seem to have so many boxes, plastics, and other things going through the house. This should be a once a week thing in my opinion. I'm really trying to examine why we have so much packaging. BTW: Check out this great article about Surviving a Week of Zero-Waste Shopping. We have a lot of work we could do in this area. Oh, goals!


Once a Week


#1: Bathrooms. I feel like our bathrooms get so dirty so fast! We tend to give them a total clean once a week, consisting of cleaning the toilet, wiping down the sink (toothpaste + 4-year-old = ugh!), spritzing the mirrors, and clearing out any empty containers.

#2: We vacuum the basement carpet once a week. If it needs to be cleaned more often, we can't ever tell because it's all different shades of brown and masks things well. I would like to get a shampooer to give the thing a good wash a few times a year. Anyone rent or buy one and have experiences to share?

#3: We wash our paperless towel system once a week -- sometimes more if we've been using a lot of them.

#4: Bedrooms. I'll just tell you I don't make our bed every day. I probably make it once a week. I used to make it mostly daily, but since being pregnant, I crawl in and out on occasion -- so I figure, what's the point? Ada's bed is the same way because she's still napping. And as good as we are with washing our clothing, we are slow to put it away. This is something I'd like to work on because having calm, clean sleep spaces is important. They're not horrible, but I hate seeing laundry piles.

#5: Change sheets. I say weekly because that's what we usually do. But if I'm being totally honest, there are times when maybe two weeks go and we don't change the sheets. Still, I try to keep this a weekly thing. If I can remember to do it before bedtime, I'm golden. If I continue to stay up too late, it doesn't get done in a timely manner. Is that gross? Probably.

#6: Trash. I am surprised this doesn't go out more frequently. Somehow, we haven't had a ton of actual trash. It's more about the recycling. Of course, if something smells or is full, we take it out right away. But usually we do the bathroom bins once a week on trash night. The kitchen has been mostly once a week since we started composting. There are always exceptions to the rule, but -- yeah.


Less Often


#1: So, we don't really vacuum upstairs all that often. It's a mix of being too lazy to take the vacuum up the stairs and the fact that we don't wear shoes or eat much up there, so there's less mess to contend with. I'd say we end up doing it every other week or every three weeks (is that awful? it's been working well for us!).

#2: I have this thing about cleaning our windows. I mean, most people I talk to don't worry about it but once a season. I really like to give ours a good scrub once a month or so. I think having plantation shutters also exposes more dust that needs to be cleaned. So, I use some homemade cleaners and spritz everything about once a month.

#3: Dusting. I feel kind of weird admitting that I don't like to dust, so I don't do it often. I mean, dust accumulates, but it never seems terribly overpowering to me. If if notice a lot of dust, I'll of course wipe it up. Otherwise, I'd say I don't dust more than once a month. I think that's one benefit of having less furniture, too!

#4: OK, so I do a surface cleaning of the kitchen every day and it keeps things sane for a while. I do a deep clean probably every three weeks to a month. Like wiping out and clearing out the refrigerator. Cleaning the (outside) of the stove. Digging into the pantries to see what's expired. That kind of stuff. In an ideal world, I'd do this weekly or every other week.

#5: Wiping down furniture. I clean off the dining set about once a month unless I see something on it from an afternoon art project. We also recently washed and conditioned our leather couch after about a year of letting it go. We should probably vacuum under couch cushions more regularly. And one area I'm always embarrassed about? Underneath our bed. I don't know how so many clothes, toys, dust bunnies, etc. end up there . . . but they do, in droves.

#6: Closets. As we've gotten rid of more, we've needed to clean our closets far less often. Only a few sets of sheets helps with the linen closet. Fewer clothes means less mess in our bedroom closets. The worst closet in the house, though, is in the craft room. When I say we're mostly done with our leaning out, it's because the office/craft room is still a mishmash of things. We're working on it, and I hope to do a before/after really soon!

So, that's our general cleaning schedule. I have probably forgotten something major and you've all wondering WHY I don't clean whatever it is . . . but I assure you, there's nothing smelly or too terribly disgusting lurking inside these walls.

Happy Friday, friends!

// RELATED


Green in 15: Revamping Your Cleaning
DIY Natural Lotion Cubes
Powerful DIY Laundry Detergent
Cleaning with Vinegar
5 Green Cleaners That Work
5-Minute Homemade Deodorant
8 Ways We've Eliminated Plastics
Cleaning Produce The Natural Way
Chemical-Free Clean With Castile Soap


Like what you just read? You can subscribe to the feed of these posts or follow us on Twitter or Facebook to be the first to know what the (never home)makers are up to. And we’ll love you forever!

Read more...

How We Purged // Spring Clean

>> Friday, April 1, 2016

There's really no secret tip or trick for the best way to actually go through your stuff. For us, it made the most sense to touch everything -- or at least get our eyes on each item. Tedious? Indeed. But this way we could ensure that we weren't parting with anything that was actually important or critical (which is particularly key when going through old paperwork!).


Our Method


Here's what we did. It may or may not make sense in your situation:

  • First cleared out the main house from anything -- like extra furniture -- we didn't want. This uncovered all sorts of stuff that had been hiding in nooks and crannies. We created a few "miscellaneous" bins and put them in the garage for further investigation.
  • We also went through closets, drawers, and cabinets for the same reason. More misc. boxes came out to the garage to be staged for the next step.
  • Then we went bin by bin in our garage (it was helpful to have an outdoor space so close to our car) and started sorting things by where we intended to take it. (You can read more about that below.)
  • As we got enough stuff to take to a certain place, we'd clear some of it out. For example, we took two trips to the Salvation Army in one day to make room for more organization. Then later that day, we decided to take a trip to the trash place with our construction waste, again, to make more room to continue on.
  • Anything we were keeping was promptly put into it's right place in the house. In the case of sentimental stuff, we did put it back in labeled bins that went down to the basement. 
  • And then we just kept at it. We took more trips to the drop-offs and kept clearing out. After not too long, the space was clearing and we could breathe again.
  • We saved our paperwork for last. We took our time on this one because we didn't want to get rid of any documents that might be important in the long run. 
  • Then we decided to go through the house just once more to make sure there wasn't anything left that we could part with. We actually got another van load from our second go-through. I think it's because once we got started, we realized how freeing it is to purge. And it helped put the stuff in perspective . . . so we were ready to just let go.

Where Stuff Went


Salvation Army

The majority of things went to our local donation center. We even called a number the person at the checkout gave us for some furniture pickup that's scheduled for next Tuesday. Always make sure to get a receipt so you can write off your donations next year at tax time.

Once Upon a Child

This is a store in my area (and I think in other areas) that buys gently used and good quality kids stuff from toys to clothing. We sold a bunch of things we know we won't need with baby #2 here. And you know how I found a brand new BOB stroller at Target on clearance a few months ago? We sold our old one (it was in OK condition) for $75! I think that's a great return on that. With everything we sold (which was only a small box), we made out with nearly $200 without having to host a yard sale.

thredUP

I sent some of my nicer clothing to thredUP and am waiting to see how much $$$ I'll get. It's always worth a try to send clothes off (or go to your local consignment shop) to see if you can get anything for them before donating.

Waste

We had a lot of construction waste, like old boards with rusty nails, etc. We took all this stuff to our local center to dispose of it properly. In addition, we took some trashed computers and other recycling there because they know what to do with it. Just make sure you've cleared off any information that could potentially be taken. You never know.

Friends, etc.

We did find some things we thought our friends could use, so we asked and gave as the opportunity arose. I like the idea of having clothing swaps and the like. We have done that even with kitchen things in the past. It takes a village.


What did we do with Ada?


So many people have asked where Ada was during all this cleaning. Well, I estimate that we spent around 4 hours a day actively sorting and taking trips. We used Stephen's spring break versus doing something fun, so it was a big sacrifice. But we did the bulk of it during nap time (Ada slept 2 hours most days). Now that she's four, though, she was able to hang around us and even help. Her favorite part was taking small boxes to the van for donation.

In other words: It wasn't hard. I don't know what it would be like trying to do this with more kids, but we've always been able to do house projects and stuff with Ada right alongside us. Don't let it be an excuse!

OK. It's Friday, so next week I'll start off with a post I'm calling "why simple organizing doesn't work." We're getting close to the end, so if you have any more questions about this process -- let me know!

And don't forget to catch up on this series:

Eliminating the Maybe
7 Clutter Categories
Cleaning Week Snapshots
Wannabe Minimalists

Read more...

7 Clutter Categories // Spring Clean

>> Tuesday, March 29, 2016

When we set out to start our spring cleaning, we were dealing with a lot of different obstacles. We just didn't know where to start. So, we decided to think about the different categories of stuff we had cluttering up our house on the inside and out. It helped us get in the right mindset to go through whatever we encountered and -- then -- to bust through.

Once we got a handle on all that, our plan of attack became much more clear.


Clothing


Of everything, clothing seems to suck up the most space in our house. For me, it's from my ever-changing body. I was one size before I had Ada. Another size afterward. And another size last year. Now I'm pregnant and have two general sizes of maternity clothing. That's just me. Ada had WAY TOO MANY CLOTHES to even pass along to Baby E. The way we could tell our clothing was out of control? We had bins upon bins of it in the garage. We also had quite a laundry pileup on the daily.

Someday Stuff


This is stuff we were hanging onto for one reason or another. Like, just in case we might need a random chair someplace in the house. Or that extra tricycle someone found at a garage sale. Basically, this category is really broad and showcases our mini hoarding from either getting deals on stuff, buying multiples, or generally over-consuming.

Trash


Then there were boxes of papers and documents that we were hold onto because we didn't know what to do with them. Or they needed shredding and we hadn't gotten around to it. Stuff like old checkbooks, tax returns from the early 2000s, mortgage paperwork from our first house, computers that hadn't been hooked up since college, etc., etc., etc. We had several bins full of this stuff we were simply too afraid to throw away. On top of that, we found a bunch of items that were broken beyond repair that we were holding onto thinking maybe someday we'd figure out how to salvage them.

Gifts


Well, not necessarily gifts . . . but stuff we came into possession of whether we wanted to or not. We're talking bags of clothing from friends and family. Random toys or other items that were either duplicates or just never used. And a lot of this stuff we had said YES to accepting, etc. This category is really tricky, guys. Because we're always thankful at the generosity of others. A lot of times, we can all benefit from sharing things. But there are other times when the influx of stuff is just overwhelming. Then there's guilt for getting rid. Right?

Sentimentals


Yearbooks. Photos. Albums. Old sheet music from sophomore choral and band festivals. Video tapes, CDs, and DVDs from life events, college papers. I mean, you name it -- we have it. This is a category we are still dealing with because we didn't want to purge and regret. I'll get more on this in my next post.

Demo Remnants 


We work on our house. A lot. So, in the winter, we tossed demo materials in the garage for spring cleaning only to find out that our trash collection no longer takes these items. In all, we had the leftovers of a huge tool bench from the basement, several doors that we had replaced in the house, and other odds and ends of splintery, nail-poked wood.

Forgottens


Last, there were boxes of things we would open and be like -- WHAT? I don't even remember this stuff? And you know what we did with those boxes? We sort of looked through them, just to make sure nothing important was mixed in. But if it had been out of sight and out of mind long enough for us to forget -- we donated them immediately.


Stay tuned! In tomorrow's post, I'm going to talk about how we dealt with these categories from a letting go perspective. How we decided what to keep, what to give away, and how we were able to make $200 from selling a few things.

Read more...
Related Posts Plugin for WordPress, Blogger...

About This Blog

MyFreeCopyright.com Registered & Protected

© 2009-2014 by the (never home)makers
All content on this blog is copyrighted.

Want to publish our pics, tips, or tricks?
Contact us! [neverhomemaker@gmail.com]

We value transparency. Links on this page may contain affiliates. In addition, please see our disclosure policy regarding sponsored posts.

  © Blogger template Simple n' Sweet by Ourblogtemplates.com 2009

Back to TOP  

Blogging tips