Showing posts with label play. Show all posts

Our Play Spaces

>> Wednesday, August 1, 2018

As I mentioned in the last bit on toys (why we sold most of our toys), we've been paring down and clearing out. These are the two play spaces we now have in our home. (I guess I should also mention Ada's doll closet in her room. I will get to that another day.). 

Why two?

Because the basement one doesn't get tons of use in the warmer months. In winter, we're down there a lot. So, it's worth having an extra area in the family room. It is also adjacent to my desk and workspace, which is helpful if I'm finishing a deadline, like today, and need the kids occupied.

Anyway, here they are after our clear out:


I wish I had snapped before photos. But I did this all on a very crazy nesting high. Basically, the living room benches had tons of random toys in them that would spill out all over the first level of our home. And the basement had two 9-cube organizers overflowing with toys and puzzles, blocks all over the ground, and a bunch of other multiples of things like dolls, puppets, and other assorted things the girls never played with.

Picture chaos.

Yeah.

That's it.

I have the highest hope for the cart in the living room, so I thought I'd show you what's in it. I have always complained about the age difference between my girls, but these toys seem to occupy them both nicely. And, OK. I'm not trying to drink the punch . . . but I'm getting more and more into Waldorf philosophies with regard to play and child-rearing.

I don't plan to follow all of it or send my kids to a specific Waldorf school (or homeschool, here's why). But I have always felt like organized sports/activities for younger kids and coached education from young ages . . . well, it just wasn't something I agreed with. Waldorf says kids need to play and explore and be exposed to the world without that type of structure. Toys are very open-ended and made from natural materials. Nature is priority. Seasons and holidays are to be celebrated with ritual. And predictable rhythm is so very important. I won't get into all the details right now, but it jibes with lots of stuff I've absentmindedly been striving for and is cool to see it in one place.

Here's where I'm starting in our home.

With the play cart.


This leads into another discussion and more explanation. But -- microblogging. Today I simply wanted to show you our spaces. We have so much less than we used to have. It might still be more than you care to have or you may -- instead -- feel like we don't have much. Who knows. Whatever the case, I'd love to gather questions or other directions you guys want me to take (the stuff you want to hear about) for the next post.

Leave a comment on the blog or on another platform so I can gather them! I will also discuss some of the homemade stuff we've put in the play cart to lower the price tag of all the expensive things you can buy. Because you can go crazy with Waldorf-style toys. They're gorgeous. But I cannot afford them. I digress!

Read more...

5-Minute DIY Glitter Slime

>> Wednesday, April 27, 2016

I cannot believe how much Ada enjoyed this slime making project, you guys. I wasn't even planning to share it on the blog -- but she has been captivated AND it was so incredibly easy to make. Of course, I need to first mention that -- no -- this recipe isn't my own. There are so many slimes and doh recipes out there on Pinterest, right? Why reinvent the wheel?

We followed these instructions on Gillian Bower's YouTube channel and got amazing results. Others we had tried in the past were too hard or sticky. Or they used regular glue with the addition of glitter and just simply didn't turn out as well. The key is using glitter glue from the start. It comes in so many different colors. The rest is all about not adding too much borax.


DIY SLIME


What you need:

  • 1/2 cup glitter glue
  • 1/2 cup water
  • 1 (scant) teaspoon borax
  • 1 cup water
  • Whisk, spoon, bowl, etc.

Method . . .

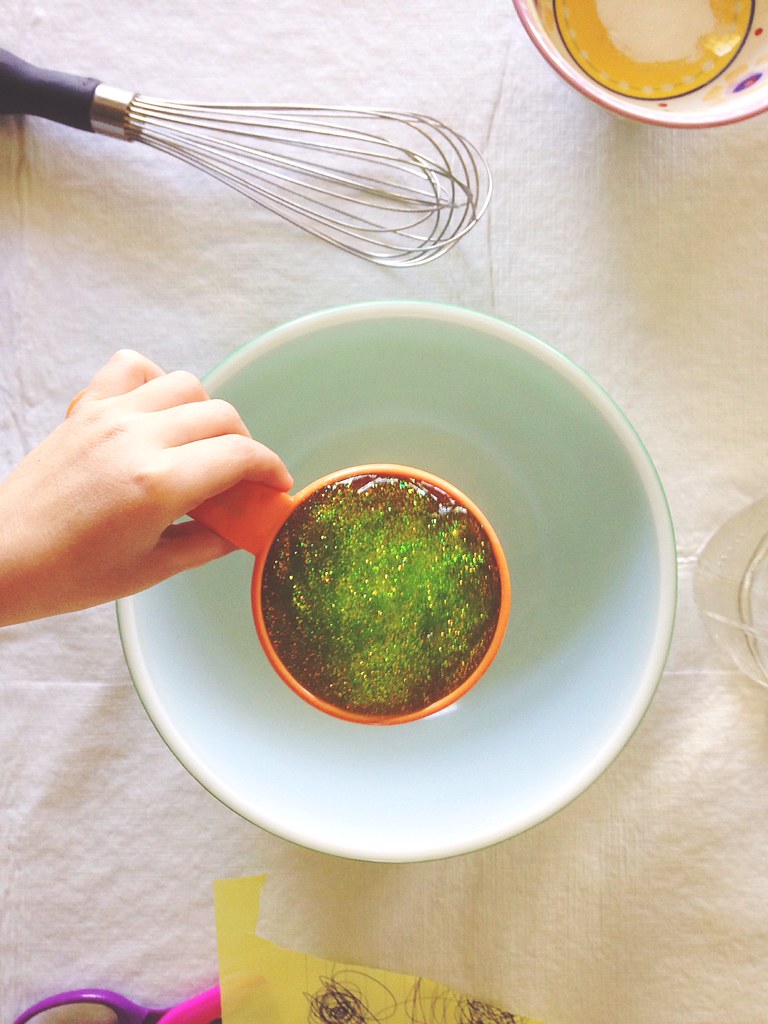
Pour 1/2 cup glitter glue and 1/2 cup water into a bowl and whisk until fully incorporated.


Then mix the borax and cup of water together. Very, very slowly stir some of this into the glue mixture. Maybe a tablespoon at a time. You will have most of the water + borax left, but you can use it to make another batch it you want.

(And -- according to Ada -- we are making more today...)


When the spoon stops working, just pick it up with your hands and knead until it stops sticking. It takes only a few minutes. You can add more borax + water if it is too sticky, but try to find the perfect balance or it'll get too hard.

It's a delicate process.


Once it feels like the slime you know and love, hand it over to your kid for seriously HOURS of enjoyment. We store ours in a zip top bag at the moment. But anything air-tight should do just fine.


That was easy, right?!


What's your favorite DIY slime, doh, or putty recipe?

Like what you just read? You can subscribe to the feed of these posts or follow us on Twitter or Facebook to be the first to know what the (never home)makers are up to. And we’ll love you forever!

Read more...

Activities For Shut-In Preschoolers

>> Monday, March 2, 2015

A couple years ago, I wrote about a bunch of indoor activities for young toddlers to do during the winter months (or whenever they’re stuck indoors). I can’t believe Ada’s grown so much since then, and -- thought a lot of the stuff is still fun for her -- the list needs some revision and updating.

Still, I encourage you to check out the original post with more details. You can enjoy a lot of the activities without spending much more than your time. Try having a beach party. Or make a quick sensory box. Plan an indoor picnic. Set up all your kid’s animal for a petting zoo. Or have a non-Easter egg hunt.

Now, here are a few ideas for the preschooler crowd.


#1: Quiet Boxes


I haven’t actually made any quiet boxes yet, but I’m obsessed with the idea. Basically, just get a bunch of independent play activities together and separate them by day or whatever system you choose. When your kid isn’t napping or is just getting on the brink of insanity -- pull out a box and let them explore the contents on their own. Independent play has become difficult over here since we’ve been indoors together all.the.time, so we’re working on this one a little more each day.


#2: Snow Dough


I’ve made homemade play dough, DIY craft kits, table top explosions, and all other kinds of messy play (here are 20 great ideas). Lately, Ada’s been digging snow dough, which is a simple mixture of 2 cups corn starch or arrowroot powder combined with around 1/2 a cup of canola, vegetable, or olive oil. You can add glitter for extra impact. Store in an airtight container when not in use.


#3: Rocks


I stumbled upon a box of rocks we gathered from the Jersey shore last summer. So, I figured Ada might enjoy looking at them through her magnifying glass. I also put them in a container and filled part with water. I gave her an old tooth brush and told her to clean and polish the stones. I was surprised how long she stayed transfixed with this activity!


#4: Fuzzy Caterpillars 


Take some regular glue, popsicle sticks, and poms. Then stick the poms on the sticks to make colorful caterpillars of all shapes and sizes. We even made stick houses and other shapes and designs. Plus, you can play with these furry guys long after you make them. Bonus points for googly eyes.


#5: Magnetic Dress-Up


This is the most expensive activity on the list at a whopping $10-$15, but I promise it’s worth every penny. Get your child one of those Melissa + Dough magnetic dress-up kits. They can stick the magnets on the fridge too. Ada loves trying out all the different combinations, and it’s great for her fine motor skills.


#6: Seed Planting


We’re dreaming of our summer garden already, and we’re starting off from seedlings this year. Get all the stuff you need -- seeds, planters, and soil -- and have your child help you get started. You can let them grow in a sunny room of your house even when the temperatures are frightful. Then you can have your little helper plant them with you when the winter finally lets up. Read all your seed packets carefully for growing and timing info.


#7: New Art


Try something new with art. If you do lots of paint, color with crayons. If you always do markers -- do clay. Skip the coloring books and go free-form. We recently did one of those projects where you use painters tape to make shapes, and Ada really enjoyed peeling off the tape when her paint had dried.


#8: Couch Potato


The rules around TV has somewhat gone out the window this winter. Well, not totally. But when the day is going especially bad (and you guys with cabin fever know exactly what I mean), I don’t think twice about running upstairs and snuggling in my bed with Ada watching a movie. In fact, it’s glorious. Pop a bag of popcorn to make it a full event.


#9: Baked Goods


Bake a cake. I love spending time with Ada in the kitchen. On the coldest of days, we’ve made all sorts of meals -- from slow cooker soups to baked doughnuts. The best part? Decorating the finished product. Let loose with some of your sugar rules and break out the mini marshmallows and sprinkles. It’s not like your kid is going to eat the entire cake. (Although, Stephen and I may have had a good chunk of this guy.)


#10: Outdoor Play


When all else fails, you can’t go wrong by bundling up and playing outdoors. Even in extremely cold temperatures, a few minutes is incredibly helpful. We’ve had plenty of -35 degrees F windchill days . . . and warming up the car and driving to a friend’s house or to the mall was a great alternative. Our tolerance for cold has increased as the winter had gone on, so we’ll gladly play outdoors for a stretch even when the temps are below 10. Just dress your child in many layers and cover as much skin as possible to prevent exposure. And start with small stretches of time, always supervised. 


What are your favorite activities for preschoolers during these shut-in months?

Like what you just read? You can subscribe to the feed of these posts or follow us on Twitter or Facebook to be the first to know what the (never home)makers are up to. And we’ll love you forever!

Read more...
Related Posts Plugin for WordPress, Blogger...

About This Blog

MyFreeCopyright.com Registered & Protected

© 2009-2014 by the (never home)makers
All content on this blog is copyrighted.

Want to publish our pics, tips, or tricks?
Contact us! [neverhomemaker@gmail.com]

We value transparency. Links on this page may contain affiliates. In addition, please see our disclosure policy regarding sponsored posts.

  © Blogger template Simple n' Sweet by Ourblogtemplates.com 2009

Back to TOP  

Blogging tips