Showing posts with label toddler-friendly. Show all posts

All Aldi // Almond Butter Oat Bars

>> Friday, February 8, 2019

So, you guys all know my issues with Aldi lately. It's not them, really, it's me. I figured rather than whine about it, I'd start trying to cook more from scratch again -- using all Aldi ingredients. This particular snack is highly adaptable. You can use most any nut butter you like and add in whatever sounds good. It's also kid and toddler approved, hence the llama in my photo.


ALMOND BUTTER OAT BARS


What you'll need . . .

  • 2 cups rolled oats
  • 1-1/2 cups crispy rice cereal
  • 1/3 cup dried cranberries
  • 1/2 cup almond butter
  • 1/2 cup honey
  • 2 tablespoons coconut oil
  • 1 teaspoon vanilla extract
  • Salt, for sprinkling

Method . . .

  1. Spritz a 9x13 inch pan lightly with oil. Set aside.
  2. Melt the almond butter, honey, and coconut oil together on medium heat. Whisk it until smooth and take off heat once incorporated, being careful not to burn the almond butter.
  3. Using a spoon or spatula, stir in the oats, cereal, and cranberries. You can also add chocolate chips (they'll melt), pepitas, or anything else that sounds good to you!
  4. Spread into your prepared pan, sprinkle with a little salt, and refrigerate until firm. Cut into 16 bars.
  5. Alternatively, you can roll loose "dough" into balls for energy chunks.


More Aldi:


Aldi Foods for Picky Toddlers and Kids
$93 Aldi Weekly Grocery Haul
$400 Monthly Food Budget
18 Vegetarian Grocery Staples at Aldi
All Aldi content this way . . . 

Read more...

Our Play Spaces

>> Wednesday, August 1, 2018

As I mentioned in the last bit on toys (why we sold most of our toys), we've been paring down and clearing out. These are the two play spaces we now have in our home. (I guess I should also mention Ada's doll closet in her room. I will get to that another day.). 

Why two?

Because the basement one doesn't get tons of use in the warmer months. In winter, we're down there a lot. So, it's worth having an extra area in the family room. It is also adjacent to my desk and workspace, which is helpful if I'm finishing a deadline, like today, and need the kids occupied.

Anyway, here they are after our clear out:


I wish I had snapped before photos. But I did this all on a very crazy nesting high. Basically, the living room benches had tons of random toys in them that would spill out all over the first level of our home. And the basement had two 9-cube organizers overflowing with toys and puzzles, blocks all over the ground, and a bunch of other multiples of things like dolls, puppets, and other assorted things the girls never played with.

Picture chaos.

Yeah.

That's it.

I have the highest hope for the cart in the living room, so I thought I'd show you what's in it. I have always complained about the age difference between my girls, but these toys seem to occupy them both nicely. And, OK. I'm not trying to drink the punch . . . but I'm getting more and more into Waldorf philosophies with regard to play and child-rearing.

I don't plan to follow all of it or send my kids to a specific Waldorf school (or homeschool, here's why). But I have always felt like organized sports/activities for younger kids and coached education from young ages . . . well, it just wasn't something I agreed with. Waldorf says kids need to play and explore and be exposed to the world without that type of structure. Toys are very open-ended and made from natural materials. Nature is priority. Seasons and holidays are to be celebrated with ritual. And predictable rhythm is so very important. I won't get into all the details right now, but it jibes with lots of stuff I've absentmindedly been striving for and is cool to see it in one place.

Here's where I'm starting in our home.

With the play cart.


This leads into another discussion and more explanation. But -- microblogging. Today I simply wanted to show you our spaces. We have so much less than we used to have. It might still be more than you care to have or you may -- instead -- feel like we don't have much. Who knows. Whatever the case, I'd love to gather questions or other directions you guys want me to take (the stuff you want to hear about) for the next post.

Leave a comment on the blog or on another platform so I can gather them! I will also discuss some of the homemade stuff we've put in the play cart to lower the price tag of all the expensive things you can buy. Because you can go crazy with Waldorf-style toys. They're gorgeous. But I cannot afford them. I digress!

Read more...

Aldi // Foods Picky Toddlers + Kids

>> Thursday, May 10, 2018

I get lots of questions about my favorite Aldi foods. So, today I thought I'd give you guys a quick post about what foods I get for Ada and Eloise. Ada's pretty good about trying new things and getting at least some variety. Eloise, on the other hand, is asserting her toddler independence and is a super picky eater, so it's a challenge finding things she will try and potentially love.

As I have mentioned in the past, we are raising our children vegetarian, so the foods I'll be mentioning are all vegetarian or vegan-friendly. Here's what's in our pantry right now. We have actually eaten through a good chunk of what I bought last week (we adults snack on a lot of these foods, too)!


In no particular order.


I provided links where they were easy find with a quick Google search. Otherwise, we just get whatever they have at the store. It's usually just one brand for a lot of the things I didn't link. Occasionally you'll come across store brands at good deals, like LaCroix, so we do take advantage of those.

Here's an example of an all-Aldi nibble tray I made for Eloise this week.


Some kid stuff we don't tend to buy at Aldi include things like peanut butter, bread, frozen fruit, granola bars, and gummies. It's not that we don't like the Aldi brand, we're just able to buy larger quantities for less money elsewhere (like Sam's or Wegman's store brand). I thought it would be good to include a list of things the girls DON'T like from Aldi, but honestly . . . they pretty much eat everything we've bought. So, now I'm wondering why I called Eloise picky!

Scratch that. We DO NOT like Aldi bananas. They are always green at the store and either don't ripen OR they get REALLY weirdly mushy. My girls love bananas, so we buy them at Wegman's (we also get our non-dairy milk, tofu, and a few other items, like large jars of peanut butter there).

Oh, and if you're curious about how we organize our kid plates, etc.


While writing this post, I also discovered that Aldi has a section on its website with snack recipes using their products! And I am also sure I'm missing a whole swath of things I usually buy. Be sure to share your favorites in the comments!

Also: I need to update my Vegetarian Staples at Aldi post! They have so many more options since the last time I wrote about it. Still no tofu, though. Boo!

Read more...

DIY Mermaid Sensory Board

>> Friday, February 23, 2018

We have a children's space totally dedicated to sensory play where I live. It has all sorts of cool things to touch and see. One of my favorites has always been these little frames filled with that mermaid flip sequin fabric. I don't think that's what it's called, but you get me. They are around six inches to a foot in size and are anchored to the walls for kids to play with.

Naturally, I wanted to bring this idea home.

In a BIG way . . .


I actually bought the fabric for this project before Christmas and just never got around to finishing it. Not that it takes long at all. And I kind of winged the execution, so this "tutorial" is more of a "see what I did, try it and maybe improve upon my method" kind of thing. In its current iteration, it works great. But I'm sure it could be refined.

First, you need your sequin fabric. I bought mine on Amazon, though I'm sure you may be able to find this stuff at your local craft shop. I chose the classic mermaid blue/green and black. It comes in an impressive array of shades, though, so you could get this to match any decor. You know, because this will be living in your living room, most likely.

So, a yard is 36" x 47". Massive.


All I did with the fabric is stretch + mount it inside a cheap plastic poster frame I had bought at Target eons ago. So, for me this project only cost the amount of the fabric. You can get a similar frame for around $10-$15. Alternatively, you could also put the fabric on the wall and then frame around it with wood trim, if you are extra handy.

There really was no trick to stretching it. I just placed the clear plastic frame insert (that would go over the poster) in the center of my fabric. I pulled the fabric taught around it and folded the extra pieces flat. I then put it in the frame and put the backing of the frame over top of the folded pieces. Then I pressed down all those tabs on the back of the frame to keep everything in place.

Note: Keeping the folded pieces there wasn't just laziness -- it helps hold everything tight. You could also cut the fabric to size and glue it to the clear insert. I'm sure there are many ways that would work.

And then we got to playing:


Again, this isn't a very technical tutorial. Ada and Eloise love this thing equally. And it's big enough that they can both play with it at the same time. I think we'll end up putting it in the play room, attached to the wall. But it's also nice to place on a table or the floor.

Oh! If you don't feel like going to all this trouble or spending much money, you can also get those sequin fabric pillows to toss about. They're super fun, too. And most cost around $7. Boom!

Let me know if you try this project! I was incredibly surprised how easily it came together.

HAPPY FRIDAY!

Read more...

Sharing Thoughts on Picky Toddler Eating

>> Friday, February 9, 2018

So many of you have asked me how Eloise's eating is these days. I wish I could say we've turned a corner. But, we've hit, like, an even higher peak of picky eating lately. It isn't all bad, but we're definitely in one of those periods of eating ONE big meal every few days and picking the rest of the time. So, it's not all bad . . . just inconsistent and frustrating.

I remember distinctly that she only ate the blueberries:


Despite all my efforts to cook and serve healthy, interesting, and tasty food . . . I have to remember that this phase isn't going to last forever. Or, as a couple of my friends tell me, maybe Eloise will always just be super incredibly picky and never grow out of it and always be super small and never grow much, etc.

Thanks, friends.
That helps.
Sarcasm.

Ada was also picky at this age, but it wasn't quite as frustrating. Some tricks worked with her. Like serving smoothies or pouches when she wouldn't eat solid foods. Heck, I could even puree up e.v.e.r.y.t.h.i.n.g she discarded on her plate and she'd suck it down. I even put scrambled eggs in one of my mixes -- and she didn't notice. Gross but it got the job done.

Ada also loved using the nibble tray. I'd section out different foods -- cheese, fruits, veggies, crackers, tofu, etc. -- and she'd graze for the whole morning to afternoon. I know some people are more for eating proper meals than snacking. I've tried both approaches and Ada's grazing periods were often temporary, punctuated by long stretches of actually eating meals regularly.

With Eloise, I have to take what I can get. The girl will literally starve herself. But at the same time, she'll also eat HUGE meals other days, so I don't think it's necessarily a feeding issue or sensory thing. Last night she ate two scrambled eggs with toast and anything else Stephen would throw at her. She hadn't touched eggs in months. And her preferences of some foods over others isn't consistent enough to pinpoint if anything isn't especially to her liking.

This sounds like a long rant about Eloise. It's not targeted resentment or anything like that. I am just updating to tell everyone that I offer healthy foods. I also offer toddler equivalent junk foods (Goldfish crackers, Nutrigrain bars, etc.). It doesn't seem to matter what it is, my girl is in a picky stage. She eats sometimes. Not others. The doctor isn't worried because she's maintaining her weight and even gaining ever so slightly. So, I'm forging ahead.

I've decided to really give the nibble tray another eager go because when I've tried to wait for proper meals, all hell breaks loose.

I have our old tray, but I cannot find its lid.


And so many of you have asked me where, oh, WHERE can you find this tray!?

Well, here. But it's discontinued and no longer carried by amazon.

Sad face.

So, I'm thinking of buying this oversized silicone ice cube tray that has a lid. It's a 2-pack (glorious!), so I figure I could load one for the morning and one for the afternoon. I like to do berries and peas and other things -- like Cheerios -- that are small and easy to grab.

(This method isn't magic. If you're curious, she only ate the peppers and one section of the Nutrigrain bar.)

PS: If you're interested in what I used to feed Ada -- also vegetarian -- when she was an older toddler/preschooler, check out this Ada's Eats posts with details on that.

Happy Friday!

Read more...

Mommy + Me Meals // Slow Cooker Soup

>> Thursday, November 10, 2016

This post from my old family blog is just about two years old. It's still one of my favorite food tricks if Ada's being picky! And I actually think I may make slow cooker soup or chili tonight for dinner. Yum!

I must admit that as Ada nears age 3, she’s been much more adventurous with her eats. Some of her new favorites? Black olives and roasted beets. Stephen opened a can of olives to toss onto our pasta dinner one night, and we heard a little: “Whadder doze?” And the rest is history.

Still, assembled meals allude us. So, I needed a way to get Ada to eat what we were eating now that it’s fall. Why does that matter? I make my many slow cooker soups, and she just wasn’t interested -- in any of them. Rather than make a completely separate meal (which is what we’ve done for far too long), I got this sort of weird and wonderful idea.

It’s Soup and Not Soup


For this particular slow cooker soup, I made a batch of this delicious Whole Foods recipe, but instead of red beans -- I used a mix of black and pinto. Instead of red rice, I used brown. I skipped the greens.  I tossed in some salsa and pumpkin puree for wet ingredients versus the wine. And then instead of cooking it on the stovetop, I simmered for several hours in the slow cooker (after the beans had soaked in water overnight).

You get the idea. Keep it loose, use what you have, and improvise.

I like to serve chunky soups and stews with cheese, so that’s why you see that in the mix. The olives were added because Ada likes them. And you see some canned black beans on Ada’s plate -- that’s because she’s only now starting to like rehydrated beans. They are ever-so slightly tougher and less salty . . . so the canned are like the gateway beans on her plate.

Here’s a closer look:


And that’s right. This is the same meal, though it looks quite different, right? The strange part: I strained Ada’s beans and rice versus serving them in soup form. I tried soup first just to see, but she turned her nose. This is much the same nutrition, minus the goop.

You can either use a slotted spoon to do the work. Really picky kids might need light rinse in the colander. Since I’d eventually hope Ada will enjoy some soup, I am going to keep trying to serve it to her in its original form before going to these measures. But we do what we need to do. It’s better than admitting defeat and serving yet another PB+J.


She was skeptical at first, but ended up eating the whole thing (plus an apple)! I’m absolutely thrilled to see Ada trying new foods. I’m going to continue to encourage it, but also keep following her lead. Thanks for you patience with this post -- I know some of you had been looking forward to it for over a week!

Have you made any good mommy + me meals lately?

Read more...

DIY Craft Kits for Kids

>> Tuesday, May 31, 2016

I'm going to start moving some posts from our old family blog over to (never)homemaker. We had a lot of goodies in there -- so I don't want them to fade away. If you want to know more about why we closed that blog, click here.

I keep seeing those clever + colorful craft boxes popping up on blogs and sidebar ads. I mean, they're cute and all, but I just can't see allocating that type of money for an activity -- art -- that can be so simple an inexpensive. And at Ada's age, I also don't care to follow directions. It's all about exploration and expression. Imagination.

Still, I see value in thinking ahead of time to plan an activity versus letting it become a chaotic mess. (Well -- let's be honest -- crafting with young preschoolers is a recipe for a mess!) So, I decided to try out a few of my own DIY craft boxes.


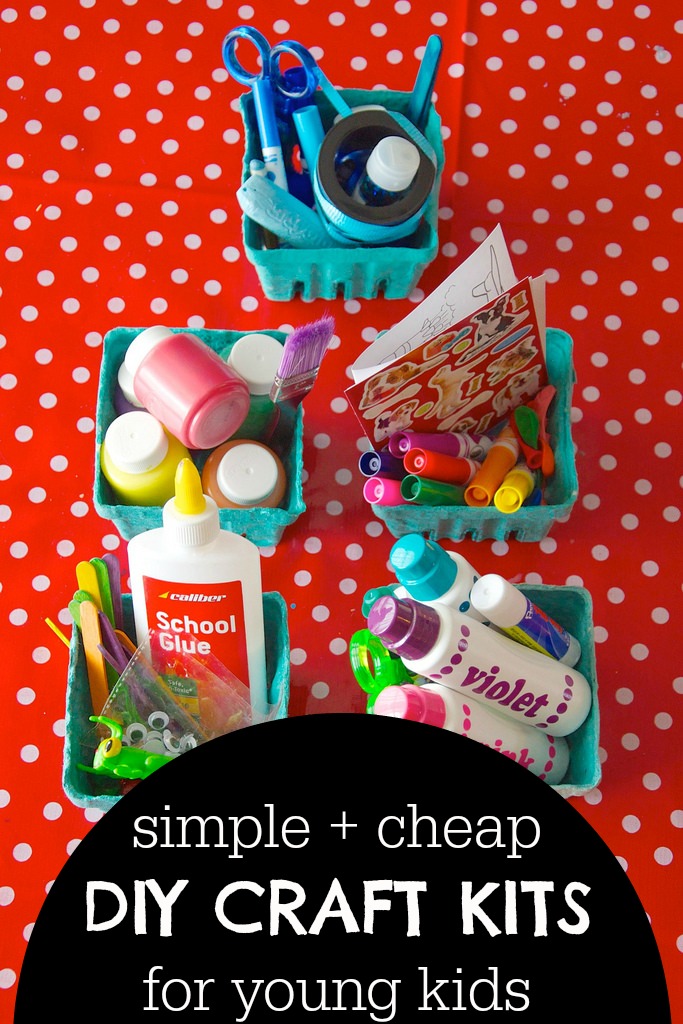
// DIY CRAFT KITS


First: I don't think these produce containers are perfect for this purpose. Any leftover small boxes or zip bags might hold more stuff and contain it better. In the future, I'll go for function over form in this regard. These collections of goodies aren't the whole story either. The idea is that I'll pull out a box along with our collection of assorted paper so Ada can make whatever her little heart desires.

Let's dive in and see what we're got.


The BLUE BOX: 

Ada knows her basic colors by now, but I think it's fun to focus on one color and its various shades. I just put in everything I could find that was blue in our supplies. I'll probably give her a glue bottle for the sparkles and help out with teaching her how to cut shapes out of paper with the plastic scissors (they work surprisingly well!).


The RAINBOW BOX: 

Markers, stickers, and even balloons! This box is bursting with all the colors of the rainbow, as well as a couple simple "stencils" (Play-Dough cutouts) to try out tracing. I can see pulling out a huge piece of paper and drawing big shapes to color in and stick with the stickers. Oh, and those stickers you can color yourself are really fun!


The STICKS + STONES BOX:

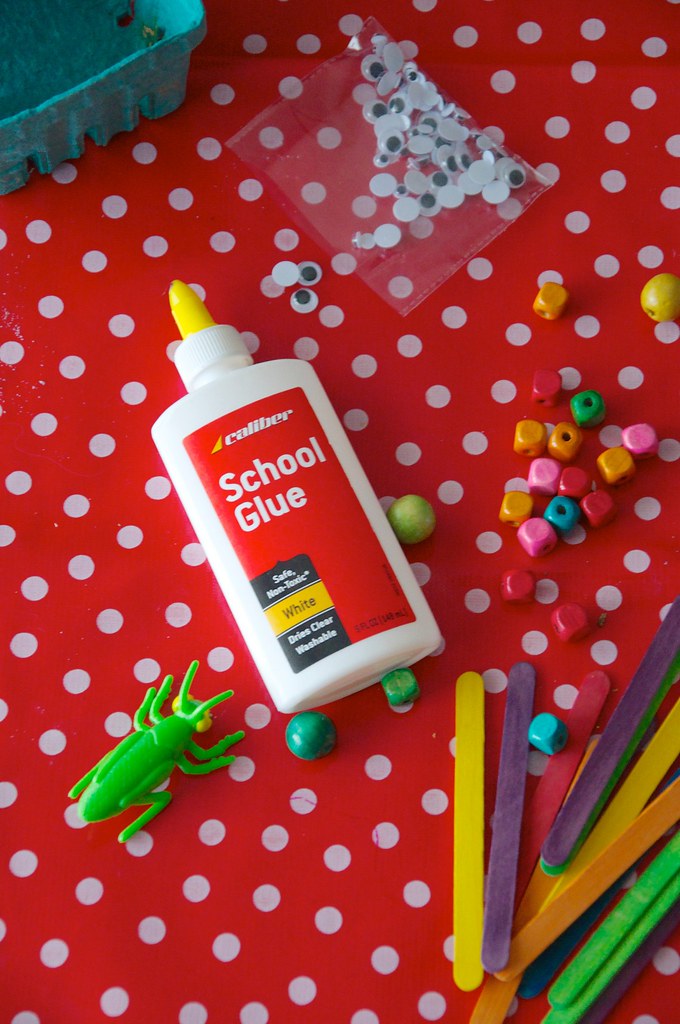
This collection is all about touch and feel. Popsicle sticks are fun for a variety of activities. The wooden beads will be fun to glue. And what kid doesn't love Googly eyes? I picture us cutting out shapes from thick card stock, glueing to the sticks and making tiny masks or something like that.


The DOT BOX:

My friend Leslie introduced me to these gigantic dot markers, and Ada's hooked. We practice writing numbers (in dot form) and drawing pictures. Or just having fun. Some crayons for coloring and plastic scissors. The glue stick is one of Ada's favorites. Cutting bits of paper and pasting to a larger base is always fun. Don't forget the Mr. Sketch smelly markers!


The PAINT BOX:

Pretty basic, right? Just a collection of Crayola Washable Paint and a big brush. What you paint is up to you. We've been trekking to our backyard creek to collect flat rocks for painting lately -- Ada can't get enough!


// SUMMARY


As you can see, there's nothing particularly smart or creative or mind-blowing about the groupings of these craft supplies. But by dividing them out into little containers, your kid will get 10,000 times more excited to create something. You also give them the power of choice.

And don't worry, most young kids don't care if they actually MAKE something that resembles anything in real life. The fun is in the process, not the product!


Like what you just read? Browse more of our posts + recipes on Pinterest. You can subscribe to the feed of these posts, chat with us on Twitter or Facebook. And you can always email us with your questions and comments.

Read more...

5-Minute DIY Glitter Slime

>> Wednesday, April 27, 2016

I cannot believe how much Ada enjoyed this slime making project, you guys. I wasn't even planning to share it on the blog -- but she has been captivated AND it was so incredibly easy to make. Of course, I need to first mention that -- no -- this recipe isn't my own. There are so many slimes and doh recipes out there on Pinterest, right? Why reinvent the wheel?

We followed these instructions on Gillian Bower's YouTube channel and got amazing results. Others we had tried in the past were too hard or sticky. Or they used regular glue with the addition of glitter and just simply didn't turn out as well. The key is using glitter glue from the start. It comes in so many different colors. The rest is all about not adding too much borax.


DIY SLIME


What you need:

  • 1/2 cup glitter glue
  • 1/2 cup water
  • 1 (scant) teaspoon borax
  • 1 cup water
  • Whisk, spoon, bowl, etc.

Method . . .

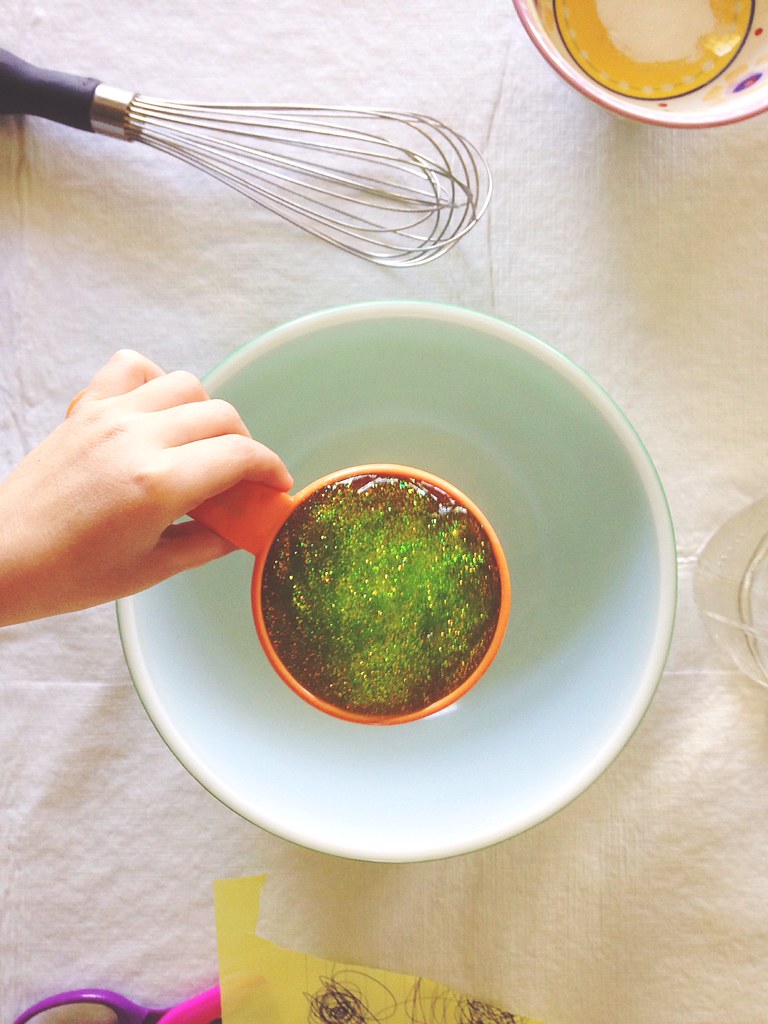
Pour 1/2 cup glitter glue and 1/2 cup water into a bowl and whisk until fully incorporated.


Then mix the borax and cup of water together. Very, very slowly stir some of this into the glue mixture. Maybe a tablespoon at a time. You will have most of the water + borax left, but you can use it to make another batch it you want.

(And -- according to Ada -- we are making more today...)


When the spoon stops working, just pick it up with your hands and knead until it stops sticking. It takes only a few minutes. You can add more borax + water if it is too sticky, but try to find the perfect balance or it'll get too hard.

It's a delicate process.


Once it feels like the slime you know and love, hand it over to your kid for seriously HOURS of enjoyment. We store ours in a zip top bag at the moment. But anything air-tight should do just fine.


That was easy, right?!


What's your favorite DIY slime, doh, or putty recipe?

Like what you just read? You can subscribe to the feed of these posts or follow us on Twitter or Facebook to be the first to know what the (never home)makers are up to. And we’ll love you forever!

Read more...

Embracing the Quiet Box

>> Friday, March 4, 2016

As I mentioned earlier this week, we've hit a hard spot with sleep recently. I don't get a lot of sympathy on this matter because, well, Ada's four. It's expected that the nap is going to disappear eventually. Kids get up early. Kids don't want to sleep, etc. But -- I mean, c'mon. When you're in a good rhythm and -- all of a sudden -- the morning, noon, and night changes all at once? It sucks!

According to BabyCenter, children age four need between 11-12 hours of sleep each day. It might be divided into 9 to 12 hours of nighttime sleep and between 0-2.5 hours of nap. Of course, these are averages and suggestions. There's no set standard. Knowing that Ada needs 2-3 fewer hours of sleep than she did last year does help me feel better about the change.

But I'm still not cool with losing my me-time. Right? After all, I'm pregnant. I've been particularly exhausted lately. I work from home primarily during preschool and nap times and before wakeup/after bed times. And I know I will soon have a newborn, so we all need all the rest we can get.


I had looked up quiet time boxes on Pinterest back when Ada was two. She had a nap strike back then and I thought it was all over.  

(Side note: First-time moms of younger kids + tots -- don't give up on the nap so easily! All kids are different, and -- yes -- yours might want to give up napping early. But persistence, if you can, is key. Ada had multiple times throughout the years when I thought she'd be done with napping, only to return to months upon months of awesome 2-hour naps up until this stage. Fight the good fight!)


Anyway, I could write a lot about naps. But today I just want to share our quiet box. It's been working really well. Ada's occupied and having fun while I get some quiet time to get stuff done, like work or dinner preparations.

Or while I take a half-nap.
Yeah.
That sounds good.


There are so many ways to do the quiet box thing. Some people have one for each day of the week with different stuff in it. I decided I didn't have the space for that, so:
  • I rotate out different things each day. Or not. Usually I try to put at least one different thing in and not everything you see here is in the box at all times. I try to keep it to four or five activities, so as not to overwhelm.
  • I also don't go crazy trying to make it endlessly entertaining. I strongly believe it's OK and even GOOD for kids to be bored and to have to come up with new uses for the same old stuff. 
  • The same goes with the actual content. You can get really educational or just go with open-ended play. I choose play. Ada gets enough learning at school, and I think she just needs to have the opportunity to be creative, to dwell in her thoughts and imagination.
Other stuff:
  • She can only play with the quiet box during those designated quiet times. So, if she wakes up too early, we have an OK-to-wakeup time set, and then she can get the box. She has to at least try to nap before she can play with the box (and yesterday she napped 2 hours -- there are days when she really does still need it!). 
  • She has to stay in her room while playing. If she needs assistance with a project, I'll give it to her later, so she just sets it aside. For example, she wanted to make a big ball out of the pipe cleaners today, but she waited and did other things until I could help her.
  • Everything in the box needs to be cleaned up before we move on to the rest of the day. If she throws something around or makes a mess, that activity gets taken away.
 Here's some of the specific things in our box right now:
So far this system is working out well for us. I'd love to know if you do something similar. I'd also love suggestions for things to put in the box, ways to deal with super random sleeping times (wakeups/bedtimes are all over the place -- I'm sure we're just in a big transition), and anything else related to preschool age sleep.

HAPPY FRIDAY! And don't forget to enter the $75 PinkBlush #giveaway!

Read more...

30 Gifts For $30 or Less // Baby

>> Wednesday, December 10, 2014

And now for a few frugal gifts for the two and under crowd. The vast majority of the items on this list are things we actually used ourselves during Ada’s baby years. It was kind of emotional writing up this list because I had lots of memories of our tiny, drooling little girl!

Here we go:


* Links are Amazon affiliate links. Thanks for your continued support of (never)homemaker. And happy shopping!

Like what you just read? You can subscribe to the feed of these posts or follow us on Twitter or Facebook to be the first to know what the (never home)makers are up to. And we’ll love you forever!

Read more...
One-Bowl Juice Pulp Bread // Muffins Recipe

>> Sunday, January 5, 2014

As with any new toy, the juicer has certainly consumed my attention this past week. And I'm already learning so much about certain fruits and veggies. Likes and dislikes. Opportunities to save and interesting flavor combinations. So far, I really like apples, romaine lettuce, carrots, and lemons + limes. They are all tasty, easy to clean, and yield a lot of juice.

The kale in this photo, on the other hand, probably gave up 2 drops of juice total . . . and mostly just ran through the machine into the pulp drawer. I don't think, necessarily, all kale in general is like this -- but ours was particularly dry.

Live an learn.


But I figured this folly was an opportunity to experiment with using pulp in fun ways. So, I made bread! And, then again today, I made this same bread recipe -- doubled it -- and baked muffins. The pulp gives baked goods flavor, any residual nutrients, and lots of fiber. This mix includes beets, carrots, oranges, limes, and celery.

(PS: Don't have juice pulp? Sub in shredded carrots, apples, or other fruits/veggies 1:1 ratio!)

(Also: I promise not all recipes going forward will involve juicing. But some will. I'm hooked!)


JUICE PULP BREAD/MUFFINS
(makes 2 loaves or 24 muffins -- use any pulp)

What you'll need . . .
  • 3 cups white-whole wheat flour
  • 1/4 cup flax meal
  • 1/2 teaspoon salt
  • 1 tablespoon baking powder
  • Heaping teaspoon ground cinnamon (or other spice)
  • 2 cups (fluffed, not packed) fruit/veggie pulp 
  • 1/2 cup olive or canola oil
  • 1/2 to 3/4 cup unsweetened almond milk (or other milk, even water)
  • 1/2 to 3/4 cup maple syrup (depending on sweetness desired)
  • 1 teaspoon vanilla extract 
Method . . . 
  1. Preheat your oven to 350 degrees F. If you've baking bread, lightly grease your bread pans; muffins grease muffin tins.
  2. In a large bowl, combine the flour, flax meal, salt, baking powder, and cinnamon together. Then mix in the pulp and follow with the oil, almond milk, and maple syrup. 
  3. Mix until just combined. Batter should be like normal quick bread or muffin batter, so if it is too thick, add more liquid -- milk.
  4. Then divide into half for bread or portion out into individual muffin tins. 
  5. Bake for 40 to 45 minutes for bread or 20 to 25 minutes for standard muffins.
  6. Repeat with rest of batter -- bread is done when set in middle and lightly golden brown. 
  7. Let cool before serving or storing in your refrigerator (or freezing!).

We made our bath of muffins this morning, and I'm happy to report that we have a great centerpiece for our breakfasts this week. Ada loves this bread. It's sweet without being overly so. The pulp really just injects it with flavor. Oh, and it goes great with . . . juice. So, more pulp.

What to do next?

Have you tried/made pulp bread, crackers, or other baked goods?


And don't miss our 90 healthiest recipes of 2013! Lots of delicious, wholesome foods for breakfast, lunch, dinner, and beyond. Includes both vegan and vegetarian recipes to please the entire family -- even toddlers!


Like what you just read? Browse more of our posts + recipes on Pinterest. You can subscribe to the feed of these posts or follow us on Twitter or Facebook to be the first to know what the (never home)makers are up to. And we’ll love you forever!

Read more...
Related Posts Plugin for WordPress, Blogger...

About This Blog

MyFreeCopyright.com Registered & Protected

© 2009-2014 by the (never home)makers
All content on this blog is copyrighted.

Want to publish our pics, tips, or tricks?
Contact us! [neverhomemaker@gmail.com]

We value transparency. Links on this page may contain affiliates. In addition, please see our disclosure policy regarding sponsored posts.

  © Blogger template Simple n' Sweet by Ourblogtemplates.com 2009

Back to TOP  

Blogging tips