Showing posts with label new house. Show all posts

Messy House Tour // Christmas Edition

>> Monday, November 27, 2017

So, we've been sick in this house for over two weeks now. Ada started with croup . . . and then we fell like dominos. Of course, this also meant we were sick for the Thanksgiving holiday. All five glorious days off we had been anticipating for, well, months. I had plans to bake, make wax ornaments, and generally deck the halls. Basically nothing has been crossed off that fun to-do list (here's our winter bucket list, if you're interested). And my house is wrecked.

I'm sure if you're on social media that you follow people for inspiration or even escape. I certainly do. But, and this is no secret, sometimes all that perfection can make you feel like, uh, crap. Even more crappy than you already feel. I was having a hint of this happening this morning as I scrolled through photo after photo of all those quirky short + stout Christmas trees placed in impeccable living rooms -- twinkling lights on the heaven setting.

This is what my house looks like right now. 

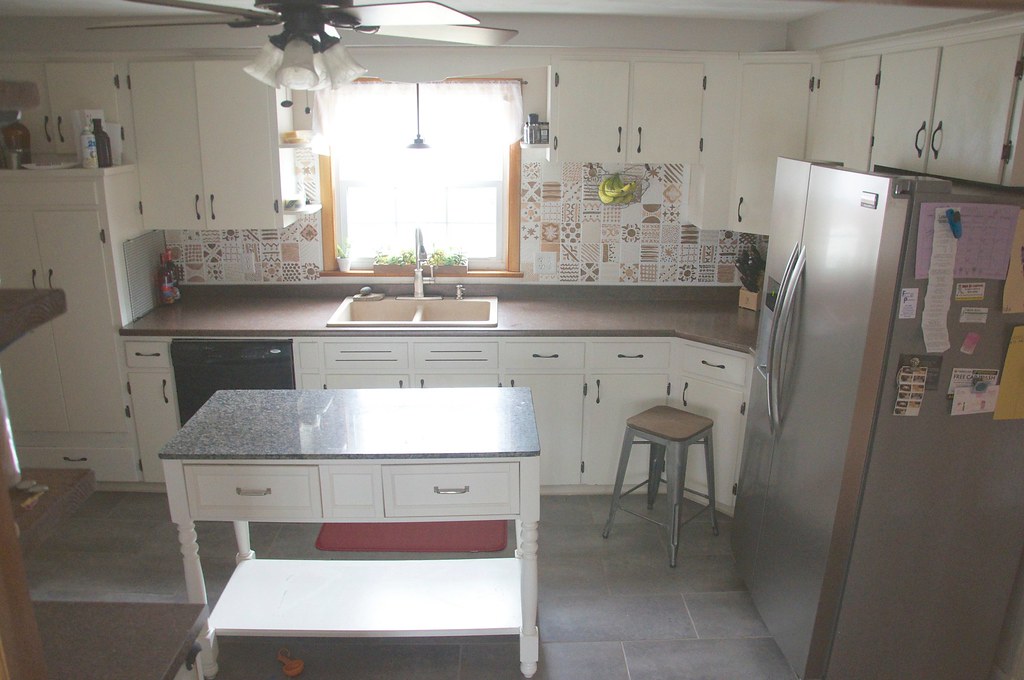
All the food is on the counters. There are electric cord extenders everywhere to hook in the outdoor lights. Clothes are on the dining table, along with random drawings and toys. I guess I didn't even snap a photo of the floor in the dining room (you can check it out on Instagram). I suppose I'll just submit these with no further comment.


And trust me . . . you do not want to go upstairs.

My bathrooms are actually quite clean, so that's a win on my part. Regardless, happy holidays. I'm sure I'll post some prettier photos eventually. I mean, we're all guilty of showing our best face even when things aren't great in reality. I'm hoping to kick this cough and to get my voice back soon. Tomorrow I'll be posting a homemade vegan turmeric cocoa recipe I've been making to curb my newfound $6 Starbucks habit.

Happy Monday!

Read more...

Dining Room Evolution

>> Wednesday, June 21, 2017


Another post! We got a lot of nice birthday wishes for Eloise -- thank you! But I'd also say after posting this photo, I got a ton of requests to talk more about our updates in the dining room. It's definitely been a while since I've written about what we've changed in the house. And we've changed quite a bit. So, let's get to it.

Back up for just a minute. When we moved in, the dining room looked like this:


Then we changed it to this:


And then this:


Then I decided to go full-on Joanna Gaines.

And I think we're finally done with changes.


Changes 


Major changes included added the corner cabinet that I found at an antique shop. I had stalked the piece for years, and it finally went on a super sale. It's just the right height for the room. It looks built in, which I love. The room isn't huge, so it's nice to have a place to stash our nicer pieces and tablecloths.

The next step was doing a faux shiplap on the walls using plywood planks. I am actually going to do a dedicated post on how I did this because I consulted a variety of sources, and it was quite a job! I did it all myself, too. We had a guy cut the plywood into six inch planks, but I did all the measuring, nailing, and shorter cuts at home.

After the planks were up, we painted everything using White Dove from Sherwin Williams. I think it's actually a Benjamin Moore color that I had matched at our local store. I hate painting, and if I'm being totally honest -- I think we need another coat in this room. Maybe Stephen will be generous enough to do that for me this summer.

You may also notice that our dining set changed in these photos. It's the same set, but I used chalk paint to refinish the table in white and the chairs in black. I still need to give the chairs another coat and do the polyurethane. But I am really pleased with how the table turned out. I did some distressing . . . and it is holding up well so far.

My kitchen is a disaster right now, but in my post on how I did the shiplap, I'll try to snap a shot of how this room flows into the kitchen. The two spaces are nicely tied into one another now. Again -- after all these changes in the three years since we've moved into this house -- I think I'm done. I really love this room. It's my favorite in our home right now.

PS: If you want to see what our house looked like back in 2015, be sure to check out the photo tour. It's in dire need of updating, so I hope to do that soon! I cannot believe how crazy the living room looks in these photos! I also stumbled upon the tours I did of our first house. Here and here and here.

PPS: That plank wood art piece came from Home Goods several years ago. We have a similar one in our dining room. They were on the more expensive side for what I spend on art, but I think they were well worth it.

Read more...

Half Bath Mini Makeover

>> Thursday, February 18, 2016

I have to admit in the nearly two years we've been in our "new" home, the novelty of having more than one bathroom has certainly not worn off. Our first house had a tiny, window-less bathroom on the second floor. One toilet. One sink. One tub and shower. And it was fine . . . until it wasn't. I remember dragging my huge pregnant self up the stairs in the final weeks before Ada was born and, ugh, it was pure torture.

So, this has been amazing:


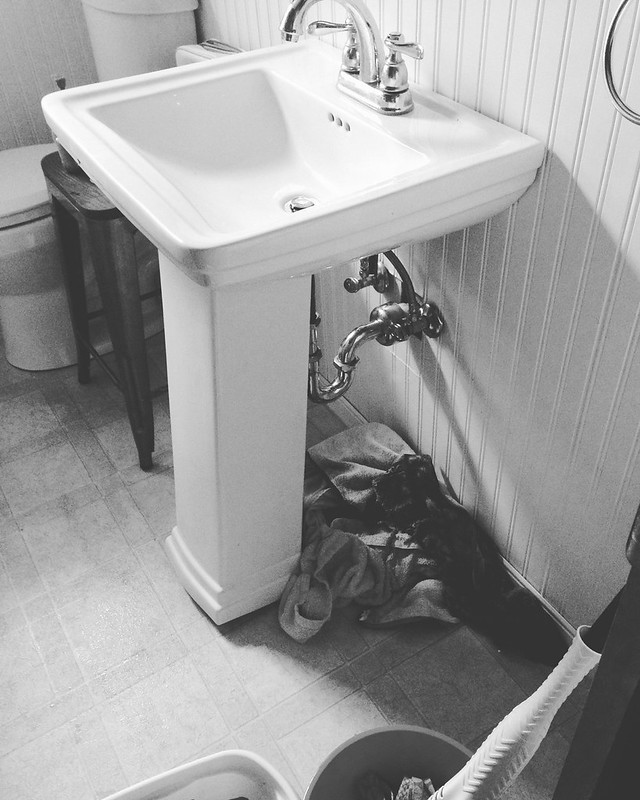
The one thing we never liked about the bathroom off the kitchen was the pedestal sink. (Well, and the impossible-to-clean flooring.) I mean, it was lovely looking. But it was always unstable because it wasn't installed properly. Then we had the whole matter of a four-year-old hanging all over it. We tightened and tightened and secured. It'd never fail, though. A couple weeks or months later, everything would be loose again. This time? The plumbing connections started to fail.

Leaks -- we had enough.


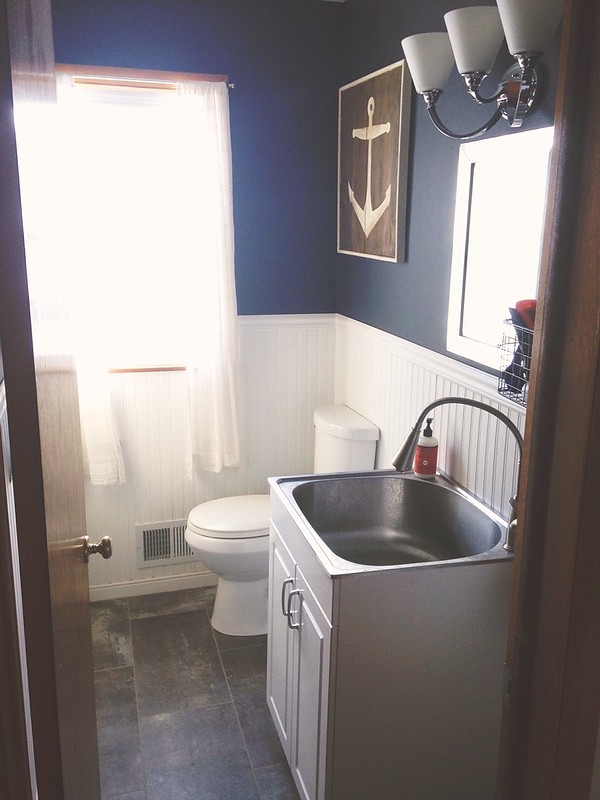
Ah, that's better:


All the while, we've really wanted to expand the use of the bathroom and make it more utilitarian. We wanted a nice, deep sink for soaking or spraying off muddy shoes, dirty scrub brushes, (maybe bathing baby?), etc. A good cabinet as a place to store all our homemade cleaning supplies. Most of all, we wanted it to be sturdy.

I've been eyeing laundry sinks for the space, but most of them were too deep to fit. When we decided we wanted to change the sink, like, NOW -- I was thrilled to discover that Home Depot now carries a laundry sink cabinet that is under 22 inches deep with lots of storage and an AWESOME spray thing.

We rushed right over to pick it up along with some new vinyl tile flooring we've been meaning to install.


Stephen installed the sink in a matter of an hour. We love it. Stainless steel is perfect. The sprayer is already getting good use. The sink itself is 9 inches deep, so I definitely think we'll be bathing the baby in here often. And, like I mentioned, while we were at it, we changed the flooring by getting some of those 12 inch by 24 inch vinyl tiles and using grout to make them look more like real stone.

It totally transformed the space:


On the other wall, we have many of our cleaning tools hanging around on a simple accordion rack:


Overall, it's made us love this bathroom. It's the one our guests use when they're visiting, so it's nice to have it looking sharp. It's also nice to have a super messy craft project with Ada and have a great place to stick all the paint and goo until we can clean it. I can't believe I'm so excited about a simple sink.

Our house has come a long way since we moved in. And even since I did the updated tour in June. I guess it's time to do another tour. Maybe a video idea! My biggest project goal is to install a sliding or French door in the living room (in place of an existing window) that will lead into the backyard. We're thinking of getting a few quotes soon just so we have a number in mind so we can save. (I'm clueless on how much something like that would cost.)

Happy Thursday!

Like what you just read? You can subscribe to the feed of these posts or follow us on Twitter or Facebook to be the first to know what the (never home)makers are up to. And we’ll love you forever!

Read more...

DIY Stair Runner // $60

>> Thursday, August 6, 2015

We’ve been wanting to do a runner in our front entryway for almost a year. When we moved in, the stairs and entry floor were covered by dingy white carpeting. We ripped it up almost immediately. We covered the entry floor with inexpensive vinyl tile + grout and left the steps naked . . . until today.

I got this crazy idea to do a DIY stair runner using cheap rag rugs from Ollie’s (a discount store chain). They’re only a couple dollars each, and this project only cost us $60 and about 90 minutes of our time. A lot less than the $400 we paid in our last house to get a boring carpet runner professionally installed.

Here’s how we did it:


SUPPLIES


  • 7 x rag rugs at $5.99/each = $42*
  • Non-slip runner pad = $12
  • Double sided carpet tape = $6 (like these)
  • Staple gun = Already owned (DeWalt for $26)
  • 3/8” to 1/2” staples = Already owned (like these)
  • Scissors 
  • Measuring tape
  • Hammer
* If you can’t find these locally, you can browse some on here. The size we used was approx. 2x3.

Total: $60

INSTRUCTIONS 


Like I said, I followed the tips on this tutorial. We also sort of just freehanded it once we got going. The first step was measuring the steps to see how many rugs we needed. You guys know I’m addicted to rag rugs, so I just used one I had in the width I wanted on the stairs to see how many I’d need.

When I got to the store, I didn’t have too many choices for patterns and colors because I needed 7 in all. Luckily, I really liked the one I was able to find. I bought 7 and then hopped over to the hardware store to get my other supplies.

When I got home, I measured the width of the stairs and marked the center on each with pen (I’d be covering it over anyway!). Then I cut the anti-slip pad so it would be a couple inches shy of the step from front to back and a couple inches short of the rug from side to side. I folded each in half and made another mark that I could align while taping.


Then I cut strips of the tape to adhere each pad to each step. I lined up the marks and did one per step.

Staple time! We started at the top of the steps and just lined up the top of the rug with the first step. We stapled in a line every couple inches. Then on the edges every couple inches. Then a couple other places. I followed the YHL tutorial for this part.


We didn’t do anything fancy for the seams. Thankfully they met on the under part of each step, so we didn’t have to deal with anything tricky where we’d be walking. Instead of overlapping, we just pulled the edges close together and stapled. It ended up working great.

We made our way down the rest of the stairs -- measuring periodically to center the rugs -- and when we reached the bottom, we cut the excess with several inches to spare. We tucked the excess under and stapled to finish.


I also found it really helpful to go back over some of the staples and hammer them deeper into the rug. There are a few that are still somewhat noticeable, so we’re planning to color them blue with a Sharpie when we get the chance.


End result:


We’re both really pleased with how it looks. It adds a lot of style to the space. Better yet, it added some nice traction to the stairs (they’re quite slippery without a runner). There’s some definite sound absorption going on, too. We still need to touch up some wood that was damaged when we pulled the old carpet off the steps, but this is a huge improvement.

I’ll be sure to let you know how this holds up. For $60, I think it’s a win. I would have liked to get a couple spare rugs as replacements in case something happens. They didn’t have any more in the same pattern, so I might check back in a few weeks.

One last before + after.


PS: I’ll share more about our new closet door in another house post soon.

For now, don’t forget to enter the Gallery Direct #giveaway.

I’ll be announcing the winner tomorrow morning!

Like what you just read? You can subscribe to the feed of these posts or follow us on Twitter or Facebook to be the first to know what the (never home)makers are up to. And we’ll love you forever!

Read more...

Big Girl Room

>> Tuesday, July 28, 2015

I haven’t shown photos of Ada’s “new” room at our “new” house . . . and we’ve already lived here a year. And in the past year, we’ve transitioned from the crib to a bed to now to a lofted bed. Her room has been a space of transition, and I’m sure it will continue to change and evolve as she grows.

Here’s where we are now:


There’s really no rhyme or reason behind much of the decor. This room was pieced together over many months, so there really was no master plan. Nothing really matches, yet -- at least to me -- the space seems to flow together in an explosion of rainbow cheeriness.

She certainly agrees!


SOURCE LIST


Bed: Ikea KURA. We had my brother pick it up for us last year because our closest store is almost 3 hours away. Here’s a very cute + inexpensive loft bed if you’re in a similar situation.

Duvet: Ikea UTELEK.

Princess art: Home Goods.

Wall hanging: Thrifted on our NYC trip.

Curtains: Eclipse Kids Blackout in purple.

Hanging sorter: Ikea PS FANGST.

Rug: Safavieh! I have had SO many questions about this rug and I finally found it again! And it’s cheaper than when I bought it several years ago. 6x9 foot.

Kid couch: Nod chair. I got ours on super sale years ago.

Baby crib: Bitty Baby by American Girl. Ours is an old version my MIL found at a yard sale.

Heart art: DIY -- here’s how.

Glow stars: Wonder Stars Super Kit.

Desk: Thrifted. Here’s a similar one -- it’s adorable and probably much sturdier than our antique version.

Knit animals: Blabla Dolls. Ada has Suzette the Fox and Mirabelle the Bunny.

Garland: Home Goods. Here are similar felted garlands.

Like what you just read? You can subscribe to the feed of these posts or follow us on Twitter or Facebook to be the first to know what the (never home)makers are up to. And we’ll love you forever!

Read more...

Updated House Tour

>> Friday, June 5, 2015

It’s been a while since I’ve collected photos of our house for a house tour. So far, I only have some photos of the lower level and yard covered. Still, it’s really fun to compare these shots with where we started last year around this time. And then with our old house tour.

Hope you enjoy these photos. These aren’t “DONE” rooms. Everything is always in progress, it seems. With budget, likes/dislikes, and moving stuff around when it makes the most sense. Is your house like this too? Regardless, I can’t believe how much we’ve done in such a short while. It already feels like home to us.

I’ll try to get up some second level photos soon-ish. We’re finishing paining the bathroom right now and doing a few things in the office, so I’d rather finish those first. (OK. You caught me. It’s also a complete disaster zone up there as I organize stuff and switch everything over to summer.)

LIVING ROOM


DINING ROOM


BATHROOM


KITCHEN


YARD


Like what you just read? You can subscribe to the feed of these posts or follow us on Twitter or Facebook to be the first to know what the (never home)makers are up to. And we’ll love you forever!

Read more...
Related Posts Plugin for WordPress, Blogger...

About This Blog

MyFreeCopyright.com Registered & Protected

© 2009-2014 by the (never home)makers
All content on this blog is copyrighted.
Want to publish our pics, tips, or tricks?
Contact us! [neverhomemaker@gmail.com]

We value transparency. Links on this page may contain affiliates. In addition, please see our disclosure policy regarding sponsored posts.

  © Blogger template Simple n' Sweet by Ourblogtemplates.com 2009

Back to TOP  

Blogging tips