
Adventures with Agave -- Vegan Chocolate Chippers
>> Monday, January 4, 2010
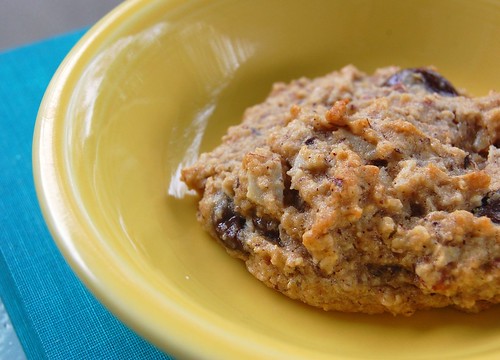
From the METHOD archives . . . Eating better means more adventures in my baking -- and, yes, these cookies are actually BAKED, not raw. So, I've decided to continue this trend with agave nectar (as you may have noticed -- it's in the "nutella" balls and coconut & carob cookies), which, if you're unfamiliar, is very much like honey except that it's a liquid-y sweetener derived from a plant. Therefore, vegan. The result of my experimentation was great -- the cookies turned out very well . . . and not TOO sweet, which is just how we like 'em here at the (never home)maker household.
Anyway, that's really all I have time for this afternoon, but I hope y'all enjoy this super chocolate chip cookie recipe! And since it's so cold outside, why not bake and go read some blogs @ the Blog Love Fest!
AGAVE-SWEETENED CHOCOLATE CHIP COOKIES
What you'll need . . .
- 1/2 cup agave nectar (you can find it in the organic foods section of most grocery stores)
- 1/4 cup Sugar in the Raw
- 1 cup canola oil
- 1/4 cup milk substitute of your choice (and I bet water works, too -- and, mmm, maybe coconut milk!)
- 1 tablespoon corn starch
- 2 teaspoons vanilla extract
- 1-3/4 cups wheat pastry flour
- 1/2 cup hazelnut flour
- 1/2 cup instant oats
- 1/2 teaspoon baking soda
- 1/2 teaspoon salt
- Vegan chocolate chips (or carob)
- Sliced almonds
Method . . .
- Preheat oven to 350 degrees F. Either grease two baking sheets -- or line them with parchment.
- Combine the agave nectar, sugar, oil, milk sub., and corn starch in the bowl of an electric mixer . . . speed on medium for two minutes. This part is important -- you want to fully combine these ingredients because they ensure the integrity of the cookie -- how it holds together.
- Stir in the vanilla.
- Add the flour, baking soda, and salt -- mix until well combined.
- Fold in the chocolate chips and almond slices.
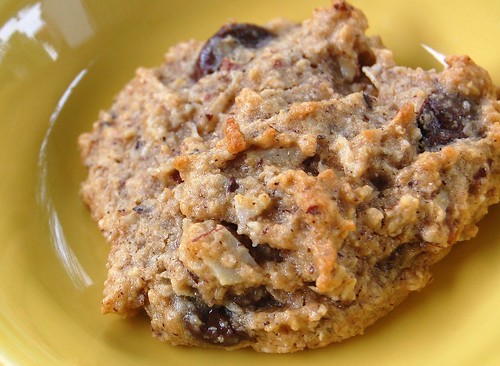
- Spoon 1-inch balls onto baking sheets and bake for between 7-10 minutes. Cookies are done when the edges are JUST browned, like in the photo above.
Like what you just read? You can subscribe to the feed of these posts or follow us on Twitter to be the first to know what the (never home)makers are up to. And we’ll love you forever!


