Showing posts with label design. Show all posts

Simple Smoothies and Grey Walls

>> Wednesday, August 24, 2011

I try my best to keep things simple. But I make all sorts of delicious foods -- all the time, in fact -- that I often don't deem blog-worthy. Especially lately, as it seems my tastes are changing again due to my pregnancy. Anything ANYTHING will give me heartburn. And I've again developed some food aversions. Most notably: I can't eat collard greens without having an immediate reaction (to put it lightly).

Simple. Easy. Boring? This smoothie, for example. It's so basic, I almost considered skipping it for posting purposes. But what makes this smoothie great is the texture.


BASIC STRAWBERRY SMOOTHIE

What you'll need . . .
  • 1 frozen banana (essential that it's frozen)
  • 3/4 cup frozen strawberries
  • 1/2 cup Greek yogurt
  • 1/2 cup almond milk

Method . . .
  1. Toss everything in a blender and blend.
  2. Add more or less milk depending on your texture preference.
  3. To jazz it up, add cinnamon. Or vanilla extract. But I don't think you need to.
I'm also favoring simple foods these days purely because I don't feel like I have much time to cook. We've been constantly on the go visiting friends, fixing up the house, etc. I'm also noticing my energy levels are changing. Our summer work hours have changed back from an 8-to-4 to a 9-to-5, and I'm having the most difficult time adjusting this year. Usually it's no biggie -- but now I can't wake up early knowing I have an extra hour to sleep in. And when I get home . . . I don't feel like exercising or blogging because I feel like it's too late.

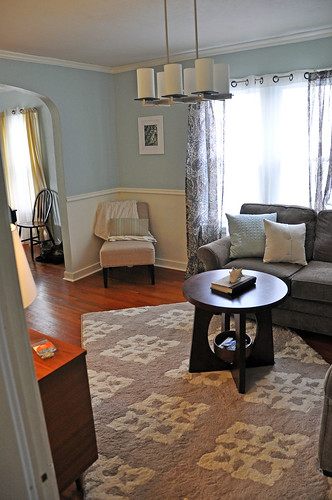
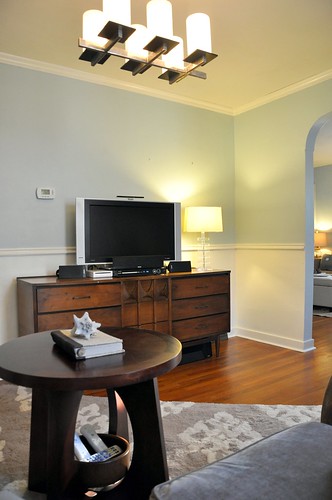
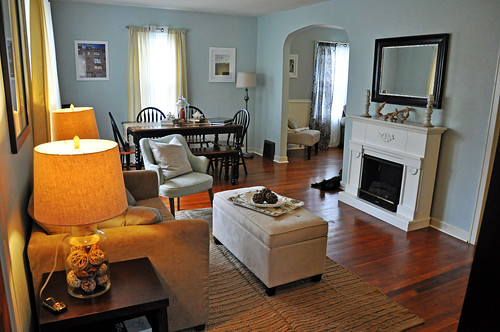
Sigh. I can't complain too much, though. We're still getting a ton done. Stephen painted most of our first floor last week. He has some detail and touch-up work to finish, but we're loving the new, bolder color.


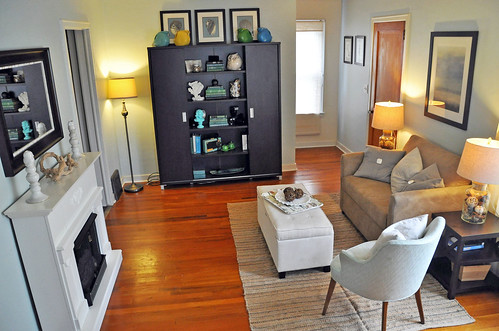
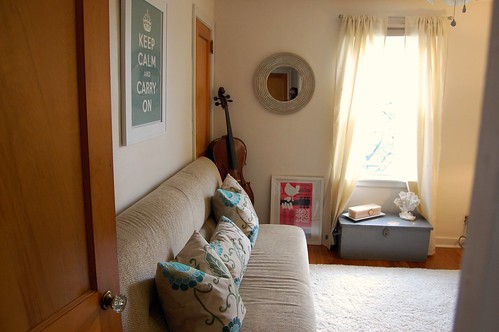
We also bought this new rug at Overstock.com as a start to our new color scheme. See the difference? If you've been on our house tour, you know we used to be all beach-y, Young-House-Love-Style.
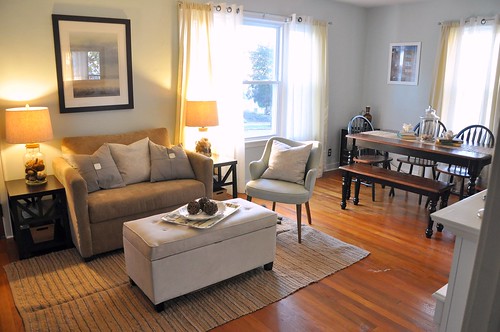

But that's so not who we really are. I think we went that direction at first because we just didn't know what to do and it was a popular look. Thing is, we're way more dramatic than that. So, the dark grey walls add some much-needed drama. We plan to keep it colorful and slightly bohemian-influenced.

But we have a lllooonnnggg way to go.


That's all for now. I'm going to TRY to sneak in a run this morning. We'll see if that happens! In the meantime, what's your favorite, most basic recipe? Just leave a comment or email us at neverhomemaker [at] gmail [dot] com.

And today on (never home)maker, baby! we're celebrating an early Thanksgiving. We want to know what baby items you've been fortunate enough to borrow . . . or what things you've been generous enough to share!

Like what you just read? You can subscribe to the feed of these posts or follow us on Twitter or Facebook to be the first to know what the (never home)makers are up to. And we’ll love you forever!!

Read more...

Sweet Potato Brownies (2.0)

>> Wednesday, August 10, 2011

Continuing with our sneaky trend of hiding veggies in desserts like Chocolate Chip-Banana Bread (and everything else), we've modified the much-loved Sweet Potato Brownie recipe we gave you several months ago. At the time when we first posted it, we were shocked at how dense, moist, and intensely chocolatey they turned out.

Only problem was . . . they wouldn't come out of the pan.


So, we set out to make them again last night, but with two new criteria. They needed to be just as healthy, if not MORE so. And they needed to be portable. After careful tweaking and taste-testing, I'm happy to report that we succeeded!


SWEET POTATO BROWNIES (2.0)

What you'll need . . .
  • 2 tablespoons canola oil (we used walnut oil, but veggie or canola works)
  • 2/3 cup unsweetened cocoa powder
  • 1/2 cup wheat flour
  • 1/3 cup rolled oats, uncooked
  • 1/4 teaspoon baking powder
  • 1/4 teaspoon salt
  • 3/4 cup maple syrup
  • 2/3 cup sweet-potato puree (we used a half/half mix of sweet potato and carrot puree we had been using for garlic knots)
  • 1 flax egg (see directions below)
  • 1 1/2 teaspoons vanilla extract
  • Handful chocolate chips
  • Handful peanut butter chips
  • Handful pecans or walnuts

Method . . .
  1. Spritz a 8-inch square baking pan with some canola oil. Set aside.
  2. Preheat your oven to 350 degrees F.
  3. In a small microwave-safe bowl, whisk together 1 tablespoon golden flax meal with three tablespoons water. Then heat on high for 30 seconds. Stir and set aside to cool.
  4. If you don't already have it, make your sweet potato puree. I used the microwave to heat a sweet potato (first prick it a few times with the tines of a fork) -- then put it on a plate and zap for 6 minutes on high. Alternatively, you can boil the potato if you're not a fan of microwaves. Scoop out the flesh, mash or puree, and let cool.
  5. In a large bowl, whisk together the flour, oats, cocoa powder, baking powder, and salt. Set aside.
  6. In another bowl, combine the sweet potato puree with the oil, flax egg, vanilla, and maple syrup. Mix until smooth.
  7. Then add the wet ingredients to the dry. Mix until everything is well moistened. Then stir in the chocolate chips, peanut butter chips, and nuts.
  8. Pour into your prepared pan. Then bake for 25 minutes. The batter will appear wet, so be sure to poke through the center with a toothpick.
  9. Let cool before slicing. They may still be quite moist, but I assure you, they will come out of the pan!
As always, my favorite way to devour these brownies is to smother them with peanut butter. Nutella might also be a great compliment. Any sinful spread, really.


And for those of you following our baby blog, we wrote all about our girl's ever-expanding closet today on (never home)maker, baby! Go see what she'll be wearing that's old, new, borrowed, PINK, and more!

Like what you just read? You can subscribe to the feed of these posts or follow us on Twitter or Facebook to be the first to know what the (never home)makers are up to. And we’ll love you forever!

Read more...

Sweet Potato Brownies

>> Tuesday, March 1, 2011

Day one of my March detox-ish thing went well. I ended up changing the end-half of the day -- choosing a couple pieces of leftover naan over brown rice and chickpea mash over broccoli. As one reader mentioned, thank you, Sabina, I needed more protein in there. Success!

I did have a slight binge right when I got home from work. But when you read the recipe, you'll see why I don't need to feel too awful about it. These sweet potato brownies (that I found on Food Loves Writing) will impress you with their fudge-i-ness.

They look sinful, too.


SWEET POTATO BROWNIES
(Adapted from Food Loves Writing, Adapted from Body + Soul)

What you'll need . . .
  • 4 tablespoons canola oil
  • 2/3 cup unsweetened cocoa powder
  • 1/2 cup oat flour
  • 1/4 teaspoon baking powder
  • 1/4 teaspoon salt
  • 1 cup organic cane sugar
  • 2/3 cup sweet-potato puree
  • 1 flax egg (see directions below)
  • 1 1/2 teaspoons vanilla extract
  • Handful or two chocolate chips
Method . . .
  1. Spritz a 8-inch square baking pan with some canola oil. Set aside.
  2. Preheat your oven to 350 degrees F.
  3. In a small microwave-safe bowl, whisk together 1 tablespoon golden flax meal with three tablespoons water. Then heat on high for 30 seconds. Stir and set aside to cool.
  4. If you don't already have it, make your sweet potato puree. Again, I used the microwave to heat a sweet potato (first prick it a few times with the tines of a fork) -- then put it on a plate and zap for 6 minutes on high. Alternatively, Shannalee suggests boiling the potato if you're not a fan of microwaves. Scoop out the flesh, mash or puree, and let cool.
  5. In a large bowl, whisk together the flour, cocoa powder, baking powder, and salt. Set aside.
  6. In another bowl, combine the sweet potato puree (pumpkin would also work wonderfully) with the oil, flax egg, vanilla, and sugar. Mix until smooth.
  7. Then add the wet ingredients to the dry. Mix until everything is well moistened. Then stir in the chocolate chips.
  8. Pour into your prepared pan. Then bake for 20 to 25 minutes. The batter will appear wet still, so be sure to poke through the center with a toothpick. Though it likely won't ever come out clean (these brownies are UBER fudge-er-rific) . . . try to make sure the middle is at least set a bit.
We enjoyed these brownies best after they had been cooled in the fridge. With a heaping scoop of homemade peanut butter on top. I also suspect they'd taste great with less sugar, maybe even with maple syrup as a substitute. They're all gone now, so experimentation will commence immediately. I may just need to make several batches until I get it right.

:)

Since I ate a ton when I got home, I don't have more photos for you to drool over. But don't worry . . . I've got something else to write about. Though we're not trying to get terribly excited over this house we looked at over the weekend (I mean, so much could go horribly wrong -- AND we have to sell our place first), I'm already lusting over rustic interiors I want to try out.


So, whether or not the stars align for this place -- wherever we land next will definitely sport a rough-around-the-edges-but-fabulous feel. And I think we can all agree that the main theme in these photos is exposed beams. Real or faux -- it doesn't matter . . . in the dark! (Arrested Development, anyone?)

Now I'll leave you with the song that's been stuck in my head since Sunday afternoon. (Quite frankly, I have a crush on this girl. She's beyond talented.) Also: Today is Stephen's 27th birthday. Please help me in wishing him the best one EVER!


Like what you just read? You can subscribe to the feed of these posts or follow us on Twitter or Facebook to be the first to know what the (never home)makers are up to. And we’ll love you forever!

Read more...

(never home)maker: You Have SO Many Looks!

>> Wednesday, December 1, 2010


That's right! We changed the site design . . . again. We promise to not make a regular habit of it. But this time, we were on a mission. We overhauled the entire layout, too. It's not just for looks, people. The results of our survey revealed that many of you thought the old navigation was OK. However, many others thought we could use a bit of TLC in the area.

You're smart. And we wholeheartedly agreed with your comments.

So, we've moved from a two column layout to a three column one. Mostly, it's because we want to create better ways to find our posts (as you'll notice, this part is still in the works). We hope to get it all looking far less busy than it did on the previous iteration.

BEFORE:


NOW:


Now, I know you're wondering about the colors. The new scheme is perhaps a symptom of the season. It's cold and grey outside today. The bright colors just didn't reflect what's going on right now. Plus, I had the opportunity to shoot some photos this morning and create a new header. (Those lights from our DIY lightbox really came in handy!) The result was a cool-toned picture that didn't exactly jive with a bold background.

The photoshoot? It was a disaster if we're being entirely honest.


But most of the clutter and filth (no, we have yet to purchase our mini dishwasher) was out of frame.

See?


Lots of props to play with. And after just a couple shots (I took only 20!), I settled on one I liked. Though, there was a close second. Unfortunately, it didn't reflect the whole fitness aspect of our site.

Here she is:


After adding some contrast and adjusting shadows, the header was complete. The next part went pretty quickly. I'd had the template picked out for a couple of weeks . . . just needed the courage to make the switch. Thankfully, it was relatively painless. And I'm pretty sure I like it. Takes some getting used to, but there's a lot more flexibility.

(Here's a trick for not-so savvy bloggers -- like me! -- out there. If you can -- set up a test site that mimics your "real" site. And just make sure you test everything before going live and changing the live page.)

So, that's the story of why we're looking quite different today than we did yesterday. We invite all you RSS followers to click through to neverhomemaker.com and check it out. Let us know what you think and if you have suggestions (Just leave a comment or email us at neverhomemaker [at] gmail [dot] com).


Obviously, we're listening . . . or I wouldn't have risked it all, gained a few grey hairs, and slightly freaked out during my morning break today. Let's just take a moment to look at the image above.

We've definitely come a long way in just over a year! Woah!!!

Like what you just read? You can subscribe to the feed of these posts or follow us on Twitter or Facebook to be the first to know what the (never home)makers are up to. And we’ll love you forever!

Read more...

Evolution of a Bedroom

>> Thursday, March 4, 2010


The time has come. I'm getting super bored with our master bedroom. Above is the space before we even moved in. The previous owner can totally take credit for the matching bedspread-curtains combo. We get kudos for our patchwork quilt and really awful tied curtains.

(What were we thinking???)

I remember being so proud of this look when we moved in. And now it makes me cringe. Has this ever happened to you?


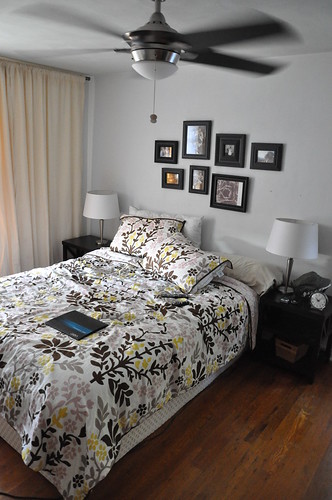
A few months passed. And we wanted a new look. A couple coats of grey no-VOC paint (that was like five shades lighter than we thought it'd be), and new spread, and a few yellow throw pillows later, here's where we found ourselves sleeping at night:


Then we discovered Young House Love (or at that time, This Young House). I loved the way they draped curtains in their bedroom to create a light, airy -- yet dramatic effect. So, like many others, we copied them.


But we still haven't mastered it. (Get it? Get it???) And you'll all just have to wait and see what we decide to do. Even I don't know at this point. It's all going down this weekend, though. Bright wall color? Bold bedspread pattern? New hanging wall treatment? Really, we're not sure. But it's boring. And blah. And oh-so plain-Jane.

We need to spice it up. NOW!

What about room design evolution in your house? Do you have any photos that make you want to hurl? It's almost as bad as looking at an old photo of yourself, really. Like back when I was blonde and Stephen got $10 haircuts. We're only sharing because we know you love us:


PS: Don't forget to add yourself to this month's BLOG LOVE FEST!


Like what you just read? You can subscribe to the feed of these posts or follow us on Twitter or Facebook to be the first to know what the (never home)makers are up to. And we’ll love you forever!

Read more...
Craftastic Envelope: DIY

>> Monday, December 14, 2009


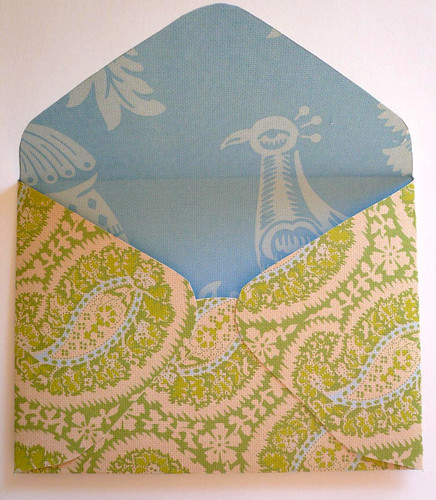
I like sending letters and cards to people -- especially during the holiday season. It's so wonderfully old-fashioned. And I strongly believe these homemade envelopes ensure that my letters are the most fashionable ones circulating the entire country. Or something like that.

You can get in on the fun, too. Just follow these easy steps!

What you'll need . . .

  • Card stock or other paper (I used Amy Butler 12x12" sheets)
  • A used (or new) envelope in whatever size you are going for
  • A pencil
  • Scissors
  • Double-sided tape
  • Stickers (or wax, etc. -- something to close the envelope)


Method . . .

  1. Gently deconstruct the used envelope. You will use this as a template to trace the newer, prettier one you're making.
  2. Trace around the envelop with your pencil on what will be the the INSIDE of the envelope you're making.
  3. Carefully cut around your template. Erase any pencil marks still left behind.
  4. Fold everything over in an envelope-like fashion (again, using the old envelope for inspiration), and then secure using double-sided tape.
  5. When you've written to your loved-one, simply fold your letter and secure the envelope with more double-sided tape and a sticker. Whatever you want to keep it sealed.


Like what you just read? You can subscribe to the feed of these posts or follow us on Twitter to be the first to know what the (never home)makers are up to. And we’ll love you forever <3

Read more...
Brief House Tour

>> Saturday, November 14, 2009


Welcome! We've never posted photos of all our current rooms in one place before. Usually we just share the before and afters as they happen. However, we're contemplating some drastic design changes in the next year, so we thought it'd be fun to chronicle what our house looks like today. Sit back and enjoy the tour . . .

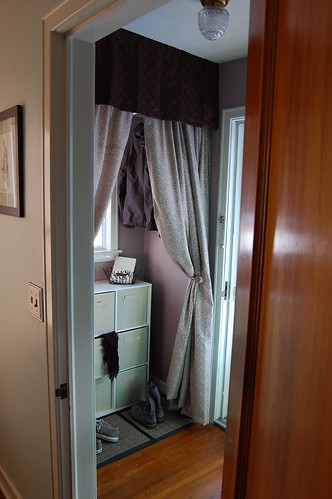
First, the entryway. A much needed coat closet prompted us to redo this space, which was once cluttered and embarassing.


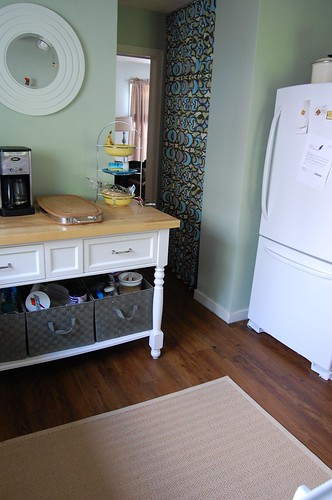
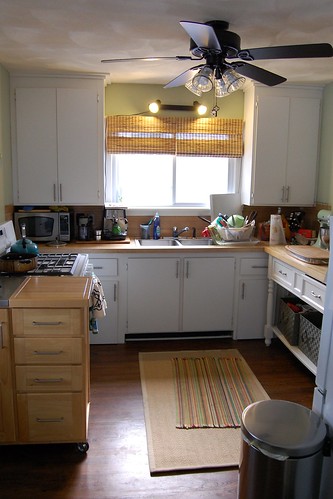
The kitchen. It's tiny, but efficient -- and we spend most of our time there. How'd we spice our space up on the cheap? First, we slapped some paint on the walls and added a dramatic printed curtain. Would you believe the floor was carpeted when we moved in? Believe it! And learn how we fixed the problem for only $1.99 a square foot!


The Family room. When we moved in, it was rather plain and carpeted 1960s-style to boot! We used it first as our dining room, but recently changed stuff around. Learn how we added some key architectural details and exposed those beautiful hardwoods with only a little cash and, OK, a lot of effort.


Living room/Dining room (sort of a decor mashup, I guess -- we're not thrilled with it at the present moment):


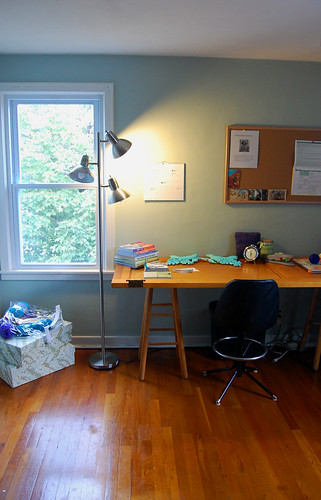
Upstairs to the guest room/office. When we moved in, this room was a pale shade of pink. A little girl's dream. Problem is: We don't have kids, and I'm a bit of a tomboy. But we were able to transform the space from pretty to posh for less than $300.


The craft room:


The "master" bedroom:


The only bathroom:


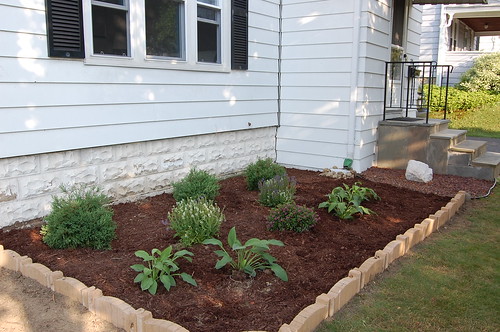
Outside to the front lawn:


Our covered porch:


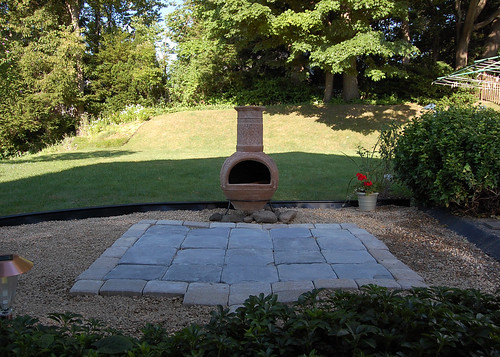
And patio:


There you have it. Our house. (Just about) all 1200 square feet of it, minus the bathroom (yes, singular bathroom) because it isn't quite "done" -- really, none of these rooms are "done". We've only been here about a year and a half. Though our house isn't quite a snazzy as we'd like . . . it's not too shabby either.


Like what you just read? You can subscribe to the feed of these posts and be the first to know what the (never home)makers are up to. And we’ll love you forever <3>

Read more...
kitchen glamour on the cheap

>> Friday, November 13, 2009


You know those fabulous kitchens featured on HGTV? With gleaming granite countertops, polished cork floors, and all stainless steel appliances? Yeah. I don't have one of those. It's all a bit of a mess. But after doing this project, it's a PRETTY mess.


The problem:

As much as I love to bake and cook, I don't exactly find our kitchen gourmet. In fact, it's rather tiny. As well as lacking in many areas (as mentioned above). To add, when we bought the place -- the walls were covered with 1960s floral wallpaper. As well, the curtains and other decorative accents left behind were also floral. Sunflowers, specifically.

So: bright yellow and orange. EVERYWHERE.

. . . did I mention our kitchen was carpeted? That was a whole other issue that we'll deal with in an upcoming post.

The solution: As Easy at 1-2-3!

  1. Rip the wall paper off the walls.
  2. Add a fresh coat of paint.
  3. And accessorize!

The method:

1.) Luckily, our wallpaper ripped clean off with little effort. However, if you don't have the same good fortune, follow these instructions for removing the nasty stuff. You'll be happy you did it the "right" way. So, as the folks at HGTV say: "patience is a virtue."

2.) Pick a color that will go with lots of different designs. We chose a pistachio for several reasons. Foremost, it matched my KitchenAid mixer. Strangely enough, the wall color we uncovered AFTER ripping down the wallpaper was also a pistachio green -- albeit tired and worn from its long life (which began in the 1950s, when the house was built). For painting, first go with a quality primer, and then a good, no-VOC (why no-VOC?) paint is always nice.

We used FreshAire in Arbor Vine. One coat did the trick.

3.) To give the kitchen some much-needed pizzazz, I opted to add a splash of print on the walls via a floor-to-ceiling curtain that I made myself. I have basically no sewing experience whatsoever. . . so be confident that you can do this! :)


  • Fabric.com has a huge variety of beautiful prints. I love Amy Butler, so I went with Nigella Twill Water Lotus Spinach -- which at just under $15 a yard packs a beautiful punch. And I appreciate the quality of the twill weight for home decor. It's simply more durable. And when you have kittens who like to climb things, it's good to go with durable.
  • I ordered 5 yards -- and the fabric's width was a bit wider than other varieties (54") . . . which fit the space almost perfectly. Play around with this before you stitch everything.You may have a larger area to cover -- in which case, make several panels following the instructions below.
  • Fold over the fabric when you determine the length (you should have plenty extra to fold over). I just got up on a stool and used my tension rod (which ultimately hangs the curtain up) to find a place to make a light mark with a fabric pen. Then, from where you fold, pin and then sew straight across two to three inches below that point -- making a long hole to push the tension rod through. Just like with regular curtains -- no tricks here. If you're in a particular bind (which I was in at our housewarming) -- you can ever staple the seam temporarily. Honestly. I'm not particularly proud of myself, but I did it.
  • Finish the piece off by hemming the other sides by folding them over one inch, pinning, seweing, etc.
That's really all it takes. I also added a cool mirror to the space because -- again -- it's tiny. And adding the print in moderation makes the space look classy versus cutesy. A much-needed improvement.

Like what you just read? You can subscribe to the feed of these posts and be the first to know what the (never home)makers are up to. And we’ll love you forever <3

Read more...
Related Posts Plugin for WordPress, Blogger...
About This Blog

MyFreeCopyright.com Registered & Protected

© 2009-2014 by the (never home)makers
All content on this blog is copyrighted.
Want to publish our pics, tips, or tricks?
Contact us! [neverhomemaker@gmail.com]

We value transparency. Links on this page may contain affiliates. In addition, please see our disclosure policy regarding sponsored posts.

  © Blogger template Simple n' Sweet by Ourblogtemplates.com 2009

Back to TOP  

Blogging tips