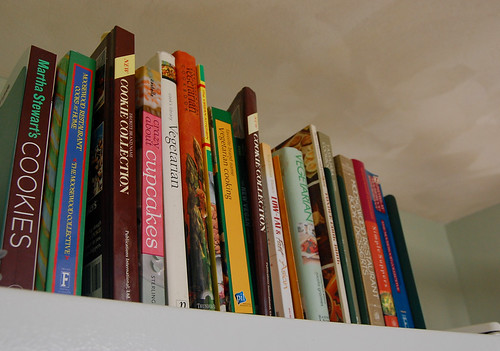
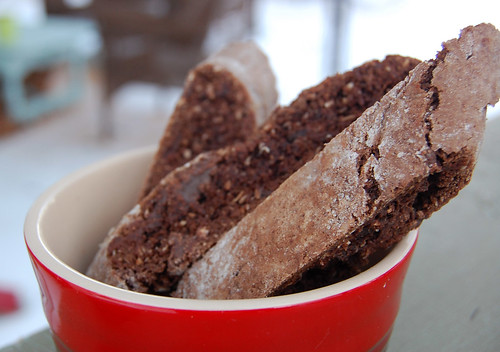
Showing posts with label martha stewart. Show all posts

Homemade Ciabatta Bread

>> Wednesday, February 18, 2015

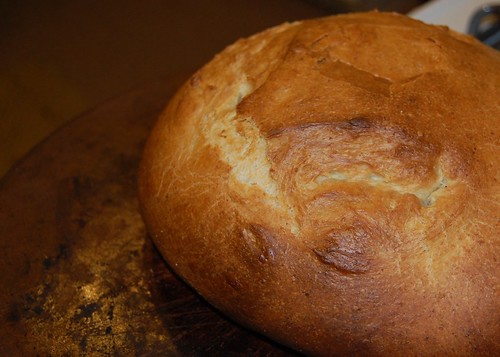
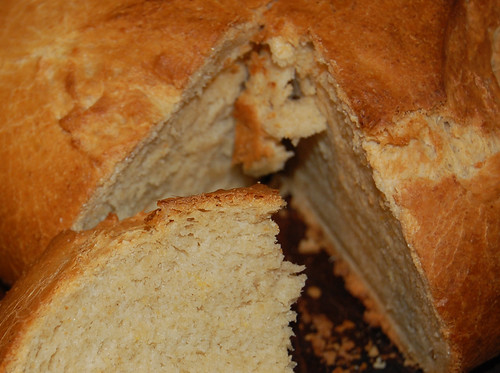
Today I want to share with you a recipe that’s changed my life over the last week. Every Friday, Stephen and I gleefully dance on into Wegmans and pick up bakery bread to make The LOVER Sandwich (yes, we still eat that one almost weekly!) or my all-time favorite, the Caprese Sandwich. Lately, we’ve been crushing on soft, pillowy ciabatta. But the $4.50 price tag shocks me every time. I knew I could make this bread from home, I just wasn’t sure how easy it would be.

Enter my beloved Martha Stewart Baking Handbook, which has taught me how to make everything from homemade bagels to pizza dough to cookies to cakes and more. The ciabatta bread is actually a variation of Martha’s foccacia recipe. I’ve made it enough times now that I’m happy to share some extended notes on mixing and baking so you guys can make bubbly ciabatta bread at home tonight!


CIABATTA BREAD


What you’ll need . . . 

  • 3-1/2 cups bread flour
  • 1/2 teaspoon dry active yeast
  • 1-1/2 cups warm water + a couple tablespoons
  • Extra flour
  • 1 teaspoon salt

Method . . . 

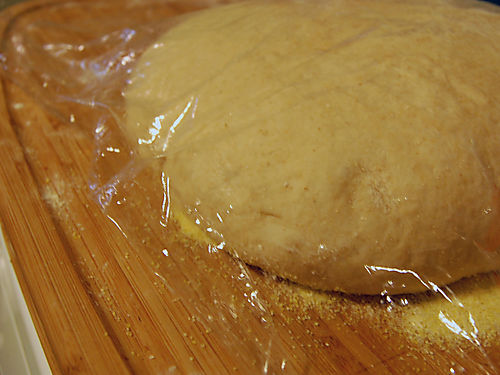
  1. In an electric mixer fitted with the whisk attachment, combine 3 cups of the flour with the water and yeast. You want to create a sponge, so the dough should basically be wet but not soupy -- see photo below. Add the last 1/2 cup flour (or more) until you reach that consistency.
  2. Cover and let rise for 1 hour uninterrupted.
  3. Then add in the salt and possibly a bit more flour for kneading. The book suggests using the dough hook for this part, but I used a silicone spatula to knead my dough with a bit of flour inside the bowl for 3-5 minutes.
  4. Then cover and let rise for two hours. 
  5. Preheat your oven to 450 degrees F. Place a baking stone on the bottom. 
  6. Generously flour a work surface and pour/scoop your dough out onto it, paying carful attention not to knead and compromise any of those bubbles.
  7. Cut dough in half or thirds so you can fashion two or three generous loaves with your hands. Coat with a light dusting of flour on all sides and let rest for another 10 minutes or so while you wait for your oven to preheat.
  8. If you have a peel, you can transfer the dough onto the stone with it. I don’t, so I just used a floured unrhymed baking sheet. Get that dough onto the stone ASAP and close the oven door. Set your timer for 20-30 minutes.
  9. Bread is done baking when it is lightly brown and the bottom -- when tapped -- sounds hollow. For me, this has generally been around 25 minutes.
  10. Let cool completely on a wire rack.


Notes


  • This recipe makes two generous loaves. I estimate they are slightly smaller than the ones we buy at Wegmans, so they’d probably cost like $6.50 or $7 together in all. Yet with the flour required and negligible yeast, I’m thinking at home the price is around $1. 
  • Play with the salt ratio to suit your tastes. I like my bread saltier, but you might not.
  • It’s important you let it rise the full two hours after the initial because it will turn out rather flat otherwise -- not great for slicing.
  • You can also use this recipe for pizza dough! Just divide into two and then lay out flat on your stone and top with toppings. Bake using the broil method like I outline in this post for best results.
  • The bread will last 2-3 days when wrapped at room temperature. 
  • I haven’t tried freezing, but will report back on that sometime soon!
  • Martha has a few other ciabatta recipes worth checking out.

And if you like this recipe, check out why you should stop buying sliced bread at the store and make your own instead. It may seem like there are lots of steps involved, but after you get the hang of a few key recipes, you’ll never want to look back -- I promise!


Bakery Style Breads, Etc.


Like what you just read? Browse more of our posts + recipes on Pinterest. You can subscribe to the feed of these posts or follow us on Twitter or Facebook to be the first to know what the (never home)makers are up to. And we’ll love you forever!

Read more...

Vegan Chocolate + PB Whoopie Pies

>> Thursday, January 15, 2015

This is one of those make-it-again kind of recipes, 2009-style. I was browsing through the site the other day thinking of ways to improve navigation and Ada said: “What are THOSE?” when she saw the gigantic sandwich cookies glowing on the screen. Of course, I was like “Why don’t we go make them and find out?”

And that’s how this happened on a Monday night:


VEGAN CHOCOLATE + PB WHOOPIE PIES


I’ve changed my modifications of the original recipe (that appears in Martha Stewart’s COOKIES book). To get the original recipe, go here. This batch turned out incredibly moist and fluffy, exactly how you’d imagine they’d be!

For the pies . . .
  • 1-3/4 cups all-purpose flour
  • 3/4 cup unsweetened cocoa powder
  • 1-1/2 teaspoons baking soda
  • 1/2 teaspoon baking powder
  • 1/2 cup Earth Balance (or your favorite butter substitute)
  • 1/2 cup raw cane sugar
  • 1/2 cup packed dark brown sugar
  • 1 tablespoon flax meal plus 3 tablespoons warm water (flax “egg”)
  • 1 cup unsweetened coconut milk (or other nondairy milk)
  • 1 teaspoon pure vanilla extract
For the filling . . .
  • 2/3 cup natural, creamy peanut butter
  • 1/2 cup soft coconut oil
  • 3/4 cup confectioners’ sugar

Method . . .
  1. Make cookies: Preheat the oven to 400 degrees. Sift together flour, cocoa powder, baking soda, and baking powder into a small bowl; set aside.
  2. Put Earth Balance (butter sub.) and sugars into the bowl of an electric mixer fitted with the paddle attachment. Mix on high speed until smooth, about 3 minutes. Add the flax egg; mix until pale and fluffy, about 2 minutes. Mix in half the flour mixture, then the unsweetened coconut milk and vanilla. Mix in remaining flour mixture.
  3. Drop rounded tablespoons of dough onto baking sheets lined with parchment paper, spacing 2 inches apart. Alternatively, you can use a muffin top or whoopie pie pan to make perfect rounds!
  4. Bake until cookies spring back when lightly touched, 12 to 14 minutes. Let cool on sheets on wire racks 10 minutes. Transfer cookies to wire racks using a spatula; let cool completely.
  5. Make filling: Put peanut butter and coconut oil (it needs to be soft but not liquid) in the bowl of an electric mixer fitted with the paddle attachment. Mix on high speed until smooth. Reduce mixer speed to low. Add confectioners' sugar; mix until combined. Raise speed to high, and mix until fluffy and smooth, about 3 minutes. Season with salt, if desired. Place in refrigerator to help firm up a bit.
  6. Assemble cookies: Wait until cookies are completely cooled before proceeding. Then put a heaping tablespoon or so of the frosting atop one round. Top with another. Repeat until you’ve used all cookies and frosting. 
  7. Suggestion: You may want to store these guys in the refrigerator so the coconut oil doesn’t soften and make your cookies fall apart. Speaking from experience. If you do put them in the fridge, just take out 10 or so minutes before you plan to consume.

Enjoy!

Like what you just read? Browse more of our posts + recipes on Pinterest. You can subscribe to the feed of these posts or follow us on Twitter or Facebook to be the first to know what the (never home)makers are up to. And we’ll love you forever!

Read more...

The Best Homemade Bagels

>> Monday, October 27, 2014

Bagels. They’re my favorite bread-y thing. I’ve been making my own bagels for years -- except the actual occasions when I take the time to make them are few and far between. Since I stopped buying sliced bread, I’ve been making more of an effort to continue that trend with other baked goods as well. And if you make them in bulk and freeze, this process is well worth the effort.

The recipe I follow for homemade bagels is always the same with a few exceptions, mostly with regard to add-ins and toppings. It’s modified from the bagel recipe you’ll find in the Martha Stewart Baking Handbook. I’m hoping to make a few batches of this recipe over the week to freeze (just slice before putting bagels into freezer bags!).



HOMEMADE BAGELS


Recipe originally posted a while back. Thought it was worth resurrecting.

What you'll need . . .
  • 3/4 teaspoon active dry yeast
  • 1-2/3 cups warm water
  • 3 tablespoons sugar
  • 3 tablespoons honey (see notes)
  • 3 cups unbleached all-purpose flour
  • 1-1/2 cups whole wheat flour
  • 1-1/2 tablespoons table salt
  • Poppy seeds, sesame seeds, coarse salt, etc. 
  • Vegetable oil (for bowl)
  • Plastic wrap
  • Parchment paper 
Mixing + prepping the dough . . .
  1. In a large bowl, whisk together the yeast and water, sugar and honey. Let stand fo 5 minutes. 
  2. Toss in the flours and salt. Knead for about 1 minute (until a slightly tacky -- but not sticky -- dough forms). You may need to add more flour or water depending on what you find. If so -- just add in 1 tablespoon amounts. Continue to knead dough by hand for about 5 more minutes -- then transfer to a lightly oiled bowl and cover with oiled plastic wrap.
  3. Let rise in a warm place for 2 hours (until doubled in bulk).
  4. Divide dough into 8-10 equal pieces. Cover with a damp kitchen towel. Let rest for a half hour.
  5. Line two unrimmed baking sheets with parchment paper and set aside.
  6. Roll each piece of dough into a 6-inch rope. Form a circle around your hand and then press the two ends (rather, roll them) together to seal. In short: Make a bagel shape and be sure to fuse the ends together.
  7. Place the bagels 2 inches apart on the prepared baking sheets. Cover with a piece of oiled plastic wrap (I used the same one from earlier in the process), and let rest while your oven preheats.
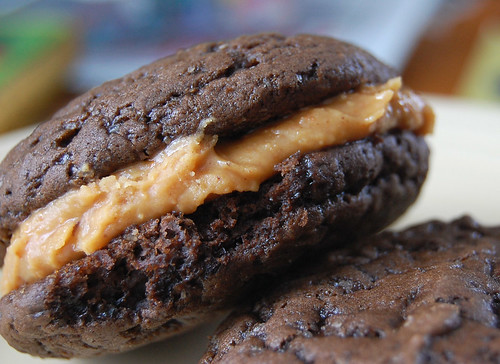
Boiling + baking the bagels . . .
  1. Preheat the oven to 500 degrees F (260 C) -- with racks in the upper and lower thirds.
  2. Fill a large stockpot with water and bring to a boil.
  3. Gently drop bagels into the water (as many as will comfortably fit without touching each other). After 30 seconds, use a slotted spoon to gently flip the bagels over -- simmer for yet another 30 seconds. (I boiled 3 at a time.)
  4. Then return the bagels to the parchment-lined sheets. Top them with the seeds or salt -- you must do this when the bagels are still wet so everything sticks to them. 
  5. When you've finished this process with all to-be bagels, immediately place sheets in the oven. Bake for 5 minutes and then rotate the sheets and reduce the temperature to 350 degrees F. Bake until golden brown, about 10 minutes.
  6. Then use a spatula and flip bagels over. Continue baking for another 5 minutes -- or until the back-sides are golden brown as well.
  7. Transfer bagels to wire rack to cool. 

// NOTES

  • Sometimes I used honey or maple syrup versus molasses.
  • Sometimes I use white sugar versus brown.
  • Sometimes I do all white bread flour or just all-purpose and WW, etc.
  • Sometimes I omit the flax meal entirely.
  • I’ll do plain toppings like just salt, poppy seeds, or sesame.
  • Whatever I toss in, the boiling + baking process is exactly the same.

// FREEZE

  • Let bagels cool completely. 
  • Slice in half. 
  • Cover each bagel with foil or plastic wrap.
  • Place inside a zip freezer bag. Freeze
  • Toast on low to defrost.
Like what you just read? You can subscribe to the feed of these posts or follow us on Twitter or Facebook to be the first to know what the (never home)makers are up to. And we’ll love you forever!

Read more...

White-Whole Wheat Baguettes: Lessons from Martha

>> Thursday, April 15, 2010


Well -- completely unintentionally -- it seems that this week, it's all about bread and time-consuming recipes on (never home)maker! I've been trying my hand at baking different kinds lately. How can I not share them all? This recipe is modified from one that appears in the Martha Stewart Baking Handbook. In typical Martha fashion, nothing is easy or fast about it.

Baguettes in 20 easy steps. Yeah, right? Well, bear with me. (It's not BARE with me, right? I'm not asking you all to disrobe . . .) It's fun! You'll need to first make a starter (and this recipe marks the first time I've had to do just that).

So, let's get starter-ed . . .

What you'll need . . .
  • 1-1/2 scant cups of unbleached bread flour
  • 3/4 cup plus 2 tablespoons warm water
  • 1 envelope (1/4 ounce) active dry yeast

Method . . .
  1. In the bowl of an electric mixer fitted with the paddle attachment, combine all ingredients to form a thin batter.
  2. Cover with plastic wrap and let stand at room temperature for 12 to 16 hours (mine was more like 24).
  3. What results will have tripled in size, deflated, and have a "ripe, yeasty smell" (yum, right? hahaha).

For the dough:

What you'll need . . .
  • 1-1/2 cups whole wheat bread flour, plus more for dusting
  • 1/3 plus 2 tablespoons room temperature water
  • 1-1/2 tablespoons coarse salt
  • Vegetable oil (for bowl)
  • Cornmeal for dusting


Method . . .
  1. Add the flour, water, and salt to the starter. Attach the bowl to the mixer -- this time fitted with a dough hook -- and mix on low for 2 to 3 minutes.
  2. Raise the speed to medium and beat until the dough is smooth and elastic (3 minutes more).
  3. Turn dough onto a lightly floured work surface and gently knead for 1 minute.
  4. Place dough in a large, lightly oiled bowl and cover with plastic wrap -- let rise about 1 hour.
  5. Return dough to lightly floured work surface. Pat into an oval shape. Be careful when handling dough to be gently with it -- you want to keep any air or bubbles in tact.
  6. Fold in the following way: Fold the bottom third up to the center, the top third down all the way, and the right and left sides in. Press down on the seal.
  7. Gather dough and flip over -- seam side down -- and pat to dislodge any excess flour.
  8. Return dough to mixing bowl and cover with oiled plastic wrap to rise for 1 hour.
  9. Return the dough to a lightly floured work surface. Pat into a round this time and divide into two equal pieces.
  10. With your hands, gently shape each piece into a rough oval. Again, avoid deflating any air pockets, you want to keep those.
  11. Cover with plastic wrap and let rest undisturbed for half an hour.
  12. Sprinkle a wooden peel with some coarse cornmeal (I used fine cornmeal and when I put it in the oven -- all hell broke loose, smoke everywhere!). Set one piece of dough on a floured work surface and press to flatten just slightly. Then fold in the same fashion as you did before. Then roll the to-be-baguette until it is approx 16 inches long.
  13. Repeat with other piece of dough.
  14. Place both to-be-baguettes on the peep, cover with plastic wrap and let sit for another 30 minutes (you're almost to the good part -- just hang in!!!).
  15. While you wait, place a baking stone on the floor of your oven and preheat to 450 degrees F.
  16. Use a sharp knife to slice four shallow slashes diagonally down each loaf. Then carefully slide each onto your baking stone -- maintaining their shape as much as possible.
  17. Bake until golden brown (about 30 minutes). Transfer immediately to a cooling rack.


Are you still with me? Yeah. This recipe is LONG. And HARD. That's what she said. But, really, it's worth the effort -- after all, baking bakery-style bread is fun and gives a great feeling of accomplishment.

Now, I don't quite know what happened, but the bottom of my loaves burned badly. I'm almost 100% sure it was because I used fine cornmeal. So, don't make the same mistake I did. This baguette is best straight from the oven. Or the same day it's made. If you must save it for a rainy day, it'll last in the freezer (wrapped in tin foil or plastic wrap) for up to three weeks.

Like what you just read? You can subscribe to the feed of these posts or follow us on Twitter or Facebook to be the first to know what the (never home)makers are up to. And we’ll love you forever!

Read more...

Three-Seed Crackers

>> Wednesday, February 10, 2010


Crackers. We've made 'em before, if you'll remember, the no-flour or yeast variety: Healthy Crackers full of couscous, oats, nuts, and spices. But these are healthy, too. And much more like what you traditionally think of when you crave the snack. Stephen ate most of them himself, so that should tell you just how good they really are!

This recipe is adapted from one that appears in Martha Stewart's Baking Handbook. We just kicked them up a notch -- took out the egg and parmesan -- and added flax meal, spelt, and sesame and poppy seeds (hence the three seed in the name). Delish!


What you'll need . . .
  • 1 cup warm water
  • 1 teaspoon active dry yeast
  • 3 tablespoons olive oil
  • 2 cups unbleached white whole wheat flour (or whole wheat)
  • 1/2 cup flaxmeal
  • 1/2 cup spelt flour
  • 2 teaspoons coarse salt
  • 2 teaspoons agave or honey
  • 1/4 cup sesame seeds
  • 2 tablespoons poppy seeds
  • 1 teaspoon garlic powder
  • More salt for sprinkling


Method . . . 
  1. In the bowl of an electric mixer, stir together 1/4 cup of the warm water and yeast. Let stand for 5 minutes (until foamy).
  2. Add the olive oil, flours, flax meal, salt, agave or honey, the garlic powder, sesame and poppy seeds, and the rest of the warm water. Attach to a mixer fitted with the paddle attachment and mix on low speed for 1 minute.
  3. Switch to a dough hook, and mix on medium-low speed until dough is soft, but not tacky. 2 minutes. I found that I had to add another tablespoon of water because my dough was too dry. If you encounter this issue, too, add water slowly -- in 1 tablespoon amounts -- until you reach the soft, but not tacky consistency.
  4. Transfer dough to a lightly floured work surface and knead for five minutes (I actually just kept mine in the bowl mixing with the dough hook for that part). Form into a ball, put in a bowl and cover with lightly oiled plastic wrap. Let sit for 10 minutes.
  5. Refrigerate until well chilled (at least 1 hour) and line two baking sheets with parchment.
  6. Preheat oven to 350 degrees F. Turn out dough onto a lightly floured work surface again. Divide into 16 equal parts (for huge crackers) or 32 (for small crackers).
  7. Use a rolling pin to roll out the pieces until they are thin and then transfer those pieces of dough to the baking sheets. Brush lightly with water and then sprinkle with the extra coarse salt you have.
  8. Bake for 15 to 20 minutes, rotating sheets halfway through, until crisp and golden. Cool on a wire rack. Repeat with remaining dough.
  9. Crackers stay good in airtight container for up to 3 days.


If you like this recipe, you'll love the Martha Stewart's Cooking School cookbook. And you still have until tomorrow night to enter our giveaway for a chance to win! It's just our way to celebrating reaching 500 subscribers (that number is now closer to 630)!

    Like what you just read? You can subscribe to the feed of these posts or follow us on Twitter or Facebook to be the first to know what the (never home)makers are up to. And we’ll love you forever!

    Read more...

    GIVEAWAY: Martha Stewart's Cooking School cookbook

    >> Monday, February 8, 2010


    You may have been with us for our last giveaway -- when we celebrated reaching 250 subscribers with prints from the (never home)maker print shop. Now we've reached yet another milestone -- 574 subscribers. And that's definitely call for a celebration! So what's our Something for Nothing Giveaway this time? You'll be pleasantly surprised!

    A couple weeks ago, I started a discussion about everyone's favorite cookbooks. And a lot of mine are in the Martha Stewart collection. So I felt it was appropriate to give away a brand-spankin'-new copy of one of my favorites: Martha Stewart's Cooking School! Though this hefty book isn't entirely vegetarian, it provides priceless tips on how to poach and coddle eggs . . . braise veggies and cream spinach . . . as well as perform a variety of delicious dessert techniques. Etc.


    (More info from the Martha Stewart Website:)

    Class is in session, and Martha Stewart is your instructor! This amazingly informative cookbook features over 200 delicious recipes with step-by-step photographs that don't just teach you what to cook, but how to cook it.
    • 200 recipes arranged by cooking technique
    • Hardcover, 480 pages
    • Over 500 photographs
    • Tips on equipment, ingredients and every other aspect of the kitchen


    Looking to make this awesome book your very own? Entering isn't hard -- and selection will be at random (using Tara's Random Number Generator). Here's the scoop:
    • THE GOODS: One (1) copy of Martha Stewart's Cooking School cookbook.
    • TO ENTER: Comment on this post with the words COOK THE BOOK somewhere in your post.
    • IN ADDITION: Tell us what cooking technique you have yet to master and would like guidance on. And anything else you'd like to tell us :)
    • GIVEAWAY CLOSES: Thursday, February 11th at 9:00PM EST
    • PRIZE SHIPS: USA only (I'm sorry -- I know many of you are from Canada and beyond . . but USA only for now, we're working on it...)
    • ALSO: To win, I need your email address -- so please provide it (or your blog link so I can find it -- just some way of contacting you) or, unfortunately, you cannot win. 
    • PS: One entry per email address is allowed. The winners will be selected using Tara's Random Number Generator (then I'll go through and make sure I get one person for each photo) and announced Friday morning.


    Some other bits of information in a handy YES/NO format:
    • Yes -- the winners will totally be random. There will be NO favoritism, mom.
    • No -- you need not subscribe or follow us on twitter to win. Though, it'd certainly be nice if you'd consider. As well, you don't need to mention our giveaway on your blogs or in your tweets -- though, if you feel like it, we won't stop you! :)
    • No -- you need not purchase anything at the Print Shop to win. Period.
    • Yes -- we reserve the right to change the rules at any time (though we likely won't need to) as well as to choose winners (though still totally at random) as we see fit and fair.
    • Yes -- if you have additional questions, you can shoot us an email at neverhomemaker@gmail.com 

    Good luck! Thanks for reading (never home)maker . . . and tell your friends! Because the sooner we get to 1,000 subscribers, the sooner we get to our next big giveaway!

    Like what you just read? You can subscribe to the feed of these posts or follow us on Twitter or Facebook to be the first to know what the (never home)makers are up to. And we’ll love you forever!

    Read more...

    Rainbow Stew: Another Slow Cooker Favorite

    >> Thursday, January 28, 2010


    My typical lunch "hour" is spent hunched over at my desk doing work, unfortunately. My responsibilities entail not only my attention to detail as the director's assistant, with the PR committee, and with various editing and photography needs (all of which I love) . . . but I'm also the building manager. What exactly does this mean? Well, I'm responsible for arranging to fix anything that breaks within a gigantic, four-story monster of a building that enjoys foot traffic from most of the campus daily. Toilets explode. Alarms go off. Students spit on the floor (true story). ID cards stop granting access. Electricity fails and outlets spark. Ants take offices by force. The list goes on and on (and on). Yesterday I found myself leading an entourage of facilities employees through the building to find nuts and bolts to fix one of our periodicals stacks. Random, random stuff here. And it doesn't stop for lunch.

    What's worse is that until recently, I always, always would forget to even BRING my lunch . . . or wouldn't have enough time in the morning to slap something together. For a while, Lean Cuisine was my savior. But all the salt in them started to concern me. And since my favorite is mac and cheese, I wasn't exactly getting the best nutrition.

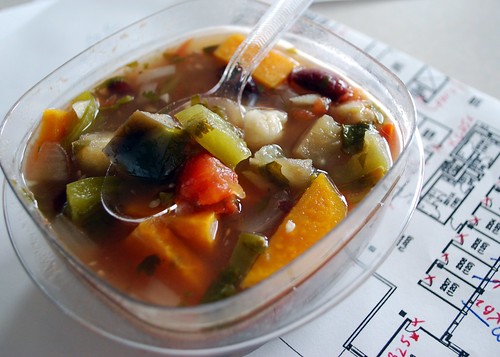
    Enter, again, the slow cooker. I made this "rainbow stew" -- a rather psychedelic name for a rather trippy stew -- by throwing all the veggies I could find into a pot. My favorite ingredients? The sweet potatoes and eggplant AND cauliflower. But the kidney beans and fire-roasted tomatoes have their moments, too. It's all good. If you're wondering why you should eat a rainbow of fruits and veggies, read this.

    So, when I take the time to actually bring my lunch, I find myself taking time to actually TAKE my lunch. Use this recipe as a jumping point and you, too, can enjoy a week of intensely nutritious, relaxing lunches (or half a week for two people eating a little over a cup daily). I paired mine with half a PB&J on multi-grain.

    Just look at all those veggies!


    RAINBOW STEW

    What you'll need . . .
    • 1 medium-large sweet potato, skinned and cubed (orange)
    • 1 medium eggplant, cubed (purple)
    • 1/2 green pepper, chopped (green)
    • 1/2 medium Spanish onion, chopped (yellow)
    • 2 small heads cauliflower, chopped (white)
    • 1 jalapeno, seeded and finely chopped (dark green)
    • 2 to 3 cloves garlic, minced (white)
    • 1 bunch cilantro, finely chopped (green)
    • 1 can kidney beans, drained (dark red)
    • 1 can garbanzo beans, drained (light brown)
    • 1 can fire-roasted tomatoes, drained (red)
    • 2 cans vegetable broth (a little over four cups)
    • Salt and pepper to taste . . . though we only used pepper

    Method . . .
    1. Chop, mince, and otherwise prepare all your ingredients.
    2. Put EVERYTHING -- all vegetables (and fruits if you want to get all technical on me) and beans -- in the slow cooker pot and mix them to distribute.
    3. Pour in the vegetable broth
    4. Turn the slow cooker to high and cook for about 3 to 3-1/2 hours. Mix every hour or so.

    PS: Unless you like your soups hot-hot-hot, you'll really want to seed the jalapeno. My husband didn't do this, and ours was very good, but for the first couple days, I'd choke when I took my first slurp.
    :)

    PPS: Check us out on one of my favorite cooking/kitchen-related blogs -- THE KITCHN -- our kitchen tour made the cut and is now up for your viewing pleasure.

    Like what you just read? You can subscribe to the feed of these posts or follow us on Twitter or Facebook to be the first to know what the (never home)makers are up to. And we’ll love you forever!

    Read more...

    Thrifty Veggie Stew

    >> Wednesday, January 27, 2010


    All you healthy eaters out there may now breathe a long sigh of relief. No more peanut butter chocolate pillows to give you a food coma. Ahhhhhhh. Vegetables! Beans! No sugar added! I crafted this meal with you folks in mind. The consistency of this dish is really less stew-like than my title may imply. It's almost more of a pasta dish. But, yet again, too stew-like to deny that fact in the title.

    What can I say . . . I'm confusing.

    The "thrifty" part comes in when you realize you have most of the ingredients needed already in the back of your kitchen cupboard.


    What you'll need . . .
    • 5 cups vegetable stock
    • 3 cups water
    • 1 can sweet corn (no salt added)
    • 1 can diced tomatoes (fire-roasted)
    • 1 can pinto beans
    • 3/4 cup Israeli couscous
    • 3/4 cup elbow pasta
    • 1/2 cup Marsala cooking wine
    • 4 large cloves garlic, chopped
    • 1 package (about 12 ounces) frozen spinach
    • Salt & pepper to taste


    Method . . .
    1. In a large stock pot, combine the vegetable stock and water. Heat on medium-high until bubbling (but not boiling).
    2. Drain – but do not rinse – the corn, tomatoes, and beans. Add them to the pot, as well as the couscous and elbow pasta. Heat on medium-high heat for approx. 10 minutes.
    3. Check to see if the pasta & couscous are getting soft. Then add cooking wine and garlic chunks, and turn the heat down a bit. Cook for another ten minutes.
    4. Add the frozen spinach, stirring occasionally until it is fully incorporated (and not a frozen brick!).
    5. Add salt and pepper. Cook on low heat until ready to serve.

    Like what you just read? You can subscribe to the feed of these posts or follow us on Twitter or Facebook to be the first to know what the (never home)makers are up to. And we’ll love you forever!

    Read more...

    Olive Oil Loaf

    >> Monday, January 11, 2010


    Before I begin: If you haven't checked out our first giveaway yet -- head over there now!

    My in-laws were up this past weekend to visit and have our belated x-mas celebration. Even my dad and brother made the trip up on Saturday to hang out in our tiny living room for the afternoon. It was a good time. And we got some AWESOME gifts -- including some fancy flour to try out, a mug (one for each of us) featuring our prettiest marathon photos, and GARMIN WATCHES! If you're a runner, you get it. The Garmin 405 is the Cadillac of GPS running watches -- even provides detailed maps, elevation charts, pace, heart rate, etc., etc. all via satellite connection.

    Very cool. Stephen's enjoying his to the max. I, unfortunately, am not to thrilled with the watch's design and opted (thanks again Kathy & Joe!) to trade the HUGE thing in for a smaller Garmin. Can't wait to try it out sometime this week and provide a full report on its awesome-ness.

    Anyway, enough running stuff. Now that's it's absolutely freezing out . . . I often have hours to kill on the weekend . . . and when the weather is absolutely terrible, I like to make bread from Martha Stewart's Baking Handbook.

    The Olive Oil Bread (page 293) looked easier than the others . . . and, as an olive oil lover, I was absolutely intrigued: what WOULD it taste like? Brilliant is the answer to that question. In fact, I can't stop eating the moist and flavorful stuff. You'll certainly taste the salt . . . and I imagine adding some minced garlic to the mix would be delicious. Seriously -- if you like bread, you're love this recipe. And as much as it takes time . . . it's far less labor intensive than some of the other recipes in the book (which, by the way, is a fantastic buy -- and I highly recommend picking up a copy for your cookbook library).

    So, if you have several hours at home today, tomorrow, whenever . . . try it out. It's a wonderful dinner companion, or just a delicious snack on its own.


    What you'll need . . .
    • 2 cups water, room temperature
    • 2-1/2 cups bread flour
    • 2 cups wheat pastry flour (I modified this part -- you may use all bread flour if you like)
    • More flour for dusting
    • 1 ounce fresh yeast
    • 3/4 cup extra-virgin olive oil, plus more for bowl and plastic wrap
    • 1 tablespoon coarse salt
    • Cornmeal, for dusting
    • Time . . . lots of it.


    Method . . .
    1. In the bowl of an electric mixer, combine the water, flour, yeast, and olive oil. Set your paddle attachment to low speed and mix until the ingredients are JUST incorporated. Cover with plastic wrap and let rise in a warm place (my mother-in-law suggested sticking it in the cool oven, which is warmer than most places in the house) until doubled in bulk -- about 1 hour and 15 minutes.
    2. Attach the bowl to the mixer fitted with the dough hook. Add the salt, and mix to combine on low speed. Raise the speed to medium, and beat until the dough pulls away from the sides of the bowl, but is still sticky (about 2 minutes).
    3. Turn out the dough onto a lightly floured surface and knead it for approx. 1 minute. Then transfer the dough to a large, lightly oiled bowl. Cover with lightly oiled plastic wrap and let rise in a warm place until, again, doubled in bulk (about 1 hour)
    4. Return the dough to a lightly floured surface and fold in the following way: Fold the bottom third of the dough up, the top third down, and the right and left sides over -- tapping the dough after each fold to release excess flour and pressing down the seal. Flip dough seam side down, cover with the oiled plastic wrap, and let rest for about 15 minutes.
    5. Dust a large wooden peel (I used one of our cutting boards) with cornmeal and set aside. Transfer dough to a clean work surface. To shape, cup it between your rounded palms, roll it in a circular motion, pulling down on the surface of the dough to form a tight, smooth round. This is MUCH more intuitive than it sounds . . . just make it into a tight ball.
    6. Transfer the round to the wooden peel (or cutting board), and drape with the oiled plastic wrap. Let rest until slightly puffed: 30 minutes.
    7. Meanwhile, place a baking stone on the bottom oven rack and preheat the oven to 450 degrees F.
    8. Make four slashes on the top of the loaf with a knife (to form a square -- which helps make sure the bread bakes evenly). Slide the loaf onto the stone (I just picked the dough up and quickly transferred it).
    9. Bake until the crust is a dark, golden brown (about 35 minutes). Please bread on wire rack to cool before slicing.

    Like what you just read? You can subscribe to the feed of these posts or follow us on Twitter to be the first to know what the (never home)makers are up to. And we’ll love you forever <3

    Read more...

    Cinnamon Raisin Bread

    >> Thursday, December 17, 2009


    Wow. So this whole X-mas thing is next week. As in, a mere seven days away. And I'm definitely not ready. Last night after work, I trekked out to Target to do a little shopping, and it was an absolute madhouse. I'm sure it'll only get worse, but -- alas -- I didn't find anything I was looking for. Just too many decor items I wanted. Ugh! As well, we woke to several inches of unexpected snow this morning. It's chilly. It's slippery. It's not great running weather (unless you put spikes on your shoes, which we're both seriously thinking of investing in).

    Guess it's time to indulge my other senses. Grow a layer of extra fat to stay warm. Well, hopefully not that last part. Tonight's gym activities include power yoga and intervals on the bike. Perhaps a mile or two on the tiny indoor track. But that drives me insane. I am, however, happy to report that I'm not confined only to the bike. My foot seems to be all better -- no joke. I'm looking forward to a 10 to 12 miler on Sunday, depending on the temperature.

    CINNAMON RAISIN BREAD!

    This recipe is from the Martha Stewart Baking Handbook -- a GREAT cookbook that I highly, highly recommend. (Actually, I think I've already recommended it. But it's early, so I'll just do it again.) The recipe in the book yields two loaves. However, I halved it (which is what I'm providing below), and it turned out great. As well, I've provided the more "normal" ingredients in parentheses (as well as some specific ingredient suggestions), but I made it vegan and, again, it turned out GREAT.


    What you'll need . . .

    . . . for the bread:
    • 1 1/8 tsp active dry yeast
    • 1 cup warm soy milk (about 110F)
    • 1 lb 1 oz (about 3 1/4 cups) bread flour, plus more for dusting
    • 1/2 stick (1/4 cup) Earth Balance or butter, room temperature, cut into pieces, plus more for pan
    • 1/4 cup sugar (In the Raw works well)
    • 2 tablespoons water + 1 tablespoon canola oil + 2 teaspoons baking powder (or one large egg)
    • 1 1/4 tsp salt (I used coarse, Kosher salt)
    • 1/2 cup raisins
    • 1/2 tbsp ground cinnamon

    . . . for the filling:
    • 3/4 cups sugar (In the Raw works well)
    • 1 tbsp ground cinnamon
    • 1 tbsp water


    Method . . .

    1. Make the dough: In the bowl of an electric mixer, sprinkle the yeast over the warm milk; whisk to combine. Add the flour, Earth Balance (or butter), sugar, cinnamon, water + canola oil + baking powder (or egg), and salt. Attach bowl to mixer fitted with the dough hook. Mix on low speed until all the ingredients are well combined, about 3 minutes. Raise the speed to medium-low, and continue to mix until the dough is uniformly smooth and pulls away from the sides of the bowl, about 3 minutes more
    2. Turn out the dough onto a lightly floured work surface. Pat out dough into a 9 inch round, about 1 1/4 inches thick. Sprinkle with raisins and knead until they are just incorporated. Place the dough in a lightly oiled bowl, and cover with an oiled sheet of plastic wrap; let rise in a warm place until doubled in bulk, about 1 hour.
    3. Return the dough to a lightly floured work surface, and pat into a round. Fold in the following manner: Fold the bottom third of the dough up, the top third down, and the right and left sides over, tapping the dough after each fold to release excess flour, and pressing down to seal. Return the dough to the bowl, seam side down, and let rise again -- covered -- until doubled in bulk, about 40 minutes.
    4. Make the filling: Combine sugar and cinnamon with water in a small bowl. Return the dough to a lightly floured work surface. Roll out one half to a 12 by 10 inch rectangle and sprinkle with the filling.
    5. Generously butter a 9x5 inch loaf pan; set aside. With a short end of the rectangle facing you, fold in both long sides of the dough, about 1 inch. Then roll the dough toward you, gently pressing as you go to form a tight log. Gently roll the log back and forth to seal the seam. Place the loaf in a prepared pan, seam side down. Cover pan loosely with lightly oiled plastic wrap, and let rest in a warm place until dough rises just above the rim of the pan, about 30 minutes. Meanwhile, preheat the oven to 425 degrees F.
    6. Transfer pan to a rimmed baking sheet. Bake, rotating pan halfway through, until loaf is golden brown, about 45 minutes (for me, it took 40 minutes). If the tops begin to brown too quickly, tent with aluminum foil -- and I did have to do this.
    7. Turn out the bread onto a wire rack to cool completely before slicing. This is important because ALL of the sugar mixture shoots out if you don't wait. It's a delicious landslide, but just wait, and yours will turn out better. :) The bread can be kept at room temperature up to 4 days, in a tightly sealed container.
    Like what you just read? You can subscribe to the feed of these posts or follow us on Twitter to be the first to know what the (never home)makers are up to. And we’ll love you forever <3

    Read more...

    Double Chocolate & Coconut Biscotti

    >> Monday, December 14, 2009


    Yet another favorite from the METHOD archives this morning. I needed something to cheer me up. Those of you who aren't friends with us on Twitter probably don't know what I'm getting for X-mas this year. Tiffany key pendant? No. Le Creuset French Oven? Nope. Pasta Attachment for my mixer? Not that either. Brace yourselves (literally), everyone -- I'm getting a fresh set of rotors and breaks for the front of my car.

    What else could a girl wish for? Ugh.

    Just another disappointment in a long line of disappointments that started earlier this weekend . . . but because I'm trying to eliminate drama and negativity from my life, I won't repeat them here. At least not at all once.

    On a positive note, there really is good news. But I won't share it yet . . . don't want to jinx it. (And, no. I'm not joining the ranks of preggers bloggers out there as the word positive might imply. My husband is totally not ready for that. Hah! For example, he is participating in a gift donation for needy families through work and was asked to pick up a 2T sized sweater for a little boy. He returned home with a baggy 5T -- it was mislabeled -- and didn't seem to notice at all that a 5T would be GIGANTIC on a little 2-year-old.)

    Alas, it is the season to be merry! So drown your sorrows with some hot chocolate and biscotti. And if you have a bit of coconut rum around, a few splashes couldn't hurt. Also . . . biscotti makes a great stocking-stuffer if you're strapped for cash!


    What you'll need . . .

    • 1-1/8 cup wheat pastry flour, plus more for dusting
    • 1/2 cup cocoa powder
    • 1/2 teaspoon baking soda
    • 1/2 teaspoon salt
    • 1/2 cup bittersweet chocolate chunks (I used Ghirardelli)
    • 1/2 cup semisweet chocolate chips
    • 1/2 cup unsweetened coconut flakes
    • 2 large whole eggs, plus 1 large egg white, lightly beaten (for brushing)
    • 3/4 cups granulated sugar (I used Sugar in the Raw)
    • Sanding sugar (or more granulated sugar), for sprinkling

    Method . . .

    1. Preheat the oven to 350 degrees F.
    2. In a food processor, pulse the flour, cocoa, baking soda, salt, 1/2 cup bittersweet chocolate chunks, and coconut flakes until chops are the size of peas.
    3. In the bowl of an electric mixer fitted with the whisk attachment, beat the whole eggs and sugar until the mixture holds a ribbon-like trail on the surface for a few seconds when you raise the whisk (approx. 5 minutes).
    4. Switch to the paddle attachment. With mixer on low speed, add the flour mixture and remaining 1/2 cup of semisweet chocolate chips -- mix until just combined.
    5. Turn out the dough onto a lightly flour work surface, and divide into two equal pieces.
    6. Shape each piece into a 12(ish) inch log and transfer to a baking sheet.
    7. With the palm of your hand, gently press the logs to flatten slightly & brush egg white over them.
    8. Sprinkle with sanding sugar, if using.
    9. Bake, rotating pan halfway through, until logs are just firm to the touch -- 20 to 24 minutes.
    10. Transfer sheet to a wire rack to cool slightly, about 20 minutes.
    11. Place logs on a cutting board. Using a serrated knife, cut 3/4-inch-thick slices on the diagonal.
    12. Place a wire rack on a large rimmed baking sheet. Arrange slices, cut sides down, on the rack
    13. Bake (still on 350F) until biscotti are firm to the touch and completely dry -- 10 to 12 minutes.
    14. Remove pan from oven; let biscotti cool completely on rack.

    Biscotti can be kept in an airtight container at room temperature for up to 1 week.


    NOTE: The recipe I've provided (modified from one in
    Martha Stewart's Baking Handbook) is for a half batch (the original yields 4 dozen!).

    Like what you just read? You can subscribe to the feed of these posts or follow us on Twitter to be the first to know what the (never home)makers are up to. And we’ll love you forever <3

    Read more...

    Peanut Butter Whoopie Pies

    >> Tuesday, December 8, 2009


    People out there who frequent this site know I'm addicted to everything chocolate-peanut butter. And for those of you new to (never home)maker -- you'll learn fast. I made these peanut butter whoopie pies one night at 10PM on a whim. Totally random. I've not had much time for baking during the work-week these days, so when I get the urge, I go for it.

    Though the original recipe wasn't vegan -- and these turned out wonderfully with a little Ener-G Egg Replacer! If you'd like some tips on how to turn regular recipes into vegan ones, check out yesterday's post about substitutions for common ingredients in baking. My favorite part of this whoopie pie? The peanut butter center, of course! Oh, and I think the pies taste best straight from the fridge.

    (A bit from the book now . . .)
    "The origins of the whoopie pie remain a mystery, but many believe that the cookie, a specialty of Pennsylvania Dutch country and parts of New England, was created when leftover cake batter was baked, iced, and sandwiched as a treat for children."


    Adapted from a recipe in Martha Stewart's COOKIES book. To get the original recipe, go here.

    For the pies . . .
    • 1 3/4 cups all-purpose flour
    • 3/4 cup unsweetened cocoa powder
    • 1 1/2 teaspoons baking soda
    • 1/2 teaspoon baking powder
    • 1/2 cup Earth Balance (or your favorite butter substitute)
    • 1/2 cup raw sugar
    • 1/2 cup packed dark-brown sugar
    • Ener-G Egg Replacement for 1 large egg (I also imagine that 1/4 cup applesauce would do the trick)
    • 1 cup regular soy milk
    • 1 teaspoon pure vanilla extract

    For the filling . . .


    Method . . .
    1. Make cookies: Preheat the oven to 400 degrees. Sift together flour, cocoa powder, baking soda, and baking powder into a small bowl; set aside.
    2. Put Earth Balance (butter sub.) and sugars into the bowl of an electric mixer fitted with the paddle attachment. Mix on high speed until smooth, about 3 minutes. Add Ener-G (or other egg replacement); mix until pale and fluffy, about 2 minutes. Mix in half the flour mixture, then the soy milk and vanilla. Mix in remaining flour mixture.
    3. Drop rounded tablespoons of dough onto baking sheets lined with parchment paper, spacing 2 inches apart. Bake until cookies spring back when lightly touched, 12 to 14 minutes. Let cool on sheets on wire racks 10 minutes. Transfer cookies to wire racks using a spatula; let cool completely.
    4. Make filling: Put peanut butter and Earth Balance (butter sub.) in the bowl of an electric mixer fitted with the paddle attachment. Mix on high speed until smooth. Reduce mixer speed to low. Add confectioners' sugar; mix until combined. Raise speed to high, and mix until fluffy and smooth, about 3 minutes. Season with salt, if desired.
    5. Assemble cookies: Spread 1 scant tablespoon filling (or more!) on the bottom of 1 cookie. Sandwich with another cookie. Repeat with remaining cookies and filling. Cookies can be refrigerated in single layers in airtight containers up to 3 days. Bring to room temperature before serving.
    Like what you just read? You can subscribe to the feed of these posts or follow us on Twitter to be the first to know what the (never home)makers are up to. And we’ll love you forever <3

    Read more...

    Homemade Bagels!

    >> Tuesday, November 24, 2009


    What I am about to share with you all is HANDS-DOWN my favorite recipe from the METHOD archives. To me, there's nothing more satisfying than making something I previously thought could be "great" ONLY if purchased in a bakery. Bagels, at least I thought, would never, EVER turn out well at home. They'd be too soft or chewy . . . but after much investigation, that's absolutely not the case.

    So let's get to it . . .


    BAGELS! GLORIOUS & HOMEMADE BAGELS!

    (Modified from a recipe in Martha Stewart's Baking Handbook)

    What you'll need (to make 10 healthy bagels) . . .

    • 3/4 teaspoon active dry yeast
    • 1-2/3 cups warm water
    • 3 tablespoons sugar
    • 1 tablespoon molasses
    • 3 cups bread flour
    • 1-1/2 cups wheat pastry flour
    • 1-1/2 tablespoons table salt
    • Poppy seeds, sesame seeds, coarse salt, rye seeds, etc., etc. (whatever you'd like to top 'em with!)
    • Vegetable oil (for bowl)
    • Plastic wrap
    • Parchment paper (I don't think this is absolutely necessary, but it definitely helps)


    Method . . .

    1. In the bowl of an electric mixer, whisk together the yeast and water. Let stand fo 5 minutes (until foamy).
    2. Attach bowl to mixer fitted with the dough hook and -- with the mixer on low speed -- add the sugar, molasses, flours, and salt. I actually forgot to add the salt, and they still turned out beautifully. Knead for about 1 minute (until a slightly tacky -- but not sticky -- dough forms). You may need to add more flour or water depending on what you find. If so -- just add in 1 tablespoon amounts.
    3. Continue to knead dough for about 5 more minutes -- then transfer to a lightly oiled bowl and cover with oiled plastic wrap.
    4. Let rise in a warm place for 2 hours (until doubled in bulk).
    5. Divide dough into 10 equal pieces. Cover with a damp kitchen towel (the book reminds us to make sure the towel is CLEAN, which I find hilarious). Let rest for about 20 minutes.
    6. Line two unrimmed baking sheets (no worries -- mine were rimmed, so I don't know the benefit of using the unrimmed sheets) with parchment paper and lightly brush with oil; set aside.
    7. With lightly oiled hands, roll each piece of dough into a 6-inch rope. Form a circle around your hand and then press the two ends (rather, roll them) together to seal. There really isn't a great way to explain how to fasten them together -- so go with your gut!
    8. Place the bagels 2 inches apart on the prepared baking sheets. Cover with a piece of oiled plastic wrap (I used the same one from earlier in the process), and let rest until puffed (about 20 minutes).


    And now the fun part . . .
    1. Preheat the oven to 500 degrees F (260 C) -- with racks in the upper and lower thirds.
    2. Fill a large stockpot (the wider the better, Martha notes) with water and bring to a boil.
    3. Gently drop bagels into the water (as many as will comfortably fit without touching each other). After 30 seconds, use a slotted spoon to gently flip the bagels over -- simmer for yet another 30 seconds. (NOTE: I only boiled 2 at a time.)
    4. Then, using the slotted spoon again, return the bagels to the parchment-lined sheets. Top them with the seeds or salt -- you must do this when the bagels are still wet so everything sticks to them. Also, I was somewhat anal and used a paper towel to wipe up the extra water that dropped onto my baking sheet.
    5. When you've finished this process with all to-be bagels, immediately place sheets in the oven. Bake for 5 minutes and then rotate the sheets and reduce the temperature to 350 degrees F (176-ish degrees C). Bake until golden brown (about 10 minutes -- but mine only took 8).
    6. THEN use a spatula (I just made my husband do this part, as he seems to be impervious to heat) and flip bagels over. Continue baking for another 5 minutes -- or until the back-sides are golden brown as well.
    7. Transfer bagels to wire rack to cool! Then toast and enjoy with some eggs (or just a generous topping of butter, Nutella, peanut butter, etc.)!


    Yes. The process is rather involved -- but it's also easy and well worth the effort.

    Like what you just read? You can subscribe to the feed of these posts and be the first to know what the (never home)makers are up to. And we’ll love you forever <3

    Read more...
    Related Posts Plugin for WordPress, Blogger...

    About This Blog

    MyFreeCopyright.com Registered & Protected

    © 2009-2014 by the (never home)makers
    All content on this blog is copyrighted.

    Want to publish our pics, tips, or tricks?
    Contact us! [neverhomemaker@gmail.com]

    We value transparency. Links on this page may contain affiliates. In addition, please see our disclosure policy regarding sponsored posts.

      © Blogger template Simple n' Sweet by Ourblogtemplates.com 2009

    Back to TOP  

    Blogging tips