Showing posts with label cinnamon. Show all posts

No-Rise Pumpkin Cinnamon Rolls

>> Monday, October 12, 2015

I’ve wanted to make cinnamon rolls for breakfast for like six months now. Every time I think to get out my mixing bowls, I get discouraged when I see all the rising time in different recipes. So, I came across a tasty pumpkin cinnamon roll recipe on Sally’s Baking Addiction (after all, I love our pumpkin pizza dough -- I figured it’d be a similar thing).

And then I asked myself . . . what if I just didn’t wait?

Well, I first made the recipe vegan because I didn’t have eggs or butter or milk in my pantry. I also didn’t wait for anything to rise much at all. They turned out w.o.n.d.e.r.f.u.l.l.y and this recipe will be a staple in our house for the holiday season to come.


PUMPKIN CINNAMON ROLLS

Adapted from this recipe -- made vegan + for the impatient among us.

What you’ll need . . . 
  • 1/3 cup canned coconut milk
  • 2 tablespoons Earth Balance
  • 1/2 cup pumpkin puree
  • 2 tablespoons brown sugar
  • Pinch salt
  • Ener-G Egg Replacer for 1 egg*
  • 2-1/4 teaspoons active dry yeast
  • 2-1/2 cups bread flour
* It’s 1-1/2 teaspoon replacer + 2 tablespoons warm water. You might also try a flax egg.

For filling . . . 
  • 1/2 cup + 2 tablespoons brown sugar
  • 2 teaspoons ground cinnamon
  • 1/4 cup melted Earth Balance

Method . . . 
  1. Preheat your oven to 350 degrees F. Generously grease an 8 x 8 baking dish (I ended up using glass) and set aside.
  2. Melt the 2 tablespoons of Earth Balance on your stovetop. Whisk together with the coconut milk, pumpkin puree, brown sugar, and salt. Then take it off the heat (you don’t want it HOT, just warm), prepare your Ener-G egg, and whisk that in until smooth.
  3. While this mixture is still warm, transfer to a large mixing bowl and add in the yeast. Wait a couple minutes to dissolve.
  4. Then add in the flour. I started with just 2 cups and then kept adding until my mixture didn’t stick to my fingers. Don’t add TOO much flour. The dough should be somewhat loose.
  5. Drizzle your dough with a bit of olive oil and cover while you prepare the filling.
  6. Simply combine the brown sugar, cinnamon, and Earth Balance in a small bowl. Set aside.
  7. I think because I was occupied with cleaning that I let my dough rise a grand total of maybe 10 to 15 minutes. That’s all.
  8. Then generously flour a work surface and roll your dough with a rolling pin into a rectangle that’s about 16 inches by 10 inches (yes -- I measured).
  9. Spread the filling over the entire thing and then roll so it’s a long tube. Cut into 10 to 12 cinnamon rolls.
  10. Arrange the rolls in your pan. Then bake for 15 minutes. That’s right! I didn’t let them rise at all before putting them in the oven.
  11. Cover with foil and bake for another 10 to 15 minutes. You’ll likely notice they’ve puffed quite a bit. Also: I found mine took a bit longer in the oven, and I think it’s because I used a glass pan, so keep and eye on the rolls to see when they’re golden. The foil is to keep them from burning, but I did remove it in the final couple minutes.
  12. Let cool before devouring. You can also top them with icing or cream cheese, etc. But I found them sweet enough as is, especially because I increased the filling a bit from the original recipe.

ENJOY!

Like what you just read? You can subscribe to the feed of these posts or follow us on Twitter or Facebook to be the first to know what the (never home)makers are up to. And we’ll love you forever!

Read more...

Operation: Cozy Food

>> Thursday, October 8, 2015

I recently wrote an article about the 9 foods you should add to your cart if you want full autumn immersion. Since I haven’t posted much about food in this space lately, I wanted to recap some of my favorite fall recipes for you. I admit the recipe archives aren’t the easiest to navigate, so some good stuff gets lost in the shuffle.

Here are my top 10 picks for fall flavor + coziness.

#1: Pumpkin Hot Chocolate for 1


#2: Butternut Squash Pizza Sauce


#3: Apple Cider Dunkers


#4: Potato-Stuffed Acorn Squash


#5: Apple + Pumpkin Spice Stew


#6: Mini Bittersweet Pumpkin Pies


#7: Savory Corn Pancakes w/ Brussels Sprouts


#8: Apple + Cinnamon Butternut Squash Soup


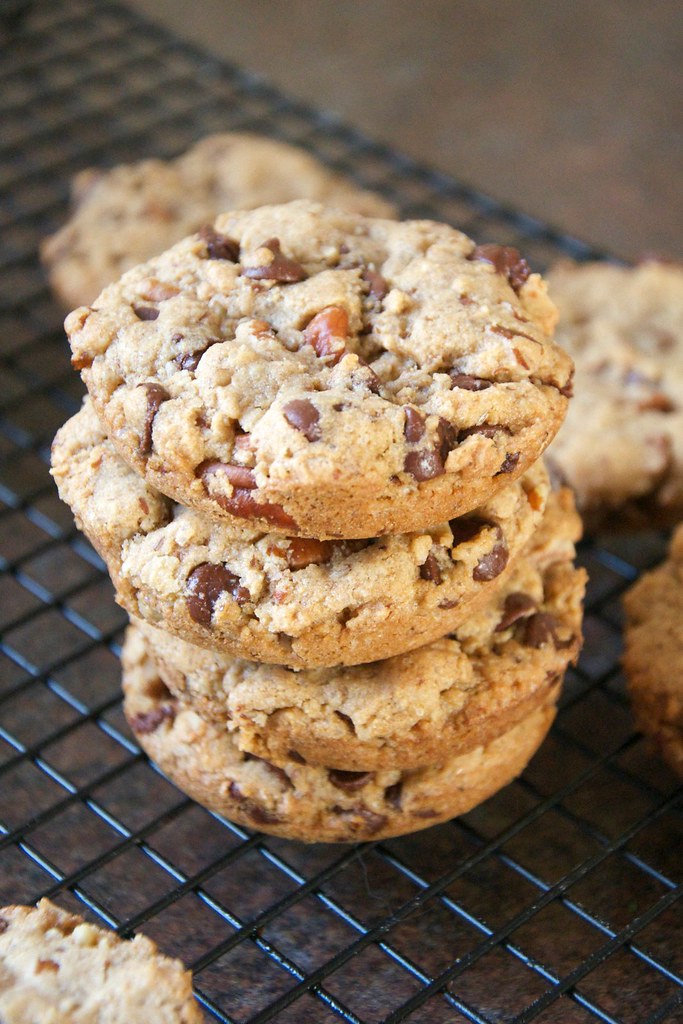
#9: Maple + Pecan Chocolate Chippers


#10: Spiced Applesauce Biscuits


Like what you just read? You can subscribe to the feed of these posts or follow us on Twitter or Facebook to be the first to know what the (never home)makers are up to. And we’ll love you forever!

Read more...

Morning Glory Muffins

>> Monday, January 19, 2015

A friend of mine shared a recipe for a delicious morning glory loaf on Facebook last week. And immediately, I just had to make them. I’m being serious. I put the computer down and started getting out all my baking pans to find the muffin tin. But, I set out to change a few things with this recipe. First, I was out of eggs and typically bake things vegan out of habit. And I wanted to include less oil. And no refined sugar.

So, I modified and mixed and even tossed in some freshly squeezed clementine juice for natural sweetness. What resulted from these efforts is a truly amazing breakfast muffin that’s also gluten-free, vegan, and full of fruits and veggies.

Ada ate half the batch herself.


MORNING GLORY MUFFINS

Adapted from this awesome recipe on Imagine Childhood.

What you’ll need . . . 
  • 1 cup GF rolled oats processed into flour
  • 1/2 cup GF rolled oats, whole
  • 1 teaspoon baking soda
  • 1 teaspoon cinnamon
  • 1/4 cup maple syrup
  • 1/4 cup olive oil
  • 2 tablespoons flax meal + 6 tablespoons hot water (2 flax “eggs")
  • 1 teaspoon vanilla extract
  • 1/2 orange (or 1 full clementine) -- just the juice
  • And also the zest, if you like it!
  • 2 large carrots, shredded (around 1 cup)
  • 1 large apple, shredded (around 1 cup)
  • 1/3 cup walnuts, pulsed to crumble
Method . . . 
  1. Preheat your oven to 350 degrees F. Grease a muffin tin with Earth Balance or coconut oil.
  2. In a large bowl, whisk together the oat flour, oats, baking soda, and cinnamon. Set aside.
  3. In a smaller bowl, combined the maple syrup, olive oil, flax eggs, vanilla, orange juice, then pour this mixture into the dry ingredients.
  4. Add the carrots, apples, and walnuts, and mix until well incorporated.
  5. Then divide evenly among your pan -- 12 muffins in all -- and bake for 20-25 minutes. Until golden brown and set in the center.
  6. Let cool on a rack for a few minutes before consuming. I am sure you can also freeze once they are totally cooled, but they didn’t last that long in our house!


You’re going to love these muffins. 

Just a note that the batter will definitely be shaggy, if that makes any sense. It might not seem like you have enough oat covering to go over all those shredded apples and carrots. I assure you, it will all bake up beautifully. And these are incredibly healthy if you consider they’re mostly just oatmeal baked into muffins.

Enjoy!

Like what you just read? You can subscribe to the feed of these posts or follow us on Twitter or Facebook to be the first to know what the (never home)makers are up to. And we’ll love you forever!

Read more...

Ultimate Apple Guide + Recipes

>> Thursday, September 25, 2014

My favorite time of year also features some of my favorite foods. From pumpkin to squash to apples, I spend a lot of time in my kitchen simmering + baking foods that are both healthy and comforting. I’ll be sharing a bunch of new recipes in the coming weeks, but wanted to rewind to some of our best recipes from the past.

Let’s get to it!


// RECIPES


If you go apple picking or purchase a huge load of apples and plan to make applesauce in bulk, freezing is easy!
  1. Let your applesauce cool completely. You may even wish to place it in the refrigerator overnight.
  2. Portion into freezer bags or Ball jars. We’re eliminating plastics from our kitchen, which is why I switched to glass. Important: Leave an inch or two of headspace for expansion!
  3. Cover and freeze for 6 months to 1 year. Stays good longer if you have a deep freeze or dedicated upright.
What’s your favorite apple recipe? 

And have you tried any of the ones above?

Like what you just read? You can subscribe to the feed of these posts or follow us on Twitter or Facebook to be the first to know what the (never home)makers are up to. And we’ll love you forever!

Read more...

10-Minute Ground Cherry Jam

>> Wednesday, September 3, 2014

Do you have those gorgeous golden ground cherries in your CSA basket? Do you have absolutely no idea what to do with them? We chop them into our salads and Ada eats them up by the pint-ful. But if you want to do something bit special, try this quick jam recipe.

It would go perfectly in place of blueberry in Brie Grilled Cheese!


GROUND CHERRY JAM
Makes what you see above -- in just 10 minutes!

What you'll need . . .

1 pint ground cherries, husks off
1 to 2 tablespoons maple syrup
2 tablespoons chia seeds
1/2 teaspoon ground cinnamon
Splash lemon juice

// Combine all ingredients in a small sauce pot. Heat on medium until ground cherries plump. Then squash them down with a spatula, lower heat, and keep stirring occasionally for 10 minutes.


What's your favorite way to use ground cherries?

// MOMMY + ME MEALS


If you don't regularly check out Writing Chapter Three, I've introduced a new series I call: Mommy + Me Meals. They're quick to prepare, tasty, and healthy meals that adults and kids can enjoy -- just presented in different ways.

First up: (Deconstructed) Kale Salad. Just wait till you see the colors in this mix! I also gave some tips for getting kids to eat tricker ingredients like, well, kale.

Like what you just read? Browse more of our posts + recipes on Pinterest. You can subscribe to the feed of these posts or follow us on Twitter or Facebook to be the first to know what the (never home)makers are up to. And we’ll love you forever!

Read more...

GF Oatmeal Raisin PB Chocolate Chippers

>> Monday, September 1, 2014

The folks at Peanut Butter + Co. contacted me to see if I'd like to try some of their peanut butter spreads after I posted my birthday Cookie Dough Stuffed Cupcakes with peanut butter frosting. Boy would I ever, I wrote them. I've been a huge fan of their brand for years on end, especially the Dark Chocolate Dreams mix.

So, I wanted to craft a recipe using a spread I had never tried before. And along with the White Chocolate Wonderful and Mighty Maple flavors, I got hooked on one that gave me this great idea for a cookie-hybrid. It's a chewy, soft cookie that's perfect for fall snacking. The best part? You only need one bowl to make them -- and cleanup is a breeze!


OATMEAL RAISIN + PB CHOCOLATE CHIPPERS
Gluten free, vegan, and simple to make.

What you'll need . . . 
  • 1 cup GF rolled oats, uncooked
  • 1 teaspoon baking soda
  • 1 tablespoon flax meal + 3 tablespoons hot water (flax egg)
  • 1 cup peanut butter*
  • 1/3 cup brown sugar
  • 1 teaspoon vanilla extract
  • 1/2 cup chocolate chips
  • Pinch salt for topping cookies
* Obviously, I used Peanut Butter + Co's Cinnamon Raisin Swirl in this recipe. If you don't have it, just use 1 cup peanut butter, but add 1/3 cup raisins and 1/2 to 1 teaspoon cinnamon to this recipe.

Method . . . 
  1. Preheat your oven to 350 degrees F. Lightly grease a baking sheet and set aside.
  2. In a large bowl, combine the flax egg with the peanut butter, brown sugar, and vanilla extract by stirring vigorously with a spatula.
  3. Then toss in the oats and baking soda and mix until well incorporated. Fold in the chocolate chips.
  4. Then let the mixture chill for 30 minutes or so, just to firm up and let oats soak in flavor a bit.
  5. Scoop out in heaping tablespoons (almost double size) and arrange on your baking sheet (makes around 12 to 14 large cookies). 
  6. Flatten each with the palm of your hand slightly before baking for 9-11 minutes. Done when lightly golden on edges. 

Just a note on all these gluten-free recipes you've been seeing (like last week's Sweet Pumpkin Bread -- as a quick note on that recipe, I used FINE GRIND cornmeal -- if you use a coarser meal, it's likely to crumble). I simply ran out of flour last week and decided to get creative with the ingredients I DID have on my kitchen shelves. Many of you have written me because you appreciate the GF recipes, so I will try to provide more in the future.

Please let me know if you try this cookie!

Thanks to Peanut Butter + Co. for sending me the different peanut butters to try. I was not compensated or required to post about their products, but I've been a fan of this brand for honestly years and enjoy it tremendously. My opinions are 100% my own.

Like what you just read? You can subscribe to the feed of these posts or follow us on Twitter or Facebook to be the first to know what the (never home)makers are up to. And we’ll love you forever!

Read more...

Vegan Cinnamon Buns for 2

>> Wednesday, September 25, 2013

On crisp, cool mornings, cereal + milk just doesn't cut it. I prefer warm, hearty breakfasts like oatmeal, pancakes, waffles, etc. Cinnamon buns are a special treat I usually save for holidays because making an entire batch can be overwhelming if it's just our family of three. I mean, I won't lie -- I could put away half of them myself, but I know that's not ideal from a nutritional perspective.

(Psst: Did you see 9 Foods w/ More Sugar Than Doughnuts on Mother Jones?)

Yesterday morning, I was freezing when I woke up. Shivering, in fact. I tied an old blanket around my waist, cranked the heat, and preheated the oven. That nagging voice inside my head begged "cinnamon bunsssssssss!" So, I figured why not take the whole half dozen concept I've used with cookies in the past . . . and apply it to another indulgence?


CINNAMON BUNS FOR 2
vegan, no-rise time required!

What you'll need . . . 

For the bun:
  • 1/4 cup + 1-2 tablespoons soy milk (or almond, etc.)
  • 1 tablespoon maple syrup
  • 1 tablespoon olive oil
  • 1 cup white-whole wheat flour
  • 1 tablespoon sugar
  • 1 teaspoon baking powder
  • pinch salt
For the filling:
  • 1 teaspoon cinnamon
  • 2 tablespoons sugar
  • 1 tablespoon olive oil
 For the glaze:
  • 1/2 cup powdered sugar
  • splash vanilla extract
  • 1/2 tablespoon Earth Balance
  • 1-2 tablespoons hot soy milk (almond, etc.)


Method . . .
  1. Preheat your oven to 350 degrees F. Lightly oil two ramekins and set aside. (Alternatively, you can also use a muffin tin.)
  2. Make your buns by combining the flour, baking powder, sugar, and salt in a dish. Then in another bowl, whisk together the wet ingredients (leaving out the extra tablespoons of soy milk at first) and then add to the dry. Dough will be firm, moist -- but not sticky. Add more soy milk accordingly.
  3. Divide dough into two equal sized pieces and then roll out into an oblong shape. 
  4. Make your cinnamon filling by combining all ingredients in a small dish. Then divide the mixture in half and spread onto your flattened buns.
  5. Roll buns with the filling on the inside and then place each one in a prepared ramekin.
  6. Bake for 20 minutes, until lightly browned.
  7. Let cool slightly while you combine the ingredients for the glaze. Then divide + drizzle evenly (depending on how much glaze you like) over your cinnamon buns and ENJOY!

More small batch recipes:
Like what you just read? You can subscribe to the feed of these posts or follow us on Twitter or Facebook to be the first to know what the (never home)makers are up to. And we’ll love you forever!

Read more...

Cinnamon + Raisin Applesauce Bread

>> Monday, March 4, 2013

Before I say what I need to say (and do what I need to do for my own curiosity), let's break bread together. I promise it won't be the last time ever. Just the last time for a while.


CINNAMON + RAISIN APPLESAUCE BREAD
Makes two loaves or, as I discovered, one gigantic monster

What you'll need . . .
  • 2-1/4 teaspoon active dry yeast
  • 1/2 cup warm water
  • 1-1/2 cups applesauce
  • 3 cups whole wheat flour
  • 3 cups unbleached bread flour, plus more for dusting
  • 1/2 cup olive oil
  • 2 tablespoons ground flax meal + 1/2 cup hot water (flax eggs)
  • 2 teaspoons salt (I used coarse, Kosher salt)
  • 1 cup raisins
  • 1 tablespoons ground cinnamon

Method . . . 

  1. Optional: Make 15-minute applesauce for us in this recipe. But any sort will do.
  2. In the bowl of an electric mixer, mix together the yeast and 1/2 cup warm water. Let sit until frothy.
  3. Whisk in the applesauce and let sit another couple minutes. Then add the flour, olive oil, flax eggs, and salt. 
  4. Attach bowl to mixer fitted with the dough hook. Mix on low speed until all the ingredients are well combined, about 3 minutes. Raise the speed to medium-low, and continue to mix until the dough is uniformly smooth and pulls away from the sides of the bowl, about 3 minutes more.
  5. Turn out the dough onto a lightly floured work surface. Pat out into a round + cover with raisins and cinnamon. Knead until they are in the dough. Don't worry if raisins pop out from time to time, that happened to me, too. 
  6. Place the dough back in the bowl you used to mix it in -- lightly oiled and covered with plastic wrap.
  7. Let rise for 2 hours, until doubled in bulk.
  8. Preheat your oven to 425 degrees F. I used a dutch oven to bake my bread (it's 5 to 6 quart in size), so if you have one -- place it in, too, to preheat as well. (Alternatively: You may also use a loaf pan and bake two loaves.)
  9. Punch down dough a bit and fashion into a round. (Alternatively, split into two pieces and shape into a loaf that will fit in your pan.)
  10. Bake for 40 to 50 minutes, until golden brown.
  11. Turn out the bread onto a wire rack to cool completely before slicing.

You read that correctly. After years of scoffing + rolling my eyes like a bratty 13-year-old at the gluten-free diet for years, I am going to give it a try for 28 days. I have been waking up feeling hungover for a couple weeks now. I've had digestive ills, too, that I won't go into. I haven't been drinking much. I haven't been particularly dehydrated (I have water at my side 24/7).

One of my friends suggested my gluten-heavy diet might be to blame. We all know I eat tons of the stuff. So, it's not out of the realm of possibility.

I will write more about this plan + why I'm doing it tomorrow. I had a farewell hunk of bread for breakfast this morning, am saving some for Stephen, and have packed a good chunk of it away in the freezer for safekeeping. I don't know exactly what "the plan" will entail, but I refuse to buy expensive, exotic ingredients to substitute in for my regular mainstays. Instead, I'll use what I have -- oats, cornmeal, almonds, flaxmeal, etc. -- staying within our weekly grocery budget.

I will not be going gluten-free for life even if I feel fantastic at the end of this little experiment. All or nothing rarely works for me, especially for matters relating to food. However, I see how my reliance on bread and other convenience carbs is cutting into my veggie intake and, therefore, might be wrecking havoc on my body.

I could learn a thing or two -- also -- by making creative substitutions for my favorite foods, like pizza and cookies, and perhaps come up with some alternatives to throw in my everyday mix of culinary delights.

Also, I've started a Pinterest board with tasty gluten-free foods I've discovered and am continuing to suss out. And I'd love your suggestions for how to incorporate GF foods and ingredients into my life without feeling shocked/deprived of my crusty slices of sourdough.

Stay tuned for more on this "exciting" adventure . . .


Like what you just read? You can subscribe to the feed of these posts or follow us on Twitter or Facebook to be the first to know what the (never home)makers are up to. And we’ll love you forever!

Read more...

Homework: Make Applesauce

>> Friday, October 5, 2012


I have an assignment for you this weekend: Make crock pot applesauce.

You have time for it, I promise you. Even better, the time you spend will be rewarded with a sweet smelling kitchen and a delicious, healthy snack that should last you a week. (Oh, and moms! You can feed this to your babies/kids. It's free of added sugar.)

I highlight my 15-minute applesauce (stove-top) recipe a lot. But my favorite way to make it is in the crock pot. The process takes longer, yes, but is ultimately far less effort. Did I mention how amazing your kitchen will smell. For HOURS?!

You can check out this recipe for crock pot Ginger Gold Applesauce I posted a few years ago. But it's really as simple as this:

Wash.


Peel.


Slice.


Pile.


Season (1 to 2 teaspoons cinnamon, 1/4 cup lemon juice or even cider).


Cook (2 to 3 hours on high). Then smash (chunkier) or blend (smoother).


Enjoy!


Promise me you'll make it this fall treat for yourself weekend. Even go apple-picking if it gives you an excuse. And if you do and choose to blog about it, I'd love for you to link up in the comments!

As well, what is your favorite apple for applesauce-making? I prefer Ginger Golds. My favorite apple to eat? Pink Lady.


Today on Writing Chapter Three I am writing about screen time. Television hours and guidelines for babies and children.

Like what you just read? You can subscribe to the feed of these posts or follow us on Twitter or Facebook to be the first to know what the (never home)makers are up to. And we’ll love you forever!

Read more...
Related Posts Plugin for WordPress, Blogger...

About This Blog

MyFreeCopyright.com Registered & Protected

© 2009-2014 by the (never home)makers
All content on this blog is copyrighted.

Want to publish our pics, tips, or tricks?
Contact us! [neverhomemaker@gmail.com]

We value transparency. Links on this page may contain affiliates. In addition, please see our disclosure policy regarding sponsored posts.

  © Blogger template Simple n' Sweet by Ourblogtemplates.com 2009

Back to TOP  

Blogging tips