Showing posts with label apple. Show all posts

Apple + Butternut Squash Soup // Slow Cook

>> Tuesday, September 27, 2016

For dinner last night, I decided to go easy on myself and simmer together a soup in the crock pot. I mean, is there anything better in autumn than smelling something yummy cooking all day long? And this soup has a healthy dose of spices that make it extra comforting.

You may have missed all my gushing last year, but I got a new slow cooker. I used to have one of those $10 varieties, and it worked quite well. If you're on a budget, I really recommend going with whatever you can afford because crock pot = easy dinner. My new baby? Still affordable! The Aroma 3-in-1, which is a slow cooker, rice cooker, and steamer in one convenient package.

I recommend using Granny Smith apples in this recipe. They have an extra edge that my McIntosh didn't this time around. But whatever you have should still do the trick.


APPLE + BUTTERNUT SQUASH SOUP


What you'll need . . .

  • 1 medium butternut squash, peeled, seeded, and cubed
  • 2 apples, cored and diced 
  • 1 medium onion, diced
  • 3 cloves garlic, minced
  • 1 cup apple cider
  • 1 cup water
  • 2 teaspoons Better Than Bullion*
  • 1 teaspoon apple pie spice (or mix of cinnamon, cloves, nutmeg)
  • 1 teaspoon smoked paprika 
  • Salt and pepper, to taste
  • 1/2 cup unsweetened soy or almond milk
* Don't have this stuff? Try using 2 cups of vegetable stock in place of the water, cider, and bullion. Also: That price on Amazon is horrible. I linked so you can see what it looks like. Pick it up at your local market.

Method . . .

  1. Toss the butternut squash, apples, onion, garlic, cider, water, bullion, spices, salt, and pepper into your slow cooker. Mix well.
  2. Cook on high for 3 to 4 hours. Then let cool slightly and stir in the soy or almond milk. 
  3. Transfer to your blender in two batches and blend until smooth.


Enjoy!

Read more...

Operation: Cozy Food

>> Thursday, October 8, 2015

I recently wrote an article about the 9 foods you should add to your cart if you want full autumn immersion. Since I haven’t posted much about food in this space lately, I wanted to recap some of my favorite fall recipes for you. I admit the recipe archives aren’t the easiest to navigate, so some good stuff gets lost in the shuffle.

Here are my top 10 picks for fall flavor + coziness.

#1: Pumpkin Hot Chocolate for 1


#2: Butternut Squash Pizza Sauce


#3: Apple Cider Dunkers


#4: Potato-Stuffed Acorn Squash


#5: Apple + Pumpkin Spice Stew


#6: Mini Bittersweet Pumpkin Pies


#7: Savory Corn Pancakes w/ Brussels Sprouts


#8: Apple + Cinnamon Butternut Squash Soup


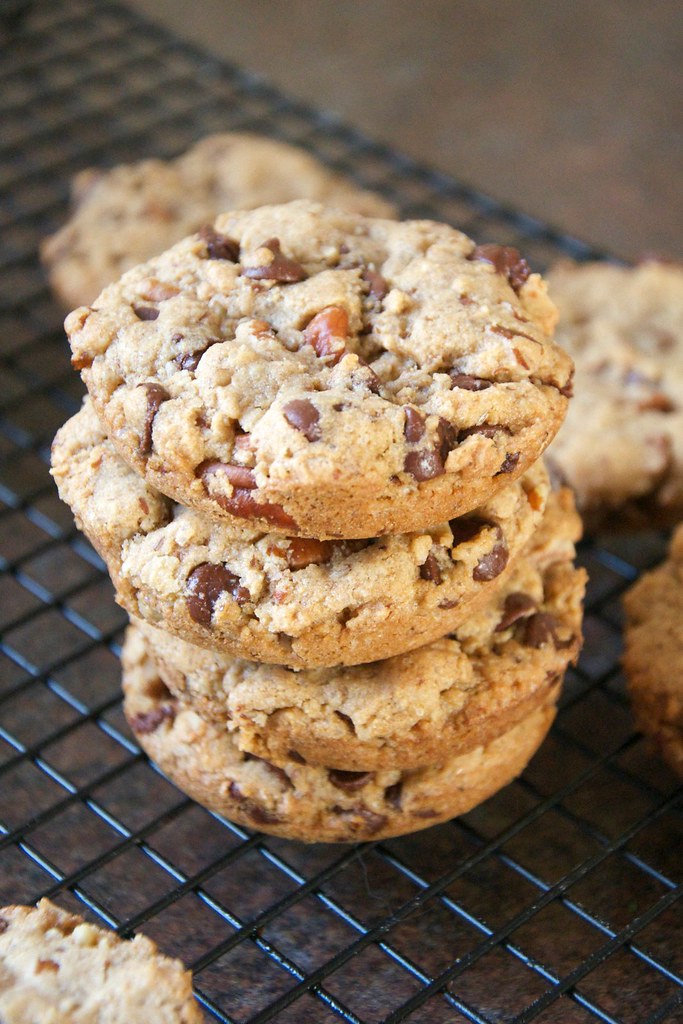
#9: Maple + Pecan Chocolate Chippers


#10: Spiced Applesauce Biscuits


Like what you just read? You can subscribe to the feed of these posts or follow us on Twitter or Facebook to be the first to know what the (never home)makers are up to. And we’ll love you forever!

Read more...

Pumpkin + Pecan Apple Crisp

>> Wednesday, September 30, 2015

My mom had certain desserts she liked to bake. I remember a few out of the rotation best. Chocolate chip cookies, of course. Then there was chocolate chip cookie pie (oh, I cannot wait to recreate this recipe sometime!). And apple crisp was probably the healthiest of the bunch.


After our epic apple-picking adventure this weekend, I knew I wanted to make up some apple crisp. But I wanted to try something new. (Check out Basil Apple Crisp.) So, I decided to add some pumpkin, pecans, and make the recipe bigger than my normal batches.

And I’m currently eating this dish for breakfast.


PUMPKIN + PECAN APPLE CRISP


What you’ll need . . . 

  • 10 small to medium apples, peeled + cored 
  • Juice from one fresh lemon
  • 1/2 cup pumpkin puree
  • 1/4 cup coconut palm sugar*
  • 1 (heaping) tablespoon maple syrup or honey
  • 1 teaspoon (or more) ground cinnamon
  • 1 tablespoon flour
  • 1 tablespoon arrowroot powder (or cornstarch)
  • 1-1/2 cups old fashioned rolled oats (uncooked)
  • 1/4 cup coconut palm sugar*
  • 1/4 cup flour (or more, depending)
  • 1/2 cup pecans (pulsed into a meal in your food processor)
  • 1/2 to 1 teaspoon ground cinnamon
  • 1/2 cup Earth Balance (or butter, substitute, etc.)
* I used Better Body’s Coconut Palm Sugar, but you can substitute in brown or granulated sugar.


Method . . . 

  1. Preheat your oven to 375 degrees Fahrenheit. Lightly grease a 9 x 13 in baking pan (I used glass) and set aside.
  2. Once you peel, core, and chop your apples, toss them with the lemon juice, pumpkin puree, coconut sugar, cinnamon, flour, and arrowroot powder in a bowl. Pour this mixture into your prepared pan.
  3. Using the same bowl (with all the pumpkin-y leftovers from the apple mixture), toss together the rolled oats, coconut sugar, flour, pecans, cinnamon, and then work the Earth Balance into the mixture with your fingers until it’s crumbly. You may want to add more flour if the mixture is too wet. I added a few more tablespoons until it was still crumbly, but not greasy.
  4. Distribute the topping over the apples, and bake for 45 minutes to an hour. You want the top to be golden brown and the apples to be cooked through.

Enjoy!

RELATED RECIPES


Apple + Pumpkin Spice Stew
Apple Oat Bars
5-Minute “Baked” Apples
Morning Glory Muffins
15-Minute Applesauce
Spiced Applesauce Biscuits
Applesauce Coffee Cake

Like what you just read? You can subscribe to the feed of these posts or follow us on Twitter or Facebook to be the first to know what the (never home)makers are up to. And we’ll love you forever!

Read more...

Weekend Scenes // Apple Picking

>> Monday, September 28, 2015

How about that moon, right? We watched the different stages of the lunar eclipse last night, and it was super cool. Then I woke up randomly in the middle of the night and looked outside. I shot straight awake because it was so bright. Whoa. Did anyone else check it out?

Here are some scenes from this year’s apple-picking fun:


I’ll be back soon with some delicious apple recipes. We got 15 pounds in all!

Anyone else go picking this weekend?

Like what you just read? You can subscribe to the feed of these posts or follow us on Twitter or Facebook to be the first to know what the (never home)makers are up to. And we’ll love you forever!

Read more...

Morning Glory Muffins

>> Monday, January 19, 2015

A friend of mine shared a recipe for a delicious morning glory loaf on Facebook last week. And immediately, I just had to make them. I’m being serious. I put the computer down and started getting out all my baking pans to find the muffin tin. But, I set out to change a few things with this recipe. First, I was out of eggs and typically bake things vegan out of habit. And I wanted to include less oil. And no refined sugar.

So, I modified and mixed and even tossed in some freshly squeezed clementine juice for natural sweetness. What resulted from these efforts is a truly amazing breakfast muffin that’s also gluten-free, vegan, and full of fruits and veggies.

Ada ate half the batch herself.


MORNING GLORY MUFFINS

Adapted from this awesome recipe on Imagine Childhood.

What you’ll need . . . 
  • 1 cup GF rolled oats processed into flour
  • 1/2 cup GF rolled oats, whole
  • 1 teaspoon baking soda
  • 1 teaspoon cinnamon
  • 1/4 cup maple syrup
  • 1/4 cup olive oil
  • 2 tablespoons flax meal + 6 tablespoons hot water (2 flax “eggs")
  • 1 teaspoon vanilla extract
  • 1/2 orange (or 1 full clementine) -- just the juice
  • And also the zest, if you like it!
  • 2 large carrots, shredded (around 1 cup)
  • 1 large apple, shredded (around 1 cup)
  • 1/3 cup walnuts, pulsed to crumble
Method . . . 
  1. Preheat your oven to 350 degrees F. Grease a muffin tin with Earth Balance or coconut oil.
  2. In a large bowl, whisk together the oat flour, oats, baking soda, and cinnamon. Set aside.
  3. In a smaller bowl, combined the maple syrup, olive oil, flax eggs, vanilla, orange juice, then pour this mixture into the dry ingredients.
  4. Add the carrots, apples, and walnuts, and mix until well incorporated.
  5. Then divide evenly among your pan -- 12 muffins in all -- and bake for 20-25 minutes. Until golden brown and set in the center.
  6. Let cool on a rack for a few minutes before consuming. I am sure you can also freeze once they are totally cooled, but they didn’t last that long in our house!


You’re going to love these muffins. 

Just a note that the batter will definitely be shaggy, if that makes any sense. It might not seem like you have enough oat covering to go over all those shredded apples and carrots. I assure you, it will all bake up beautifully. And these are incredibly healthy if you consider they’re mostly just oatmeal baked into muffins.

Enjoy!

Like what you just read? You can subscribe to the feed of these posts or follow us on Twitter or Facebook to be the first to know what the (never home)makers are up to. And we’ll love you forever!

Read more...

Eat Local // Sweet Butternut Squash Soup

>> Monday, October 20, 2014

Would you believe that when I started this blog back in 2009, I had absolutely no idea what it meant to cook seasonally? I’d go to the grocery store, pick up whatever looked good that week, and make whatever recipes interested me at the moment. Instant gratification at its finest. I can’t really blame myself, though. That’s how the store system is set up -- we can have it all if we want, whenever we want.


After I had immersed myself in the food world for a couple years and honed my own cooking skills, I had a sort of awakening. Or maybe it was a pretty fundamental mind shift certainly also sparked by books like Plenty (100 Mile Diet), Animal, Vegetable, Miracle, The Omnivore’s Dilemma, and more. I started to understand where my food actually comes from and why it’s not exactly natural, for example, to slice fresh tomatoes onto my plate in the dead of a Northeast winter. I also discovered the world of CSA shares, local farmers, and buying more eats -- like eggs, honey, milk, etc. -- from nearby sources. 

I can’t say I eat locally 100 percent of the time. After all, we shamelessly stash bananas and avocados in our cart at Aldi on a weekly basis. We favor our local cafes and restaurants, but still go through the Panera drive through in a pinch. And -- yes -- I heartily eat up those supermarket tomatoes for a subpar taste of summer even on the coldest January afternoon. In my opinion, it’s all about balance and trying and budget and trying some more.

This soup was actually inspired by one of those Panera quickie experiences. They have an autumn squash soup on the menu that’s sickeningly sweet -- I knew I could do better at home using local ingredients. The butternut squash, onions, and garlic came from our farm share this week and the biggest, juiciest Honey Crisp apples came from a local orchard. There’s a satisfaction knowing these foods were grown on our native soil. There’s a soulfulness in knowing and caring for the people who work so hard to nourish us throughout the seasons. 

And eating locally just tastes better -- there’s no denying that.


SWEET BUTTERNUT SQUASH SOUP
Makes around 4 quarts -- that’s 16 cups!

What you’ll need . . . 
  • 3 medium butternut squashes
  • 2 large onions, chopped
  • 1 bulb (or 4 huge cloves) of garlic, chopped
  • 2-3 large apples, chopped 
  • Water*
  • Cinnamon, to taste
  • Sea salt + black pepper
*Alternatively, you can use vegetable broth. We’re just out and trying to spend $0 on food this week, which I’ll write more about in another post.

Method . . . 
  1. Preheat your oven to 375 degrees F. Place an safe bowl with a few inches of water in it on the bottom of the oven. 
  2. Wash your butternut squash, then chop off the top, cut in half, and scoop out the seeds. Rub down with olive oil and sprinkle a little salt and pepper before placing halves face-down on a cookie sheet to bake for around an hour, checking periodically for done-ness. (Just needs to be soft enough to scoop out of shells).
  3. Once your have your squash meat set aside, heat some olive oil in a large stock pot over medium-high heat. Add in your onions and garlic and cook until translucent before tossing in apple chunks. Cook until softened.
  4. Since you’re making a large amount of soup, you’ll need to puree in batches. Add around half the squash meat, half the apple mixture, and a few cups of water to a blender and blend until smooth. Repeat with what’s leftover. You can add however much (or little) water as you like. In fact, I leave it up to you since you might also want to reserve some of this puree for baby -- and a bit thicker is nicer for baby food consistency.
  5. Return everything to the stove to season with the salt, pepper, and cinnamon powder. I did around a tablespoon of salt, a teaspoon of black pepper, and a teaspoon of cinnamon. 
  6. You may also wish to stir in additional water at this point to achieve your desired consistency. Just add about a half cup at a time and stir well to incorporate.
  7. Serve with crusty bread on the side. Freeze leftovers using this simple method.


NOTES:


  • Use you can whatever apples you have on hand -- but I’d say the juicer and sweeter the better because you really do taste them in this recipe.
  • As noted above, you can use this soup as baby food as is or even after just pureeing with less water for a thicker consistency. To freeze, portion into 1-ounce cubes and once frozen place in a freezer bag for storage. Let thaw and/or warm before serving.
  • You can also use other winter squashes like delicata and acorn in this recipe -- the size will impact the yield and ratio of squash to apples. So, maybe three to four large delicata and 4 acorn squashes.
  • If you don’t like cinnamon or want to change the flavor, I recommend using curry powder much like we do in our Delicata Mac and Cheese recipe. Curry powder marries well with squash. Smoked paprika, too. Yum!

And head to Writing Chapter Three for a peek into the kitchen in progress. Last weekend, I painted the cabinets white and -- this weekend -- I hand-painted the tile backsplash this weekend. Some notes on how I did it, what I used, and if I like it (or not). Things are certainly coming along! Can’t wait to share the finished kitchen with you guys!

Like what you just read? You can subscribe to the feed of these posts or follow us on Twitter or Facebook to be the first to know what the (never home)makers are up to. And we’ll love you forever!

Read more...

Ultimate Apple Guide + Recipes

>> Thursday, September 25, 2014

My favorite time of year also features some of my favorite foods. From pumpkin to squash to apples, I spend a lot of time in my kitchen simmering + baking foods that are both healthy and comforting. I’ll be sharing a bunch of new recipes in the coming weeks, but wanted to rewind to some of our best recipes from the past.

Let’s get to it!


// RECIPES


If you go apple picking or purchase a huge load of apples and plan to make applesauce in bulk, freezing is easy!
  1. Let your applesauce cool completely. You may even wish to place it in the refrigerator overnight.
  2. Portion into freezer bags or Ball jars. We’re eliminating plastics from our kitchen, which is why I switched to glass. Important: Leave an inch or two of headspace for expansion!
  3. Cover and freeze for 6 months to 1 year. Stays good longer if you have a deep freeze or dedicated upright.
What’s your favorite apple recipe? 

And have you tried any of the ones above?

Like what you just read? You can subscribe to the feed of these posts or follow us on Twitter or Facebook to be the first to know what the (never home)makers are up to. And we’ll love you forever!

Read more...

Simple Pleasures, no. 2

>> Wednesday, November 6, 2013


Honeycrisp apple, skinned + sliced thin.
Tossed in melted Earth Balance or butter.
Sugar, spice, and a splash of lemon juice.
Roasted at 400 F for 15 minutes, tossed + repeat.

Who says you need to bake a whole pie or make a big dish of crisp to enjoy soft + warm apples?


I love making this "recipe" on weekends and topping waffles or pancakes or oats. But on weekdays when I need some extra breakfast love, I serve with a nice, thick yogurt (I love Siggi's Orange & Ginger these days).

What's your favorite variety of apples?

(More simple pleasures: no. 1)

Like what you just read? You can subscribe to the feed of these posts or follow us on Twitter or Facebook to be the first to know what the (never home)makers are up to. And we’ll love you forever!

Read more...

Gluten-Free Waffles + Nayonaise Giveaway

>> Wednesday, April 17, 2013

When I went gluten free for 28 days, I missed a lot of breakfast foods like french toast, pancakes, etc. I tried various homemade flour mixtures to try and make a suitable waffle, for example. And, though I know it can certainly be done + will continue tooling around, my favorite attempt was with gluten free all purpose flour.

But we'll get to that in another post because I have a savory sandwich -- that's right, a waffle SANDWICH, people! -- version of these guys that's to DIE for. Maybe Friday or early next week?

Till then, breakfast!

BASIC GLUTEN-FREE WAFFLES
(adapted from this recipe on Bob's Red Mill)

What you'll need . . . 

  • 1-1/2 cups Bob's Red Mill GF All Purpose Flour
  • 2 tablespoons cane sugar
  • 1 tablepoon baking powder
  • 1/2 teaspoon baking soda
  • 1/2 teaspoon salt
  • 1 tablespoon flax meal
  • 3 tablespoons hot water
  • 2 teaspoons vinegar
  • 3/4 cup unsweetened almond milk
  • 1 tablespoon olive oil
  • 1/2 teaspoon vanilla 
 Method . . . 

  1. In a large bowl, whisk together the flour, sugar, baking powder + soda, and salt. Set aside.
  2. In a small dish, combine the flax meal, hot water, and vinegar. Let sit for a couple minutes.
  3. Then add the flax mixture along with the rest of the ingredients into the bowl with the flour mixture. Mix until well combined.
  4. Let sit for a few minutes while you preheat your waffle maker.
  5. Then cook as directed, dividing the recipe into about three parts, as -- at least for our waffle maker -- this recipe makes 3 sheets . . . or 6 total . . . waffles.
  6. Serve immediately with the following toppings or freeze them for up to a few months.

// Grill slices of an apple on the stove over medium heat until browned on both sides.. If you have a grilling pan, that is. If not, you can just pan cook them with a bit of Earth Balance until browned. There's no real science to this.

// What makes this combo so special is the sauce . . .


It's a mixture of peanut butter, maple syrup, cinnamon, and a "secret" ingredient. Oh, I'll just tell you. Nasoya recently sent me some of their Nayonaise to try out, and I couldn't resist trying to make something a little different with it -- we use vegan mayo on almost all our sandwiches, too.

For those of you unfamiliar, Nayonaise is a vegan alternative to mayonnaise. It's made from expeller pressed oil, it's cholesterol-free, and it's a good source of vitamin B12 and Omega-3 ALA.

MAPLE + PEANUT BUTTER SAUCE
makes enough to generously top two waffles or six, if you're less indulgent

Combine the following in a small bowl.
  • 3 tablespoons Nayonaise
  • 1 (heaping) tablespoon crunchy peanut butter
  • 2 to 3 teaspoons maple syrup
  • dash or two cinnamon

You could also just use plain peanut butter instead of a sauce, but where's the fun in that?

/// \\\ /// \\\ GIVEAWAY /// \\\ /// \\\

The folks at Nasoya have been generous enough to giveaway some free Nayonaise to one of you as well! Just leave a comment with the word "YUMMY!" below to be entered. Make sure there's some way to contact you, too.

I'll choose a winner Friday morning (4/19/13).

And if you're in the mood for more waffles:

Peanut Butter + Banana Waffles
Green Egg-Topped Waffles
Applesauce Freezer Waffles

Like what you just read? You can subscribe to the feed of these posts or follow us on Twitter or Facebook to be the first to know what the (never home)makers are up to. And we’ll love you forever!

Read more...
Related Posts Plugin for WordPress, Blogger...

About This Blog

MyFreeCopyright.com Registered & Protected

© 2009-2014 by the (never home)makers
All content on this blog is copyrighted.

Want to publish our pics, tips, or tricks?
Contact us! [neverhomemaker@gmail.com]

We value transparency. Links on this page may contain affiliates. In addition, please see our disclosure policy regarding sponsored posts.

  © Blogger template Simple n' Sweet by Ourblogtemplates.com 2009

Back to TOP  

Blogging tips