Showing posts with label lunch. Show all posts

My All-Purpose Bread Mix

>> Tuesday, February 6, 2018

I've been in a great groove with homemade meals lately. For us, bread often makes the meal. This isn't to say we don't eat heaps of healthy whole foods. But if we're trying to be successful with resisting takeout and meals out of the house, making tasty pizza and other bread-y things is essential. So, I want to share with you the ONE recipe I've been using to make all of it.

I use this mix for garlic knots, pizza dough, and naan.

It does it all!


What you'll need . . .
  • 3-1/2 to 4 cups all-purpose flour
  • 2 tablespoons sugar
  • 2-1/4 teaspoons instant yeast
  • 1 teaspoon salt
  • 1-1/2 cups warm water or non-dairy milk

Method . . . 
  1. In a large bowl, whisk together 3-1/2 cups flour, the sugar, yeast, and salt.
  2. Add in water if you're making garlic knots or pizza dough. Add in milk if you're making naan.
  3. Mix with your hands until a ball forms. You may need to add more flour if it's too sticky to handle.
  4. Knead for 5-10 minutes. I find it's best when I really take the time, but five minutes will do in a pinch.
  5. Drizzle with olive oil and cover with plastic wrap or a damp tea towel.
  6. Let rise in a warm spot for 2-3 hours, until doubled in bulk.

To bake . . . 
  • Divide into small balls to make garlic knots. Bake for 10-13 minutes at 425 degrees F, until golden.
  • Divide into discs to make pizzas. We place this dough on well greased pans and press it thin. Bake with toppings at 450 degrees F for 10-13 minutes, until golden.
  • Divide into fist-sized balls and roll flat for naan. Bake on a pizza stone in a well preheated oven at 500 degrees for a few minutes until golden.

What's your favorite multi-purpose recipe?

I hope to be back into another blogging groove soon. Ada woke up with the stomach bug and I have some big deadlines this week. But we'll all survive! What would you like to see next? Any requests?

Read more...

6 Foods That Make My Life Easier

>> Sunday, December 17, 2017

I still love Aldi, but there are several foods that I've had to shop elsewhere for recently. Eloise has been a picky eater since, well, forever. But it was especially bad in the last four months. She would literally not eat anything. In retrospect, I do think a lot of it has to do with the fact that she has 16 teeth when many of her peers have far fewer. Poor girl has probably been in pain for a long while.

That said, I have slowly found some things she loves to eat. As much as I'd like to say they're all whole foods, I have also had to rely on a few "products" if you will. But I'll get to those in a minute. Let's just jump in . . . and I'd love to hear your make-life-easier food suggestions.

I've included Amazon links so you can check out more reviews, ingredients, and just more general info. Always price-compare, as I've found that grocery of Amazon can either be good deals or AWFUL.


JUST. Mayo


There are a variety of flavors of this mayo. Stephen and I are addicted to chipotle mayos of various brands. The just. chipotle mayo is consistently the least expensive and gets high marks on taste. It's also vegan -- at least I know that several varieties of it are. Another favorite is the sriracha. We put it on veggie burgers, use it as dip for fries, and as a spread for sandwiches.


Don Pepino Pizza Sauce


Our family absolutely loves Don Pepino's pizza sauce. Stephen it biased, since it's made in NJ. It's slightly more expensive than some store brand sauces I buy, but the texture and flavor make it worth it in my opinion (especially since homemade pizza costs so much less than takeout). I know I included the Amazon link, but I highly recommend checking your bulk stores for this brand as well. I once found GIGANTIC tins of it at Sam's that I then divided into smaller portions and froze.


Mueslix, etc.


I don't necessarily endorse this brand of muesli over another (there are SO MANY). I'm just addicted to the stuff. I have a thing for cereal and I feel like this is healthier than other varieties I enjoy. I used to make my own muesli, but these days I haven't made time for it. Hoping to get back into that mode at the start of the new year, though.


Stonyfield Whole Milk Yogurt


Here's one of those foods that Eloise will eat without fail almost every day. So, we have had this issue where she doesn't want to drink milk since her first birthday. Not that she necessarily HAS to drink milk, but I think it's a good source of calcium and protein in a vegetarian diet. Anyway, we're working on the drinking milk thing. In the meantime, she's been eating this yogurt and having cheese sticks. I've made my own yogurt in the past (and love it!), but she digs this flavor.


Kodiak Cakes


And this is often Eloise's lunch. I know, I know. I mean, it's protein waffles. Sort of strange to push on a toddler. But she likes muffin texture, and I like that Kodiak Cakes has added protein and it's fast. It also comes in fun flavors -- of which we like chocolate and peanut butter best. Have you guys tried this stuff? I want to get plain buttermilk next.


Bob's Red Mill Soup Mixes

These dry soup mixes have been A LIFESAVER and have massively improved our slow cooking dinners. We got into a soup and chili rut, so I decided to branch out one day and buy a few different varieties. Anyway, this one is my favorite. The prices on these guys on Amazon aren't good, so I include the link only for reference, ingredients, and such.

You must try this recipe on the back of the bag, by the way.


And if you DO plan to try it, I recommend adding a can of coconut milk in place of two cups of water and added a heaping tablespoon of miso to the mix. I like adding the gourmet mix of mushrooms I get at Wegmans and plenty of fresh ginger.

Related:


Expanding Our Homemade Pantry
Homemade Almond Milk
Our Go-To Pizza Dough
Homemade Ciabatta Bread
Homemade Muesli
Adventures in Cereal-Making
Homemade Bagels
White + Whole Wheat No Knead Loaf
Three Seed Crackers
Homemade Flax Crackers
Homemade Pancake/Waffle Mix
Awesome Couscous Crackers
My Favorite Hummus
Stephen’s Homemade Pickles
Homemade Applesauce
Red Curry Kimchi

Read more...

ROAD // Zucchini Noodle Salad

>> Thursday, May 11, 2017

My first recipe is what inspired this whole series. And you don't need a pricey spiralizer to make it either. Of course, I've seen the ones that attach to KitchenAid mixers, but they come at a premium (may make a nice gift, though -- I doubt my cheapie can make beet noodles). One of the most popular tools on Amazon is around $20; it has a handy handle and makes very neat looking noodles. I, on the other hand, have a bare bones model. You hold it in your hand and twist. It makes large and small noodles and costs around $12.

However you slice it, this is what you want in your life:


RAW ZUCCHINI NOODLE SALAD


What you'll need . . . 

  • Half a bell pepper, sliced
  • Half a large zucchini, spiralized
  • Half an avocado
  • Few tablespoons water (or kombucha*)
  • Couple tablespoons almond meal
  • 1 clove garlic
  • Salt, pepper 

* I added some ginger kombucha because I happened to be drinking it when I made this dish. If you use plain water, consider adding a bit of apple cider vinegar just to give the sauce a little extra flavor.

Method . . .
  1. Toss your veggies into a medium bowl. You can add more variety of veggies if you like, too. I just happened to have these on hand.
  2. Then put your avocado, water or kombucha, garlic, and almond meal in a food processor. You want to get a thick sauce, so play around with the ratios until you reach your desired consistency. Mine was like lowfat yogurt.
  3. Toss everything together and top with the salt (I'm loving pink sea salt lately) and black pepper to taste.

This meal took about five minutes to prepare from start to finish. It serves just one person, which is how I'll approach all meals in this series. It's best served fresh or else your avocado sauce may brown.

And if you want to read more about Raw Once A Day, check out yesterday's post.

Read more...
January Foods + Carrot Boost Soup

>> Thursday, January 5, 2017

If you click over to the website, you'll see that I'm playing around with some new design. I also want to make things easier to find. With limited time, this might be a long process. So, please be patient! If there's a feature you'd like to see on neverhomemaker, let me know! If there's something that isn't working for you, please let me know that as well.

Let's jump in with my favorite foods for January. I'm hoping to make this a monthly video feature where I rummage through my cupboards and refrigerator and share with you the stuff I'm loving to eat that particular month. As mentioned yesterday, I'm doing Weight Watchers -- so some of these foods are particularly friendly for that program.

JANUARY FAVE FOODS


// If you aren't watching the video: PB2 Premium Chocolate, Kodiak Cakes in PB Protein, Grillo's Pickles, Republic of Tea Gingerbread, carrot soup (below), and Poor Gal's Kombucha.

Our family has r.e.a.l.l.y taken to this carrot soup. It's full of immune-boosting ingredients. Stephen has been making a carrot soup for quite some time, actually. In a way, this is his recipe. Ada and I keep getting sick. And I decided I wanted to see what I could add to the mix that might help matters.


Immunity-boosting ingredients, according to Healthline:

  • Ginger
  • Garlic
  • Lemon
  • Turmeric  
We actually made a TRIPLE batch of this soup recently. Feel free to play with the recipe and make more if you want to stock up. Though I'm still new at it, I'm thinking this soup has only 1 point for WW people who are tracking. We ate the first bit for dinner and then packed the rest for lunches. It's easy to sip down soup even when you have a Velcro-baby.

See?


CARROT BOOST SOUP


What you'll need . . . 

  • 1 medium onion, chopped
  • 2 pounds organic carrots, scrubbed and chopped into 1-inch coins
  • 2 tablespoons olive oil
  • 3 large cloves garlic, chopped
  • 1-2 inch piece of ginger, peeled and grated
  • 1 teaspoon ground turmeric
  • 1/2 teaspoon ground cinnamon
  • 5-6 cups water, depending on how runny you like your soup
  • Juice of one lemon 
  • Pinch salt and pepper
Method . . . 

  1. Heat oil in a large stock pot over medium-high heat. Add in onions and cook until softened.
  2. Add in the garlic, ginger, and spices. Cook for a minute or so. 
  3. Then add your carrots and water. Increase heat and bring to a boil.
  4. Lower to a simmer and cook for 30 minutes. 
  5. Then let cool for a little while before blending until smooth. Feel free to add more water, if necessary.
  6. Return to stove to season with the salt and pepper + stir in lemon juice.
Enjoy!

Read more...

Apple + Butternut Squash Soup // Slow Cook

>> Tuesday, September 27, 2016

For dinner last night, I decided to go easy on myself and simmer together a soup in the crock pot. I mean, is there anything better in autumn than smelling something yummy cooking all day long? And this soup has a healthy dose of spices that make it extra comforting.

You may have missed all my gushing last year, but I got a new slow cooker. I used to have one of those $10 varieties, and it worked quite well. If you're on a budget, I really recommend going with whatever you can afford because crock pot = easy dinner. My new baby? Still affordable! The Aroma 3-in-1, which is a slow cooker, rice cooker, and steamer in one convenient package.

I recommend using Granny Smith apples in this recipe. They have an extra edge that my McIntosh didn't this time around. But whatever you have should still do the trick.


APPLE + BUTTERNUT SQUASH SOUP


What you'll need . . .

  • 1 medium butternut squash, peeled, seeded, and cubed
  • 2 apples, cored and diced 
  • 1 medium onion, diced
  • 3 cloves garlic, minced
  • 1 cup apple cider
  • 1 cup water
  • 2 teaspoons Better Than Bullion*
  • 1 teaspoon apple pie spice (or mix of cinnamon, cloves, nutmeg)
  • 1 teaspoon smoked paprika 
  • Salt and pepper, to taste
  • 1/2 cup unsweetened soy or almond milk
* Don't have this stuff? Try using 2 cups of vegetable stock in place of the water, cider, and bullion. Also: That price on Amazon is horrible. I linked so you can see what it looks like. Pick it up at your local market.

Method . . .

  1. Toss the butternut squash, apples, onion, garlic, cider, water, bullion, spices, salt, and pepper into your slow cooker. Mix well.
  2. Cook on high for 3 to 4 hours. Then let cool slightly and stir in the soy or almond milk. 
  3. Transfer to your blender in two batches and blend until smooth.


Enjoy!

Read more...

Chipotle + Lime Chickpea Salad

>> Wednesday, August 24, 2016

Just wanted to hop on here quickly to share my new favorite lunch! I often make chickpea salad sandwiches when hummus gets boring. This latest variation is a real keeper! Especially if you are as addicted to chipotle Vegenaise as I am. We put it on everything!


CHIPOTLE + LIME CHICKPEA SALAD


What you'll need . . .

  • 1 (15-ounce) can of chickpeas, drained + rinsed
  • 1/2 cup pickles, chopped into bits
  • 1/2 cup cherry tomatoes, chopped into bits
  • Handful fresh cilantro, minced
  • 3 tablespoons chipotle Vegenaise
  • 2 teaspoons time juice
  • Salt and pepper to taste

Method . . .

  • Mash the chickpea in a large bowl using a potato masher or a fork. The texture should resemble canned tuna or chicken.
  • Add the rest of the ingredients and mix until well combined. Season to taste.
  • Then toast bread, top with spinach or other greens, and scoop out the salad.


It's so good!

Read more...

An Egg On It

>> Wednesday, July 1, 2015

I was reading this article on NPR the other day about how to get better nutrition by pairing certain foods. Definitely a fascinating concept, especially with my current quest for cleaner eating habits. One of the combinations particularly piqued my interest, possibly because I’m addicted to eggs. But if you combine eggs and greens, you’re in for a treat.

Here’s the deal: "adding eggs to salads makes it easier to absorb the carotenoids in the raw vegetables.” They even did a study where one group of people ate plain salad and the other group added eggs. The egg group’s absorption of the good stuff was a whopping 3.8-fold higher on average.

We already know all the absolutely incredible nutrition that are in eggs alone.

So, why not?


AWESOME EGGS

Soft Boiled Eggs for Breakfast (above)
Avocado Egg Salad
Rustic, Egg-Topped Pizza
5 Ways to Eat Hardboiled Eggs
Easy Egg Bake for One
Scrambled Egg Bites
Laughing Cow Deviled Eggs
Guacamole Deviled Eggs
Mayo-Free Egg Salad

Other great food combinations include black beans + peppers (vitamin C foods), hummus and whole wheat bread, and turmeric + black pepper. Here’s the whole article for more information. Pretty neat, don’t you think?

What’s your favorite way to combine eggs + greens?

Mine: Eggs florentine!

Like what you just read? You can subscribe to the feed of these posts or follow us on Twitter or Facebook to be the first to know what the (never home)makers are up to. And we’ll love you forever!

Read more...

Better Cauliflower Crust

>> Tuesday, June 16, 2015

Here’s another installment of my Make It Better series. I’m not intolerant to gluten or even sensitive for that matter. I just eat a lot of too much bread and have been looking for alternatives to clean up my diet. So, in my adventures, I’ve made several recipes for cauliflower crust pizza in the last couple years. And I absolutely love it. Some of the recipes have indeed been great. Others, OK. Yeah. Horrible.

Along the way I’ve picked up a few tricks of the trade.


// Pulse in Processor


You may encounter a recipe that instructs you to grate your cauliflower. That’s going to make a huge mess. Instead, chop up florets and pulse them into “rice” in your food processor. It’s faster, the “rice” gets much smaller, and you’ll spend less time cleaning up.

// Microwave Fast


I know some of you will disagree with me, but I find it much easier to just microwave my cauliflower “rice” while I’m getting other parts of my meal ready. We rarely use the microwave, so I revel in the convenience of it for those 7 minutes. That way, you can keep it all in the same bowl and skip the step of draining from added water. It’s the little things . . .

// Drain + Drain Some More


Once you’ve cooked your cauliflower, let it cool almost completely. But never, and I mean NEVER, skip draining the moisture out. You’d be surprised how much is in there, too. I usually use a clean tea towel and work on my “rice” in batches. I’ll squeeze as much as humanly possible . . . and then return in five or so minutes to squeeze any last bit of water that remains.

If you think it’s done, try again.


// Season Well


Don’t forget to add salt, pepper, and even herbs or other spices. You want it to taste freaking amazing, right? My favorite recipe calls for a good amount of cheese in the crust, and I think it’s worth the add-in. So, I just skimp on any added cheese atop the pizza and opt instead of lots of roasted veggies and good sauce. Versus where the bread is sort of in the background in a lot of pizza recipes, the cauliflower can be one of the highlights of the entire meal.

// Use Parchment, Not Foil


A few of the recipes I’ve followed have said to use greased aluminum foil as a surface for cooking. Please, please don’t do this. Ever. I’ve tried twice with disastrous results. You will likely be so sorry. Parchment (or maybe a silicone pizza baking mat) will keep your pizza from sticking. If you’re out of parchment (like I often am) try a well greased baking pan before skipping to aluminum.

// My Favorite Recipe


Like I said, I’ve tried several different recipes, but this one on PopSugar is by far my favorite. Usually we’ll make two pizzas -- one for me + Ada, one for Stephen -- and I’ll cut the cheese almost in half when doubling. For toppings, we often use BBQ sauce for sauce, a medley of roasted veggies (I roast while preparing the crust // before putting them on the pizza), fresh tomatoes, a little ricotta, and then chopped basil from the garden.

Do you have any cauliflower crust tips to share?

Like what you just read? You can subscribe to the feed of these posts or follow us on Twitter or Facebook to be the first to know what the (never home)makers are up to. And we’ll love you forever!

Read more...

Food (Finally)

>> Wednesday, June 10, 2015

Wow. I haven’t written about food or recipes in a while. Sorry about that. I have really been enjoying writing more about, well, life in general. Sharing what we’re doing in real time. But I miss sharing good eats with you guys for a few reasons. Strangely enough, I feel like I eat better (more variety, healthier meals, etc.) when I come up with recipes to share on a regular basis. Maybe that isn’t strange, it actually makes perfect sense!

So, today I wanted to dive right in with a quick and easy lunch you can make with lots of raw veggies. I’ve never tried subbing romaine or other leafy greens like chard in for my wraps or bread -- and I was pleasantly surprised at how full I felt after eating this meal. It’s salad for people (like me) who hate salads.


VEGGIE-FUL WRAPS


What you’ll need . . . 
  • Romaine lettuce (spring for organic)
  • Hummus*
  • Sliced carrots
  • Sliced cucumber
  • Hot sauce
  • Parmesan cheese (optional)

Method . . .
  1. Lay out washed and dried romaine leaves and spread generously with hummus.
  2. Load with chopped veggies (I’d love to add crispy bell peppers and even avocado!).
  3. Top with hot sauce and Parmesan shake (alternatively, you could use nutritional yeast).

ENJOY!


* Homemade hummus is best and much less expensive.
Like what you just read? You can subscribe to the feed of these posts or follow us on Twitter or Facebook to be the first to know what the (never home)makers are up to. And we’ll love you forever!

Read more...

Basil Hummus

>> Wednesday, May 20, 2015

Now that we have some plants growing in our garden, I’m coming up with ways to incorporate them into our meals. Of course, it will be a while until we see our first tomatoes or cucumbers, but the herbs are already out and proud. Here’s a delicious (and fast) hummus recipe I whipped up for lunch yesterday.

The story with hummus is this: It’s super expensive at the store. Even with the Wegmans family pack or Aldi big tubs, the price is much cheaper when you make it at home. So, this recipe is for a double batch that should last a hungry family all week. The cost was around $2.00 total versus the $6.00 or more you might spend to purchase a similar amount. You could save even more money if you soak and cook chickpeas at home versus buying canned.

(Also: Sorry for the iPhone photo. When I made this, I didn’t have my camera around.)


GARDEN BASIL HUMMUS


What you’ll need . . .

  • 2 cans chickpeas, drained + rinsed
  • 1-2 tablespoons tahini
  • 1/4 cup chopped basil leaves
  • 1 tablespoon lemon juice
  • 1-2 teaspoons garlic powder
  • dash cayenne (optional)
  • salt + pepper to taste
  • Water


Method . . .

  1. Toss everything in your food processor except the water.
  2. Pulse and slowly pour water into the processor to achieve desired consistency.
  3. Turn the speed to high and blend until smooth.
  4. Feel free to try this with cilantro, chives, or other herbs in your garden.

Note: I don’t provide exact measurements of some ingredients because you want to tinker with the flavors until you reach exactly what you like. I prefer more tahini and garlic powder, while others might like a less intense blend.

Enjoy!

RELATED RECIPES:


Stephen’s Garden Hummus
Spinach + Pea Hummus
Hu-mousse Dessert Hummus
Hummus Melts
Simple Hummus Wrap w/ Arugula

Like what you just read? You can subscribe to the feed of these posts or follow us on Twitter or Facebook to be the first to know what the (never home)makers are up to. And we’ll love you forever!

Read more...

Better Veggie Burgers On Demand

>> Friday, February 27, 2015

Here’s another installment of my Make It Better series. This time, I’m focusing on veggie burgers, which are one of the favorites in our house. Well, besides pizza and garlic knots and homemade ciabatta bread. I used to follow recipes for veggie burgers, but once I got down the basics of this method, I use whatever we have on hand to mix together delicious patties on demand.

Like this kidney bean burger!


// Choose Your Bean


Canned beans are easy in a pinch and if you need burgers to fill your tummy, like, now. If you have a bit more time, try soaking and cooking beans for less salt and BPA. I usually just use one can of beans (drained + mashed) or around 1-1/2 cups as my base.

And anything that’s bean-ish (and mashes) works, too.
  • Chickpeas
  • Kidney beans
  • Black beans
  • Lentils
  • Split peas
  • Canelli beans
  • Sweet potato

// Chop Veggies Small


The key to fast burgers that don’t require a food processor? Chopping your veggies super small so they’ll incorporate well. I use around 1 cup of veggies total, but they can be a mix of anything I have on hand. How much you use total might also depend on the specific veggie, so be creative and keep the ratio pretty much 1:1 or a little less.

Some of my favorites:
  • Onions
  • Shredded carrots
  • Shredded sweet potato
  • Shredded zucchini
  • Garlic
  • Peas
  • Corn
  • Mushrooms
  • Olives

// Add Healthy Bulk


A lot of veggie burger recipes I made at the start used breadcrumbs to bulk up. Over the years, I’ve used all different ingredients to get that bulk. I always add this part by feel. You want a patty that is not too dry but also not sticking to your hands. Usually this means around 1+ cup of bulk, depending on what you use. You can also (and I suggest you do) combine different bulk items, like flax meal and rolled oats or almond meal and sunflower kernels.

Any suggestions to add?
  • Almond meal
  • TVP or TSP
  • Whole wheat breadcrumbs
  • Flax meal
  • Rolled oats
  • Sunflower kernels 

// Spice It Up


Here’s where I get creative. I honestly just start dumping in spices and taste as I go along. You can get away with just using salt and pepper. But sometimes, you want to have more fun. Start by adding a half teaspoon of different things and build. You can always add more spice, not take away. And if you splash in any liquids (maybe a tablespoon or so), you might need to add more bulk to soak up the moisture. Play it by ear.

Spice:
  • Smoked paprika
  • Curry powder
  • Turmeric 
  • Cumin
  • Chili powder
  • Garlic powder
  • Dill
  • Cayenne
  • BBQ sauce
  • Apple cider vinegar
  • Soy sauce
  • Tamari

// Bake It


After your mix starts to come together -- and feel free to tweak the ratios till you get something perfect -- you bake. Now, I didn’t always bake my veggie burgers before cooking them on the stove. But I’ve found doing so helps them keep their shape. And once they cool on the rack, you can transfer to your freezer for healthy weeknight dinners in a flash. Anyway, you can take or leave this tip.

If you do choose to bake:
  • Preheat your oven to 350 degrees F. Line a cookie sheet w/ parchment.
  • Scoop burgers by heaping 1/4 cups + flatten into patties.
  • (I also love using my muffin top pan for this process!)
  • Placing on your cookie sheet and bake around 15 to 20 minutes.
  • Then brown them on your stove-top. 
  • Add some cheese and melt by placing a cover on your pan.


// Related


10 Steps To Slow Cooker Perfection
Bake Better Kale Chips
Blend Better Green Smoothies
Chickpea Burgers
Bulk Veggie Burgers -- Frozen
Beet Burgers
Full Sandwich + Burger Recipe List

And if you need more ideas on how to use beans in your cooking:


Like what you just read? You can subscribe to the feed of these posts or follow us on Twitter or Facebook to be the first to know what the (never home)makers are up to. And we’ll love you forever!

Read more...

30-Minute Mushroom + Kale Frittata

>> Monday, November 10, 2014

Eggs.


Veggies.


Combined with cheese.


And baked.


MUSHROOM + BABY KALE FRITTATA

What you’ll need . . . 
  • 6 eggs
  • 4 large white mushrooms, chopped
  • Gigantic handful baby kale (or other greens), chopped
  • 2-3 cloves garlic, minced
  • 2 tablespoons mayo or milk*
  • 3/4 - 1 cup shredded cheddar 
  • Black pepper to taste
  • Pinch salt
* I know lots of you guys don’t like mayo, and I don’t use it often. But when you’re scrambling eggs or making bakes like these -- the texture is amazing. We use mayo that’s made with olive oil that contains half the fat and calories of a traditional blend.

Method . . .

  1. Preheat your oven to 350 degrees F. Lightly oil an 8 x 8 inch casserole dish and set aside.
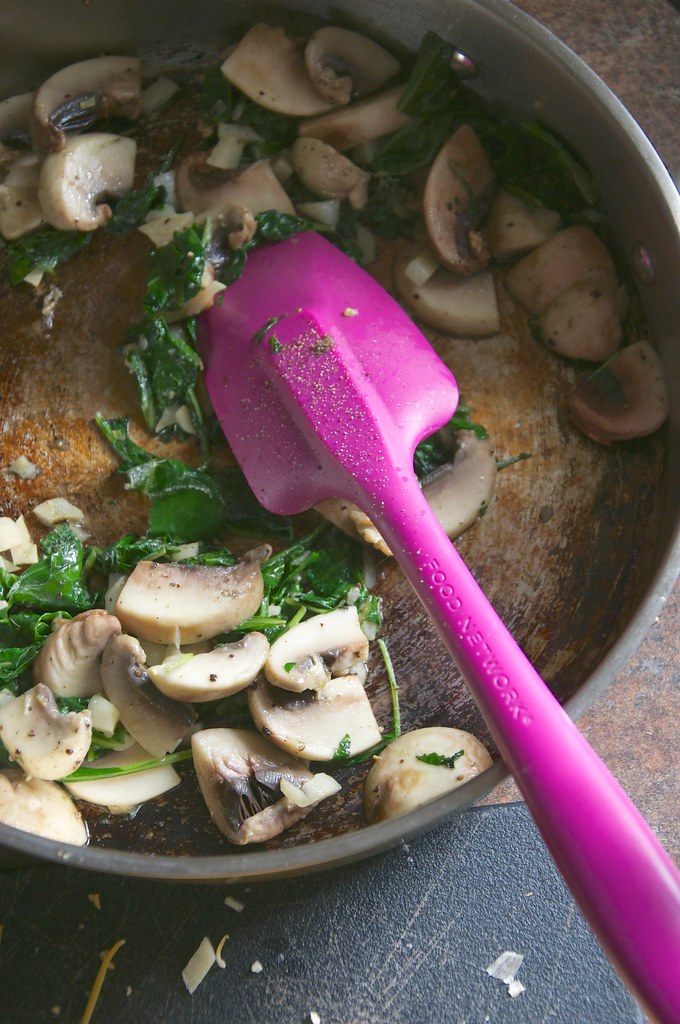
  2. Chop your veggies, then sauté them on the stove, starting with the garlic. Add the mushrooms and cook for a few minutes, until softened. Then add the greens and wilt. You don’t want the mushrooms super soft just yet. Season with salt and pepper.
  3. Whisk your eggs with the mayo or milk, then toss in the shredded cheese and cooked veggies. Mix until combined. Then pour into your prepared casserole dish.
  4. Bake for 20-30 minutes or until the top is lightly golden brown and the middle is set. Let cool a while before slathering on the hot sauce. 
Yum!


This meal’s a good one to modify using whatever odds and ends you might find in your fridge. You can pretty much toss any vegetables or cheese in the mix. Frittatas tend to keep well for around 5 days when stored in an airtight container. You can eat it cold or heat up again for several minutes at 350 degrees F.

And my favorite way to enjoy this egg bake? Between two slices of crusty bread.

Enjoy!

Like what you just read? You can subscribe to the feed of these posts or follow us on Twitter or Facebook to be the first to know what the (never home)makers are up to. And we’ll love you forever!

Read more...

Simple Pleasures, no. 3

>> Monday, September 22, 2014


SRIRANCHA* EGG SALAD
  • 2 slices of homemade bread, toasted
  • 2 hardboiled eggs
  • A couple tablespoons ranch dressing
  • A few squirts Sriracha sauce
  • Black pepper, to taste
* Thanks to @lyndseyf412 on Instagram for giving this awesome sauce a name!

// Just mash together the eggs, dressing, and sauce until they form familiar egg salad consistency. Spread atop your toast. Sprinkle your black pepper. Enjoy!

Here are 5 more ways to eat protein perfect hardboiled eggs.

(Simple pleasures no. 1: Cheesy Toasted Bagel, no. 2: Roasted Apple For One)

Like what you just read? You can subscribe to the feed of these posts or follow us on Twitter or Facebook to be the first to know what the (never home)makers are up to. And we’ll love you forever!

Read more...

Vegan French Onion Soup

>> Monday, September 15, 2014

This weekend I retooled one of my most popular recipes, Vegan French Onion Soup. I loved this sort of soup as a kid because it was often was of of the only meat-free options for me at restaurants . . . only to find out as an adult that it -- and many other soups -- most often contains beef broth.

So, as I played around with making my own mix in the past, I used a quick roux to thicken the broth and give it a nutty, fuller flavor. This new version is gluten-free because I swapped out the flour for almond meal. And it tastes even better than my last batch!


FRENCH ONION SOUP*
Improved on the original -- vegan, gluten-free.

What you'll need . . .
  • 2 pound bag yellow onions**, sliced thinly
  • 1/2 cup chopped celery
  • 2 large cloves garlic, minced
  • 2 tablespoons olive oil
  • 2-3 tablespoons pure maple syrup
  • salt and pepper to taste
  • 8 cups low sodium vegetable stock
  • 1/4 cup olive oil
  • 1/3 to 1/2 cup almond meal
*A reader pointed out that for this to TRULY be French Onion, it would need the bread and cheese. Feel free to use your favorite bread or gluten-free bread and broil the top with cheese or vegan substitute.

** I actually used assorted onions from our CSA share. Toss in what you've got!

Method . . .
  1. Place the onions, celery and garlic in a large stock pot with the olive oil. Cook for 8 to 10 minutes over medium to high heat, until translucent.
  2. Then add in the maple syrup, salt, and pepper. Cook another 15 minutes, until golden and caramelized. 
  3. Pour in the vegetable stock and bring to a boil. Lower heat to a simmer and stir occasionally for another 30 minutes.
  4. During those last 10 minutes of waiting, heat the olive oil into a shallow pan on medium-low and wait for the it to get to a hot, but not too hot (shouldn't be smoking -- read more in our last Thai Jambalaya recipe).
  5. Add the almond meal to the 1/4 cup oil and stir continuously for 10 minutes -- until deep brown and smells nutty. You may add more or less almond meal depending. You want a paste like in the photo below.
  6. Add roux to the soup and let cook for another 5 minutes.
  7. Serve with crusty homemade bread and/or nutritional yeast.

Enjoy!

Like what you just read? Browse more of our posts + recipes on Pinterest. You can subscribe to the feed of these posts or follow us on Twitter or Facebook to be the first to know what the (never home)makers are up to. And we’ll love you forever!

Read more...

Hardboiled Eggs // Portable Protein

>> Thursday, September 11, 2014

I have this wild love affair with eggs, especially hardboiled eggs.
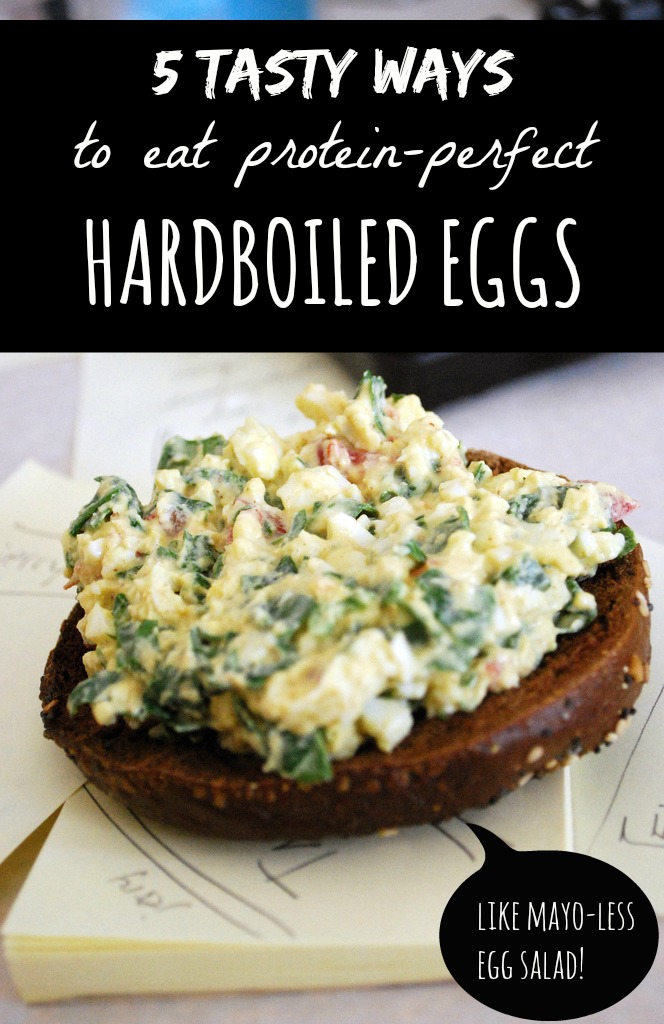
I can't get enough + here's why.


Every week I boiled a dozen using the Martha Stewart Cooking School method: Place 12 eggs in a large stock pot. Cover with 1 inch of cold water. Bring to a boil over high heat. Take off heat, cover with a lid, and set a timer for 13 minutes. Then drain and put in an ice bath (or just cold water).

It's so easy.


I put them -- shells still in tact -- in an airtight container in the fridge. Peel them when I want to nutritious snack. I often eat them plain or chopped on salads, like in this Mommy + Me Meal I posted last week. Absolutely delicious. Over the years, I've come up with a lot of other tasty uses for this awesomely portable protein.

#1: Avocado Egg Salad


This Avocado Egg Salad recipe is by far one of my favorite lunch options. It has an amazing mix of good fats, protein, and deliciousness that sustain me through the afternoons. If you're vegan and skipping over most of this post, I can offer you my egg-free version of this recipe: Tofu Avocado Salad -- incredible in its own way.

#2: Mayo-Less Egg Salad


I wrote this Mayo-Less Egg Salad recipe by request many years back. Some of you, understandably, hate mayonnaise! I always did, too. In fact, I often use Vegenaise when I make standard egg salad. But tahini + mustard is another interesting substitute worth trying.

#3: Guacamole Deviled Eggs


I made these Guacamole Deviled Eggs for a 4th of July party this year, and I've been hooked on them ever since. Very much like the egg salad spread above, just in a different package. I like to season ours with smoked paprika for extra flavor.

#4: Sandwich Topper


You can also skip all the sauces and seasonings and slice your hardboiled eggs directly into sandwiches. Here's a pretty comprehensive list of the sandwich recipes we've posted over the years. I'd say eggs would work well with veggie-based creations, like this Open-Faced Portabella Sandwich or even Caprese Sandwich.

#5: Soup Dipper


I've never tried this personally, but I've seen hardboiled eggs tossed into soups. It's sort of like a garnish, if you will. Skeptical? I don't blame you. But check out this cold Tomato-Almond Soup with hardboiled eggs. It looks good to me!


Pssst: Today was Ada's FIRST DAY of Preschool! Read about how it went, see some cute photos (if I do say so myself!), and find out why I freaked out a bit right before dropping her off.

Like what you just read? Browse more of our posts + recipes on Pinterest. You can subscribe to the feed of these posts or follow us on Twitter or Facebook to be the first to know what the (never home)makers are up to. And we’ll love you forever!

Read more...

Hatch Chile Grilled Cheese

>> Wednesday, September 10, 2014

Fancy grilled cheese is quickly becoming my new favorite meal. I can't get enough of the Blueberry + Brie Grilled Sandwich -- I've made it with a variety of fruits, including the 10-Minute Ground Cherry Jam I made last week. And I'm sure you guys know after yesterday's homesteading post that I've started using homemade bread for most of my recipes, too.

Delicious times a gazillion.


So, I'm a pepper lover, but I have never head of Hatch chiles until this year. There was this huge sign at Wegmans, so of course they piqued my interest. I looked them up and discovered that this uniquely tasty pepper was originally grown in the Hatch Valley of New Mexico. People have entire Pinterest boards devoted to them. I picked up a bag (great marketing, Wegmans, right?) . . . and then couldn't figure out what to do.

After asking a few friends, roasting was the universal suggestion. I set my oven to broil, put them in whole and roasted on all sides until they were slightly charred. Then I placed them in a bowl, covered with a plate (you can use plastic wrap, etc.) until they were cool enough to slice, remove seeds, and peel the skins. If you plan to do all of this, too, just wear gloves or something. Big mistake on my part -- burning on my hands all day!

After that:


This sandwich is far from being local fare. (And I didn't even make the bread -- it was leftover from a dinner out the night before.) Still, it was certainly delicious and worth the effort. I slapped on a good helping of the roasted chiles. Used some tasty Colby cheese. Sliced avocado for good measure. I think I even tossed in a couple of Stephen's Homemade Pickles after that.

Oh: You can easily make this same type of sandwich using roasted red peppers, etc.

Anyway, I placed the rest of my roasted Hatch chiles in an airtight container and used them in soups, Veggie-Loaded Quesadillas, hummus, etc. Mine were gone pretty quickly, but I've heard they freeze well. Here are some specific instructions for freezing them whole and otherwise.

Have you tried Hatch chiles? What's your favorite recipe?

Like what you just read? Browse more of our posts + recipes on Pinterest. You can subscribe to the feed of these posts or follow us on Twitter or Facebook to be the first to know what the (never home)makers are up to. And we’ll love you forever!

Read more...
Related Posts Plugin for WordPress, Blogger...

About This Blog

MyFreeCopyright.com Registered & Protected

© 2009-2014 by the (never home)makers
All content on this blog is copyrighted.

Want to publish our pics, tips, or tricks?
Contact us! [neverhomemaker@gmail.com]

We value transparency. Links on this page may contain affiliates. In addition, please see our disclosure policy regarding sponsored posts.

  © Blogger template Simple n' Sweet by Ourblogtemplates.com 2009

Back to TOP  

Blogging tips















