Showing posts with label tips. Show all posts

Sharing 20 of YOUR Tips for Healthy Eating

>> Tuesday, February 5, 2019

I'm getting a slow start to 2019 with regard to health and fitness goals. And if you've read here for a while, you know that I often struggle with healthy eating (despite loving healthy food!). I get caught up in my hobby of baking and end up in a cycle of homemade sweets, bread, and -- now -- sourdough bread. I don't want to give up on baking entirely, but I do need to find a way to get back to healthier eating. Not so much for the number on the scale . . . but because I just feel so full and sluggish.

Here are the tips you guys sent me yesterday. My criteria was that I don't want to go all or nothing when it comes to food. I don't want to label foods "good" or "bad" . . . and I want to continue doing some of my baking. You guys delivered some great tips, and here are the 20 that were most shared.


Start the day with a huge glass of water

Resist eating sugar -- even fruit sugar -- at breakfast

Read the book Intuitive Eating

Eat way more protein

Skip alcohol for a while

Choose one meal to focus on and go from there

Only bake bread + desserts on weekends

Drink more water throughout the day, especially before meals

Prep meals on weekends for the whole week

Pack lunch the night before to resist daytime snacking

Stop buying all processed foods

Eat meals on smaller plates

Split lunch up to avoid crashing mid-afternoon

Fill half your dinner plate with vegetables

Roast a large pan of veggies and refrigerate for easy grabbing

Stop eating at 7PM and don't eat again till 7AM

Try sweet potatoes + other whole carbs vs. bread

Eat more healthy fats

Choose fruits that are lower glycemic (cherries, apples, etc.)

Even if it's hard, stick with it for 21 days to make a habit


THANK YOU for all your advice. 

If you, too, are struggling, I hope these tips are helpful to you. I'm sure many of you are in the same place I am . . . we KNOW what to do, it's just a matter of actually getting back into the rhythm. I'm going to check back with you all in 21 days to see how things are going. My main goal is to get in more protein, drink WAY more water, and fill most meals with vegetables. 

(But I also hope to expand my sourdough baking skills this month. I'll just try saving that activity for weekends only. Also: Image source.)

Read more...

Smart + Thrifty Tips for Buying Second-Hand Clothing

>> Monday, August 14, 2017

So many of you have messaged me privately about my second-hand shopping escapades. It’s really one of my biggest hobbies. There’s definitely a method to my madness. One of my favorite bloggers -- Jessica over at What I Wore -- recently shared her own tips for shopping thrift, garage sales, etc. You should definitely check those out.

Here’s how I approach things, at least when it comes to clothing. I have a host of other tips for household and other items.


Make the rounds


A lot of people tell me they aren’t able to find good stuff at their local shops. And for some of you, that may be an ongoing issue, I understand. But for others -- don’t give up with just one visit! Consider that these places get new stock from time to time. How often will certainly depend on the shop, so it’s a good idea to ask the sales associates how often new stuff comes in.

I find that if I try to hit up all my local places in a rotation about every two weeks, I am able to see a wealth of goodies. Of course, I still see that crazy cat embroidered vest at Good Will even a month down the line, but many other awesome things have filtered into the aisles as well.

I also have discovered that where you go matters. We live in a large-ish area with many different pockets of age brackets, income levels, etc. While I have found good things at most stores . . . I tend to more heavily hit certain areas where I find the demographic more closely matches my own. Well, and also where middle-aged women who like FLAX clothing live.

Know your style


I know what I’m looking for. Usually natural fibers. Linen, mostly. FLAX the brand specifically (here are my 5 favorite FLAX outfits for summer). If you have a tried-and-true brand or fabric or cut or item you like, look for it specifically and try to forget the rest. In my own experience, I have picked up things that I would have never purchased simply because I thought it looked kinda sorta neat. Then? I never put it on because, well, it’s just not my style.

You may find it helpful to write down a list of things you like. Or things you need. But try to avoid getting random stuff that appeals to you based on price alone. I went through this period of time when I thought maybe I’d like to wear corduroy jumpers simply because I was finding a lot of them and they were cheap. Nope.

Oh, and while you’re at it, don’t hoard things just because they are what you’re “looking” for. Again, I LOVE FLAX . . . but I don’t need a lime green FLAX vest or something that doesn’t match my style.


Know your size


I really, really don’t recommend trying on thrift store clothing. Even while shopping at a “nice” store, I contracted scabies when I was in my early twenties. It’s helpful to know your size in different brands or simply by looking at the item. You may even want to bring a measuring tape with you to help. I tend to wear things big or in a freer size, so usually I’m pretty good if something is a tad too big on me.

Instead of trying on, I tie my bag tightly after leaving the store and immediately throw it in the wash when I get home. I dry in the dryer as well -- anything to help kill weird stuff that might be on there. I am usually just fine with sizing because I’m a ninja at this stuff. BUT I’m not immune to mistakes. So, that all said, if you do end up getting something home that just won’t work after washing, you may also try to re-sell it or donate it again if it only set you back a couple dollars.

Oh, and I would recommend checking all sizes. Some things are either in the wrong section (misplaced) or -- at least with vintage clothing -- sizes have changed over time. I wear anywhere between a 2 and 8 in different modern brands. With vintage, I can wear up to a 12!

Scan and keep moving


This goes with knowing what you want -- keep moving! If I stop too long to consider something, the chances are that I’m more convincing myself that it’s a good deal or whatever. If I see something that I immediately love, I grab it and move onto the next item. Oh, and if you’re curious . . . I seriously go item by item when I shop. Since I know that I mostly like linen, it’s pretty easy to scan for this fabric among all the other things in the store.

And any seasoned second-hand shopper will tell you to inspect your items well before purchasing. You will find stains, holes, tears, and other reasons why these things may have ended up in the shop. If it’s something you can fix, great. If not, put it back.

Or  . . .

Ask for deals


If I find anything wrong that I think I can fix, I ask for a discount. Some stores offer while others aren’t as willing. Don’t go overboard. But, for example, I found a linen dress once that looked like it had simply fallen on the ground and got some dirt/dust on it that would clearly come out in the wash. Still, I said “gee, I love this . . . but I sure hope this stain comes out . . . would you take off anything?” And they took off 20 percent with no issues.

If something has an issue I’m not as confident about resolving and they won’t take anything off, I walk away. Sometimes after saying never mind, they’ll take off more and other times, not. It’s all part of the game.

Remember -- you can (often) return


At the same time, check out your store’s return policies. If you do bring something home and don’t like it or find it has issues, you’ll want to return if you can. Some shops only offer in-store credit while others will give you your cash back. Some store do not offer any type of return policy. This is, again, where checking items carefully comes in to play. I’ve been burned a few times. I have mended a few things . . . but others were beyond help or my abilities.

Consider modification


There have been times I’ve found dresses or pants and I love the cut + fabric, etc. But not the color. You can actually change that, you know. RIT dye is extremely useful in these cases + easy to use. Jessica recently darkened the color of a cool pair of leather boots she found. And there’s a blogger called ReFashionista who buys second-hand clothing that some find hideous and transforms it into hip, ultra-wearable pieces through her sewing skills.

Look beyond what’s in front of you to see what it could be. But don’t go too crazy or elaborate. I find that quick fixes or changes work best for my skill set.


Don’t forget shoes


I shunned the shoe section at thrift shops for years because the idea of wearing other people’s shoes creeped me out. Here’s the thing . . . some of the shoes you will find are either like-new or entirely new. It always astounds me. For example, I found a like-new pair of FRYE boots (similar to these that go for HUNDREDS!) this weekend. I also found a brand new pair of Eileen Fisher espadrilles (just like these that are currently in stores for $135+).

Don’t forget to check the shoes. Period.

Mind the calendar


Most thrift shops in my area have sales throughout the year. This weekend the thrifty shopper up the road had 50 percent off everything for just one day. I think they do it twice a year. Ask your associates if there are any planned sales. Many stores also have tag sales where, say, purple tags are 30 percent off or blue are 50 percent off. This usually means that whatever the item is has been sitting on the shelves longer than other items.

Again: Inspect your loot carefully for damage . . . but otherwise celebrate finding a super deal!

Go alone, if you can


I try to shop thrift on my own. I find when I bring the kids that they get terribly bored. I am also much (MUCH!) faster without them. So, I try to join my thrifting trips with my grocery shopping, which I also try to do alone as much as possible. If I’m scanning and moving on, I find I can go through a whole store in like 15-20 minutes. That means I could hit up three in the span of an hour.

For me, this is great entertainment and exhilarating deal-finding, but I totally understand if this isn’t your idea of fun that you might want to spend your solo time doing other things . . . NOT. :)

*

*

*

What are some of your tips for thrift shopping? I’d love to hear them!

Read more...

Five Things I No Longer Buy // Minimalism

>> Monday, March 13, 2017

This whole minimalism thing is a process. That's for sure. It started out long ago with just a thought. And then a bit of passion. From there, it got physical. And by that, I mean we got rid of a bunch of stuff. Remember last year when I took you all on our spring cleaning adventures? By the end, we had figured out some major stuff about how to clear everything out and we were down to just a few bins in storage.

Amazing. Not so amazing is where we're at a year later. I blame it on having a baby. But the stuff, or maybe should I type out The Stuff, has slowly made a return. Not to previous levels, but we definitely need to take some time again to get back on track.


The hardest part isn't actually purging. Sure, you need to make those keep, sell, donate, and trash piles. Sure, you need to part with things that you may be emotionally tied to. But once you've done that -- it feels amazing. The hard part is actually NOT BUYING and NOT BRINGING HOME things to fill all that empty space.

So, here are some things I have stopped buying since committing to being more minimalist. We're still a work-in-progress over here. But saying no to these areas has helped tremendously. We need to add more items to this list, and I'll note those down below.

5 Things I No Longer Buy

#1: Paper towels, plates, etc.

We do not buy any paper towels, paper plates, napkins, paper cups, etc. Not only are they wasteful, but they also clutter up the trash can and pantry space. This isn't to say we don't have some rogue ones around the house. My parents and in-laws (trying to be helpful -- so we appreciate the sentiment) do end up buying us paper towels on occasion. My mother-in-law also has a thing for getting Ada decorated paper plates for holidays, birthdays, etc. We try to use them sparingly and re-use them as many times as we can (for example, I may use them as paint trays a few times).

We have a cloth towel system for cleaning the house. We also have two sets of Corel dishes in plain white. It is enough for eight people total. We very, very infrequently would need more than that.

#2: Cleaning Supplies

You guys know that we make a lot of our own cleaners. A great all-purpose spray is just vinegar with water and some essential oils. You can use different ratios of this to get the job done. You can add some rubbing alcohol to make it suitable for cleaning glass. In other words: Vinegar is awesome. Here are many ways you can use it.

We also make our own laundry detergent, dishwasher tabs, and even some of our own personal care items, like deodorant, lotion cubes, and face scrub.

#3: Fast Fashion

I have so much to write about this topic. I think my LuLaRoe obsession was my breaking point. I had this brief love affair and bought #alltheleggings and it left me feeling really empty and sad. I've made some major changes to my wardrobe, including selling most of my LLR (in my Poshmark closet) and buying the vast majority of my clothing second hand now (again, on Poshmark -- you can use code NYRLS to get a $5, btw -- not sponsored).

I have been trying to switch out my clothing with more timeless pieces. Also buying natural fibers, like FLAX, that are made to last for many years without wearing out. I will talk much more about all these changes when I show you guys my 33-piece wardrobe. That post will be a video. I'm in a weird place with my wardrobe right now because one day it's 65 and sunny . . . and tomorrow we're expecting up to 18 inches of snow.

#4: Sheets and Blankets

When we were doing the great purge last year, I discovered that I hoard blankets. If I see something warm and cuddly, I simply cannot pass it up. Or, at least I wasn't able to a year or so ago. I am happy to report that I have not bought a blanket in a little over a year. We've even pared down on our sheets so we have just one pair of flannel and two cotton for our bed.

In Ada's minimalist bedroom tour, you can see that I also stored away the top sheets on her bed and only use the fitted.

#5: Toys

OK. So, this one isn't something we totally don't buy. We have just changed a lot about how we buy toys. As in, we don't buy many . . . and we are continually looking to pare down on them. This is really difficult with so many generous friends and relatives. Instead of toys, we try to buy Ada things to do, like coloring books, where she's being creative. Or we try to invest in experiences versus stuff. Like with clothing, this is a topic I need to devote an entire post to writing.

I also need to give you guys a tour of our basement play room. This is one area that I just cannot seem to totally control. Part of it is because it's hard to make kids give up toys. It's also hard to part with things that were given as gifts, whether or not the child plays with whatever it is. I think you parents out there know what I'm talking about. This is a tricky area.

Our policy in the house is that we do not buy toys unless it is a holiday, like Christmas or birthday. There are limits on the number of toys. And we like to get rid of something if we are bringing in new. I won't lie, though. Right now my basement looks a bit like a daycare center. That's what a late November birthday, Christmas, and having a new-ish baby will do!

We're Not Perfect


Thing is, we are far from perfect. Minimalism has been a two steps forward, one step backward process for us. What remains a constant is that both Stephen and I see value to trying to live with less. We may fail at times, but we regroup and often chat about how to get where we want to be.

Here's something cool, too. Using the cash envelope system is really helping us bring less stuff into the house. It's because we end up writing out shopping lists, seeing where our money is going, and thinking more about the purchases we make in general.

Good Resources


If you want to read more, check out these links.

How to program your mind to stop buying crap you don't need via LifeHacker
10 ways to stop shopping for a while via Be More With Less
Giving up (new) clothes for a year via Becoming Minimalist
How to not buy anything for a year via Two Less Things

More Minimalism:


Eliminating the Maybe
7 Clutter Categories
Cleaning Week Snapshots
Wannabe Minimalists

Read more...

Better Cauliflower Crust

>> Tuesday, June 16, 2015

Here’s another installment of my Make It Better series. I’m not intolerant to gluten or even sensitive for that matter. I just eat a lot of too much bread and have been looking for alternatives to clean up my diet. So, in my adventures, I’ve made several recipes for cauliflower crust pizza in the last couple years. And I absolutely love it. Some of the recipes have indeed been great. Others, OK. Yeah. Horrible.

Along the way I’ve picked up a few tricks of the trade.


// Pulse in Processor


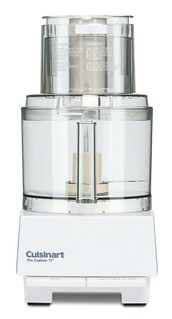
You may encounter a recipe that instructs you to grate your cauliflower. That’s going to make a huge mess. Instead, chop up florets and pulse them into “rice” in your food processor. It’s faster, the “rice” gets much smaller, and you’ll spend less time cleaning up.

// Microwave Fast


I know some of you will disagree with me, but I find it much easier to just microwave my cauliflower “rice” while I’m getting other parts of my meal ready. We rarely use the microwave, so I revel in the convenience of it for those 7 minutes. That way, you can keep it all in the same bowl and skip the step of draining from added water. It’s the little things . . .

// Drain + Drain Some More


Once you’ve cooked your cauliflower, let it cool almost completely. But never, and I mean NEVER, skip draining the moisture out. You’d be surprised how much is in there, too. I usually use a clean tea towel and work on my “rice” in batches. I’ll squeeze as much as humanly possible . . . and then return in five or so minutes to squeeze any last bit of water that remains.

If you think it’s done, try again.


// Season Well


Don’t forget to add salt, pepper, and even herbs or other spices. You want it to taste freaking amazing, right? My favorite recipe calls for a good amount of cheese in the crust, and I think it’s worth the add-in. So, I just skimp on any added cheese atop the pizza and opt instead of lots of roasted veggies and good sauce. Versus where the bread is sort of in the background in a lot of pizza recipes, the cauliflower can be one of the highlights of the entire meal.

// Use Parchment, Not Foil


A few of the recipes I’ve followed have said to use greased aluminum foil as a surface for cooking. Please, please don’t do this. Ever. I’ve tried twice with disastrous results. You will likely be so sorry. Parchment (or maybe a silicone pizza baking mat) will keep your pizza from sticking. If you’re out of parchment (like I often am) try a well greased baking pan before skipping to aluminum.

// My Favorite Recipe


Like I said, I’ve tried several different recipes, but this one on PopSugar is by far my favorite. Usually we’ll make two pizzas -- one for me + Ada, one for Stephen -- and I’ll cut the cheese almost in half when doubling. For toppings, we often use BBQ sauce for sauce, a medley of roasted veggies (I roast while preparing the crust // before putting them on the pizza), fresh tomatoes, a little ricotta, and then chopped basil from the garden.

Do you have any cauliflower crust tips to share?

Like what you just read? You can subscribe to the feed of these posts or follow us on Twitter or Facebook to be the first to know what the (never home)makers are up to. And we’ll love you forever!

Read more...

Blend Better Green Smoothies

>> Monday, February 2, 2015

This post continues my series on improving favorite foods, like Baking Better Kale Chips and 10 Steps For Slow Cooker Perfection. Green smoothies have been a huge help to me with my latest EAT BETTER efforts. I’ll be the first person to admit that I don’t like munching on salads, so sometimes the only way I get roughage in my diet is through a straw. Whatever works, right?

Sipping green smoothies on the regular is just another way of making healthy eating more automatic. So, if you are new to this way of drinking -- take note. And if you’re a veteran, I’d love to hear some of your favorite ways to make a perfect blend.


// Follow 60/40


I’ve tried to make almost 100% vegetable green smoothies in the past. And if you can drink them this way, more power to you. For the rest of us, a 60 (fruit) / 40 (veggie) ratio works out best. This way, the fruit dominates the overall flavor, yet you’re still getting a hefty dose of the greens you need.

I save the all veggie stuff for when I juice. (And here’s more on juicing, if you’re into that. I’d say we do it once or twice a month. It’s more expensive than smoothies and -- as healthy as it is -- it’s also really important to get all the fiber from the fruits and veggies that blending in a smoothie provides versus juicing.)

// Try Different Liquids, Etc.


Over the years, I’ve tried a variety of liquid bases for my smoothies. I always try to stick with unsweetened versions of anything I pour into the blender. My favorite right now is unsweetened coconut milk. You can also do almond milk, hemp milk, soy milk, and even plain water if you’re strapped. In addition, I often toss in yogurt -- plain or Greek -- for some extra creamy + tart goodness. You can totally change the taste and texture (and nutrition) with the liquid you choose, so be sure to experiment!

// Add Protein


If you like to drink green smoothies after you work out (like I do), adding protein is key to replenish your muscles. There are a number of ways you can add protein to a green smoothie and take its healthy qualities to a new level. Try tossing in a tablespoon or two of nut butter, a serving of Greek yogurt, some spirulina powder, or a scoop of your favorite protein powder. If you want to use a green smoothie as a meal replacement, try and add a few hardboiled eggs on the side or something small to get a more complete mini-meal.

// Blend Well


As much as I hate to spend tons of money, it does pay to invest in a quality blender if you want to drink green smoothies regularly. That doesn’t mean you need to drop bank on a Vitamix or Blendtec. Those are incredibly nice machines, but a Ninja Blender is worth the extra over standard blenders because it blends those greens smooth. I’ve used standard blenders and they will work on maybe spinach -- but if you like kale and other heartier greens, consider saving up. A blender with more than 800-1000 watts should do the trick.

Regardless of what machine you use, it’s helpful to first blend the fruit and liquid, then add the greens and keep pulsing until smooth. If you find your greens are too chunky and not incorporating well, try adding a bit more liquid (a couple tablespoons at a time), and that should help.

// Freeze Ingredients


I might be alone in this, but if most of my ingredients in the smoothie are fresh, I don’t love the texture. So, I’ve started freezing cubes of yogurt and milk to act like ice cubes (after all, ice cubes don’t add nutrition beyond hydration). Furthermore, I always use frozen bananas for the best, thick texture.

BONUS: You can take this concept a step beyond by making your smoothie in big batches and freezing it into cubes so all you need to do is pop a few out and thaw in a glass for quick weekday drinking.

// Recipes


We have a ton of smoothie recipes -- green and “normal” -- on this site. You can browse through a lot of the recipes right here, and some of the latest and greatest ones can be found over here.


Now onto other fun stuff. 

What was your favorite Super Bowl snack? I made a delicious spinach + artichoke dip with hummus and pickles. It sounds really strange, but I can’t get enough of it, so I’ll be sure to share that recipe with you guys soon!

Like what you just read? You can subscribe to the feed of these posts or follow us on Twitter or Facebook to be the first to know what the (never home)makers are up to. And we’ll love you forever!

Read more...

Foods I Prepped Ahead This Week

>> Monday, December 1, 2014

Talk about Thanksgiving hangover.


We definitely overindulged in many ways this holiday, not that I’m really complaining. Thing is, we ended up only making around half of what was on our original recipe list for the actual day. We had the lentil loaf, kale chips, stuffing, and chocolate pie. Then we had the rest of the menu the next day. I loved breaking up the cooking and eating. We could savor it longer this way.

So, and everyone says this, I’m looking forward to getting back into our more usual routine and to eating some of the meals that make our bellies happy on the regular. I’m still on this low-glycemic (higher protein) makes me feel good thing. (However, I cannot impress enough how awesome this Mushroom Stuffing recipe is using sourdough bread as your base!)

We’re also doing another one of our $0 Grocery Weeks because we spent a lot on our feast this year. It’s got to come from somewhere in the budget, right? We do need to get some milk for Ada and maybe a bunch of bananas, but otherwise -- we’re eating freezer meals and other things I can cook from our stash.

Here’s some of what I prepared.


VEGGIE BURGERS


While we still have a good number of the last batch of burgers I made, I used our Thanksgiving leftovers to make these Cauliflower + Eggplant Burgers. It’s a nice change from all the bean-heavy burgers we eat. I love the flavor combination, too. Seriously -- if you’re into freezer meals, you can’t go wrong with a big stockpile of veggie burgers!


CHAI STEEL CUT OATS


So, last time I posted our meal preparations for the week, I had made some amazing pumpkin oats in our slow cooker that lasted nearly the entire week. This time, I took that same recipe but I substituted 1 cup of chai mix in for 1 cup of water and used some applesauce versus pumpkin puree. Very tasty. Definitely some extra sugar in there, but it’s diluted but a good portion. (This photo is of the pumpkin oats -- just imagine the same exact thing with less of an orange tint.)


HARD BOILED EGGS


$0 shopping weeks are all about grab-and-go and ease. When we cannot easily figure out what to eat, that’s when we find ourselves running to the store or picking up the phone to order takeout. Hard boiled eggs (here’s 5 ways to eat them) are a huge help in this regard. Full of protein and can be eaten on their own, deviled for a quick snack, or mixed for a lunch sandwich, etc.


FLAX BURGER BUNS


I’ve been meaning to post this Burger Bun Recipe that takes around 40 minutes to make (no rise time!). To health it up, I use half whole wheat flour and skip the egg and substitute in 1 tablespoon and flax meal + 3 tablespoons of hot water. I actually make a double batch -- but I don’t double the yeast in this case. The buns are perfect . . . and they freeze wonderfully.


PUMPKIN CHILI


We have some chili in our freezer, but I had all the right ingredients on hand, so I made a quick batch of Pumpkin Chili to start off the week with some easy lunches. Ada even loves this chili if we use the Strained Soup Trick I told you guys about in Mommy + Me Meals.


TAGINE DINNER


Alright, I’m breaking the mold. I didn’t already make this Chickpea and Sweet Potato Tagine recipe, but I do have the chickpeas soaking. That counts, I think. I got a Le Creuset Tagine for Christmas last year (thanks, Kathy!). If you don’t have one, you can still make this recipe without a tagine -- here’s some methods.

PS: Some of you have asked how I adapt recipes since we keep a relatively modest assortment of ingredients. Basically, I just put in what we have and either leave out of substitute like-ingredients for the rest. In this particular recipe, yes -- having the complex spices is important for the most flavorful dish. But i could leave out a bunch and still have the flavor turn out pretty great.


What are your favorite food prep recipes?


// MORE PREP TIPS


Stock up on frozen veggies 
Buy greens and actually USE them 
$0 Grocery Weeks
Create simple, go-to meals
Learn to love alternatives
Prep, Make, and Store
Add In: Convenience to your advantage
Eliminate Food Waste
20 Ideas for Make-Ahead Meals
Foods I Prepped For The Week, I

Like what you just read? You can subscribe to the feed of these posts or follow us on Twitter or Facebook to be the first to know what the (never home)makers are up to. And we’ll love you forever!

Read more...

Foods I Prepped Ahead This Week

>> Tuesday, October 28, 2014

This is a case of why don’t I do this more often? Prepping foods for the week on the weekend makes perfect sense, but it’s also somewhat time consuming. However, whenever I expend the extra effort, I’m so happy I did. I thought I’d share a few of the foods I made ahead for our week (and to stock our freezer with) because it feels amazing to have hot food on the table with no mess to clean up.

The key with making foods ahead of time is making them simple. I use the slow cooker a lot, which I’ve written about extensively in the past. I also favor foods that need to rise, soak, or otherwise require little attention from me.

Here’s some of what I made this weekend.


BAGELS


So, I wrote about my bagel-making process yesterday. No, it’s not the most automatic thing, but if you can crank out a few batches at once, you’ll have quick grab-and-go bagels in your freezer for a fraction of the price you’d get them at the store or bakery. I made two batches to add to our upright freezer this weekend. Nom.


WHEAT BERRIES


I started cooking wheat berries in our slow cooker a couple months ago because it’s so darned easy. Just toss in 3 cups of wheat berries with 7.5 cups of water. Cook on high for 5 hours, stirring every now and again. This makes 3 quart-sized bags. I keep one in the fridge and freeze the other two (after they’ve cooled completely) for making quick salads and sides. You can even toss them in veggie burgers.


SMOOTHIE CUBES


I’m going to write more about smoothie cubes on Writing Chapter Three  since they’re usually for Ada. I basically blend up whatever fruit we have on hand at the end of the week (this time it was bananas, blueberries, and strawberries) with whatever yogurt is still left in the tub and/or milk (almond, cow’s, etc.). I also added some frozen broccoli to this mix. Blend. Then I freeze the smoothie into cubes and pop out a few to thaw for quick weekday drinking.


HUMMUS


Friday night I usually throw dry beans into containers to soak so I can cook them on Saturday or Sunday (sometimes I let them soak two days -- I just chance the water to keep it fresh). This time around I soaked some garbanzos, cooked them, and then made a garlic hummus -- using tahini and water for moisture -- with a nice dose of smoked paprika.


VEGGIE BURGERS


The other container of beans was a mixed bag of white, black, and pinto. I think I soaked three cups in all, which yielded much more. I then made 2 large batches of my Bulk Veggie Burgers recipe. After shaping them into patties, I just put them on a cookie sheet, freeze, and then place in freezer bags. Once you get the hang of this recipe, it’s easy to toss in whatever you have on hand. This time around, I used some salsa, a little leftover cheese, carrots, onions, oats, sunflower kernels, and spices.


STEEL CUT OATS


Love this slow cooker recipe for pumpkin pie oats -- and I make it often. Just put 2 cups of steel cut oats in with 6 cups of water and 3 cups of milk (we used cashew milk for fun this time). Then add a can of pumpkin puree or the same amount (around 1.5 cups) of applesauce. Some cinnamon and spice and maybe some vanilla extract if you have it. Then cook on low for around 8 hours or until oats have absorbed the moisture and are soft. Store in your fridge and enjoy for the whole week with different toppings!

What are your favorite food prep recipes?


// MORE PREP TIPS


Stock up on frozen veggies 
Buy greens and actually USE them 
Create simple, go-to meals
Learn to love alternatives
Prep, Make, and Store
Add In: Convenience to your advantage
Eliminate Food Waste
20 Ideas for Make-Ahead Meals

Like what you just read? You can subscribe to the feed of these posts or follow us on Twitter or Facebook to be the first to know what the (never home)makers are up to. And we’ll love you forever!

Read more...

6 Steps for Summer Salad Perfection

>> Friday, July 11, 2014

Remember my 10 Steps for Slow Cooker Perfection? Well, I'd like to follow that same format for these summer salads I've been making lately. See, I'm not a lettuce and raw salad kind of girl. But eating raw veggies is important, so I try to sneak them in however + whenever I can.


// 1. Use a grain as a base.

Before I slice and dice up anything else for my salads, I prepare some type of grain with my normal Sunday meal prep and keep it in an airtight container in the fridge. Grains add protein, fiber, and substance to a meal -- so it's all good!

Some of my favorites:
  • Israeli couscous
  • Regular couscous 
  • Brown rice
  • Wheat berries
  • Farro
  • Barley
  • Bulgur 
  • Kamut
  • Millet
  • Quinoa

// 2. Slice fresh veggies.

Again, you can do all of this stuff at the beginning of the week to create custom salads each day. Or you can do it all at once and let marinate in your fridge. Regardless, a good salad needs veggies. I use raw whenever I can, slicing and dicing carrots, celery, onions, mushrooms, broccoli, etc. I make sure to cut them small so I don't have to chew them forever. For what ever reason, that makes me much more likely to munch them up.

As for greens, I use whatever is in our CSA box that week. Spinach, kale, lettuce, even herbs like basil and cilantro. I tend to cut up my leaves small just like the veggies, but if you prefer lots of leafs, do whatever you like best.

// 3. And fruits!

Don't forget tomatoes, cucumbers, squash, peppers, tomatoes, strawberries, blueberries, raspberries, raisins, craisins, and all other sorts of sweet, seedy whole foods that will enhance your salad. Plus, for those of you who are less inclined to eat plain veggies -- fruits are a nice gateway with some added flavor dimension.

Slow Roasted Tomatoes are delicious on summer salads!


// 4. Roast or grill the rest.

If you have leftovers from your dinner, use them in your salad! I always tend to make extra roasted veggies that we top our pizzas with or just use as a side for our overall meal. Plus, cooking certain ones -- like asparagus, beets, cauliflower -- means I can add some different stuff I prefer not to eat in the raw. I even set them aside before our meal so I'll know I have enough for the next day. Oh, and roasted sweet potatoes go famously well in salads!

// 5. Don't forget protein + healthy fats.

Great add-ons for your salad include avocados, olives, nuts, seeds, beans, eggs, cheese, and all other sorts of healthy sources of fat that we need in our diets. Vegetarians and vegans especially can gain a dose of goodness by adding protein to salads. It transforms the plate into a full meal.

Here are some of my favorite toss-ins:
  • Chickpeas
  • Black beans
  • Kidney beans
  • Over easy egg (warm salad)
  • Hard boiled egg (cold salad)
  • Cubed tofu
  • Sliced avocado
  • Black olives
  • Sunflower seeds
  • Walnuts
  • Sliced almonds
  • Shredded cheddar
  • Goat cheese

// 6. Dress for success

Last, but certainly not least, the dressing!


You can go store-bought here or make your own. I really enjoy thick dressings like Miso Ginger Dressing. This thick and creamy Avocado Pesto Sauce goes really well on salads, too. And one of my favorite homemade salad dressings is Sesame Ginger!

Just combine the following ingredients in a dressing container and mix.
  • 2 tablespoons minced garlic
  • 2 tablespoons minced ginger
  • 1/2 cup olive oil
  • 1/4 cup sesame oil
  • 1/3 cup light vinegar
  • 1/4 cup low sodium soy sauce
  • 2-3 tablespoons honey or agave
  • 1/4 cup water
What's your favorite salad combination? If you don't love salads (I don't!) -- how do you modify them to get all the goodness in? I'd love some more tips!

MORE TIPS TO EAT HEALTHY

#1: Stock up on frozen veggies 
#2: Buy greens and actually USE them 
#3: Create simple, go-to meals
#4: Learn to love alternatives
#5: Prep, Make, and Store
#6: Add In: Convenience to your advantage
#7: Eliminate Food Waste
* 20 Ideas for Make-Ahead Meals

Like what you just read? Browse more of our posts + recipes on Pinterest. You can subscribe to the feed of these posts or follow us on Twitter or Facebook to be the first to know what the (never home)makers are up to. And we’ll love you forever!

Read more...

The Automatic Meal

>> Monday, June 30, 2014

We're hopefully moving this year week (more here). But I want to try and keep forging on with some stuff I've been meaning to share. Like my favorite breakfast (or lunch) (or dinner). It's pretty basic, but it's one of the most satisfying meals I make.


Really, I could eat this mix every day, every week. It's pretty darned healthy, too.
  • Fry two whole eggs in virgin coconut oil
  • Toast bread (sourdough!) or cook a sweet potato in your microwave
  • Add some avocado via pre-made guacamole or simple slices
  • Toss some salsa and/or hot sauce in the mix
  • Slice some fruit or even add more veggies on the side
  • Finish off with tea or water or whatever you're drinking these days
What's your favorite all-day sort of meal?

I'm actually off to make this one right now! I think what makes it best is that it doesn't require much planning. I almost always have the ingredients. And it comes together in a flash. Now that's what I think is a recipe for automatic healthy eating!

MORE TIPS TO EAT HEALTHY

#1: Stock up on frozen veggies 
#2: Buy greens and actually USE them 
#3: Create simple, go-to meals
#4: Learn to love alternatives
#5: Prep, Make, and Store
#6: Add In: Convenience to your advantage
#7: Eliminate Food Waste
* 20 Ideas for Make-Ahead Meals

Like what you just read? Browse more of our posts + recipes on Pinterest. You can subscribe to the feed of these posts or follow us on Twitter or Facebook to be the first to know what the (never home)makers are up to. And we’ll love you forever!

Read more...

Pregnant Running: What I'll Change

>> Thursday, June 26, 2014

So, it's not secret that I'm having second thoughts about my marathon training. Blame in on the move (which is insane right now -- our sellers was $500 to use their garage for one day before closing!), blame it on the weather (so hot and humid -- can't imagine 20-milers in mid-August), or blame on it (crazy) baby fever . . . but I go back and forth. As of this moment, I am still all signed up and embarking on the whole plan as if I'm going to lace up in October and attack the course with gusto.

Still, the whole impending second pregnancy has me thinking a lot about how I want to approach running and exercise in my next with-child phase. I feel like the first time when I was pregnant, I felt I had something to prove to myself. How I didn't want to lose my identity and ability as a runner. At the time, I didn't feel much external pressure, but over the years it seems like the world and women expect much from their pregnant selves -- especially when it comes to staying fit and active.


I've written somewhat extensively about the irritable uterus issue I experienced with Ada's pregnancy. About how it's actually delayed our own child spacing out of fear I might be bed-bound the next time around and -- regardless -- faced with near-constant contractions from week 17 onward. Anyway, a comment I often got online and from family/friends concern running + irritable uterus and the possible link. My midwife didn't see much correlation since even when I would spend a week on the couch, I'd get the same issue with as much frequency and intensity.

This is all a (too) long introduction to how I plan to approach fitness in my next pregnancy. I read blogs and see women everyday who are kicking major butt, lifting gigantic weights, running marathons, and doing all sorts of impressive feats. Some of these women are supervised and going about it in a smart way. Others, honestly, not so much. But I've decided all I can do is take care of my body and my baby -- so I try to filter out what others are doing and just do me.

If I am straight with myself, I also know I was worried about gaining too much weight during pregnancy and holding onto it after pregnancy. Here's the cruel joke: I never lost all my baby weight despite all the exercise and healthy eating I did. Maybe I'm doing it wrong, but breastfeeding made me hold onto weight and with all my training, I am still up a good 7 pounds from where I started all those years ago.


With all this in mind, here's what I'll likely change the next time around:

#1: I won't race:

I didn't do lots of races while I was pregnant (a half marathon, a self-timed 15K, and a couple 5Ks), and I never actually pushed to get PRs. Still, in retrospect -- I don't see a point to participating in racing events if I can't go all out. I know some OBs and midwives say you can listen to your body and push to whatever feels comfortable, but "racing" is just that, and I don't see how it would benefit me the next go around. Also: All the crowds and adrenaline tend to trick my own body into going harder without realizing it. Even if my body is telling me something, it would likely be muffled by all that jazz.

#2: I won't wear a watch:

Yes. I still cared and fretted a bit about my pace in pregnancy. I didn't necessarily try to keep myself chugging along at a certain time . . . but if I could see myself slipping week by week, I would get frustrated. So, I refuse to wear a watch the next time around. Instead, I'll be sure to run naked. Well, at least with a naked wrist. Same goes for tracking distance, too. I'd rather keep a loose gauge on that and go with my energy levels on any given day. They can change so dramatically according to whatever is happening anyway!

#3: I won't just run:

I put way too much emphasis on running the last time I was pregnant. I was running at least 5 days a week for a long while and then slipped to 4, 3, 2, etc. I know I wanted to keep as much running up as long as possible so I could bounce back faster when Ada was born, but the next time around will be different for a number of factors. First of all, I don't run more than 4 days a week currently. I could see 3 days being a sweet spot punctuated with some at-home yoga, lots of walking, and maybe a day or two of my favorite prenatal workout DVD.

#4: I'll stop while I'm ahead:

Like I mention above, I ran a half marathon when I was around 13 weeks. I did the race slow and steady and felt fine afterward. But I was exhausted. I look back on that and think: WHY!?!? I know it was because I wanted to feel good about myself and my changing body, but I'd rather feel energized by exercise rather than have another bib to add to my collection. I don't think I'll run more than 6 miles at a time (probably around an hour) once a week. The other runs I'd like to keep between 2-4 miles in distance. If I have energy to spare -- awesome.

#5: I won't start again so soon:

After I gave birth to Ada I definitely started walk/running at like 3 weeks. I think I was slightly insane because -- though my midwife said to go with what felt good -- I certainly was exhausted and felt like the whole thing was draining me. I will likely wait until the 6 week mark to start jogging again and just walk a lot before that. I did bleed for a while after giving birth and I'm sure it's because I was doing too much. Looking back, I took SO much time off from running throughout pregnancy and postpartum . . . as well as at different times with injury, etc. -- and I'm still getting better race times each and every time I go out there.

+     +     +     +     +

I think a lot is at play here, and I'm sorry to seem somewhat rambling. Pregnancy or even the mere idea of it tends to dominate my brain because I'm a huge planner. After my first experience with pregnancy was less than ideal, I definitely have decided that I want to go easier on myself and my body. And -- just to be crystal clear -- I'm not passing judgement on the choices of other women. We all do what we feel is best for our individual cases. It's impossible to say that what one woman does is right or wrong. I am simply pointing out some things I feel I could benefit from changing.

I feel fortunate to have experienced pregnancy once already and to, as a result, feel more confident and secure in my abilities as both an athlete and mother. I look back on that whole first year. I read my words, my worries, etc., and I sometimes just roll my eyes and think: "Why on EARTH were you so up in arms about that stuff?" Life moves on, and it's really just a blip on the radar.


In closing (because this piece feels like it needs a proper conclusion!): I suppose this is a message to those of you out there thinking that pregnant women need to be these amazing beasts. Growing a fetus, eating perfectly, exercising to the max, etc. Thing is -- you could have an AWESOME pregnancy and feel incredibly fantastic. Go for it. But if you're like me . . . don't get caught up in the shame game. It's not worth it, and you will return to yourself and get back into your normal (or "new normal") activities before you know it.

What are your thoughts on pregnancy and exercise? Second (third, etc.)-time moms: What did YOU change from pregnancy to pregnancy? And if you want to read about exercise in my first pregnancy, scroll down a bit on this page to find those posts.

Like what you just read? Browse more of our posts + recipes on Pinterest. You can subscribe to the feed of these posts or follow us on Twitter or Facebook to be the first to know what the (never home)makers are up to. And we’ll love you forever!

Read more...

Weeknight Pizza Tricks

>> Thursday, May 15, 2014

As you guys know, one of our weeknight staples is pizza. I'd say we eat pizza at least twice or three times a week. So, I guess you could say somewhere in those 130 or so pies we make at home each year, we've picked up a few tricks.

Here are the top 5 for busy weeknights.


#1. Use Cornmeal


We usually make our pumpkin garlic knots crust or substitute all water for the pumpkin puree, depending on what we have in the pantry. But a trick we picked up over the years is to always roll out our dough with cornmeal. Not only does it help with transferring the dough to the pizza stone (another necessity!), but it always give the crust a nice crunch.


#2. Fold It Up


From there, transferring the dough to the pizza stone is made easy -- even without a pizza peel -- by gently folding the rolled out dough in half and then in half again. We simply place the quarter down on the stone and then unfold and reposition quickly.


#3: Get Saucy 


Since it's not tomato season, I usually cook up some type of homemade sauce using canned tomatoes. On busy weeknights when I just don't have the time, I improvise. My favorite makeshift sauce these days? A mix of half salsa and half barbecue sauce. Certainly has a nice zing to it!


#4. Top Heavily


Along with a generous heap of roasted veggies, we like topping all our homemade pizzas with cold avocado slices. Not only do the vegetables and avocado add lots of good-for-you nutrients, but they also help us justify eating pizza more often. This particular example isn't teeming with as many toppings as we usually enjoy, so if you'd like to see a better example of a loaded pizza, check out this lightened up recipe.


#5. Garnish Wisely


And with all those toppings, you need more sauce. We always have a bottle of hot sauce nearby, whether it's standard Frank's Red Hot (have you guys tried our Vegan Tofu Wings?) or spicy Sriracha.  I also like ranch dressing or even a quick side of this 5-minute tomato sauce.


// MORE TIPS + RECIPES

Brie-Stuffed Pumpkin Garlic Rolls
Pumpkin Deep Dish Pizza
Pesto Pizza Dough
Veggie-Topped Pizza, Lightened Up
Cornmeal + Flax GF Pizza Crust
Pumpkin Pesto Rolls
Like what you just read? Browse more of our posts + recipes on Pinterest. You can subscribe to the feed of these posts or follow us on Twitter or Facebook to be the first to know what the (never home)makers are up to. And we’ll love you forever!

Read more...

Freezer Drawer // Love or Hate It?

>> Tuesday, January 28, 2014

Airing my dirty laundry today. Or, I guess in this case, it's my cluttered freezer drawer.


We have an upright freezer in our basement that I have filled to the brim (and organized, labeled, etc.!) with all sorts of foods, from Vegetarian Freezer Month eats to big bulk bags of veggies + fruits to glass containers of homemade staples, like applesauce, waffles, and chili.

Our refrigerator's freezer drawer is quite another story, as you can see. It's a catch-all for leftovers that aren't as, well, planned. Like bananas that are too ripe. Or half bags of frozen stuff. Or old freezer packs. (We have a million on them somehow.) From what I discovered . . . stuff expired in 2007 and ALL . . . what we keep upstairs is stuff we rarely eat.

Hmmm.

I think a huge part of it is my own lack of labeling and organization coupled with the poor design. Or let me re-state that. The poor design for my own preferences. When we bought our refrigerator several years ago, a drawer was a HOT item on my must-have list. Now? I don't really like hate it! Everything gets lost in there.

After doing a major cleaning, I ended up getting rid of the majority of what you see above. Including a few rogue breastmilk bags from Ada's first year. Now we're left with an empty space looking to be filled.

Here's the deal:
  • I'm planning to keep a roll of masking tape + a Sharpie next to the fridge to make labeling simple.
  • I'd also like to create a list of what's in the freezer to post on the refrigerator door.
  • I might invest in some smarter storage for that type of space, maybe something like these taller, slimmer containers.
  • I may also try to create some loose zones in the freezer (like fruit, veggies, meals, desserts, etc.) so everything is easier to find.
  • And obviously, I need to clean the freezer more regularly to keep everything under control.
I'm hoping to unveil a much more inspiring freezer space the next time I share. But I guess I'm wondering if any of you have tips you could give me. Do you have a freezer drawer? Love or hate it? And, it not -- maybe there are universal methods that would work for everyone?

I need all the help I can get!

Like what you just read? Browse more of our posts + recipes on Pinterest. You can subscribe to the feed of these posts or follow us on Twitter or Facebook to be the first to know what the (never home)makers are up to. And we’ll love you forever!

Read more...

10 Steps for Slow Cooker Perfection

>> Thursday, January 16, 2014

I make a soup or stew in our crock pot at least once a week. Yet, we don't have a lot of crock pot-specific recipes here on the blog. That's because I usually toss in whatever is available at the time and season accordingly. I thought I'd share some tips with you for creating a delicious result from this seemingly sloppy way of cooking.

Recipe independence is really your best weapon in the kitchen. It allows you to use your ingredients up without having a specific plan. It encourages you to eat a more varied diet and not shy away from foreign foods. In other words, it makes healthy eating more automatic.

Heck, it makes cooking more enjoyable and satisfying -- empowering -- too.


10 STEPS TO SLOW COOKER PERFECTION
Follow these steps and create your own tasty crock pot creations!
// 1: Use (32 ounces) of low sodium vegetable broth as a base.
  • adds fuller flavor
  • adds nutrition
  • regulates salt (if you don't add more!)
// 2: Add puree or other base enhancer.
  • canned tomatoes chopped, whole, or even sauce
  • pumpkin, squash, or other veggie purees
  • miso paste, curry paste, coconut milk, roux, even tahini!
// 3: Toss in at least one or two cans of (rinsed) beans for protein.
  • kidney beans
  • chickpeas
  • black beans
  • black-eyed peas
  • canelli beans 
  • lima beans
  • edamame
  • pinto beans
// 4: Use 1/2 to 1 full cup of a grain or grain-like filler.
  • white or brown rice
  • quinoa of all colors
  • couscous -- my favorite is Israeli
  • wheat berries  
  • bulgur wheat
  • dry lentils
// 5: Chop veggies small or use canned/frozen + 2-4 cups, 1 each, depending. 
  • carrots
  • celery
  • potatoes or sweet potatoes
  • broccoli
  • kohlrabi
  • zucchini or summer squash
  • onions + garlic
  • kale or other chopped greens
  • bell peppers
  • parsnips
  • butternut or acorn squash, etc.
  • corn
  • peas
  • green beans
// 6: Add a tablespoon or two of oil for healthy fat.
  • Olive oil for mild flavor.
  • Chili oil for some spice.
  • Sesame, truffle, walnut, etc. oil for complex, exotic taste.
// 7: Pinch in salt and pepper for basic seasoning.
  • Don't forget salt is in the stock you already added, if you're regulating.
  • You can always add more, not take away.
// 8: Scoop other seasonings in 1 teaspoon at a time. 
  • Oregano
  • Smoked paprika
  • Curry powder
  • Cayenne pepper (start 1/4 teaspoon at a time!)
  • Saffron
  • Fenugreek
  • Dried basil
  • Rosemary
  • Thyme
  • Turmeric 
  • Red pepper flakes
  • Ginger
  • Cinnamon
// 9: Add water (if necessary) + stir until the mixture reaches the top.
  • Evaluate your liquid to veggies ratio. 
  • More liquid, soupier soup.
  • Less, more like stew.
  • Don't forget items like rice will absorb liquid.
  • You can remove veggies/add liquid if ratio doesn't please you.
// 10: After cooking for several hours on high, I season again -- to taste. 


While writing this post, I tested these tips and slow simmered a delicious soup, including the following ingredients:
  • 32 ounces veggie broth
  • 28 ounce can whole tomatoes + juice
  • Black beans
  • Chopped carrots
  • Chopped celery
  • Israeli couscous
  • Olive oil
  • Water to fill the pot
  • Salt + pepper
  • Paprika, cayenne, and basil
Not ready to go it on your own? Take it slow. The worst that can happen is you eat lots of veggies that aren't seasoned perfectly. Plus, with mistakes comes learning. Just try again!

Here are more slow cooker recipes:
Like what you just read? You can subscribe to the feed of these posts or follow us on Twitter or Facebook to be the first to know what the (never home)makers are up to. And we’ll love you forever!

Read more...

Automatic (Healthy) Eating // Tip 3

>> Wednesday, December 4, 2013

I used to sit down with cookbooks or my recipe archives and set out to make all these amazing meals each week. Even back when I worked outside the house full time, I made meal planning + cooking a huge priority. I'd go through and meticulously write out the ingredients needed, write up my list, and take lots of time each day preparing food.

But just as setting unrealistic fitness goals can be overwhelming and defeating, so too can being overly ambitious in the kitchen. Even the best plans can be super organized, easy to follow, and even frugal. If they're too labor intensive, you'll likely fail -- and what's at stake isn't your ego, it's your health.

Or at least that's how it worked for me.

// TIP 3: Create Simple, Go-To Meals


Simple meals don't need to be boring. Instead, they need to be easy + fast to prepare AND feature healthy ingredients. That being said, if you're not used to assembling meals without recipes, it can take some practice to get into a good groove.

Mastering a few key recipes can be a fantastic use of your time. Focusing on a few to start is helpful if you're learning, but can get somewhat boring. Good news: Before too long, you'll gain more confidence and independence from books + blogs and be able to make your own no-fuss meals like a pro.

A well-stocked pantry is all you need. And maybe a few ideas . . .

BREAKFAST:

Oatmeal
Smoothies
Eggs + Toast
Banana Scramble
Breakfast Burrito
Homemade Freezer Waffles

LUNCH:

Avocado Egg Salad
Tofu Avocado Salad
Couscous Salad
Hummus Melts
Apple Melt
Other Salads
5-Minute Bruschetta Toast

DINNER:

Veggie Stir-Fries
Veggie Chili
Whole Wheat Pasta + 10-Minute Tomato Sauce
Anything with frozen veggies!
Stuffed Peppers
Slow Cooker Soups + Stews
Roasted Veggies w/ Baked Tofu


What these meals have in common is that they use relatively few ingredients and rely mostly on spices and seasonings to give them flair. I love roasting vegetables as a side for dinners because most just require preheating the oven to 400 degrees F, chopping, and drizzling with olive oil (and adding salt + pepper to taste). After roasting around 30 minutes, tossing every 10 minutes or so, they should be golden.

I like to keep beans on hand for hummus and soups. I use my slow cooker every Sunday to effortlessly simmer a delicious lunch chili. A little prep ahead of time -- hard boiling -- can make work-week egg salad a breeze. And when in doubt, we cook up tofu or tempeh and toss with some frozen or fresh veggies stir-fried with soy sauce and sesame oil.

Using ingredients in their most basic form + seasoning is the way to go.

What are your go-to meals? How do you make them healthy?

(If you're catching up, check out tip #1: stock up on frozen veggies + tip #2: buy greens and actually USE them.)

Like what you just read? You can subscribe to the feed of these posts or follow us on Twitter or Facebook to be the first to know what the (never home)makers are up to. And we’ll love you forever!

Read more...

Prepping for Winter

>> Friday, October 25, 2013

Those bright, sunny, and unseasonably warm days we were having decided to abruptly go elsewhere. In fact, snow showers are in the forecast and my back is aching from raking. Last night the temperature was around 40 degrees when I headed out on my 6-mile run. It was also dark + I could just smell the winter in the air.

You know the smell, right?

So, I put on my tights, a long-sleeve tech shirt, and my trusty fleece vest and jumped in.


I've written a lot of survival guides for the cold months, so I thought it might be nice to put them all in one place. Whether you're a seasoned runner who just don't like the seasons OR if this is your first winter running, you can enjoy frigid temperatures (or at very least, learn to love the treadmill).

Overall, my best tip for learning to love the cold weather is to just DO IT. (Any maybe bring a friend for emotional support.) Usually by 10 minutes into a run, I'm not shivering anymore. The blood is pumping and I feel much better being outside than stuck indoors. The key, though, is to start now, before it's too much of a shock. It takes some getting used to . . . even if it's only a few miles at a time.

How do you overcome the deep freeze?

Like what you just read? You can subscribe to the feed of these posts or follow us on Twitter or Facebook to be the first to know what the (never home)makers are up to. And we’ll love you forever!

Read more...

Running + Vacation

>> Monday, July 22, 2013


We're on vacation, which I wrote a bit about (from a family perspective) today on Writing Chapter Three. Since this blog is more exercise + food focused, you'll be getting that highlights reel over here. And what's more of an issue on vacation than fitting in exercise?

As much as the beach is a runner's wonderland, when you're juggling two running schedules + a toddler, things can get tricky. Here's some ways we're both sticking it out and enjoying a good sweat session each day.

// 1: Stephen runs in the AM, I run in the PM. It may sound like I'm getting the short end of the stick, but I'm an afternoon runner anyway. Since I'm still working mornings while on vacation, it's better to split stuff up this way. Plus, the shady streets of Cape May + ocean breeze get things comfortable again after the mid-day heat by 5:30 or so -- squeeze it in before dinner.

// 2: We brought our jogging stroller. And we both plan to use it for more than strolling. Since we aren't down here with family (yet), we realize it might be best some days to get in a run together. The BOB (we have the Revolution SE) took most of the storage space in our tiny Kia, but packing light to make room was well worth it.

// 3: We're being active otherwise. I may not totally meet my 30 mile goal this week, but with all the additional walking to the beach and town we're doing, I'm moving my body more each day.

// 4: I'm skipping long runs. Stephen isn't, but whenever I'm on vacation, I'm just not in the mood to run double digits. Plus, dehydration is an issue since it's so much warmer/sunnier than we're used to. Instead, I opt to run more days of the week at up the mileage a few of those days versus loading it on one day. Instead of a week that's got a 4, 3, 4, 6, 12 . . . I do something like 4, 5, 4, 6, 8, 2.

// 5: I push through. Sure, there's a lot of other stuff I'd rather be doing (like eating mounds of pizza or lounging at the beach), but there's time for all of that. Taking a half hour to hour out of the day to exercise is important. And it's a great way to explore the new scenery.

// 6: I pay attention to hydration. I didn't write about it, but I had some type of sun poisoning or dehydration issue at the shore last summer. It may have had to do with running + breastfeeding + being at the beach all day, but this year, I'm paying better attention. Drinking water with chia seeds. Avoiding peak heat/sun times. Etc.

How do you keep up with running (or other exercise) while on vacation?

Other running-related stuff I've written recently for WalkJogRun:

Simple No-Bake Energy Bars
To Get Faster, Run Slower
Running in the Heat: A Northern Girl's Tricks
Keeping Baby Occupied On the Run

Like what you just read? Browse more of our posts + recipes on Pinterest. You can subscribe to the feed of these posts or follow us on Twitter or Facebook to be the first to know what the (never home)makers are up to. And we’ll love you forever!

Read more...
Related Posts Plugin for WordPress, Blogger...

About This Blog

MyFreeCopyright.com Registered & Protected

© 2009-2014 by the (never home)makers
All content on this blog is copyrighted.

Want to publish our pics, tips, or tricks?
Contact us! [neverhomemaker@gmail.com]

We value transparency. Links on this page may contain affiliates. In addition, please see our disclosure policy regarding sponsored posts.

  © Blogger template Simple n' Sweet by Ourblogtemplates.com 2009

Back to TOP  

Blogging tips