Showing posts with label gluten-free. Show all posts

Clean Up Cookies

>> Tuesday, April 26, 2016

I mentioned in my pregnancy update that all my cravings have been really junky. The thing is, I feel like it's OK to eat sweets and other often-labeled "bad" foods in moderation. I enjoy chocolate cake tremendously, and it's not something I'd ever be willing to give up. But as you guys have followed me over the years, I have an admittedly high tolerance for sugars, etc. As I get older, it's catching up with my health and my waistline.

I'm not watching my weight, but as I prepare to be a mama again, I'd like to really start to make some changes that will (hopefully) be longer lasting. A big part of this is sugar. I go on good streaks and bad. As Ada gets older, I'm observing how closely she watches me and my habits.

This is all a long introduction to some "healthy" cookies I made and loved. I thought I'd share them ASAP because this recipe -- modified from the one on the back of the Bob's Red Mill bag -- really inspired me to get on a better track again regarding sugar. I'll still be eating my fair share of treats on special occasions, but I don't need to bake dizzy dozens on the daily.

That's one beautiful thing about the world we live in now. We have access to so many alternatives. And we can SHARE them with one another. Bonus!
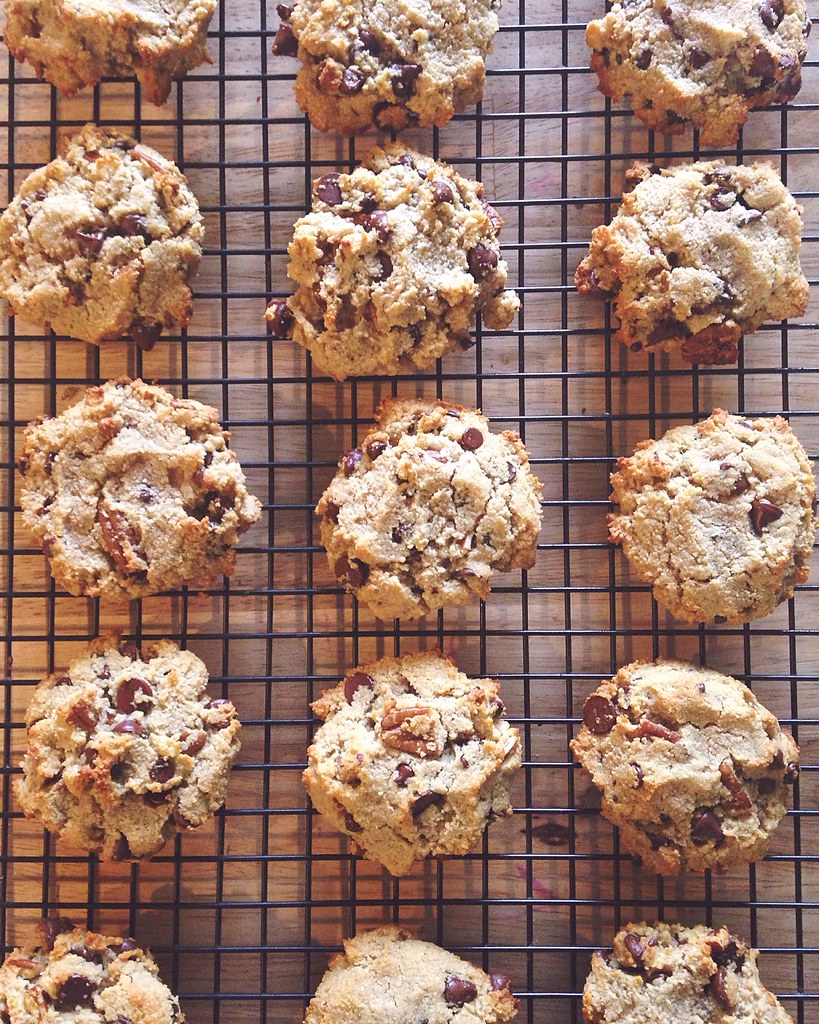

CLEAN UP COOKIES


What you'll need . . . 

  • 3 cups almond meal/flour
  • 1 teaspoon baking soda
  • 1/2 teaspoon Kosher salt
  • 1/4 cup coconut oil, soft but not liquid
  • 1/4 cup maple syrup
  • 1 ripe banana, mashed as much as possible
  • 1-1/2 teaspoon Ener-G Egg Replacer
  • 3 tablespoons water
  • 1 teaspoon vanilla extract
  • 1 cup chocolate chips
  • 1/2 cup chopped pecans

Method . . . 

  1. Preheat your oven to 375 degrees Fahrenheit. Line a baking pan with parchment paper.
  2. In a large bowl, whisk together the almond meal, baking soda, and Kosher salt. Set aside. 
  3. Mash up your banana. I actually ran it through my stand mixer until goopy. Then whisk in the egg replacer powder and water. Add the vanilla, coconut oil, and maple syrup and beat on high speed until well incorporated.
  4. Then pour the dry mixture into the wet, add the chocolate chips and pecans (or walnuts, etc.) and mix until everything is incorporated.
  5. Scoop heaping tablespoons onto your baking sheet and flatten slightly. Bake for 12-15 minutes, until the tops are golden and the centers are mostly set. Repeat with the remaining dough (I made 20 cookies).
  6. Then let cool before eating to firm up more. Cookies should be stored in an airtight container. They will be soft and tender. And you can eat them for breakfast.
Hope you're having a happy Tuesday!

Read more...

Chunky Peanut Butter Chocolate Chippers

>> Wednesday, June 24, 2015

While I was home, my best friend had me over one morning and let me sample some delicious energy bars she had just made. She was also baking up a chickpea breakfast muffin, and it got me thinking about bean desserts again. They are seriously tasty . . . and surprisingly healthy. And they usually trick Ada into thinking they’re way more decedent than they actually are.

So, now we’re all hooked on these:


CHUNKY PEANUT BUTTER CHOCOLATE CHIPPERS


What you’ll need . . . 

  • 1 can black beans, drained + rinsed 
  • 1 teaspoon vanilla extract 
  • 1/2 cup (heaping +) crunchy peanut butter*
  • 1/4 cup maple syrup 
  • 1 teaspoon baking powder 
  • 1/4 to 1/2 cup chocolate chips 

* I don’t normally specify ingredients, but I highly (!!!) recommend using Earth Balance’s Crunchy Coconut Peanut Butter. Only two grams of sugar and so much good coconut flavor added to the cookies. I picked some up at Wegmans the other day and -- whoa -- it’s good. 

Method . . .

  1. Preheat to 350 degrees F. Lightly grease a baking sheet with coconut oil.
  2. Blend all ingredients (except chocolate chips!) together in food processor. It should get sticky but also sort of fluffy.
  3. Fold in the chocolate chips. Divide into 12-16 “cookies” and roll with your palm into rounds. Place onto your baking sheet and flatten slightly.
  4. Then -- and this is key -- press with fork tines for that classic pb cookie look. It makes them even more deceptively delicious.
  5. Bake for 10 minutes and let cool a bit before devouring.

RELATED POSTS


Like what you just read? You can subscribe to the feed of these posts or follow us on Twitter or Facebook to be the first to know what the (never home)makers are up to. And we’ll love you forever!

Read more...

Better Cauliflower Crust

>> Tuesday, June 16, 2015

Here’s another installment of my Make It Better series. I’m not intolerant to gluten or even sensitive for that matter. I just eat a lot of too much bread and have been looking for alternatives to clean up my diet. So, in my adventures, I’ve made several recipes for cauliflower crust pizza in the last couple years. And I absolutely love it. Some of the recipes have indeed been great. Others, OK. Yeah. Horrible.

Along the way I’ve picked up a few tricks of the trade.


// Pulse in Processor


You may encounter a recipe that instructs you to grate your cauliflower. That’s going to make a huge mess. Instead, chop up florets and pulse them into “rice” in your food processor. It’s faster, the “rice” gets much smaller, and you’ll spend less time cleaning up.

// Microwave Fast


I know some of you will disagree with me, but I find it much easier to just microwave my cauliflower “rice” while I’m getting other parts of my meal ready. We rarely use the microwave, so I revel in the convenience of it for those 7 minutes. That way, you can keep it all in the same bowl and skip the step of draining from added water. It’s the little things . . .

// Drain + Drain Some More


Once you’ve cooked your cauliflower, let it cool almost completely. But never, and I mean NEVER, skip draining the moisture out. You’d be surprised how much is in there, too. I usually use a clean tea towel and work on my “rice” in batches. I’ll squeeze as much as humanly possible . . . and then return in five or so minutes to squeeze any last bit of water that remains.

If you think it’s done, try again.


// Season Well


Don’t forget to add salt, pepper, and even herbs or other spices. You want it to taste freaking amazing, right? My favorite recipe calls for a good amount of cheese in the crust, and I think it’s worth the add-in. So, I just skimp on any added cheese atop the pizza and opt instead of lots of roasted veggies and good sauce. Versus where the bread is sort of in the background in a lot of pizza recipes, the cauliflower can be one of the highlights of the entire meal.

// Use Parchment, Not Foil


A few of the recipes I’ve followed have said to use greased aluminum foil as a surface for cooking. Please, please don’t do this. Ever. I’ve tried twice with disastrous results. You will likely be so sorry. Parchment (or maybe a silicone pizza baking mat) will keep your pizza from sticking. If you’re out of parchment (like I often am) try a well greased baking pan before skipping to aluminum.

// My Favorite Recipe


Like I said, I’ve tried several different recipes, but this one on PopSugar is by far my favorite. Usually we’ll make two pizzas -- one for me + Ada, one for Stephen -- and I’ll cut the cheese almost in half when doubling. For toppings, we often use BBQ sauce for sauce, a medley of roasted veggies (I roast while preparing the crust // before putting them on the pizza), fresh tomatoes, a little ricotta, and then chopped basil from the garden.

Do you have any cauliflower crust tips to share?

Like what you just read? You can subscribe to the feed of these posts or follow us on Twitter or Facebook to be the first to know what the (never home)makers are up to. And we’ll love you forever!

Read more...

100 Calorie Cookie Dough Bites

>> Tuesday, April 28, 2015

I could eat cookie dough for hours (forever?). In fact, I’ve been snacking on quite a bit of it after creating my new favorite cookie recipe of all time, Maple Pecan Oatmeal Chocolate Chippers. But all that sugar, all that fat, all that dessert-y type stuff, I know it’s not good for me, especially in high doses.

Not surprising: I’ve been struggling with sugar and food in general due to stress. Now that I have a few months to really focus on myself, I’ve decided to start by keeping a food diary for a short period of time. I’m not into long-range calorie-counting. In fact, it makes me crazy and isn’t good when you consider my disordered past. But I do think the exercise of writing eats down can be a good one to just see a.) what you’re eating in general and b.) how much of it you’re consuming versus activity, etc.

So, this is how these 100 calorie cookie dough bites came to be. I won’t go nuts and call them “healthy” -- they contain less than 2 grams of protein per serving -- however, they are somewhat toned down from the ingredients in my usual cookie recipes. And they’re portioned out . . . versus the hugely rounded gobs I usually spoon into my mouth. It’s something in the right direction.


100-CALORIE COOKIE DOUGH BITES


What you’ll need . . . 
  • 2 cups GF rolled oats
  • 2 tablespoons coconut flour
  • 3 tablespoons Earth Balance
  • 1 tablespoon coconut oil
  • 1/3 cup maple syrup
  • 2 tablespoons flax meal
  • 1/4 cup chopped pecans
  • 1/4 cup semi-sweet chocolate chips

Method . . . 
  1. In your food processor, pulse oats into flour and mix with the coconut flour. Set aside in a large bowl.
  2. Put the Earth Balance, coconut oil, maple syrup, and flax meal in the food processor. Pulse into well incorporated.
  3. Add the wet ingredients to the dry and mix with a spatula until everything is moistened.
  4. Fold in the pecans and chocolate chips. Then portion out by tablespoonfuls onto a plate.
  5. Place in the fridge to firm up, then store there for the week.

// This recipe makes 18-20 tablespoon-sized balls. Between 95-105 calories.


Like what you just read? You can subscribe to the feed of these posts or follow us on Twitter or Facebook to be the first to know what the (never home)makers are up to. And we’ll love you forever!

Read more...

10-Minute (GF + Freezable) Lasagna

>> Wednesday, February 11, 2015

OK. This recipe doesn’t take ten minutes total with bake time included -- but to prepare? Not even ten active minutes. I always have stuff to make lasagna on hand. It’s one of those quick pantry meals we make when we’re low on groceries. Plus, that’s the beauty of this recipe -- there are no rules. Use what you have, leave out what you don’t, substitute where you can.

Assemble, store, and bake when you need it.

Start by mixing the filling:


In the mix:
  • Ricotta cheese (part-skim), one small tub
  • Sliced olives
  • 1/4 to 1/2 cup or so pumpkin puree
  • Couple handfuls chopped spinach
  • Salt + pepper
I set that aside and got some no-boil noodles. I decided to try a gluten-free variety made from brown rice, and they were quite good. Any no-boil noodles -- GF or standard -- should do for this recipe, though, a standard package usually includes enough to make a 9 x 13 pan of lasagna.

Just spread the uncooked noodles with the filling.


You’ll want to spread a small amount of sauce at the bottom of your pan. From there, layer your first row of noodles. Top with more sauce and spread to cover. Layer another row. More sauce + spread. Another row, etc. until you’ve used all the noodles. Top with more sauce, mozzarella cheese, and some Parmesan, if you feel so inclined.

I ended up using more than one jar of sauce, just FYI.


That whole part you just did should only take around 10 minutes! From there, you can stick this guy -- covered with foil -- in your fridge until you’re ready to bake (the passive part). Oven temperatures and cook times vary by the type of noodle. I cooked ours at 375 degrees F for around 45 minutes -- taking off the foil in the end stage of cooking to get that mozzarella browned.

We never eat an entire dish of lasagna, so I serve dinner and then refrigerate the leftovers overnight. The next morning I slice the cooled lasagna into squares and individually wrap in plastic wrap and then place the single serve portions in a freezer bag. To serve again, just thaw and bake in your oven (or in your microwave -- just be careful of hot spots!).

What’s your favorite quick pantry meal?

Like what you just read? You can subscribe to the feed of these posts or follow us on Twitter or Facebook to be the first to know what the (never home)makers are up to. And we’ll love you forever!

Read more...

Peanut Butter Hearts

>> Monday, February 9, 2015

Happy Monday, friends. This “snow storm” is rather disappointing. Stephen has a two hour delay (update: school is now closed and Stephen’s jumping up and down like a little boy), which usually causes more stress than it’s worth. Anyway, I wanted to thank you guys for your thoughts, suggestions, and support with the next steps in our TTC process. It’s overwhelming, but I know we’re doing the right thing.

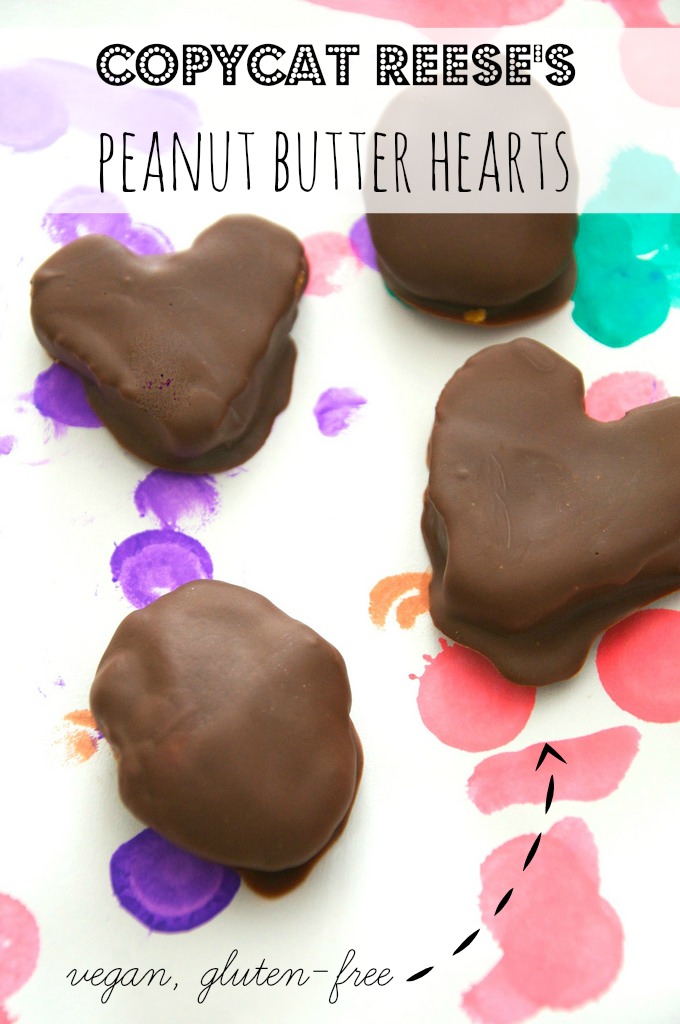
Now for something fun: My mainstream candy weakness? Reese’s Peanut Butter Cups. Not just the cups, though, I love this gigantic pumpkins, trees, hearts, and eggs that only come out on special occasions. The ratio of peanut butter to chocolate is optimal. And I’ve seen copycat recipes in the past, but most contain a load of confectioners sugar for sweetness.

So, I got to think about the flavors I like most in the candy. When they’re very fresh, there’s almost this hint of coconut I taste. It could be all in my head, but I taste coconut. Immediately, I knew what I needed to do. These guys are vegan, gluten-free, and contain more nutrients than the real deal.

#nom:


REESE’S COPYCAT PEANUT BUTTER HEARTS


What you’ll need . . .
  • 1/2 cup natural peanut butter
  • 2-3 tablespoons coconut sugar*
  • 2-3 tablespoons coconut flour*
  • 2-3 tablespoons maple syrup
  • 1/2 cup semi-sweet chocolate chips
  • 1 tablespoons coconut oil

Method . . .
  1. Combine your peanut butter, coconut sugar, coconut flour, and maple syrup in a food processor. I’ve made this recipe a few times now and have played with the ratios to suit my taste. For a slightly stiffer cup, I used 3 tablespoons of both coconut sugar and flour and just 2 tablespoons maple syrup. Another time, I used 2 tablespoons coconut sugar and flour and 3 tablespoons maple syrup. See what you like best for consistency and adjust as necessary.
  2. Then pulse to combine until mixture rolls into a ball. Take the ball out of your processor and place it on a piece of wax or parchment paper. Divide into 8-10 balls and roll.
  3. Then shape into whatever you like. I did some messy hearts and eggs. You can also just leave them as balls, but I think the coating part is easier when they’re a bit flattened out.
  4. Place hearts in your freezer for an hour or more. Before removing, make your chocolate coating.
  5. In a small saucepan, heat the chocolate chips and coconut oil on low, stirring constantly until melted together. Remove from heat.
  6. Take your hearts out of the freezer and then -- one by one -- place in the slightly cooled chocolate mixture. Coat all sides and then return to the wax or parchment. Repeat with all hearts.
  7. Return everything to the freezer (you can spoon any extra chocolate onto the tops of the hearts) and let rest until set.
  8. I store the eggs in my freezer to keep them fresh and also to deter me from eating ALL of them at once.

* Nutiva sent me samples of their Coconut Flour and Coconut Sugar to try. I’ve actually used their brand in the past with coconut oil, so it was neat to check out the other products in their line. I see they also carry hemp, chia, and red palm stuff -- but I’m all about the coconut.

Yum:


If you’ve never tried these ingredients, coconut sugar contains potassium, magnesium, zinc, iron, and B vitamins. It’s also reported to be lower GI than other sweeteners, which is why I’m favoring it these days. Coconut flour is much the same, with lower GI than standard flours and high fiber. Tip: When you’re using coconut flour in baking, use it for up to 1/3 of the flour. It tends to absorb a lot of liquid.

Have you made candy at home?

A while back, I had whipped up some Peanut Butter Twix, definitely time consuming but fun. I’ve also made Basic Peanut Butter Cups using a special blend of graham crackers + Homemade Peanut Butter.

Disclosure: Nutiva sent me the flour and sugar you see above, but I received no other compensation. My opinions are my own. And I hope you enjoy the peanut butter cup recipe! It’s a good one!

Like what you just read? You can subscribe to the feed of these posts or follow us on Twitter or Facebook to be the first to know what the (never home)makers are up to. And we’ll love you forever!

Read more...

GF Black Bean Avocado Brownies

>> Wednesday, January 21, 2015

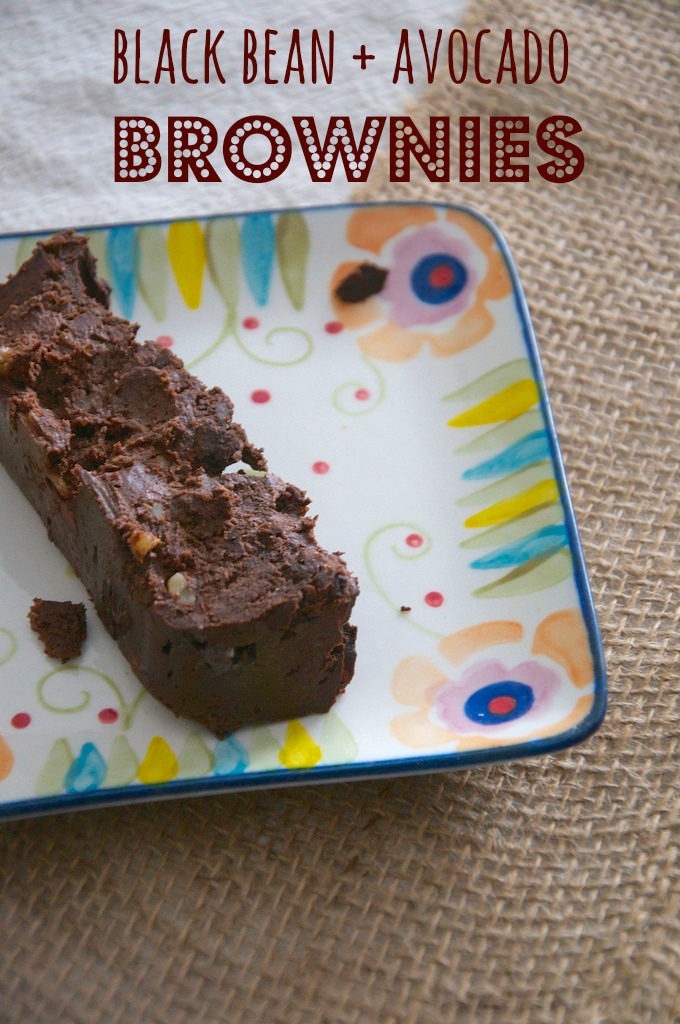
Here’s a sweet treat for your Wednesday. This recipe is a modification of the Healthy Chocolate + PB Brownies and Peanut Butter Blondies I posted last summer. What makes these guys different is that I used avocado in place of banana and made them super dark chocolate. Adding walnuts also made them taste even more legit. Please let me know if you try this recipe! The first ones were a huge hit, so I’m hoping this one’s a new favorite.

In pictures:


BLACK BEAN AVOCADO BROWNIES 

Flourless, gluten-free, vegan, etc.

What you’ll need . . .
  • 1 can black beans, drained and rinsed 
  • 1 medium-large avocado, ripe 
  • 1/3 cup pure maple syrup 
  • 1/3 cup smooth peanut butter 
  • 2 teaspoons vanilla extract 
  • 1/3 (heaping) cup unsweetened cocoa powder 
  • 1/4 teaspoon baking powder 
  • 1/4 teaspoon baking soda 
  • pinch sea salt 
  • 2 Moser Roth chocolate bars, 70% dark (from Aldi)
  • (or big handful dark chocolate chips)
  • 1/3 cup walnuts 

Method . . .
  1. Preheat oven to 350 degrees F. Grease a loaf or square baking pan with coconut oil and set aside.
  2. Place all ingredients except the chocolate and walnuts in a food processor and combined until smooth.
  3. Then pulse in the walnuts and chocolate until well incorporated but chunky.
  4. Pour mixture into your prepared pan and distribute evenly, flatten with a spatula.
  5. Bake for 20-25 minutes. Let cool before serving.

Enjoy!

Like what you just read? You can subscribe to the feed of these posts or follow us on Twitter or Facebook to be the first to know what the (never home)makers are up to. And we’ll love you forever!

Read more...

Morning Glory Muffins

>> Monday, January 19, 2015

A friend of mine shared a recipe for a delicious morning glory loaf on Facebook last week. And immediately, I just had to make them. I’m being serious. I put the computer down and started getting out all my baking pans to find the muffin tin. But, I set out to change a few things with this recipe. First, I was out of eggs and typically bake things vegan out of habit. And I wanted to include less oil. And no refined sugar.

So, I modified and mixed and even tossed in some freshly squeezed clementine juice for natural sweetness. What resulted from these efforts is a truly amazing breakfast muffin that’s also gluten-free, vegan, and full of fruits and veggies.

Ada ate half the batch herself.


MORNING GLORY MUFFINS

Adapted from this awesome recipe on Imagine Childhood.

What you’ll need . . . 
  • 1 cup GF rolled oats processed into flour
  • 1/2 cup GF rolled oats, whole
  • 1 teaspoon baking soda
  • 1 teaspoon cinnamon
  • 1/4 cup maple syrup
  • 1/4 cup olive oil
  • 2 tablespoons flax meal + 6 tablespoons hot water (2 flax “eggs")
  • 1 teaspoon vanilla extract
  • 1/2 orange (or 1 full clementine) -- just the juice
  • And also the zest, if you like it!
  • 2 large carrots, shredded (around 1 cup)
  • 1 large apple, shredded (around 1 cup)
  • 1/3 cup walnuts, pulsed to crumble
Method . . . 
  1. Preheat your oven to 350 degrees F. Grease a muffin tin with Earth Balance or coconut oil.
  2. In a large bowl, whisk together the oat flour, oats, baking soda, and cinnamon. Set aside.
  3. In a smaller bowl, combined the maple syrup, olive oil, flax eggs, vanilla, orange juice, then pour this mixture into the dry ingredients.
  4. Add the carrots, apples, and walnuts, and mix until well incorporated.
  5. Then divide evenly among your pan -- 12 muffins in all -- and bake for 20-25 minutes. Until golden brown and set in the center.
  6. Let cool on a rack for a few minutes before consuming. I am sure you can also freeze once they are totally cooled, but they didn’t last that long in our house!


You’re going to love these muffins. 

Just a note that the batter will definitely be shaggy, if that makes any sense. It might not seem like you have enough oat covering to go over all those shredded apples and carrots. I assure you, it will all bake up beautifully. And these are incredibly healthy if you consider they’re mostly just oatmeal baked into muffins.

Enjoy!

Like what you just read? You can subscribe to the feed of these posts or follow us on Twitter or Facebook to be the first to know what the (never home)makers are up to. And we’ll love you forever!

Read more...

Cauliflower + Eggplant Mash, Two Ways

>> Wednesday, November 26, 2014

If you’d rather skip the traditional mashed potatoes this year in favor of a more veggie-filled side -- this recipe is for you. Not only that, you can transform any leftovers into a delicious veggie burger! Actually, you can do the veggie burger with any mash you might have on hand, but first I’ll cover making the roasted mashed veggies.

Chop.
Season.
Roast.
Blend.
Enjoy!


ROASTED CAULIFLOWER + EGGPLANT MASH

Makes around 4 cups total.

What you’ll need . . . 
  • 1 head cauliflower, chopped
  • 1 medium eggplant, skin peeled + chopped
  • Handful nutritional yeast
  • Salt and pepper to taste
  • Olive oil
  • Water
  • 1 tablespoon Earth Balance

Method . . . 
  1. Preheat your oven to 350 degrees F.
  2. Place veggies on a rimmed baking sheet. Drizzle with olive oil and season with the nutritional yeast, salt, and pepper.
  3. Roast for around 1 hour -- stirring every 20 minutes until everything is browned and soft.
  4. Transfer to a food processor and add water 1/4 cup at a time until you reach your desired consistency. I used around 1-1/4 cups water total.
  5. Mix in the Earth Balance and serve in a large baking dish.

LEFTOVER MASH BURGERS

A wonderful way to use the rest!

What you’ll need . . .

  • 2 cups Cauliflower + Eggplant Mash (cold)***
  • 1 cup texturized soy protein
  • 1 cup rolled oats, uncooked
  • 1/2 cup sunflower kernels 
  • 1/4 cup flax meal

Method . . . 

  1. In a large bowl, simply mix all the ingredients together by hand until well incorporated.
  2. You can add any extra seasonings you might want, but I found the original mix to be quite flavorful on its own.
  3. Then shape into patties -- about 8 in all. 
  4. *** Alternatively, if you didn’t quite have 2 cups of mash, you can use just one cup and half the other ingredients for 4 burgers.
  5. Then cook in a fry pan with some olive oil over medium-high heat until browned on both sides.
  6. I even froze my burgers using these instructions.

HAPPY THANKSGIVING -- and don’t forget dessert!

Like what you just read? You can subscribe to the feed of these posts or follow us on Twitter or Facebook to be the first to know what the (never home)makers are up to. And we’ll love you forever!

Read more...

Ultimate Pumpkin Guide + Recipes

>> Tuesday, October 7, 2014

So, after the Ultimate Apple Guide + 15 Recipes, you know I was just chomping at the bit to get you the same thing for all our pumpkin recipes. I’m sure you’re bombarded with pumpkin this time of year. But even when it’s not in season, pumpkin is a super healthy addition to your diet -- here’s more about pumpkin nutrition and other benefits for runners.

Time for food!


// Recipes


// DIY Puree


Picking up cans of pumpkin at the store is surely quick and convenient. But making your own puree at home is easier than you might think. Visit this post for the full DIY tutorial with photos + instructions.


In short: Preheat oven to 350 degrees F. Clean your pumpkin and chop in half. Roast face down on parchment atop a cookie sheet for around 45 minutes. Then scoop out the seeds and process in your food processor until smooth. Add a little water to achieve desired texture.

What’s your favorite pumpkin recipe? 

And have you tried any of the ones above?

Like what you just read? You can subscribe to the feed of these posts or follow us on Twitter or Facebook to be the first to know what the (never home)makers are up to. And we’ll love you forever!

Read more...

Vegan French Onion Soup

>> Monday, September 15, 2014

This weekend I retooled one of my most popular recipes, Vegan French Onion Soup. I loved this sort of soup as a kid because it was often was of of the only meat-free options for me at restaurants . . . only to find out as an adult that it -- and many other soups -- most often contains beef broth.

So, as I played around with making my own mix in the past, I used a quick roux to thicken the broth and give it a nutty, fuller flavor. This new version is gluten-free because I swapped out the flour for almond meal. And it tastes even better than my last batch!


FRENCH ONION SOUP*
Improved on the original -- vegan, gluten-free.

What you'll need . . .
  • 2 pound bag yellow onions**, sliced thinly
  • 1/2 cup chopped celery
  • 2 large cloves garlic, minced
  • 2 tablespoons olive oil
  • 2-3 tablespoons pure maple syrup
  • salt and pepper to taste
  • 8 cups low sodium vegetable stock
  • 1/4 cup olive oil
  • 1/3 to 1/2 cup almond meal
*A reader pointed out that for this to TRULY be French Onion, it would need the bread and cheese. Feel free to use your favorite bread or gluten-free bread and broil the top with cheese or vegan substitute.

** I actually used assorted onions from our CSA share. Toss in what you've got!

Method . . .
  1. Place the onions, celery and garlic in a large stock pot with the olive oil. Cook for 8 to 10 minutes over medium to high heat, until translucent.
  2. Then add in the maple syrup, salt, and pepper. Cook another 15 minutes, until golden and caramelized. 
  3. Pour in the vegetable stock and bring to a boil. Lower heat to a simmer and stir occasionally for another 30 minutes.
  4. During those last 10 minutes of waiting, heat the olive oil into a shallow pan on medium-low and wait for the it to get to a hot, but not too hot (shouldn't be smoking -- read more in our last Thai Jambalaya recipe).
  5. Add the almond meal to the 1/4 cup oil and stir continuously for 10 minutes -- until deep brown and smells nutty. You may add more or less almond meal depending. You want a paste like in the photo below.
  6. Add roux to the soup and let cook for another 5 minutes.
  7. Serve with crusty homemade bread and/or nutritional yeast.

Enjoy!

Like what you just read? Browse more of our posts + recipes on Pinterest. You can subscribe to the feed of these posts or follow us on Twitter or Facebook to be the first to know what the (never home)makers are up to. And we’ll love you forever!

Read more...

GF Oatmeal Raisin PB Chocolate Chippers

>> Monday, September 1, 2014

The folks at Peanut Butter + Co. contacted me to see if I'd like to try some of their peanut butter spreads after I posted my birthday Cookie Dough Stuffed Cupcakes with peanut butter frosting. Boy would I ever, I wrote them. I've been a huge fan of their brand for years on end, especially the Dark Chocolate Dreams mix.

So, I wanted to craft a recipe using a spread I had never tried before. And along with the White Chocolate Wonderful and Mighty Maple flavors, I got hooked on one that gave me this great idea for a cookie-hybrid. It's a chewy, soft cookie that's perfect for fall snacking. The best part? You only need one bowl to make them -- and cleanup is a breeze!


OATMEAL RAISIN + PB CHOCOLATE CHIPPERS
Gluten free, vegan, and simple to make.

What you'll need . . . 
  • 1 cup GF rolled oats, uncooked
  • 1 teaspoon baking soda
  • 1 tablespoon flax meal + 3 tablespoons hot water (flax egg)
  • 1 cup peanut butter*
  • 1/3 cup brown sugar
  • 1 teaspoon vanilla extract
  • 1/2 cup chocolate chips
  • Pinch salt for topping cookies
* Obviously, I used Peanut Butter + Co's Cinnamon Raisin Swirl in this recipe. If you don't have it, just use 1 cup peanut butter, but add 1/3 cup raisins and 1/2 to 1 teaspoon cinnamon to this recipe.

Method . . . 
  1. Preheat your oven to 350 degrees F. Lightly grease a baking sheet and set aside.
  2. In a large bowl, combine the flax egg with the peanut butter, brown sugar, and vanilla extract by stirring vigorously with a spatula.
  3. Then toss in the oats and baking soda and mix until well incorporated. Fold in the chocolate chips.
  4. Then let the mixture chill for 30 minutes or so, just to firm up and let oats soak in flavor a bit.
  5. Scoop out in heaping tablespoons (almost double size) and arrange on your baking sheet (makes around 12 to 14 large cookies). 
  6. Flatten each with the palm of your hand slightly before baking for 9-11 minutes. Done when lightly golden on edges. 

Just a note on all these gluten-free recipes you've been seeing (like last week's Sweet Pumpkin Bread -- as a quick note on that recipe, I used FINE GRIND cornmeal -- if you use a coarser meal, it's likely to crumble). I simply ran out of flour last week and decided to get creative with the ingredients I DID have on my kitchen shelves. Many of you have written me because you appreciate the GF recipes, so I will try to provide more in the future.

Please let me know if you try this cookie!

Thanks to Peanut Butter + Co. for sending me the different peanut butters to try. I was not compensated or required to post about their products, but I've been a fan of this brand for honestly years and enjoy it tremendously. My opinions are 100% my own.

Like what you just read? You can subscribe to the feed of these posts or follow us on Twitter or Facebook to be the first to know what the (never home)makers are up to. And we’ll love you forever!

Read more...

Gluten-Free Sweet Pumpkin Bread

>> Friday, August 29, 2014

Here we go with the pumpkin! Expect a lot of it from me (and everyone else) for the next several months! I couldn't resist picking up a can of my favorite orange puree the last time I visited the store. We adore our Pumpkin Garlic Knots and Brie-Stuffed Pumpkin Garlic Rolls, among many other pumpkin-centric recipes. Don't you?

When I found myself without flour, I made a bread that didn't require any! It's a sweet, quick bread that contains no refined sugar, flour, or dairy/eggs. So, it's suitable for a variety of diets and preferences. We all deserve a little fall indulgence. (Didn't you hear? It's fall already, at least in my mind.)


HEARTY + SWEET PUMPKIN BREAD
Gluten-free, vegan, naturally sweetened, and perfect for breakfast, etc.

What you'll need . . . 
  • 1 cup pumpkin puree
  • 1 cup coconut milk (or other nondairy milk)
  • 1/2 teaspoon vanilla extract
  • 1 tablespoon flax meal + 3 tablespoons hot water (flax egg)
  • 1/3 cup pure maple syrup
  • 3 tablespoons olive oil
  • 1-1/2 cups FINE GRIND cornmeal*
  • 1 cup almond meal
  • 1 cup gf rolled oats, uncooked
  • 1 tablespoon baking powder
  • 1/2 teaspoon ground cinnamon 
  • pinch salt
  • Handful semi-sweet chocolate chips (optional)
* I originally didn't specify the cornmeal I used -- but it was a fine grind variety. If you use a coarser meal, it will be more likely to crumble.

Method . . . 
  1. Preheat your oven to 350 degrees F. Generously grease a standard loaf pan with olive or coconut oil. Set aside.
  2. In a large bowl, mix together your wet ingredients -- pumpkin, milk, vanilla, flax egg, maple syrup, and oil. 
  3. In another bowl, whisk together your dry ingredients and then toss them into the bowl with the wet ingredients. Mix with a spatula until just moistened.
  4. Transfer to your prepared loaf pan and smooth down until even. 
  5. Bake for 1 hour, checking periodically. Should be set in the center when inserting a toothpick. If it doesn't come out clean, continue to cook for another 5 or 10 minutes.
  6. Let cool before serving.


I think walnuts would be an excellent addition to this recipe, I just didn't have any on hand. You can also substitute in any other purees you'd like, including applesauce, which would produce a lovely loaf. Oh, and I have another delicious vegan + gluten-free recipe coming up next week! It's a fall-ish cookie hybrid of oatmeal cinnamon raison + peanut butter chocolate chip cookies.

HAPPY FRIDAY!

// My Writing, Elsewhere:

How To Eat Well On Just $20/Week
6 Health + Fitness Rules That Have Changed
10 Things Healthy People DO NOT Have In Their Homes
Satisfying Stir-Fries in 20 Minutes Or Fewer
Tips For Getting the Home Loan You Want
12 Delicious Nut Butter Recipes to Make At Home
7 Tricks For Better Posture Today!
12 Herbs and Spices Every Pantry Should Have
5 Smart Ways To Save on Back-To-School Clothing
4 Workout Recovery Essentials For a Healthy Body
Make 15 Junk Food Favorites Healthier + Cheaper At Home

Like what you just read? You can subscribe to the feed of these posts or follow us on Twitter or Facebook to be the first to know what the (never home)makers are up to. And we’ll love you forever!

Read more...

Strawberry Shortcake Muffins

>> Tuesday, July 22, 2014

I'm a little late with posting these, since strawberry season has come and gone here in upstate NY. And pretty much everywhere else for that matter. If you were smart and preserved or have frozen strawberries on hand, they would make a perfect substitute for this recipe. Now that blueberry season is upon us, feel free to use them (or any other fruit) in equal ratio as well!

These muffins are gluten-free and make a delicious dessert or even breakfast, depending on your cravings. I used a 1/2 cup of sugar, but I'm thinking in the future I could certainly use less or substitute in maple syrup or honey for a lower glycemic punch.


STRAWBERRY SHORTCAKE MUFFINS

What you'll need . . . 
  • 2-1/2 cups rolled oats (if you're GF, use Bob's Red Mill)
  • 1 cup low fat Greek yogurt*
  • 2 tablespoons flax meal + 6 tablespoons hot water (you could also use 2 eggs)
  • 1/2 cup raw sugar 
  • 1-1/2 teaspoons baking powder 
  • 1/2 teaspoon baking soda 
  • 1 cup fresh strawberries, chopped -- more if desired
* To make this recipe vegan, you can substitute in your favorite dairy free yogurt. You could even experiment with nondairy milk, like Homemade Almond Milk, though you will need to perhaps use a bit less, more like 3/4 cups. 

Method . . . 
  1. Preheat your oven to 400 degrees F. Lightly grease a muffin tin or use liners and set aside.
  2. Give your flax eggs some time to gel up by combining the 2 tablespoons of flax meal with the 6 tablespoons of hot water. Just whisk in a little dish and let sit for a few minutes.
  3. Put all ingredients (except strawberries -- you will fold those in at the end) in your food processor and pulse until smooth. Alternatively, I'm sure you could just use some oat flour and mix it with the other dry ingredients and then add the wet later and stir until well incorporated.
  4. Then transfer to a bowl and fold in the strawberries. The flax and oats will make the dough quite sticky, so just make sure your muffin tins are greased. I used Earth Balance.
  5. Portion equally for 12 standard size muffins. Bake for 20 minutes, then check to see if edges are turning golden and you can even prick a muffin to check the center for done-ness. You may wish to bake up to 25 minutes or so.
  6. Let cool on a rack before serving.

// FREEZE + RELATED RECIPES

If you'd like to save some to freeze, just let cool completely, then wrap each individually in plastic wrap and store in another airtight freezer container for up to 6 months, longer if you have a deep freeze.


What's your favorite seasonal fruit? 

Mine? Strawberries. But I'm sure you could have guessed it!

Like what you just read? Browse more of our posts + recipes on Pinterest. You can subscribe to the feed of these posts or follow us on Twitter or Facebook to be the first to know what the (never home)makers are up to. And we’ll love you forever!

Read more...
Related Posts Plugin for WordPress, Blogger...

About This Blog

MyFreeCopyright.com Registered & Protected

© 2009-2014 by the (never home)makers
All content on this blog is copyrighted.

Want to publish our pics, tips, or tricks?
Contact us! [neverhomemaker@gmail.com]

We value transparency. Links on this page may contain affiliates. In addition, please see our disclosure policy regarding sponsored posts.

  © Blogger template Simple n' Sweet by Ourblogtemplates.com 2009

Back to TOP  

Blogging tips