Showing posts with label pizza. Show all posts

My All-Purpose Bread Mix

>> Tuesday, February 6, 2018

I've been in a great groove with homemade meals lately. For us, bread often makes the meal. This isn't to say we don't eat heaps of healthy whole foods. But if we're trying to be successful with resisting takeout and meals out of the house, making tasty pizza and other bread-y things is essential. So, I want to share with you the ONE recipe I've been using to make all of it.

I use this mix for garlic knots, pizza dough, and naan.

It does it all!


What you'll need . . .
  • 3-1/2 to 4 cups all-purpose flour
  • 2 tablespoons sugar
  • 2-1/4 teaspoons instant yeast
  • 1 teaspoon salt
  • 1-1/2 cups warm water or non-dairy milk

Method . . . 
  1. In a large bowl, whisk together 3-1/2 cups flour, the sugar, yeast, and salt.
  2. Add in water if you're making garlic knots or pizza dough. Add in milk if you're making naan.
  3. Mix with your hands until a ball forms. You may need to add more flour if it's too sticky to handle.
  4. Knead for 5-10 minutes. I find it's best when I really take the time, but five minutes will do in a pinch.
  5. Drizzle with olive oil and cover with plastic wrap or a damp tea towel.
  6. Let rise in a warm spot for 2-3 hours, until doubled in bulk.

To bake . . . 
  • Divide into small balls to make garlic knots. Bake for 10-13 minutes at 425 degrees F, until golden.
  • Divide into discs to make pizzas. We place this dough on well greased pans and press it thin. Bake with toppings at 450 degrees F for 10-13 minutes, until golden.
  • Divide into fist-sized balls and roll flat for naan. Bake on a pizza stone in a well preheated oven at 500 degrees for a few minutes until golden.

What's your favorite multi-purpose recipe?

I hope to be back into another blogging groove soon. Ada woke up with the stomach bug and I have some big deadlines this week. But we'll all survive! What would you like to see next? Any requests?

Read more...

Better Cauliflower Crust

>> Tuesday, June 16, 2015

Here’s another installment of my Make It Better series. I’m not intolerant to gluten or even sensitive for that matter. I just eat a lot of too much bread and have been looking for alternatives to clean up my diet. So, in my adventures, I’ve made several recipes for cauliflower crust pizza in the last couple years. And I absolutely love it. Some of the recipes have indeed been great. Others, OK. Yeah. Horrible.

Along the way I’ve picked up a few tricks of the trade.


// Pulse in Processor


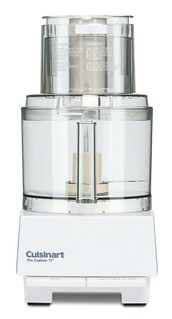
You may encounter a recipe that instructs you to grate your cauliflower. That’s going to make a huge mess. Instead, chop up florets and pulse them into “rice” in your food processor. It’s faster, the “rice” gets much smaller, and you’ll spend less time cleaning up.

// Microwave Fast


I know some of you will disagree with me, but I find it much easier to just microwave my cauliflower “rice” while I’m getting other parts of my meal ready. We rarely use the microwave, so I revel in the convenience of it for those 7 minutes. That way, you can keep it all in the same bowl and skip the step of draining from added water. It’s the little things . . .

// Drain + Drain Some More


Once you’ve cooked your cauliflower, let it cool almost completely. But never, and I mean NEVER, skip draining the moisture out. You’d be surprised how much is in there, too. I usually use a clean tea towel and work on my “rice” in batches. I’ll squeeze as much as humanly possible . . . and then return in five or so minutes to squeeze any last bit of water that remains.

If you think it’s done, try again.


// Season Well


Don’t forget to add salt, pepper, and even herbs or other spices. You want it to taste freaking amazing, right? My favorite recipe calls for a good amount of cheese in the crust, and I think it’s worth the add-in. So, I just skimp on any added cheese atop the pizza and opt instead of lots of roasted veggies and good sauce. Versus where the bread is sort of in the background in a lot of pizza recipes, the cauliflower can be one of the highlights of the entire meal.

// Use Parchment, Not Foil


A few of the recipes I’ve followed have said to use greased aluminum foil as a surface for cooking. Please, please don’t do this. Ever. I’ve tried twice with disastrous results. You will likely be so sorry. Parchment (or maybe a silicone pizza baking mat) will keep your pizza from sticking. If you’re out of parchment (like I often am) try a well greased baking pan before skipping to aluminum.

// My Favorite Recipe


Like I said, I’ve tried several different recipes, but this one on PopSugar is by far my favorite. Usually we’ll make two pizzas -- one for me + Ada, one for Stephen -- and I’ll cut the cheese almost in half when doubling. For toppings, we often use BBQ sauce for sauce, a medley of roasted veggies (I roast while preparing the crust // before putting them on the pizza), fresh tomatoes, a little ricotta, and then chopped basil from the garden.

Do you have any cauliflower crust tips to share?

Like what you just read? You can subscribe to the feed of these posts or follow us on Twitter or Facebook to be the first to know what the (never home)makers are up to. And we’ll love you forever!

Read more...

Review: Pizza Hut + Udi’s GF Pizza

>> Monday, February 23, 2015


Growing up geographically isolated in the north mountains of Pennsylvania, we didn’t have a lot of restaurants. I mean, there were definitely some -- a local sub shop, the bakery adjoining the bowling alley, the “famous” diner, and my favorite bagel place. When we wanted pizza? It was one hundred percent Pizza Hut! In fact, Pizza Hut might actually be responsible for my love of reading and writing, since I participated in its BookIt program way back when:

Reading for pizza -- that’s a beautiful thing.


When BlogHer gave me the opportunity to try out Pizza Hut’s® new "Gluten-Free Pizza", through its partnership with Udi's® and their certified gluten-free crust, I was super excited. Now that we live in an area that was once dominated by Italians, I haven’t had their pizza as often. But those taste buds of mine have a definite nostalgic craving from time to time.

At the present moment, the gluten-free pizzas are available in a 10-inch small size. I spoke with the manager at our location, and she mentioned that there have been quite a few people coming in and ordering the GF option lately. She was actually thrilled to hear I was reviewing it because she’s seen such a positive response and wants to get the word out.

Cool, but how does it taste?


First, we got our pie home and it was the perfect size for a mommy and me lunch. Well, and a few slices leftover for Stephen to sample as well. I will admit I was expecting a crust more like Pizza Hut’s pan pizzas -- so if that could ever happen, I’d be totally wowed! That being said, the thin and crispy crust was delicious with all the flavor I remember of Pizza Hut.

And Ada ate her whole slice, so that’s a good review in itself.


Though we aren’t a gluten-free family, we know many who do follow this diet and, well, it’s really a lifestyle. It’s nice to have gluten-free options on the go as much as it is to have vegetarian and vegan options. I like how both chain restaurants, like Pizza Hut, and local eateries are recognizing different diets and catering their menus accordingly.

Now, SheKnows is hosting a sweepstakes! One reader will win a $100 Pizza Hut gift card to use at any Pizza Hut locations. To enter for a chance to win tell me, who would you share your "Gluten-Free Pizza" with?

Entry Instructions:
No duplicate comments.
You may receive (2) total entries by selecting from the following entry methods:
1. Leave a comment in response to the sweepstakes prompt on this post
2. Tweet (public message) about this promotion; including exactly the following unique term in your tweet message: “#SweepstakesEntry”; and leave the URL to that tweet in a comment on this post
3. Blog about this promotion, including a disclosure that you are receiving a sweepstakes entry in exchange for writing the blog post, and leave the URL to that post in a comment on this post
4. For those with no Twitter or blog, read the official rules to learn about an alternate form of entry.
This giveaway is open to US Residents age 18 or older (or nineteen (19) years of age or older in Alabama and Nebraska). Winners will be selected via random draw, and will be notified by e-mail. The notification email will come directly from BlogHer via the sweeps@blogher email address. You will have 2 business days to respond; otherwise a new winner will be selected.
The Official Rules are available here.
This sweepstakes runs from 2/23/2015 – 3/16/2015.
Be sure to visit the Pizza Hut’s brand page on BlogHer.com where you can read other bloggers’ posts!

Read more...

Biscuit Waffles, Two Ways

>> Tuesday, December 16, 2014

Throughout the last couple years, I’ve seen people making all sorts of things in the waffle maker. Brownies. Cake. Pizza. Eggs. Falafel. S’mores. The list goes on (and on). So, slowly I’ve started to try out some of these recipes, and I’m definitely hooked. Baking stuff in my waffle maker is both easy and completely, amazingly satisfying.

I’ve now made several savory waffle recipes using this exact biscuit crust as my base. And if you eat dairy, I highly recommend using real butter and real milk. The flavor and texture -- oh, the texture -- are out of this world. That being said, Earth Balance and soy or almond or coconut milk make a wonderful waffle as well. Maybe just not as flaky.

Crunch.


(Sorry! Sometimes I’d rather eat than take gorgeous photos.)

BASIC BISCUITS

You can also make this recipe and use as drop biscuits!

What you’ll need . . . 


  • 1-1/2 cups all purpose flour
  • 1/2 cup whole wheat flour
  • 1 tablespoon baking powder
  • 1 stick cold butter (or 1/2 cup Earth Balance)
  • 1-1/4 cups milk (or substitute)
  • pinch salt

Method . . .

  1. Whisk the dry ingredients together. Then toss in the butter -- but in pieces throughout.
  2. Mix with your hands until the “dough” resembles a coarse meal texture. You might need to pinch and crumble the flour and butter together a little. 
  3. Preheat your waffle maker. Lightly grease with more butter or Earth Balance.
  4. Then pour in the milk and stir until everything is just moistened. Spoon out in portions that make sense for your waffle maker. For ours, 1/2 cup fills it up.
  5. Bake until done, then set on a cooling rack to avoid sogginess.
  6. If you want to make these guys as drop biscuits, preheat your oven to 450 degrees F. Then drop dough onto a parchment lined cookie sheet and bake for 14 minutes, until golden.

BRUNCH GRAVY BISCUITS


For this deliciousness, you’ll want to whisk up some Mushroom Gravy. Then just make your waffles, poach (here’s how) or soft boil (here’s how) or fry a few eggs, and assemble with a little spinach or other greens. Very easy, but it’s an amazingly tasty breakfast for those of you who don’t like to start the day on the sweet side.


PIZZA WAFFLES


I mentioned these guys (thanks, Ashley!) the other day in my Weekend Things post, and since then . . . we’ve made them twice more. I originally just used Pumpkin Pizza Dough in my waffle maker, but there wasn’t as much taste. When I used this biscuit waffle as a base, the resulting “pizza” reminded me of some of the great pan pizzas I’ve had. Thick, buttery crust. I broiled Pepper Jack cheese onto the tops until bubbly and chose to leave the sauce off and dunk instead.

So, there you go. Biscuit waffles, two ways!

I have already asked Stephen for a new, round waffle maker as one of my Christmas gifts. Our current one was a $10 find, and it’s done quite well but seems to be a little over-loved these days. We’ll see. Now, if you’ll excuse me, I have a s’mores waffle recipe to drool over.


MORE WAFFLES!

Peanut Butter + Banana Waffles
CSA Market Waffles
Green Waffles, Two Ways
Zucchini + Carrot Waffles
Homemade Freezer Waffles

Like what you just read? You can subscribe to the feed of these posts or follow us on Twitter or Facebook to be the first to know what the (never home)makers are up to. And we’ll love you forever!

Read more...

(Gas) Grilling Pizza

>> Monday, July 28, 2014

I love grilled pizza. It's been a long time (a LONG time) since I've written about our favorite BBQ food on the blog. In fact, the last time I talked about our process for grilling pizza was just after the new year in 2010. That's right. We make grilled pizza no matter the time of year or (frigid) weather. We've even made cheesy flatbreads on the grill -- I'm pretty much obsessed with grilling anything and everything.

We recently purchased a gas grill, and our method had changed. Over the years, too, we've picked up some new tips and tricks, so I wanted to revisit.


In the summer, we make grilled pizza at least once a week. Twice, if we're lucky. If you haven't had a chance to try it out yet, be sure to check out my recent piece for Wise Bread: This Is How You Grill Pizza At Home. It's a goodie -- and I don't get paid per click or anything to share my articles, so just go and read it! NOW!

Some additional tips from my home kitchen, er, patio:
  • Use all white flour in your crust recipe. It promotes better gluten production and will mean less tearing of your pizza on the grill.
  • Olive oil is your FRIEND, people. Lube it up. The dough and the grill. And char marks are definitely tasty, just remember there's a fine line between beautifully charred and horribly burned.
  • You'll want all your toppings at the ready before you start. We often grill veggies for the whole week and just put them in little prep bowls for easy pinching.
  • Experiment. One of our most favorite grilled pizzas involved brie and grilled peaches.
And I'll be sharing my new favorite crust recipe sometime next week. I have one more trial before it's perfecto. If you have a charcoal grill, don't miss our old trusty tips from 4-1/2 years ago (!). Seriously, once you try this at home -- you're hooked for life.

Also: Happy Birthday to ME! I turn 31 today (here are my thoughts on 30), and I'm celebrating at the beach! For more vacation photos, follow me on Instagram.


Like what you just read? Browse more of our posts + recipes on Pinterest. You can subscribe to the feed of these posts or follow us on Twitter or Facebook to be the first to know what the (never home)makers are up to. And we’ll love you forever!

Read more...

Weeknight Pizza Tricks

>> Thursday, May 15, 2014

As you guys know, one of our weeknight staples is pizza. I'd say we eat pizza at least twice or three times a week. So, I guess you could say somewhere in those 130 or so pies we make at home each year, we've picked up a few tricks.

Here are the top 5 for busy weeknights.


#1. Use Cornmeal


We usually make our pumpkin garlic knots crust or substitute all water for the pumpkin puree, depending on what we have in the pantry. But a trick we picked up over the years is to always roll out our dough with cornmeal. Not only does it help with transferring the dough to the pizza stone (another necessity!), but it always give the crust a nice crunch.


#2. Fold It Up


From there, transferring the dough to the pizza stone is made easy -- even without a pizza peel -- by gently folding the rolled out dough in half and then in half again. We simply place the quarter down on the stone and then unfold and reposition quickly.


#3: Get Saucy 


Since it's not tomato season, I usually cook up some type of homemade sauce using canned tomatoes. On busy weeknights when I just don't have the time, I improvise. My favorite makeshift sauce these days? A mix of half salsa and half barbecue sauce. Certainly has a nice zing to it!


#4. Top Heavily


Along with a generous heap of roasted veggies, we like topping all our homemade pizzas with cold avocado slices. Not only do the vegetables and avocado add lots of good-for-you nutrients, but they also help us justify eating pizza more often. This particular example isn't teeming with as many toppings as we usually enjoy, so if you'd like to see a better example of a loaded pizza, check out this lightened up recipe.


#5. Garnish Wisely


And with all those toppings, you need more sauce. We always have a bottle of hot sauce nearby, whether it's standard Frank's Red Hot (have you guys tried our Vegan Tofu Wings?) or spicy Sriracha.  I also like ranch dressing or even a quick side of this 5-minute tomato sauce.


// MORE TIPS + RECIPES

Brie-Stuffed Pumpkin Garlic Rolls
Pumpkin Deep Dish Pizza
Pesto Pizza Dough
Veggie-Topped Pizza, Lightened Up
Cornmeal + Flax GF Pizza Crust
Pumpkin Pesto Rolls
Like what you just read? Browse more of our posts + recipes on Pinterest. You can subscribe to the feed of these posts or follow us on Twitter or Facebook to be the first to know what the (never home)makers are up to. And we’ll love you forever!

Read more...

Pumpkin Deep Dish Pizza

>> Thursday, September 19, 2013

I've regained my appetite (good sign) + the food must go on! I stay sane by stepping into the kitchen to cook. We've been enjoying our freezer meals, but I've made stuff from scratch more than I intended to this month simply because I needed that time to think. To knead dough and zone out. Those of you who love cooking and baking understand. Kitchen therapy for the win!

So, it started way back when with pumpkin garlic knots then pumpkin pizza then pumpkin pesto rolls. Now I'm dishing up deep dish pizza with a new crust recipe that lends better to this style dish. I've made three different variations, and this is the one that has worked the best. If I haven't yet convinced you to try pumpkin in your dough, this might be the time to trust me.

For those of you new to my favorite crust: Why put pureed pumpkin in place of water? Is it just jumping on the fall trend train? Nope. It adds nutrition, obviously, but also a great moisture content and more complex flavor.

I could just be crazy, though. Probably.


PUMPKIN DEEP DISH CRUST
enough for two 10 inch pies

What you'll need . . .
  • 1 package yeast (2-1/4 teaspoons)
  • 1/4 cup warm water 
  • 1/2 cup pumpkin puree (or homemade)
  • 2 teaspoons maple syrup 
  • 1/4 cup + 1 tablespoon olive oil 
  • 2 cups bread flour (give/take)
  • 2 teaspoons salt

Method . . .

  1. In a large bowl, combine the yeast with the water and let proof (get frothy). 
  2. Then add in the pumpkin puree, oil, and maple syrup. Whisk well until totally combined. 
  3. Fold in the flour and salt and eventually work to kneading with your hands for several minutes. Start with 1-1/2 cups flour and work up to more until you form an elastic, non-sticky ball. 
  4. Then place back in the bowl, drizzle with some olive oil, cover with plastic wrap or a damp towel, and let rise for 2 hours. 
  5. Punch down, divide into two balls -- use one per pizza. Dough stores in the refrigerator for two days or freeze it for a month.


// DEEP DISHIN'

To make deep dish pizza -- you flip your notions about this dish upside down. The cheese actually goes on FIRST and is then covered with sauce of your choice.

Whoa.
  • Preheat your oven to 475 degrees F. Lightly oil a 10" (or 8" if you want a lot of crust overlap) pan. I used a springform pan for a few of the pizzas and like how it worked better than a standard cake pan. Just my preference!
  • Take your dough and press it into the pan, distributing evenly and working up the sides almost like you'd do for a pie crust.
  • Start with a layer of provolone cheese covering the entire bottom. This will help keep the crust beneath from turning soggy. Then sprinkle with shredded mozzarella.
  • Add a layer of sauce just a bit thicker than you'd normally use on a traditional pizza. You want to cover the cheese below, but not drown it.
  • Sprinkle with Parmesan or other cheese and then bake for 25 to 30 minutes, until edges are browned and cheese is melted (you can cut to check).
  • Let cool 5-10 minutes before slicing.
  • It took me a few goes for my pizza to turn out "right" -- so don't be surprised if you're first try yields too-thick crust or not-crisp-enough, etc. You'll get the hang of it quickly. It's just a different animal.

What sauce you use is up to you.

Here are a few suggestions -- pesto works great, too:
The weekend is a perfect time to try out new recipes, especially pizza recipes, so I hope you'll consider this one for a go.

Happy Friday, everyone!

Like what you just read? Browse more of our posts + recipes on Pinterest. You can subscribe to the feed of these posts or follow us on Twitter or Facebook to be the first to know what the (never home)makers are up to. And we’ll love you forever!.

Read more...

10-Minute Heirloom Tomato Sauce

>> Monday, August 19, 2013

A goal I have for this blog is to simplify the foods I feature and to keep it real with regard to what we eat on a day-to-day basis. So, over the coming weeks, I'll highlight a few previously overlooked staples we have in our kitchen. Things that aren't really exciting or masterpieces on their own, but recipes that bring a lot of flavor and vibrancy to the meals we eat.

Which brings us to this delightfully simple tomato sauce, great for use on pasta or pizza or even for dipping. You don't need to use heirlooms, they're just particularly delicious and gigantic. And tomatoes can be switched out with tomatillos, too. I make sauce with whatever we get in our CSA basket.


10-Minute HEIRLOOM TOMATO SAUCE

What you'll need . . .
  • 2 very large tomatoes  (or approx 1-1/2 cups) chopped
  • Minced onion + garlic*
  • Dried or fresh herbs of choice
  • Salt + pepper
  • Red pepper flake
  • 1 tablespoon maple syrup 
  • olive oil
* You can certainly use fresh, but I keep a secret stash of dehydrated onions and garlic by Earth's Pride on hand for quick recipes like these.


Method . . . 
  1. Heat a tablespoon or more of olive oil over medium-high heat, toss all ingredients into the pan, starting with the tomatoes, onions, and garlic.
  2. The salt is important in this recipe for drawing out the moisture from the tomatoes. So, be sure to add that straight away.
  3. Add the spices slowly, though -- remember, you can always add more, but not take away. It's all to your taste, too. Feel free to omit red pepper flakes if you don't like heat or maple syrup if you don't like sweetness. Others to consider adding include oregano, thyme, basil, and even sage can be nice!
  4. Cook + stir continuously and  as moisture is released from the tomatoes, squish them down with the back of your spatula or spoon to your desired chunky consistency. 
  5. Sauce is ready after 10 minutes or less, depending on the use. For pizza, just make sure that it is thick and not watery. 
  6. For a less rustic sauce, run through your food processor until smooth. And feel free to double, triple, etc. this recipe for more sauce!

To make this pizza, flatten dough and bake at 450 for 2 to 3 minutes. Then assemble with the sauce and cheeses and bake for another 12 to 14 minutes. Until cheese is golden brown + bubbly.
  • Use half the yield of the Pumpkin Pizza Dough (we made ours with squash puree)
  • Use the sauce you just made
  • Mozzarella cheese + crumbled honey goat cheese
  • Fresh basil
If you don't have fresh tomatoes on hand, try this Boozy + Bold Sauce made with packaged tomatoes. And if you have a bit more time, try out this Grilled Kalamata Sauce, maybe with Pesto Pizza Dough. 

Monday is as great a night as any for pizza, don't you think?

Like what you just read? You can subscribe to the feed of these posts or follow us on Twitter or Facebook to be the first to know what the (never home)makers are up to. And we’ll love you forever!

Read more...

Rustic + Grilled Kalamata Tomato Sauce

>> Thursday, July 11, 2013

So, I've got my pesto pizza crust ready to go. But no sauce or tomato puree in sight. 
Oh, crap! No mozzarella either. 
A half container of ricotta left, but it'll go South starting tomorrow. 
Must use tonight. Hmm. 
Wait. What's this? I spy a sleeve of kalamata tomatoes! 
Looks like the basil plant is doing well from all the rain we've had lately, too.

Drip, drip.


Basically, you've all just taken a trip inside my head around dinnertime. I've been wanting to fire up the grill and take our pizza adventures to the great outdoors, but it seems like afternoon thunderstorms are always in my way. This weekend. It's going to be epic -- the grilled bruschetta pizza I'll make. Promise!

But in a pinch, using what we had on hand last Thursday allowed us to go beyond our usual roasted veggies and cheese-heavy pie.

BOOM!


RUSTIC (INDOOR) GRILLED TOMATO SAUCE 
goes great atop pesto pizza crust or on any other pizza recipe

What you'll need . . .

  • 6 to 8 kalamata tomatoes (you may use whatever tomatoes you have, though! the heartier, the better.)
  • 2 tablespoons olive oil
  • Salt + pepper
  • Pinch red pepper flakes
  • 1 teaspoon each dried oregano + rosemary


Method . . . 

  1. Chop your tomatoes head to toe into thick slices (about four per tomato). Toss into a large bowl with the olive oil and other ingredients. Toss around until well coated.
  2. Preheat your grilling pan* for about 5 minutes on medium-high heat. Then plan your tomatoes atop the grill and cook for 5 minutes.
  3. Flip and cook another 5 minutes. Flip again and continue until the tomatoes start to get grill marks and release their juices.
  4. Once they get goopy, start mixing the sauce around in the pan and take off the heat. Let cool and remove from pan and continue mashing until desire consistency (we left our tomatoes rather whole).
* A grilling pan isn't required to make this recipe, it will just give those nice blackened grill marks. You can also use a regular fry pan with similar results.


The sauce truly was the star -- majorly chunky + rustic -- and the dollops of ricotta were light. Almost sweet, lending perfectly well to the freshly picked basil I grabbed right before the afternoon's second deluge of rainfall.

To cook your pizza, just preheat your oven to 450 degrees F, preferably with a pizza stone preheating as well. Roll out your pizza dough and then cook it for about 4 minutes before taking out of the oven and flipping over. Put on your toppings -- including the basil and perhaps a shake or two of Parmesan -- and bake for about 15 more minutes. Until cheese is lightly browned and bubbly.

I gladly tackled this half myself.


Enjoy!

Like what you just read? Browse more of our posts + recipes on Pinterest. You can subscribe to the feed of these posts or follow us on Twitter or Facebook to be the first to know what the (never home)makers are up to. And we’ll love you forever!

Read more...

Pizza || Lightened Up

>> Tuesday, May 21, 2013

Talk about food rut. My name is Ashley, and I'm a pizza-haulic. But you already know this about me. We're not talking Domino's or Little Caesar's. No. Just like sandwiches, there are so many different ways to get my fix.

And the fastest + easiest way to lighten up a pie is by thinning out the crust and topping with roasted veggies.

Exhibit A:


Here we have . . .
  • 2 poblano peppers 
  • 1 large yellow squash
  • 1 medium cooking onion
  • pinch salt + pepper 
  • 1 tablespoon olive oil
  • (and I added 1/2 cup garbanzos)
For the crust . . . 

I made a half batch of Jamie Oliver's pizza dough (full recipe calls for 7 cups flour, but we've found when using white-whole wheat and halving it, 3 cups is usually enough versus 3.5) and divided it into THREE sections. (Each is about a cup of flour.)

To make the crust thin + crispy, it works best to let the dough rise fully, punch down and then refrigerate overnight . . . and then take out for about an hour or two before use.


Sauce + Cheese . . .

  • I used 1/2 cup of our Boozy + Bold Tomato Sauce, without the booze. No substitution either. Just left it out.
  • Then a healthy 1/2 cup of Colby-Jack cheese sprinkled on top. Maybe another sprinkle for good measure.
Putting it together . . . 

  1. With the oven preheated to 400 degrees F, I just roasted the veggies for 35 minutes, stirring occasionally, until they were browned.
  2. I upped the oven temperature to 450 degrees F and put our baking stone inside to warm up.
  3. I rolled out the dough onto a lightly floured surface using a rolling pin to get it really flat and then transferred it to the stone and baked for around 2 minutes.
  4. I flipped the dough over and then spread out my sauce, topped with the roasted veggies, and finished with the cheese.
  5. Baked for between 11-13 minutes, until golden brown.
  6. Then we cut the pizza in half, topped with some hot sauce, and it was gone in no time at all!


I don't plan on giving calorie breakdowns for all my recipes now, but a.) I've been keeping up my meal diary and b.) it's been a request I've received (overwhelming, actually) in the past. Anyway, I was surprised this meal came in so "good" calorie-wise (even though this isn't EXACT, like I over-shot the cheese -- but I tried getting as much info in there as possible). Because it's pizza. It's something I eat all the time. And it's pretty darned healthy.

Another food rut I'll happily fall into. Especially with our CSA produce season upon us. So many options for roasted veggies -- maybe even mushrooms. And one of my goals this summer is to make my own mozzarella cheese.

Have you found a healthier way to eat more of something you love?

Like what you just read? Browse more of our posts + recipes on Pinterest. You can subscribe to the feed of these posts or follow us on Twitter or Facebook to be the first to know what the (never home)makers are up to. And we’ll love you forever!

Read more...

Gluten-Free Pizza Crust

>> Wednesday, March 20, 2013

Thing is: Green Curry Stir-Fries are fantastic. But even with all this shifting of my "ideal" dinner, I still crave pizza. At least every Thursday. I tried my hand at a gluten-free pizza crust in the past and the results were horrible. I share them anyway, but we haven't gone near that recipe since.

I have also adapted several of our other pizza crust and naan recipes using a bag of Bob's Red Mill all-purpose gluten-free flour. I had a coupon to try some out, but I am trying to offer up recipes with ingredients you don't necessarily have to buy special.


Cornmeal + flax. And you will see that quinoa flour is in this recipe. A special ingredient. We have some left over from a Food for Runners: Quinoa post we did a while back.

I have read that you can make your own at home. Here's one tutorial using a food processor + here's another using a coffee grinder. I hope to try each out soon.

CORNMEAL-FLAX PIZZA CRUST
serves 1 to 2, depending on appetite

What you'll need . . . 

  • 1 teaspoon active dry yeast
  • 3 tablespoons warm water 
  • 1/3 cups cauliflower or pumpkin puree
  • 2 tablespoons olive oil
  • 1/2 cup quinoa flour
  • 1/2 cup organic, stone-ground cornmeal, plus more for pizza stone
  • 1/4 cup flax meal
  • 1/2 teaspoon coarse sea salt
  • 1/2 teaspoon baking soda

Method . . .
  1. In a small bowl, proof your yeast by sprinkling it over the 3 tablespoons of warm water. Let sit for 5 to 10 minutes, until frothy.
  2. Combine the yeast with the puree (I just boiled frozen cauliflower and ran it through my food processor) and olive oil. Mix well.
  3. In a large bowl, whisk together the quinoa flour, cornmeal, flax meal, salt, and baking soda.
  4. Add the wet and dry ingredients and mix until well combined. Form into a ball and cover for a couple hours.

To bake . . .

  1. Preheat your oven to 425 degrees F, placing a baking stone inside the oven to preheat as well.
  2. Flatten the crust into a circle right onto the hot stone, being careful not to burn your fingers. (It happened to me.)
  3. Then bake for 5 to 7 minutes, take out of the oven and carefully flip over.
  4. Top with your favorite toppings. We used my Butternut Squash Pizza Sauce and mozzarella cheese.
  5. continue baking for another 10 to 15 minutes, until cheese -- or whatever else you've topped it with -- is warmed/browned and bubbly.

What's your favorite gluten-free pizza crust recipe? Any one I should try out that's particularly "authentic" or particularly NY-style? 

And click here to read more about my adventures with gluten-free foods.

Like what you just read? You can subscribe to the feed of these posts or follow us on Twitter or Facebook to be the first to know what the (never home)makers are up to. And we’ll love you forever!

Read more...

Butternut Squash Pizza Sauce

>> Monday, February 18, 2013


We ran out of tomato puree and all other canned tomato products last week. But Pizza Thursday had to go on! Instead of heading to the store, I thought I'd venture around the kitchen and find a suitable replacement.

And now I don't know if I'll use tomatoes for a while because this is way too good!


BUTTERNUT SQUASH PIZZA SAUCE 
enough for two large homemade pizzas -- or even pasta

What you'll need . . . 

  • 16 ounces butternut squash puree (ours was frozen from the fall)
  • 2 tablespoons olive oil
  • 2 cloves garlic, minced
  • 1 tablespoon Italian seasoning (a dry blend is what I used)
  • 1/2 cup water
  • 1/4 cup white wine ($4 Pinot Grigio, baby!)
  • 1/4 cup grated Parmesan cheese
  • salt and pepper  
NOTE: 

You can feel free to use nutritional yeast in place of Parmesan. For the wine, you can just use water, but I'd suggest playing around with vinegars, etc. because it adds great flavor to this recipe. Most of the alcohol cooks off anyway!

Method . . . 

  1. Thaw the puree if you are using frozen. 
  2. In the meantime, pour the olive oil into a medium pot over medium-high heat and saute the garlic for a few minutes. Until fragrant.
  3. Then add in the puree and cook for a few minutes more, stirring constantly.
  4. Continue by adding the water and white wine. Let it incorporate fully in before adding the Parmesan cheese.
  5. Season with the Italian seasoning and salt and pepper to taste and cook for about 10 more minutes to let the flavors mingle, fall in love, if you will.
  6. Add more liquid depending on how you'd like the texture. We had our spread rather thick.
  7. Store for up to a week in the fridge or freeze.
// To use:

Mix up your favorite pizza dough recipe + let it rise -- we actually made the Pumpkin Garlic Knots but replaced the canned pumpkin with homemade applesauce for a sweeter crust.

We always bake our pizza at 425 degrees F with a pizza stone preheating first. Then we spread the plain crust onto the stone and bake one side for 4 to 5 minutes, flip over, and then add the sauce + toppings.

A mix of mozzarella and cheddar 50/50 worked well with the flavors in the sauce and crust. But feel free to experiment or even go dairy-free with lots of roasted veggies and avocado.

Bake until cheese is browned and bubbly. 12 to 15 minutes.


Have you made pizza without tomato sauce? I love white pizza best, actually. Pesto pizza, too! This was a nice change of pace. We'd love some more suggestions for our favorite dinner of the week!

And PS: I made a HUGE batch of Homemade Freezer Waffles this morning. Take a look!


Hope you all had a great weekend. And if you want to check out Writing Chapter Three, you can see Ada's first haircut. That I gave her am still giving her!

Like what you just read? You can subscribe to the feed of these posts or follow us on Twitter or Facebook to be the first to know what the (never home)makers are up to. And we’ll love you forever!

Read more...
Related Posts Plugin for WordPress, Blogger...

About This Blog

MyFreeCopyright.com Registered & Protected

© 2009-2014 by the (never home)makers
All content on this blog is copyrighted.

Want to publish our pics, tips, or tricks?
Contact us! [neverhomemaker@gmail.com]

We value transparency. Links on this page may contain affiliates. In addition, please see our disclosure policy regarding sponsored posts.

  © Blogger template Simple n' Sweet by Ourblogtemplates.com 2009

Back to TOP  

Blogging tips