Showing posts with label workweek. Show all posts

Weeknight Pizza Tricks

>> Thursday, May 15, 2014

As you guys know, one of our weeknight staples is pizza. I'd say we eat pizza at least twice or three times a week. So, I guess you could say somewhere in those 130 or so pies we make at home each year, we've picked up a few tricks.

Here are the top 5 for busy weeknights.


#1. Use Cornmeal


We usually make our pumpkin garlic knots crust or substitute all water for the pumpkin puree, depending on what we have in the pantry. But a trick we picked up over the years is to always roll out our dough with cornmeal. Not only does it help with transferring the dough to the pizza stone (another necessity!), but it always give the crust a nice crunch.


#2. Fold It Up


From there, transferring the dough to the pizza stone is made easy -- even without a pizza peel -- by gently folding the rolled out dough in half and then in half again. We simply place the quarter down on the stone and then unfold and reposition quickly.


#3: Get Saucy 


Since it's not tomato season, I usually cook up some type of homemade sauce using canned tomatoes. On busy weeknights when I just don't have the time, I improvise. My favorite makeshift sauce these days? A mix of half salsa and half barbecue sauce. Certainly has a nice zing to it!


#4. Top Heavily


Along with a generous heap of roasted veggies, we like topping all our homemade pizzas with cold avocado slices. Not only do the vegetables and avocado add lots of good-for-you nutrients, but they also help us justify eating pizza more often. This particular example isn't teeming with as many toppings as we usually enjoy, so if you'd like to see a better example of a loaded pizza, check out this lightened up recipe.


#5. Garnish Wisely


And with all those toppings, you need more sauce. We always have a bottle of hot sauce nearby, whether it's standard Frank's Red Hot (have you guys tried our Vegan Tofu Wings?) or spicy Sriracha.  I also like ranch dressing or even a quick side of this 5-minute tomato sauce.


// MORE TIPS + RECIPES

Brie-Stuffed Pumpkin Garlic Rolls
Pumpkin Deep Dish Pizza
Pesto Pizza Dough
Veggie-Topped Pizza, Lightened Up
Cornmeal + Flax GF Pizza Crust
Pumpkin Pesto Rolls
Like what you just read? Browse more of our posts + recipes on Pinterest. You can subscribe to the feed of these posts or follow us on Twitter or Facebook to be the first to know what the (never home)makers are up to. And we’ll love you forever!

Read more...

Lentil + Quinoa Burgers // Baby Kale Pesto

>> Thursday, February 20, 2014

I decided over the weekend that we had enough food in the fridge to skip grocery shopping this week.  I like to skip from time to time to save money and use up foods we might otherwise let go to waste. Surely I could come up with some tasty meals for us -- but (MISTAKE!) I didn't do much planning. As a result, we've had some horrible, unsatisfying dinners this week.

Like one night we were going to do breakfast for dinner. We both like our eggs over-easy and only 1 of the 4 eggs didn't break into a hot mess on the stove. And then one night I was grumpy and hadn't eaten well all day, so I made myself a pitiful grilled cheese with a bruised apple on the side. Another night, we got takeout and the takeout place forgot half our order.

Here's how I made up for it last night:


CURRIED LENTIL + QUINOA BURGERS
makes 10-12 generously sized burgers

What You'll Need . . . 

  • 1 cup red lentils (uncooked) + 2 cups water
  • 1/4 cup red quinoa (uncooked) + 3/4 cup water
  • 1 can white beans (or any, really), drained + rinsed + mashed
  • 1 small white onion, chopped
  • 1 small green pepper, chopped
  • 2 large white mushrooms, chopped
  • 1/2 cup nutritional yeast
  • 1/2 cup dry roasted almonds, pulsed into coarse flour
  • 1/2 cup golden flax meal
  • salt + pepper, to taste
  • 1 tablespoon curry powder

Method . . .

  1. Cook your red lentils (or any lentils) in the water until softened. Like 30-45 minutes or so. Do the same with the quinoa, but it only takes around 15 minutes. For both, simply put in the water and boil until water is absorbed. Then combine the two and set aside.
  2. Smash your beans with a fork and set aside with your pot of lentils + quinoa.
  3. Then in a large pot over medium-high heat, sauté your onion, pepper, and mushrooms with some olive oil. Long enough to soften and lightly brown them. The smaller you chop the veggies the better.
  4. Let everything cool a bit until it's warm, but not too hot to handle. Then combine everything together by hand until well mixed.
  5. Divide into 10-12 patties -- I used a 1/2 cup measure to scoop the to-be "burgers" into my palm and then shaped/flattened them.
  6. Place on a plate or cookie sheet and put in your fridge for around an hour to set.
  7. Then in a pan over medium-high heat, cook on each side in a little olive oil until golden brown and warmed the whole way through.
  8. You may also follow the directions in my Freezer Veggie Burgers post to freeze some of this batch for later consumption.

// FIXINGS

  • I topped each burger with a slice of cheese and let melt for a few minutes by covering the pan I fried in the burgers in with a lid.
  • Sriracha. Enough said.
  • I made my own buns (6 of them in all) in just 40 minutes by adapting this easy bun recipe -- instead of an egg, I used 1 tablespoon golden flax meal + 3 tablespoons hot water. Instead of regular flour, I used mostly whole wheat with a little white mixed in.
  • I also topped with some homemade pesto, using a variation of our simple Spinach Pesto recipe, as I'll detail below.

// BABY KALE PESTO

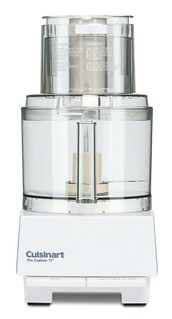
Combine the following ingredients in your food processor until smooth.

  • 2 (heaping) cups fresh baby kale
  • 1/2 cup almond meal
  • 1/4 cup Parmesan cheese or nutritional yeast
  • 3-4 cloves garlic
  • 1/4 cup olive oil
  • 1-2 tablespoons fresh lemon juice
  • salt + pepper, to taste
  • Water -- to achieve desired consistency

I plan to freeze some burgers for a future night when we're stuck wondering what to make. I love that this burger doesn't have flour in it to make up the bulk -- you get enough flour with the bun, right? And it's easily adaptable to whatever's on hand.

Like I said, we didn't shop this week, so I dug deep into our cupboard to mix these guys up. I'm sure they'd taste great with black beans, and any color quinoa or lentils under the rainbow. The taste and theme could be considerably changed by exchanging, say, curry for chipotle seasoning, etc.

Quite a redemption dinner!

// MORE SANDWICHES + BURGERS:
* means VEGAN

Like what you just read? Browse more of our posts + recipes on Pinterest. You can subscribe to the feed of these posts or follow us on Twitter or Facebook to be the first to know what the (never home)makers are up to. And we’ll love you forever!

Read more...

Tangy Roasted Veggies

>> Wednesday, June 12, 2013

I'll have that food blogger rant for you soon. Promise. But today I wanted to share a quick way to jazz up a simple meal. Simple because our weeknight dinners are far from culinary masterpieces, but they're tasty anyway. I mean who has time to really COOK during the week?

I roast a lot. (A LOT!) It can get boring.

So, here's something fun:


Chop up sweet potatoes, bell peppers, onions, garlic . . . and apple chunks, too.

(I peeled the sweet potato and apple, but you don't necessarily have to.)


And instead of drizzling with olive oil + salt + pepper, which you can do but = boring, take your favorite barbeque sauce (1/4 cup) and add to it a tablespoon olive oil + 2 tablespoons coconut milk + even a glug of hard cider. Maybe 2 glugs, actually.

Roast for around 40 minutes on 400 degrees F, stirring every 10-15 minutes until browned.

Why? It makes the veggies tender and gives them a tangy flavor.


Really delicious on the side of this (strange and horribly photographed on my iPhone, I know, I know) meal we had last night: Grilled cheese, eggs, and those veggies with avocado.

What's your favorite way to transform a simple side dish?
Any good sauces to share?
And do you agree that avocado makes everything better?
Please say YES!

Like what you just read? Browse more of our posts + recipes on Pinterest. You can subscribe to the feed of these posts or follow us on Twitter or Facebook to be the first to know what the (never home)makers are up to. And we’ll love you forever!

Read more...

Skillet-Baked Cappellini Pomodoro

>> Monday, June 3, 2013

In the vast + deep sea of other food bloggers you follow, you probably haven't noticed that I never post pasta recipes. Like ever. And that's because . . . I hate pasta. Sort of. Obviously, I'm more of a pizza girl. Or calzones. Sometimes ravioli.

Cappellini, too, is quite nice when done up the right way.


Maybe it's because until the last five years, the bulk of my "authentic" exposure to Italian pastas was through Olive Garden. Now we live in an area with undeniably amazing + REAL Italian cuisine, so I suppose I need to start giving their homemade noodles a try.

This recipe can be made at home in around half an hour.

Here's how:


I'd do an old-school animated GIF circa (never)homemaker 2010.
 

But the image resolution sucks. So, you're stuck scrolling . . .


Almost there!


SKILLET-BAKED CAPPELLINI POMODORO 
just a fancy way of writing thin spaghetti w/ tomato sauce

What you'll need . . .

  • A good-sized skillet
  • 1-1/2 cups tomato sauce (I used our Boozy + Bold Chunky Sauce)
  • 1/2 package of cappellini pasta (uncooked)
  • 1 onion, sliced and browned in olive oil atop the stove
  • Drops of low-fat ricotta
  • Sprinkles of mozzarella cheese
  • Salt, pepper to taste
  • Tablespoon olive oil

Method . . . 

  1. Preheat your oven to 350 degrees F. Drizzle the bottom of your skillet (this skillet is the one I used) with olive oil. Break the cappellini in half by snapping it and arrange at the bottom of the pan.
  2. Make your tomato sauce or use your favorite store brand.
  3. After you've browned your onions over medium-high heat, arrange them atop the pasta.
  4. Then spread the sauce. You may use more or less sauce, depending on your taste for it. I know some people like LOTS and others just a little. You'll need to cover all the pasta, though, for the moisture to cook the noodles.
  5. Then scatter your dollops of ricotta and sprinkle with some mozzarella.
  6. Place in the oven for 30-40 minutes, until cheese is lightly browned + bubbly.
  7. Let cool before serving.

I couldn't find a more creative way to photograph the finished product. Or maybe after a while I couldn't stop scooping my fork into the pan and taking big bites. But the result is an al dente + chewy pasta underneath that thick blanket of cheese and sauce. Delicious. And super easy for a week-night meal.

What's for dinner tonight at your house?

Like what you just read? Browse more of our posts + recipes on Pinterest. You can subscribe to the feed of these posts or follow us on Twitter or Facebook to be the first to know what the (never home)makers are up to. And we’ll love you forever!

Read more...

Cranberry-Hazelnut Crunch Oatmeal: Plan B Lunch on the Go

>> Thursday, February 18, 2010


You may remember our post on how to cut back on work-week spending. And one of my favorite (and, well, the number one) tips was to BRING YOUR LUNCH. Let's review that information again:

Tip #1: Bring your lunch!!! Yes, it's extra work. Yes, it's more fun to go out. But spending over $4.00 on a sandwich you could easily make for a fraction of the cost (and knowing how fresh the ingredients are) is sheer insanity! Moreover, if you have a daily chocolate habit like mine, you could be adding 250 (or more) calories to your diet that can likely be classified as I'm-bored food. That's 2.5 extra miles on the treadmill, people! Save yourself and bring your own apples and peanut butter. Or if you absolutely have to have something sinful -- pack a homemade cookie.
My coconut chocolate chippers travel well. I'm just sayin'.

Here's a tip to make it green: Invest in a bento-style lunch box (like the Laptop Lunch Box -- I scored one this past weekend for $20) and you can transport your foods -- like Stephen's bulgar wheat salad -- waste-free everyday. It'll pay itself off in time when you stop buying Ziploc and paper bags. Plus, it's exciting to see all your food laid out in cute containers.


Oh, the best laid plans . . . I was doing so well until about a month ago. Then my daily trips to the coffee kiosk started again, and so did all my cash. I don't know why exactly I stopped making time in my evenings for lunch prep. But it happens to the best of us, which is why I've come up with a Plan B of sorts: Keep food on hand at work. From a health standpoint, I need to be careful with how bountiful a loot I choose fill my drawers. I tend to eat whatever is in sight.

This got me thinking: Those instant oatmeal packets are not only a quick and easy way to get a warm meal on the go -- they're also relatively healthy if you get the right kind. And you don't typically want to munch on them without proper cooking, which makes eating too many of them a non-issue. But that isn't good enough for me. They're usually a bit too small for my appetite. Stephen found the answer.

MAKE YOUR OWN! Not only is our new favorite lunch Plan B healthier than the store-bought variety -- it's also packed with far more tasty stuff, catered to our own unique taste. So, try out this recipe for the (never home)maker instant oatmeal "pack" -- and if you like it, double it, triple it, quadruple it, whatever . . . and you can fill an old oat container with the stuff, throw in a 3/4 cup scoop, and never feel stuck buying expensive crap-food at lunch when you forget to pack.


Cranberry-Hazelnut Crunch Oatmeal

What you'll need . . . (to make three heaping 3/4 cup --dry -- servings)
  • 3/4 cup instant oats
  • 3/4 cup rolled oats
  • 1 to 2 tablespoons date sugar (or raw sugar)
  • 1/4 cup flax meal
  • 1/2 teaspoon cinnamon
  • 1/2 cup coconut flakes
  • 1/2 cup dried cranberries
  • 1/2 cup crushed hazelnuts (or walnuts, etc.)

Method . . .
  1. Combine all ingredients. Mix well. I found it was easy to put them in a container and just shake.
  2. Portion out heaping 3/4 cup scoops of the stuff into baggies or containers . . . and if you choose to make way more, think of stashing it all in an old oat container with a scoop.
  3. To make on the go -- just add water! About 1-1/2 cups of the hot stuff will do it. Or add cold water and microwave on high for1 to 2 minutes. Then mix and enjoy.

So, the next time you're scraping pennies together to buy a Snickers bar from the vending machine: Think about making this stuff. Great for future low points (and we all have them -- I'll be the first to admit) . . . it'll help fill you up, sustain your energy, and the different combinations you can create are endless. The next one I shake together will definitely have some chocolate in it. Maybe walnuts. Etc.

Like what you just read? You can subscribe to the feed of these posts or follow us on Twitter or Facebook to be the first to know what the (never home)makers are up to. And we’ll love you forever!

Read more...

Crock Pot Meals: FAQ Response

>> Thursday, January 28, 2010


The question: Do you guys have any good recommendations for prepare-in-advance and/or crock pot meals? I often have some free time in the morning and less in the evening, so I'm all about getting dinner ready in advance!

We love our crock pot. Especially when we were training for the marathon, we used it to make soups and other meals at least once a week. Here's my original post (from the METHOD archives) about this juicy, slow cooker vegetable curry.

This week has indeed been an experiment of how to get the most variety of healthy foods into my diet. I've found that using our slow cooker has (tremendously) helped me achieve success with this quest. It all started on Sunday, after I ran my weekly long run. I mused for those 2+ hours about how I'll ever be able to run 26.2 miles. I wasn't concerned cardiovascular-ly, really, because I'm devoting so much of my time and energy to that aspect. More nutritionally, I'm lacking these days. My diet has consisted mostly of white bread and cheese because I've become incredibly lazy (OK, and busy with work, tired with aforementioned running, etc.). So, Monday morning, I took charge -- throwing a rainbow of vegetables into the slow-cooker pot . . . seasoned it all with some spices and vegetable stock to make a soup that has lasted for lunches all week.

Tuesday, I made the vegetable curry (above) . . . and it stretched out to two dinner for us!

I've also discovered through all this veggie-love that I heart cauliflower. I don't know why exactly -- I always figured the white stuff was devoid of nutrition. But I was wrong, and if you'd like more information on why you should be eating cauliflower, just click here.


And here's what you'll need . . .
  • Slow cooker/crock pot
  • 2 medium-large sweet potatoes, skinned and cubed
  • 2 cups cauliflower, chopped
  • 1-1/2 cup frozen or fresh peas
  • 1 package veggie Chik'n Strips (optional, but highly recommended)
  • 1 cup vegetable stock
  • 1 cup coconut milk (I used light)]
  • 1 teaspoon raw sugar
  • 1 teaspoon crushed garlic
  • 1 small jalapeno, finely chopped
  • Bunch of cilantro, chopped
  • 1/4 teaspoon turmeric powder
  • 2 teaspoons curry powder
  • Soy milk (optional, see below)


Method . . .
  1. Place the cubed sweet potatoes, chopped cauliflower, and peas in the slow cooker.
  2. In a medium-sized bowl, combine the vegetable stock, coconut milk, sugar, garlic, jalapeno, cilantro, turmeric and curry powders.
  3. Pour this mixture over the veggies and mix around a bit to coat.
  4. Turn the slow-cooker on the LOW setting and cook for 4 to 5 hours. If you're in a pinch and would rather wait only 2 to 3 hours, you may use the HIGH setting. However, I've read that that makes it all a bit more mushy.
  5. You may find that you want more liquid in the pot. If so, feel free to add splashes of soy milk as desired. However, note that the veggies will cook down.
  6. If you plan to eat the meal the day you make it -- once it is ready, add the Chik'n Strips and heat until they are warm. I decided to add these last so they didn't get too soft. And, actually, we ate ours the next day . . . so I poured the vegetable curry into a big pot, heated it up again (on the stove) and THEN added the Chik'n strips.
  7. Serve with naan (recipe coming later today!)

Like what you just read? You can subscribe to the feed of these posts or follow us on Twitter or Facebook to be the first to know what the (never home)makers are up to. And we’ll love you forever!

Read more...

Cut Back on Workweek Spending: It's as Easy as Making PB&J

>> Wednesday, December 9, 2009


Along with the no-new clothes challenge, monthly FREEKENDs, more carefully examining our grocery bill, and getting creative with gift giving, we've been watching what we eat -- specifically while at work. Those daily coffees and sandwiches are sneaky, and they really add up. Fast.

In fact, when I did an audit of my work-week food habits, I uncovered that I was spending nearly $10 a day! If you can do simple multiplication (it's one of the few math skills I've retained, thank goodness), that's a $50 a week habit. It's plain outrageous and shows much laziness on my part.

What did I spend it on? Well, working on a college campus has its perks and its pitfalls.

  • Perk: Multiple coffee shop-like establishments -- including one located in my very own building.
  • Pitfall: Yep, just re-read that last bullet minus the "perk" part.

At said food service location, I'd purchase a morning soy chai ($3.50) because I'd often skip breakfast (GASP! I know). At lunch, a quick trip across the quad to the food court to buy a sandwich ($4.00+) -- along with some type of chocolate ($1.50) at the campus store. I realized my daily trips to this store prompted me to buy other things like magazines and other whatnots. Whipping out my debit card and politely refusing receipts only made matters worse.

So, I've changed my ways . . . and if you're a big spender like me, you should too!


Tip #1: Bring your lunch!!! Yes, it's extra work. Yes, it's more fun to go out. But spending over $4.00 on a sandwich you could easily make for a fraction of the cost (and knowing how fresh the ingredients are) is sheer insanity! Moreover, if you have a daily chocolate habit like mine, you could be adding 250 (or more) calories to your diet that can likely be classified as I'm-bored food. That's 2.5 extra miles on the treadmill, people! Save yourself and bring your own apples and peanut butter. Or if you absolutely have to have something sinful -- pack a homemade cookie.

My coconut chocolate chippers travel well. I'm just sayin'.

Here's a tip to make it green: Invest in a bento-style lunch box (like the Laptop Lunch Box -- I scored one this past weekend for $20) and you can transport your foods -- like Stephen's bulgar wheat salad -- waste-free everyday. It'll pay itself off in time when you stop buying Ziploc and paper bags. Plus, it's exciting to see all your food laid out in cute containers.


Tip #2: Keep a mug at your desk. As well as packets of instant hot chocolate, tea, or even instant coffee. A package of my favorite tea -- Red Zinger -- is less than $3.50 for 20 bags. To get just one at the cafe? $1.75. Again . . . you do the math. And you can easily make use of the hot water tab on your water cooler. Or heat up tap water in the office microwave.

Maybe your coworkers has a coffee club -- which is definitely cheaper than buying your own day after day -- join in! Where Stephen works, the only requirement is that he buy a canister of coffee (maybe $5 or $6) basically once a year (they would all rotate). A regular cup of coffee out in the world is around $1.75.

Just HAVE to fuel your habit? If you have your own mug, at least you'll cut down on all those paper (or worse, styrofoam) cups.

Tip #3: If you must, go out for lunch rather than dinner. Maybe you're good with bringing lunch to work, but all the madness afterward (picking up kids, going to the gym, cleaning, etc.) has you stopping to pick up pizza or Chinese takeout on your way home. In this event, you may want to consider spending any time you have at night preparing dinner for the next day. Work week food habits not your problem? Save on weekends as well by following this tip. A lunch out is much less expensive on average than a dinner out. At least in our experience.

Have any tips of your own to share? We'd love to hear 'em. Just leave a comment or email us at neverhomemaker@gmail.com :)

Like what you just read? You can subscribe to the feed of these posts or follow us on Twitter to be the first to know what the (never home)makers are up to. And we’ll love you forever <3

Read more...
Related Posts Plugin for WordPress, Blogger...

About This Blog

MyFreeCopyright.com Registered & Protected

© 2009-2014 by the (never home)makers
All content on this blog is copyrighted.

Want to publish our pics, tips, or tricks?
Contact us! [neverhomemaker@gmail.com]

We value transparency. Links on this page may contain affiliates. In addition, please see our disclosure policy regarding sponsored posts.

  © Blogger template Simple n' Sweet by Ourblogtemplates.com 2009

Back to TOP  

Blogging tips