Showing posts with label sauce. Show all posts

Weeknight Pizza Tricks

>> Thursday, May 15, 2014

As you guys know, one of our weeknight staples is pizza. I'd say we eat pizza at least twice or three times a week. So, I guess you could say somewhere in those 130 or so pies we make at home each year, we've picked up a few tricks.

Here are the top 5 for busy weeknights.


#1. Use Cornmeal


We usually make our pumpkin garlic knots crust or substitute all water for the pumpkin puree, depending on what we have in the pantry. But a trick we picked up over the years is to always roll out our dough with cornmeal. Not only does it help with transferring the dough to the pizza stone (another necessity!), but it always give the crust a nice crunch.


#2. Fold It Up


From there, transferring the dough to the pizza stone is made easy -- even without a pizza peel -- by gently folding the rolled out dough in half and then in half again. We simply place the quarter down on the stone and then unfold and reposition quickly.


#3: Get Saucy 


Since it's not tomato season, I usually cook up some type of homemade sauce using canned tomatoes. On busy weeknights when I just don't have the time, I improvise. My favorite makeshift sauce these days? A mix of half salsa and half barbecue sauce. Certainly has a nice zing to it!


#4. Top Heavily


Along with a generous heap of roasted veggies, we like topping all our homemade pizzas with cold avocado slices. Not only do the vegetables and avocado add lots of good-for-you nutrients, but they also help us justify eating pizza more often. This particular example isn't teeming with as many toppings as we usually enjoy, so if you'd like to see a better example of a loaded pizza, check out this lightened up recipe.


#5. Garnish Wisely


And with all those toppings, you need more sauce. We always have a bottle of hot sauce nearby, whether it's standard Frank's Red Hot (have you guys tried our Vegan Tofu Wings?) or spicy Sriracha.  I also like ranch dressing or even a quick side of this 5-minute tomato sauce.


// MORE TIPS + RECIPES

Brie-Stuffed Pumpkin Garlic Rolls
Pumpkin Deep Dish Pizza
Pesto Pizza Dough
Veggie-Topped Pizza, Lightened Up
Cornmeal + Flax GF Pizza Crust
Pumpkin Pesto Rolls
Like what you just read? Browse more of our posts + recipes on Pinterest. You can subscribe to the feed of these posts or follow us on Twitter or Facebook to be the first to know what the (never home)makers are up to. And we’ll love you forever!

Read more...

Pesto + Avocado Sauce // Cooking Video

>> Thursday, February 27, 2014

Sauces can make or break a dish, am I right? For example, we've been making a lot of quesadillas with beans, peppers, onions, zucchini, etc. -- but without the salsa and Greek yogurt (which we use instead of buying additional sour cream to save $), it's just not as interesting.

I think you've gathered by now that pesto is my all-time favorite spread. Plus, it's so easy to make. I used to go with more complicated recipes, but over the years, I've discovered that the simpler the better.


I gave you guys a similar recipe for pesto in our Lentil + Quinoa Burgers post, except that time I had used baby kale versus spinach. Today I wanted to simplify it even more -- seriously, this recipe takes just 5 minutes to mix together and will spice up a variety of meals from burgers to pizza to pasta.

Here's how it's made -- no cooking or roasting, just blending:


// 5-MINUTE SPINACH PESTO

Combine the following ingredients in your food processor until smooth.

  • 2 (heaping) handfuls fresh spinach
  • 1/4 cup almond meal
  • 1/4 cup Parmesan cheese or nutritional yeast
  • 2 large cloves garlic
  • 1/4 cup olive oil
  • 1-2 tablespoons water
  • salt + pepper, to taste

// CREAMY AVOCADO PESTO SAUCE

Then I took half of that pesto and blended it even more with the flesh of one avocado and a few more tablespoons water until I made this creamy, alfredo-like sauce. It's great spread onto some toast or on the side with homemade quesadillas (I literally just licked some off my fingers before typing this post).

Or you can just coat a bit of pasta in it.

Maybe serve with a fried egg.

Definitely some salsa.

And Sriracha?


// GREEN PASTA WITH EGG

  • Cook pasta to the package directions. These shells boiled for 30 minutes. Then I drained and rinsed them so they cooled off a bit.
  • Then scoop a couple tablespoons of your green sauce onto them and mix around until well coated.
  • Fry an egg (or make it any style you like best) and place atop the pasta.
  • Top with salsa and Sriracha sauce, or whatever other condiments you want on there.
  • Enjoy!

Basically, this Avocado + Pesto mix is your new favorite sauce.

Period.

If you'd like to make the pesto first -- I'd even freeze half of it (so 1/2 cup of pesto for later use) by either placing it in a plastic bag and freezing flat or even putting it in an ice cube tray for smaller chunks.

OTHER PESTO RECIPES

Pumpkin Pesto Rolls
Garlic Scape + Swiss Chard Pesto, 2 Ways
Steamed Pesto Dumplings
Pesto Pizza Dough
Baby Kale Pesto
Walnut Basil Pesto
Basil-Pesto French Toast
Pesto French Toast, II -- with Avocado Butter
Pesto Quiche with Oatmeal Crust
Pesto Garlic Knots
Pesto Portabella Sandwiches
(Pesto) Smothered Mother

Like what you just read? You can subscribe to the feed of these posts or follow us on Twitter or Facebook to be the first to know what the (never home)makers are up to. And we’ll love you forever!.

Read more...

Tangy Freezer BBQ Sauce

>> Friday, August 30, 2013

I'm nearly ready to go on my big shopping date for the Vegetarian Freezer Meals I'm planning for the entire month of September. In my planning, I realized that barbeque sauce would suit a variety of the dishes I'm included in our plan well. It works as a topping for veggie burgers and even as a sweet sauce for pizza. Really. It's going to be fabulous.

And guess what! We already had several pounds of farm fresh tomatoes around. So, I did some prepping early and opted to freeze this bunch rather than can them.


SWEET + TANGY FREEZABLE BBQ SAUCE
Makes 4 to 5 pints of the stuff for slathering

What you'll need . . . 
  • 1 to 2 small chopped onion
  • 3 to 4 garlic cloves, chopped
  • 10 to 12 cups chopped tomatoes (any size/variety)
  • 1/4 to 1/3 cup brown sugar
  • 1/4 to 1/3 cup maple syrup
  • 1/3 to 1/2 cup apple cider vinegar
  • Salt and black pepper, to taste
  • 1/4 cup smoked paprika/chipotle seasoning
  • Red pepper flakes


Method . . .
  1. Chop all tomatoes and set aside. In a large stock pot over medium high heat, saute your onions/garlic until glassy. Then add the tomatoes and crank the heat a bit higher.
  2. Add the brown sugar, maple syrup, apple cider vinegar, salt, pepper, and spices. Bring to a boil and continually stir/mash until mixture thickens. About 20 minutes.
  3. Then lower the heat and let simmer for an hour, stirring occasionally. Turn off heat and let cool for a few minutes.
  4. And then blend in a food processor or blender. (We used our beloved Ninja Blender + I did this process in two batches.)
  5. Return mixture to pot and simmer over medium/low heat for another 30 minutes to an hour, depending on how you'd like the consistency. (The longer you cook, the thicker it gets.)
  6. Take stock of the flavor at this point and make any modifications accordingly. Add any sugar/spices/etc. at just 1 tablespoon at a time (or less, depending).
  7. Fill pint jars, leaving 3/4 inch of space for freezing. Bring jars down to room temperature and refrigerate overnight before placing in your freezer (covered well so no air can get in). Stays good for up to 1 year. (In the fridge, use in a week or so.)

So stay tuned for my menu guide for freezer month, along with recipes for this whole thing. Many of you said you've tried this method, but that a whole month is a bit intense (both on the cooking/cleaning end and because it means not much cooking for a long while). I'm already tending to agree -- and I haven't even started yet.

But, then again, maybe I'll fall in love with freezer meals. Time will tell!

Happy Friday!

Like what you just read? You can subscribe to the feed of these posts or follow us on Twitter or Facebook to be the first to know what the (never home)makers are up to. And we’ll love you forever!

Read more...

10-Minute Heirloom Tomato Sauce

>> Monday, August 19, 2013

A goal I have for this blog is to simplify the foods I feature and to keep it real with regard to what we eat on a day-to-day basis. So, over the coming weeks, I'll highlight a few previously overlooked staples we have in our kitchen. Things that aren't really exciting or masterpieces on their own, but recipes that bring a lot of flavor and vibrancy to the meals we eat.

Which brings us to this delightfully simple tomato sauce, great for use on pasta or pizza or even for dipping. You don't need to use heirlooms, they're just particularly delicious and gigantic. And tomatoes can be switched out with tomatillos, too. I make sauce with whatever we get in our CSA basket.


10-Minute HEIRLOOM TOMATO SAUCE

What you'll need . . .
  • 2 very large tomatoes  (or approx 1-1/2 cups) chopped
  • Minced onion + garlic*
  • Dried or fresh herbs of choice
  • Salt + pepper
  • Red pepper flake
  • 1 tablespoon maple syrup 
  • olive oil
* You can certainly use fresh, but I keep a secret stash of dehydrated onions and garlic by Earth's Pride on hand for quick recipes like these.


Method . . . 
  1. Heat a tablespoon or more of olive oil over medium-high heat, toss all ingredients into the pan, starting with the tomatoes, onions, and garlic.
  2. The salt is important in this recipe for drawing out the moisture from the tomatoes. So, be sure to add that straight away.
  3. Add the spices slowly, though -- remember, you can always add more, but not take away. It's all to your taste, too. Feel free to omit red pepper flakes if you don't like heat or maple syrup if you don't like sweetness. Others to consider adding include oregano, thyme, basil, and even sage can be nice!
  4. Cook + stir continuously and  as moisture is released from the tomatoes, squish them down with the back of your spatula or spoon to your desired chunky consistency. 
  5. Sauce is ready after 10 minutes or less, depending on the use. For pizza, just make sure that it is thick and not watery. 
  6. For a less rustic sauce, run through your food processor until smooth. And feel free to double, triple, etc. this recipe for more sauce!

To make this pizza, flatten dough and bake at 450 for 2 to 3 minutes. Then assemble with the sauce and cheeses and bake for another 12 to 14 minutes. Until cheese is golden brown + bubbly.
  • Use half the yield of the Pumpkin Pizza Dough (we made ours with squash puree)
  • Use the sauce you just made
  • Mozzarella cheese + crumbled honey goat cheese
  • Fresh basil
If you don't have fresh tomatoes on hand, try this Boozy + Bold Sauce made with packaged tomatoes. And if you have a bit more time, try out this Grilled Kalamata Sauce, maybe with Pesto Pizza Dough. 

Monday is as great a night as any for pizza, don't you think?

Like what you just read? You can subscribe to the feed of these posts or follow us on Twitter or Facebook to be the first to know what the (never home)makers are up to. And we’ll love you forever!

Read more...

Garlic Scape + Swiss Chard Pesto, 2 Ways

>> Tuesday, June 25, 2013

It's CSA season, so our fridge is teeming with beautiful seasonal produce. So much of it, in fact, that I'm frantically trying to come up with good ways to use it all. Maybe "frantic" isn't the right word, but I hate wasting food we get from the hands of farmers we know + love.

Pesto is a favorite of mine because it's adaptable and forgiving. You can use so many different nuts, greens, and other additions to make it new and different. You can add flavor a bit at a time so it doesn't get out of control. It freezes well, too. So, though this recipe makes four 1/2 cup servings -- I kept two in the fridge for the week and sent two down to our upright freezer for safekeeping.

Bring on the greens!


GARLIC SCAPE + SWISS CHARD PESTO
// 2 ways // feel free to use other nuts, greens, or seasonings!

What you'll need . . .

(vegetarian version)

  • 5 garlic scapes, chopped
  • 1 cup swiss chard, leaves only, cut off stems
  • 1/4 cup coarsely processed almonds
  • 1/4 cup grated parmesan cheese
  • 1/4 cup olive oil
  • 1/2 lemon, juice only
  • salt + pepper, to taste

(vegan version)
  • 5 garlic scapes, chopped
  • 1 cup swiss chard, leaves only, cut off stems
  • 1/4 cup coarsely processed almonds
  • 1/4 cup nutritional yeast
  • 1/4 cup olive oil
  • 1/2 lemon, juice only
  • 1 tablespoon red pepper flakes
  • 1 teaspoon smoked paprika
  • salt, to taste

Method . . .
  1. Prepare all your ingredients. (Or just half if you want less or just one type of pesto.) The great thing with this recipe versus some of my others? You don't need to cook anything.
  2. Make your first batch by tossing all the ingredients (except the salt, pepper, and other seasonings) into a food processor and pulsing until you reach your desired consistency. I left this pesto pretty chunky because we're going to be using it on pasta and on pizza -- if you're like it drippier, add more olive oil, 1 tablespoon at a time.
  3. Set aside + repeat same process with other pesto ingredients, from start to finish.
  4. Then divide your finished pesto into two portions each and store in airtight containers. (Alternatively, you can place in freezer bags and freeze for up to 6 months or more.) 


MORE THINGS PESTO:

Pumpkin Pesto Rolls
Spinach Pesto
Vegan Walnut Pesto
Basil-Pesto French Toast
Pesto French Toast, II -- with Avocado Butter
Pesto Quiche with Oatmeal Crust
Pesto Garlic Knots
Pesto Portabella Sandwiches
(Pesto) Smothered Mother

Like what you just read? Browse more of our posts + recipes on Pinterest. You can subscribe to the feed of these posts or follow us on Twitter or Facebook to be the first to know what the (never home)makers are up to. And we’ll love you forever!

Read more...

Tangy Roasted Veggies

>> Wednesday, June 12, 2013

I'll have that food blogger rant for you soon. Promise. But today I wanted to share a quick way to jazz up a simple meal. Simple because our weeknight dinners are far from culinary masterpieces, but they're tasty anyway. I mean who has time to really COOK during the week?

I roast a lot. (A LOT!) It can get boring.

So, here's something fun:


Chop up sweet potatoes, bell peppers, onions, garlic . . . and apple chunks, too.

(I peeled the sweet potato and apple, but you don't necessarily have to.)


And instead of drizzling with olive oil + salt + pepper, which you can do but = boring, take your favorite barbeque sauce (1/4 cup) and add to it a tablespoon olive oil + 2 tablespoons coconut milk + even a glug of hard cider. Maybe 2 glugs, actually.

Roast for around 40 minutes on 400 degrees F, stirring every 10-15 minutes until browned.

Why? It makes the veggies tender and gives them a tangy flavor.


Really delicious on the side of this (strange and horribly photographed on my iPhone, I know, I know) meal we had last night: Grilled cheese, eggs, and those veggies with avocado.

What's your favorite way to transform a simple side dish?
Any good sauces to share?
And do you agree that avocado makes everything better?
Please say YES!

Like what you just read? Browse more of our posts + recipes on Pinterest. You can subscribe to the feed of these posts or follow us on Twitter or Facebook to be the first to know what the (never home)makers are up to. And we’ll love you forever!

Read more...

Skillet-Baked Cappellini Pomodoro

>> Monday, June 3, 2013

In the vast + deep sea of other food bloggers you follow, you probably haven't noticed that I never post pasta recipes. Like ever. And that's because . . . I hate pasta. Sort of. Obviously, I'm more of a pizza girl. Or calzones. Sometimes ravioli.

Cappellini, too, is quite nice when done up the right way.


Maybe it's because until the last five years, the bulk of my "authentic" exposure to Italian pastas was through Olive Garden. Now we live in an area with undeniably amazing + REAL Italian cuisine, so I suppose I need to start giving their homemade noodles a try.

This recipe can be made at home in around half an hour.

Here's how:


I'd do an old-school animated GIF circa (never)homemaker 2010.
 

But the image resolution sucks. So, you're stuck scrolling . . .


Almost there!


SKILLET-BAKED CAPPELLINI POMODORO 
just a fancy way of writing thin spaghetti w/ tomato sauce

What you'll need . . .

  • A good-sized skillet
  • 1-1/2 cups tomato sauce (I used our Boozy + Bold Chunky Sauce)
  • 1/2 package of cappellini pasta (uncooked)
  • 1 onion, sliced and browned in olive oil atop the stove
  • Drops of low-fat ricotta
  • Sprinkles of mozzarella cheese
  • Salt, pepper to taste
  • Tablespoon olive oil

Method . . . 

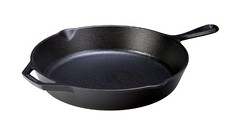
  1. Preheat your oven to 350 degrees F. Drizzle the bottom of your skillet (this skillet is the one I used) with olive oil. Break the cappellini in half by snapping it and arrange at the bottom of the pan.
  2. Make your tomato sauce or use your favorite store brand.
  3. After you've browned your onions over medium-high heat, arrange them atop the pasta.
  4. Then spread the sauce. You may use more or less sauce, depending on your taste for it. I know some people like LOTS and others just a little. You'll need to cover all the pasta, though, for the moisture to cook the noodles.
  5. Then scatter your dollops of ricotta and sprinkle with some mozzarella.
  6. Place in the oven for 30-40 minutes, until cheese is lightly browned + bubbly.
  7. Let cool before serving.

I couldn't find a more creative way to photograph the finished product. Or maybe after a while I couldn't stop scooping my fork into the pan and taking big bites. But the result is an al dente + chewy pasta underneath that thick blanket of cheese and sauce. Delicious. And super easy for a week-night meal.

What's for dinner tonight at your house?

Like what you just read? Browse more of our posts + recipes on Pinterest. You can subscribe to the feed of these posts or follow us on Twitter or Facebook to be the first to know what the (never home)makers are up to. And we’ll love you forever!

Read more...

Butternut Squash Pizza Sauce

>> Monday, February 18, 2013


We ran out of tomato puree and all other canned tomato products last week. But Pizza Thursday had to go on! Instead of heading to the store, I thought I'd venture around the kitchen and find a suitable replacement.

And now I don't know if I'll use tomatoes for a while because this is way too good!


BUTTERNUT SQUASH PIZZA SAUCE 
enough for two large homemade pizzas -- or even pasta

What you'll need . . . 

  • 16 ounces butternut squash puree (ours was frozen from the fall)
  • 2 tablespoons olive oil
  • 2 cloves garlic, minced
  • 1 tablespoon Italian seasoning (a dry blend is what I used)
  • 1/2 cup water
  • 1/4 cup white wine ($4 Pinot Grigio, baby!)
  • 1/4 cup grated Parmesan cheese
  • salt and pepper  
NOTE: 

You can feel free to use nutritional yeast in place of Parmesan. For the wine, you can just use water, but I'd suggest playing around with vinegars, etc. because it adds great flavor to this recipe. Most of the alcohol cooks off anyway!

Method . . . 

  1. Thaw the puree if you are using frozen. 
  2. In the meantime, pour the olive oil into a medium pot over medium-high heat and saute the garlic for a few minutes. Until fragrant.
  3. Then add in the puree and cook for a few minutes more, stirring constantly.
  4. Continue by adding the water and white wine. Let it incorporate fully in before adding the Parmesan cheese.
  5. Season with the Italian seasoning and salt and pepper to taste and cook for about 10 more minutes to let the flavors mingle, fall in love, if you will.
  6. Add more liquid depending on how you'd like the texture. We had our spread rather thick.
  7. Store for up to a week in the fridge or freeze.
// To use:

Mix up your favorite pizza dough recipe + let it rise -- we actually made the Pumpkin Garlic Knots but replaced the canned pumpkin with homemade applesauce for a sweeter crust.

We always bake our pizza at 425 degrees F with a pizza stone preheating first. Then we spread the plain crust onto the stone and bake one side for 4 to 5 minutes, flip over, and then add the sauce + toppings.

A mix of mozzarella and cheddar 50/50 worked well with the flavors in the sauce and crust. But feel free to experiment or even go dairy-free with lots of roasted veggies and avocado.

Bake until cheese is browned and bubbly. 12 to 15 minutes.


Have you made pizza without tomato sauce? I love white pizza best, actually. Pesto pizza, too! This was a nice change of pace. We'd love some more suggestions for our favorite dinner of the week!

And PS: I made a HUGE batch of Homemade Freezer Waffles this morning. Take a look!


Hope you all had a great weekend. And if you want to check out Writing Chapter Three, you can see Ada's first haircut. That I gave her am still giving her!

Like what you just read? You can subscribe to the feed of these posts or follow us on Twitter or Facebook to be the first to know what the (never home)makers are up to. And we’ll love you forever!

Read more...

Organization, Shoes, and Sauce

>> Monday, November 12, 2012


This is what our house looked like over much of the weekend. Now, I know I said it was messy, but I'm sorry to disappoint you. It wasn't THIS bad all along. This is just how it looked while we organized.

We pulled everything out of the cupboards. I mean e.v.e.r.y.t.h.i.n.g.


I found many bulk mystery flours and other unidentified things. I used to label and date stuff, but lost my way this past year. What I've decided for both a cleaner kitchen and tighter budget is to stop buying exotic ingredients. For example, having bread flour, white flour, and wheat flour is more than enough.

We'll see how long this "rule" lasts. I've been known to get far too excited about food, toting home some new and weird thing to cook or bake with, only to leave it unused for years. Waste. What a bad habit!

Onto much-needed new shoes . . .


It's been a good 7 months since I've bought sneakers, and it was definitely time. Notice anything strange in this photo? Probably not. It's such a minute difference, even I didn't detect anything was off until we got into the car.

First: I decided to go with the Nike FREE 4.0s -- a slightly more minimal version than the Nike Run + 3.0s I've been sporting for the past several years. I'll be sure to review them once I get in some miles and see if there's any significant difference.

(My prediction? No major change).


Anyway, I wear an 8.5. While trying them on, I remember that the right shoe felt slightly snugger than the left. I figured it was because the anti-theft buzzer was on my right foot. I must have been blinded by my love for the magenta color because I ended up buying two different sizes!

(Strangely enough, this is the second time I've come home from shoe shopping with two different sizes. I have no idea why I didn't check before buying. In a rush, I guess.)

I plan to take them back tomorrow and actually buy them again, but online. I found a much better deal at Running Warehouse, where membership to our local runners club means an extra 15% off. I don't know why I didn't just do that to begin with!

Now onto one of my worst food photos ever.


I'll blame it on the iPhone. But really, I can't take a good photo of eggs no matter what camera I'm using. Just don't look at the eggs. Focus on the sweet potatoes. I made the Miso-Tahini Sauce featured on Emily's blog finally over the weekend. I am hooked.

Go make it. NOW! We have a whole jar full of it ready for dribbling and dipping this week. Ada's BIRTHDAY week, by the way. The girl took her first steps yesterday. You can read about them -- as well as the rest of our weekend -- on Writing Chapter Three.

Like what you just read? You can subscribe to the feed of these posts or follow us on Twitter or Facebook to be the first to know what the (never home)makers are up to. And we’ll love you forever!

Read more...
Related Posts Plugin for WordPress, Blogger...

About This Blog

MyFreeCopyright.com Registered & Protected

© 2009-2014 by the (never home)makers
All content on this blog is copyrighted.

Want to publish our pics, tips, or tricks?
Contact us! [neverhomemaker@gmail.com]

We value transparency. Links on this page may contain affiliates. In addition, please see our disclosure policy regarding sponsored posts.

  © Blogger template Simple n' Sweet by Ourblogtemplates.com 2009

Back to TOP  

Blogging tips