Showing posts with label puree. Show all posts

Pumpkin Pizza Dough

>> Tuesday, February 3, 2015

I’ve been making pumpkin pizza crust for years. So long, in fact, that my favorite recipe has changed from this first time I posted it in 2010. If you make pizza often from home (like we do), this crust will help health it up a bit. It’s also way tastier than plain pizza crust. And you can use it for far more than just pies. Think garlic knots, rolls, calzones, etc.

All with this simple 5-ingredient recipe.

And don’t miss the secret below!
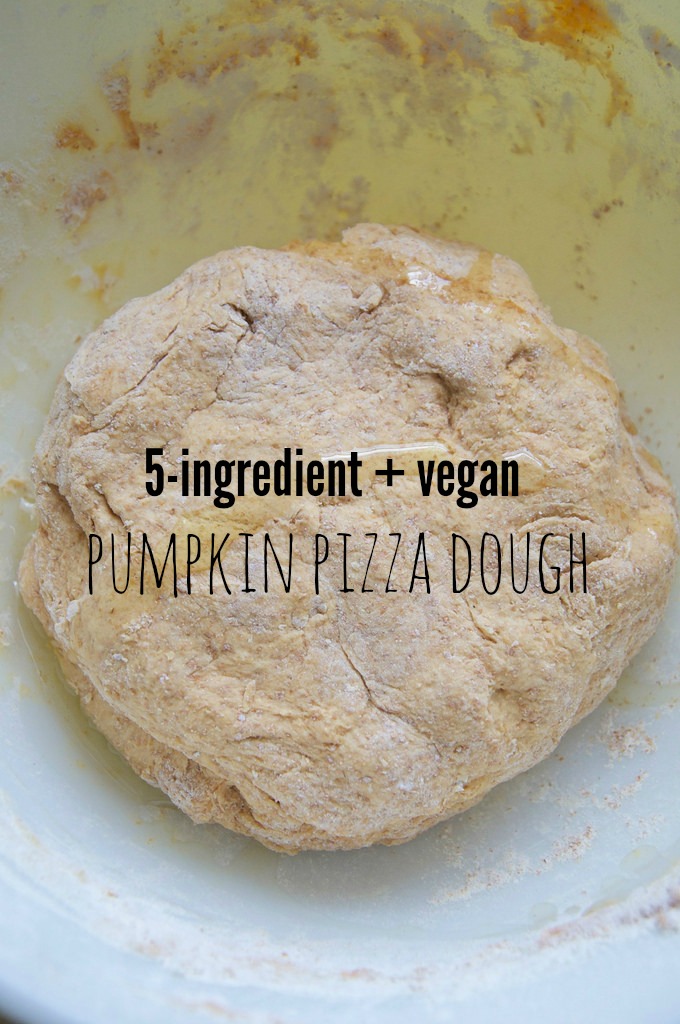

PUMPKIN PIZZA DOUGH


What you'll need . . .
  • 1 cup warm water
  • 2-1/4 teaspoons active dry yeast
  • 2 tablespoon pure maple syrup
  • 3 tablespoons olive oil
  • 1/2 cup canned pumpkin
  • 3-1/2 cups unbleached bread flour*
  • 1-1/2 teaspoons coarse kosher salt
* These days I often do a mix of half bread flour, half whole wheat flour. It gives the crust a hearty texture. Sometimes I’ll roll in a little cornmeal before baking, too.

Method . . . 
  1. In a small bowl, whisk together your warm water and active dry yeast. Let sit until frothy -- around 5-10 minutes. Pour in the maple syrup, olive oil, and pumpkin puree and mix again.
  2. In a large bowl, combine 3 cups of flour with your salt. Create a small well in the center using your fist.
  3. Pour your wet ingredients into the well and use a spatula to bring everything together. When you can no longer mix that way, use your hands to knead -- adding the final 1/2+ cup of flour until you form an elastic dough.
  4. Return dough to the large bowl and drizzle with more olive oil. Cover with plastic wrap or a wet tea towel and let rise for 2 hours, until doubled in size.

RECIPES


Oven Baked Pizza:

This method is a little different from what you might be used to. Now, the recipe yields enough dough for two large pizzas. We bake ours on a pizza stone by preheating the oven (with stone inside) to 450-500 degrees F.  When we’re ready to bake, we take the stone out of the oven, place the crust on top and spread with sauce, sprinkle with cheese, etc. Before placing the pizza back in the oven, we turn it to broil and then broil the pizza on the middle rack for 7-10 minutes, until browned and bubbly.

Seriously, if you bake pizza at home and don’t have a stone, pick one up! (This one costs a little over $16) We’ve been using the same one since we got married in 2007. We do our pizza on it, of course, but also most of our baking of garlic knots, biscuits, sweet potato fries, etc. I feel like I could dedicate a whole post to the pizza stone, and maybe I will.

You can also use this dough in these recipes:

Pumpkin Garlic Knots
Pumpkin Pesto Rolls -- my personal favorite
Brie-Stuffed Pumpkin Pesto Rolls
Gourmet Grilled Pizza
Homemade DP Dough Calzone


THE SECRET


And here’s the coolest part about this recipe: You can basically substitute in ANY kind of puree in for the pumpkin. Trust me and try it. I’ve made Beet Pizza Dough, Pesto Pizza Dough, and even Garbanzo Pizza Dough -- all by using similar ratios + this recipe as a jumping off point.

Have you tried pumpkin pizza dough? 

Like what you just read? You can subscribe to the feed of these posts or follow us on Twitter or Facebook to be the first to know what the (never home)makers are up to. And we’ll love you forever!

Read more...

Ultimate Pumpkin Guide + Recipes

>> Tuesday, October 7, 2014

So, after the Ultimate Apple Guide + 15 Recipes, you know I was just chomping at the bit to get you the same thing for all our pumpkin recipes. I’m sure you’re bombarded with pumpkin this time of year. But even when it’s not in season, pumpkin is a super healthy addition to your diet -- here’s more about pumpkin nutrition and other benefits for runners.

Time for food!


// Recipes


// DIY Puree


Picking up cans of pumpkin at the store is surely quick and convenient. But making your own puree at home is easier than you might think. Visit this post for the full DIY tutorial with photos + instructions.


In short: Preheat oven to 350 degrees F. Clean your pumpkin and chop in half. Roast face down on parchment atop a cookie sheet for around 45 minutes. Then scoop out the seeds and process in your food processor until smooth. Add a little water to achieve desired texture.

What’s your favorite pumpkin recipe? 

And have you tried any of the ones above?

Like what you just read? You can subscribe to the feed of these posts or follow us on Twitter or Facebook to be the first to know what the (never home)makers are up to. And we’ll love you forever!

Read more...

Try It // Black Bean + Carrot Brownies

>> Wednesday, April 9, 2014

This recipe! As I wrote earlier this week, it's sort of like these healthy Carrot Brownie Bites meet these Red Velvet Black Bean Brownies. And they have a protein-rich, vegan baby. Which actually reminds me to address a question I often get: "You're not vegan, so why do you bake mostly vegan goods?"

Totally curious, I understand.

So, no. I'm not vegan, but I do make an effort to eat a primarily plants-based diet. I also spent the bulk of my "formative" years learning how to cook and bake as a vegan; it's just what I know how to do. When it comes to cookies, cakes, etc. and baking sans eggs -- it also has a lot to do with taste. I can usually faintly taste eggs in something, and though I love eggs . . . baking does something odd to the flavor -- at least for my palate. It's as simple as that.

So, this is a long introduction to these vegan brownies. I've had great success baking black bean brownies over more traditional varieties for some reason (and following the strict instructions for this INCREDIBLE batch). Why fix it if it's broken? I whipped up this batch the other day when I was trying to come up with something sweet that Ada could eat. Then I ended up eating almost the entire lot myself.


// BLACK BEAN + CARROT BROWNIES
Makes 12 delicious, vegan brownies with hidden health benefits!

What you'll need . . .

  • 1 cup black beans, drained + rinsed 
  • 1/3 cup pureed carrots*
  • 1/3 cup maple syrup 
  • 3 tablespoons olive or canola oil
  • 2 tablespoons smooth peanut butter 
  • 1 tablespoons vanilla extract 
  • 1/3 cup unsweetened cocoa powder
  • 1/2 cup + 1-2 tablespoons whole wheat flour 
  • 1 tablespoon baking powder 
  • 2 handfuls chocolate chips semi-sweet
  • Handful of nuts, if you want more protein!

Method . . . 

  1. Preheat your oven to 350 degrees F. Lightly grease a standard muffin tin and set aside.
  2. In a food processor or blender, combine the black beans, carrot puree, maple syrup, oil, peanut butter, cocoa powder, and vanilla extract.
  3. In another bowl, whisk together the whole wheat flour and baking powder.
  4. Then add the wet ingredients to the dry (should get really fluffy and a bit stiff). Then fold in the chocolate chips -- do no over-mix.
  5. Spoon by big heaping tablespoons and divide evenly among the 12 muffin tin slots. Then with slightly moistened fingertips, press the tops to flatten.
  6. Bake for 15-20+ minutes, until slightly pulling away from pan at edges and set in the middle.
  7. Let cool before eating (the flavor develops better after cooling).
  8. Store in an air-tight bag or container in your fridge for up to a week.
* To make carrot puree, wash and scrub a couple medium to large carrots and chop off ends. Then chop into smaller pieces and either steam or boil until soft. Puree in a food processor or blender until smooth with a tablespoons or three of water. You could also use store-bought pumpkin puree.


// Nutrition Info

Per brownies there are 145 calories, 19 g carbs, 7 g fat, 3 g protein, 80 mg sodium, 8 g sugar. Not too shabby in my opinion. Though these counts change depending on how many chocolate chips you use, if you include nuts, etc.

If you're looking for a way to use up that last cup of Roasted Carrot + Miso Soup, you'll want to check back for tomorrow's post. I love the mix even more in my hummus dip!

Like what you just read? Browse more of our posts + recipes on Pinterest. You can subscribe to the feed of these posts or follow us on Twitter or Facebook to be the first to know what the (never home)makers are up to. And we’ll love you forever!

Read more...

Pumpkin Rut

>> Wednesday, October 10, 2012


I've made so many different soups, stews, breads, desserts, etc. with pumpkin. In autumn, I buy a large can of it nearly every week at the grocery store. I don't even think about it, but it's there in the cart at checkout time.

I sat for a good hour trying to think of something NEW to do with pumpkin. Well, that's not all I did during said hour, but you know how it goes when something's on your mind. You carry it with you.

I decided to ask Google for some help.


I searched "ways to use canned pumpkin" and it yielded some good links:

Bon Appetit's 11 Ways to Use Canned Pumpkin
TLC's 10 Ways to Use Canned Pumpkin (Besides in a Pie)
Self.com's 4 Tasty Ways to Use Canned Pumpkin
Food Network's Leftover Canned Pumpkin 5 Ways
Momadvice.com's 8 Ways to Use Canned or Fresh Pumpkin

If you add in my Food for Runners post with 18 pumpkin recipes, I entertained 56 creative, delicious ideas. But many of these recipes -- pumpkin butter, pumpkin muffins, pumpkin bread, pumpkin smoothies, pumpkin pancakes, pumpkin cookies, etc., etc., etc. -- are sort of been-there-done-that for me.

What to do?


rolled PUMPKIN LASAGNA 
in a SMOKY PUMPKIN CHEDDAR SAUCE

What you'll need for the pasta . . . 

  • 1/2 cup walnuts
  • 1/2 cup whole wheat flour
  • 1+ cup unbleached white flour
  • Pinch salt
  • 1/2 cup pumpkin puree 
  • 1 tablespoon flax meal + 3 tablespoons hot water (= flax egg)
  • 3 tablespoons water
Method . . . 

  1. In a food processor, pulse walnuts until they become meal. Then add the flours and salt. Pulse until combined.
  2. Add in the pumpkin puree, the flax egg, and water. Mix until a dough ball is formed.
  3. Take out of processor. If dough is sticky, knead in more flour until it isn't.
  4. Let rest at room temperature for 15 to 20 minutes. 
  5. Then generously flour a work surface and roll out into a large rectangle. Cut into 8 smaller, longer lasagna rectangles (as shown below)
  6. Set aside until ready for use. 
  7. Best part: There is no need to boil noodles before baking lasagna rolls.

What you'll need for the sauce . . .

  • 2 to 3 cloves garlic, minced
  • 2 tablespoons olive oil
  • 1-1/2 cups pumpkin puree
  • 1 cup water
  • 1/2 cup almond milk (or regular milk)
  • 1 tablespoon balsamic vinegar
  • 1/4 to 1/2 cup shredded sharp cheddar cheese
  • 1 to 2 teaspoons smoked paprika
  • 1/4 to 1/2 teaspoon cayenne pepper
  • Salt and black pepper to taste

Method for sauce . . .

  1. Heat the olive oil in a sauce pan over medium heat. Add in the garlic and let cook for a couple minutes.
  2. Then add the cayenne and paprika. Mix until garlic is coated. 
  3. Add the rest of the ingredients -- all but the cheese.
  4. Once it sauce is well incorporated take off heat and stir in cheese.

What you'll need for the filling . . .

  • 1 block extra firm tofu, drained well
  • 15-ounce can of black beans, drained and rinsed
  • 1 small tomato, diced
  • Salt and pepper to taste
Method . . . 

  1. Simply crumble the tofu into a large bowl, toss with the black beans and diced tomato.
  2. Season with the salt and pepper. 
  3.  The key is making sure the tofu is as drained as possible. Otherwise you may have some soggy pasta (but it isn't terrible if that happens).

PUTTING IT ALL TOGETHER:

  1. Preheat your oven to 350 degrees F. Spritz an 8" x 8" (9" x 9" works, too) pan with some olive oil. Then pour in 1/4 to 1/3 cup of the sauce into the bottom
  2. Lay out your lasagna noodles. Spread each evenly with some sauce, making sure that you have a good 1/2 cup or more of sauce left over.
  3. Then evenly distribute the filling mixture.
  4. Starting at one end, roll the pasta and then place into your baking dish -- one right next to another.
  5. When you have finished rolling the pasta, cover with the remaining sauce.
  6. You may also choose to add a bit of shredded cheese on top. 
  7. Cover dish with foil and place in oven to 45 minutes.
  8. Then take off the foil and bake for another 15 to 20 minutes. 
  9. We actually did this and then turned off the heat and left the dish in there for another 25 minutes while we gave Ada a bath and it turned out great.

My weakness as a food photographer?

Taking photos of cooked pasta dishes. I never, ever get a good shot! The finished pumpkin pasta tastes much better than this photo would lead you to believe.


Anyway, that's how I busted out of my pumpkin rut. And not only did we have a great dinner, we still have half the food left over for tomorrow's lunch. I'll be the first to say that this recipe SEEMS long and complicated, but I assure you -- it wasn't terribly difficult. Even for a weeknight.

Also, if you'd rather use ricotta in place of tofu, that would be delicious! Alternatively, if you'd like to make this recipe vegan, omit all cheese and consider adding in some nutritional yeast for the flavor.

Have you come across any new, fun pumpkin recipes lately? I'd like to make something sweet that I haven't tried before. Hmmm.

Like what you just read? You can subscribe to the feed of these posts or follow us on Twitter or Facebook to be the first to know what the (never home)makers are up to. And we’ll love you forever!

Read more...

Healthy Brownie Bites

>> Tuesday, November 29, 2011

In addition to the Apple-Cinnamon Butternut Squash Soup and Cranberry-Persimmon Sauce we made for Thanksgiving, we served up these rich, dense brownie bites. But their texture/taste is deceiving -- they are made with a healthy dose of carrot puree!

OK. They also have a lot of chocolate and sugar in them. But I consider any addition of veggies a move in the right direction.


HEALTHY BROWNIE BITES

What you'll need . . .
  • 4 tablespoons canola oil
  • 2/3 cup unsweetened cocoa powder
  • 1/2 cup whole wheat flour
  • 1/4 teaspoon baking powder
  • 1/4 teaspoon salt
  • 1 cup sugar
  • 2/3 cup carrot puree
  • 1 egg
  • 1 1/2 teaspoons vanilla extract
  • Handful or two chocolate chips

Method . . .
  1. Preheat your oven to 350 degrees F. Lightly grease an 8 x 8 inch baking pan. Set aside.
  2. In a large bowl, whisk together the canola oil, sugar, puree, egg, and vanilla extract.
  3. In another bowl, combine the cocoa powder, flour, baking powder, and salt.
  4. Add the dry ingredients to the wet and mix until well combined. Fold in the chocolate chips.
  5. Pour batter into prepared pan and bake for 25 minutes. Final texture is very dense, moist, and fudge-y.
  6. Cut into bite-sized pieces. Or, really, in any way you like! Regardless, they'll go fast.

We're still getting into the groove over here with Baby Ada. For two people who thrive on scheduling life . . . it's been quite an adjustment. No two days are the same.

But I've been told we'll find our way eventually!


Like what you just read? You can subscribe to the feed of these posts or follow us on Twitter or Facebook to be the first to know what the (never home)makers are up to. And we’ll love you forever!

Read more...

Veggie Noodle Soup: Dinner in a Flash

>> Tuesday, December 15, 2009


I absolutely hate, hate, hate taking food photos with my flash on. But now that it's always dark when I'm at home on weekdays (and my photography skills are limited -- anyone have any tips?) . . . I'm just going to have to take at least a few awful food photos to share what I've been cooking and baking.

Thus, the DINNER IN A FLASH thing. Hah. Hah. Clever?

This soup makes use of 1 cup of the hubbard squash puree from this weekend's post. I'll admit -- at first I didn't think it was turning out very well. It smelled kind of metallic and weird. But I shouldn't even mention that! With a little salt and pepper (and cayenne pepper, my favorite), the end result was a tasty veggie noodle soup that I'm sure we'll make again on another cold winter's night.


What you'll need . . .
  • 3 cups low sodium vegetable broth (this way, you control the salt)
  • 2 cups water
  • 1 cup hubbard squash puree (or pumpkin puree would work)
  • 1/2 medium onion, diced
  • 10 fresh basil leaves, sliced
  • 1 tablespoon olive oil
  • 1 cup chopped mushrooms
  • 3 to 4 carrots -- chopped thinly
  • 1-1/2 cups tri-colored rotini pasta (or one-color -- whatever you have)
  • 1 can red kidney beans
  • 1/4 to 1/2 teaspoon cayenne pepper
  • salt and pepper to taste


Method . . .

  1. Whisk together the vegetable broth, water, and puree in a medium to large stock pot over high head. Bring to a boil.
  2. Cook the onion and basil over medium-high heat until onions are glassy. Add to broth mixture (even if it's before it's boiling).
  3. Bring boil down to a simmer and add the mushrooms, carrots, and pasta. Season with the cayenne pepper, salt, and pepper.
  4. Cook until pasta and carrots are soft ("done"). Turn off heat and add canned kidney beans. Stir.
  5. Serve alone or with a mozzarella cheese stick (that's how I ate mine!).
Like what you just read? You can subscribe to the feed of these posts or follow us on Twitter to be the first to know what the (never home)makers are up to. And we’ll love you forever <3

Read more...

Even Ugly Squashes Deserve a Little Love

>> Saturday, December 12, 2009


What exactly is this ugly, bumpy, curious-looking thing? It's a hubbard squash. A blue hubbard to be exact. I didn't know what it was either until my mother-in-law kindly gave me one as a gift (she was as intrigued as I was) before we headed back from our pilgrimage to the New York Wine & Culinary Center earlier this fall. At first, we just kept it around the house as a Halloween decoration.

But last weekend, I was in the bathroom brushing my teeth, and I decided it was business time. (Please tell me you get this reference!)

What I've found out about the squash is that it's actually quite delectable. It's often used as a substitute for pumpkin in recipes (like pie) because its sweet flavor closely mimics other, more normal-looking varieties. Other cooking suggestions include making soups and even baby food. For now, we've only harvested the big beast's puree. And the process is much like the one we used to make pumpkin puree.


Step 1: Actually, this photo is jumping ahead a bit. The hubbard squash's skin is so thick, it's difficult to cut the whole thing open with a knife. I'm sure there are much sharper knives that could do the trick -- but ours simply didn't work. What'd we do? We listened to the guy who sold us the squash . . . we put the poor thing in a clean garbage bag and went outside and said happy birthday to the ground!

Much like in this video . . .


Step 2: Scoop out the seeds. Chop up the flesh. Preheat the oven to 350 degrees F, and get ready to roast.


Step 3: Roast for 45 minutes -- until the flesh is soft and juices start flowing. Then let cool, scoop out as much soft stuff as you can, and puree in your food processor or blender until smooth.


Step 4: Use the puree in your cooking and baking. Or, if you have no idea what to do with it -- package it up. I put mine in various containers and measured out 1/2 cup (the two little guys), 1 cup (the medium-sized one), and 2 cups (the two largest containers).


I'm still really not sure what I'm going to make, but this weekend will give me the perfect opportunity to get creative with it. And, of course, I'll share it all with you :) If you have any suggestions -- I'd love to hear 'em! Just leave a comment or email us at neverhomemaker@gmail.com.

Like what you just read? You can subscribe to the feed of these posts or follow us on Twitter to be the first to know what the (never home)makers are up to. And we’ll love you forever <3

Read more...

Rich Chocolate-Pumpkin Cake w/ Pumpkin Frosting

>> Monday, November 30, 2009


What else can you make with your freshly-roasted pumpkin puree? Cake, of couse! Warning: If you're a (never home)maker . . . this recipe is rather time intensive. It's well worth the effort, but it isn't something you'll find yourself making on a Tuesday night.

Now, I make lots of cupcakes and cookies, but only rarely work with cakes. I think it's mostly because at my house, it's only me and my husband. What will the two of us do with an entire cake? Eat it, yes. But, seriously now -- that's a lot of intense dessert to have sitting around the house. When we made this bad boy, we ended up giving a large chunk (perhaps the very part pictured above) of it away to our neighbors.

Aren't we nice?

Not because it was bad, however. In fact, it was wonderful! It's spicy . . . and chocolaty. And dense, but not like a brick by any means. The cake has pumpkin-Nutella frosting on it. I'll provide the recipe for making it, but also the instructions for plain pumpkin frosting, which IS vegan . . . and bright orange like candy corn :)


Rich Chocolate-Pumpkin Swirl Cake

What you'll need . . . for the pumpkin cake part:

  • 4 tablespoons (1/2 stick) butter substitute
  • 1/2 cup firmly packed dark brown sugar
  • 1/6 cup raw sugar (this is a half recipe -- hence the strange measurements)
  • 1/4 cup applesauce
  • 1 cup wheat pastry flour
  • 1 teaspoon baking powder
  • 1/8 teaspoon baking soda
  • 1/2 teaspoon cinnamon
  • 1/2 teaspoon ground ginger
  • 1/4 teaspoon salt
  • 1/4 cup soy milk
  • 5/8 cup canned pumpkin (1/2 cup plus 1/8 cup -- sorry!)
  • 1/2 teaspoon vanilla extract

Method . . .

  1. Preheat oven to 350 degrees F.
  2. Cream together the butter substitute and sugars with an electric mixer on medium speed until fluffy (about 4 minutes).
  3. Add the applesauce to the creamed mixture and beat well.
  4. In a separate bowl, combine the flour, baking powder, baking soda, spices, and salt.
  5. Add the dry ingredients to the wet mixture -- alternating with the milk. Mix until completely integrated.
  6. Add the pumpkin and vanilla and beat until smooth
  7. Set aside while you make the chocolate cake batter (below).


What you'll need . . . for the chocolate cake part:

  • 4 tablespoons (1/2 stick) butter substitute
  • 1/4 cup coarsely chopped chocolate
  • 1/2 cup boiling water
  • 1/2 teaspoon vanilla extract
  • 1 cup raw sugar
  • 1/4 cup soy milk
  • 1 cup wheat pastry flour
  • 1/2 teaspoon baking powder
  • 1/2 teaspoon baking soda
  • 1/4 cup applesauce


Method . . .

  1. Place the butter substitute and chocolate in a large bowl. Pour boiling water over them and let stand until melted.
  2. Stir to combine. Stir in vanilla and sugar.
  3. Add soy milk and mix on medium speed until fully integrated.
  4. In a separate bowl, combine the flour, baking powder, and baking soda.
  5. Gradually add the dry ingredients to the batter, mixing at medium speed until smooth.
  6. Gently fold in the applesauce.


MAKE THE CAKES

  1. Take two 9" round cake pans, grease and lightly flour them.
  2. Pour half pumpkin mixture into the middle of each (this mixture is thicker)
  3. Then pour half chocolate cake mixture into each.
  4. Swirl with a knife. As you can tell, I didn't swirl very much. It was just as delicious.
  5. Bake for approx. 30 minutes, and then check every 5 minutes until a toothpick inserted into the cakes comes out clean.
  6. Set aside to cool COMPLETELY (you'll really need to wait until it's cool to the touch) before frosting.

(These "cake" recipes are modified from two found in Crazy About Cupcakes. I use this book ALL the time. Go and buy it now!)


Pumpkin Frosting (created from combining various personal recipes)

What you'll need . . .

  • 1/2 cup butter substitute
  • 1 teaspoon salt
  • 4 teaspoons vanilla extract
  • 6 cups vegan confectioner's sugar
  • 1/2 cup canned pumpkin
  • Soy milk
  • 1/2 to 3/4 cup Nutella (if you'd like to go that route)

Method . . .

  1. Put all ingredients (except Nutella) into a bowl and start mixing!
  2. I did this by hand with a fork for the first few minutes, and then transferred everything to my stand mixer. You can just start with your stand mixer, if desired.
  3. You may need to add soy milk depending on the consistency. But I didn't need any. Just add it in small doses.
  4. Optional: If you are adding the Nutella, add it at the end. Start with 1/2 cup and add more to taste.


PUTTING IT ALL TOGETHER

  1. Again, wait until the cakes have cooled completely. Then trace around the edge with the blunt end of a butter knife, turn pan upside down (hope you floured the pans well enough!) to release the cake.
  2. Set one layer of the cake on a plate and top it with frosting. Spread until smooth.
  3. Lay the next layer on top of the frosted one. Then frost on top and move to the sides.
  4. Frosting is always tricky, so I don't have many rules or tricks. Just go slowly. You may find that the frosting does not stay on the sides cake if you didn't wait for it to cool. In this event: Frost the cake, but then put it in the refrigerator and check every two minutes . . . correcting the frosting each time you check until it stays.
  5. I kept my cake refrigerated. You may also wish to do so.


Like what you just read? You can subscribe to the feed of these posts and be the first to know what the (never home)makers are up to. And we’ll love you forever <3

Read more...

Pumpkin Soup


What exactly can you make with pumpkin puree? This easy soup, for example. My mother-in-law made it for Thanksgiving using cheese pumpkins. So, if you haven't already, don't forget to check out the pumpkin puree how to. And if you have, get ready to make some soup! This one's great with crusty bread . . .

What you'll need . . .
  • 6 cups vegetable stock
  • 4 cups pumpkin puree
  • 1 cup chopped onion
  • 1 clove garlic, minced (we threw in maybe five cloves or garlic)
  • 1/2 cup heavy whipping cream (or Silk -- soy -- half and half)
  • Salt and pepper to taste

Method . . .
  1. Heat veggie stock, pumpkin, onion, garlic, salt, and pepper. Bring to a boil, reduce heat to low, and simmer for 30 minutes uncovered.
  2. Puree the soup in small batches (1 cup at a time) using a food processor or blender.
  3. Return to pot, and bring to a boil again.
  4. Reduce heat to low, and simmer for another 30 minutes, uncovered.
  5. Stir in heavy cream or soy substitute.(Or you may wish to do this after you pour into bowls to allow guests to control their amount of cream.)
  6. Pour into soup bowls and garnish with fresh basil.


Like what you just read? You can subscribe to the feed of these posts and be the first to know what the (never home)makers are up to. And we’ll love you forever <3

Read more...

Pumpkin Puree: How To


Good morning! We actually grew this pumpkin in our garden over the summer. Don't ask me how -- it wasn't a conscious decision. The little thing just sort of popped up one day, along with a few other strange squashes (and LOTS of mint, but that's another story). That's what you get for mixing compost that isn't quite "done" yet into your garden.

But it's a great mistake. We let it hang around our kitchen as a mere decoration for a while. Earlier in the season, I decided to make use of it. I'd never actually cooked or baked with a REAL pumpkin before. Picking up those cans at the store seemed so easy -- so, why bother? Well, it's actually a really cool process. And, as always, making your own creates this sense of satisfaction that's addicting.


So, follow these steps and you, too, will have your own puree suitable for use in breads, cakes, pies, soups, muffins, and other fun recipes. It is indeed a bit different from the canned variety -- but I found it tastes just as good. In the next couple days, I'll share with you all the pumpkin bread I made yesterday. But you'll have to wait for now.

PUMPKIN PUREE


Of course, you'll first need to pick out your pumpkin. This can be kind of tricky -- you don't want to use the LARGE ones that are for carving. Instead, search for those pumpkins called "sugar pie" pumpkins. I'm not 100 percent sure that's what mine was. But it was small. I would recommend, though, trying to get the "sugar pie" variety, as they have the best taste and texture.


Step 1 -- Preheat your oven -- 350 degrees F. Now carefully cut the pumpkin in half. I first used a serrated knife to get through the stem, then finished off with my sharpest, biggest knife. But be careful! I've also read you can just cut off the stem. So, do what you wish. It just needs to be halved.


Step 2 -- Place your pumpkin face down atop a sheet of parchment paper on a RIMMED baking sheet. Why rimmed? The juices will start to flow near the end of this process -- so you don't want them getting everywhere. I hate cleaning my oven!


Step 3 -- Bake for 45 minutes or until you notice the skin of the pumpkin turn a richer orange and become soft to the touch. I'm guilty of possible under-roasting mine. It still turned out well, but probably could have used a few more minutes in the oven. This 45 minute time frame is only a guide -- depending on the size of your pumpkin, you may need more or less roasting time. Just pay attention. Also notice how sweet it smells while roasting!


Step 4 -- Gently scoop out the seeds and other gooey stuff until you only have the flesh left. Once you only have flesh (like pictured above), you'll want to scoop it into your food processor. So, scoop away, but don't include the skin (I know that's probably just common sense, but you never know)!


Step 5 -- Process the heck out of the roasted pumpkin until it's as smooth as you can get it. You may wish to add spices or sugar. It's really up to you. I used my puree in a bread (recipe to come soon, I promise!) so I actually added a bit of maple syrup. Maybe 1 teaspoon. My pumpkin yielded about 2 cups of puree. So, plan ahead if you need more or less. For the bread recipe, you'll need 2 cups.

And you're done! However, not really. Unless you're going to eat it as is . . . you'll need some recipes. Don't fret. Just check back later today :)

Like what you just read? You can subscribe to the feed of these posts and be the first to know what the (never home)makers are up to. And we’ll love you forever <3

Read more...
Related Posts Plugin for WordPress, Blogger...

About This Blog

MyFreeCopyright.com Registered & Protected

© 2009-2014 by the (never home)makers
All content on this blog is copyrighted.

Want to publish our pics, tips, or tricks?
Contact us! [neverhomemaker@gmail.com]

We value transparency. Links on this page may contain affiliates. In addition, please see our disclosure policy regarding sponsored posts.

  © Blogger template Simple n' Sweet by Ourblogtemplates.com 2009

Back to TOP  

Blogging tips