Showing posts with label peanut butter. Show all posts

In the Kitchen // Vegan Protein Waffles

>> Wednesday, January 25, 2017

Hey, friends! So, here's that waffle recipe I've been promising for a few days. I've written about my love for Kodiak Protein Waffle mix, but the $5 price tag (about 50 cents per waffle)? I didn't love that so much.With our new budget stuff on the horizon, I figured I should figure out something homemade.

But how to get 14 grams of protein into delicious waffles?

Well, you can see how I figured it out -- in a vegan recipe with no protein powder!


INSTRUCTIONS 


To make 4 waffles . . . 
  • 1 cup whole wheat flour
  • 1/4 cup white flour
  • 1/2 cup peanut butter powder
  • 1 tablespoon coconut sugar (or plain sugar)
  • 1 tablespoon cacao powder (or cocoa powder)
  • 2 teaspoons baking powder
  • 1/2 teaspoon salt

Whisk all ingredients together in an airtight container for storage.  

You can easily double this recipe to make 8 waffles.

And all you need to do to make the waffles is combine a half cup of mix with a half cup of either soy milk or water -- whisking works best. Then fire up your waffle maker* on its higher setting, spritz with just a little cooking spray, cook, and you're done. That's all.

* I have a ceramic Oster Belgian waffle maker -- it was less than $25 and I end up using it daily either for waffles or pressed sandwiches (grilled cheese!). You definitely don't need to go fancy with this appliance. And when you're cooking these waffles, even if the green light turns on indicating it's "done" cooking, I like to wait another full minute to get it a bit crisper.

BTW: These waffles end up being 7 Weight Watchers points if you use unsweetened soy milk. (You can also use water if you don't care as much about hitting 14.5 grams -- the mix alone has 11-ish grams.)

And I broke out how much these waffles cost each and it's about 40 cents. No, that's not a HUGE savings on the Kodiak mix (and the cost would be lower if I used plain sugar and cocoa powder), but if you consider I eat one of these waffles almost daily, that's 10 cents a day or the potential savings of $36 a year.

That's a month of internet (at least after yesterday's switch).

Every little bit counts!

Read more...

Peanut Butter Swirl Black Bean Brownies

>> Monday, January 9, 2017

I won't make you guys wait any longer for this vegan black bean brownie recipe I posted on Instagram last week. I mean, I've already made it several times! I tweaked it from an old favorite to make it even more Weight Watchers friendly.

And -- though I'm still new at all of this -- I got this batch down to just 3-4 points per piece (depending on if you cut them into 8 or 10 pieces).


PEANUT BUTTER SWIRL BLACK BEAN BROWNIES


What you'll need . . .

  • 1 can of black beans, drained + rinsed
  • 1 medium ripe banana
  • 1/4 cup unsweetened peanut butter powder*
  • 1/4 cup unsweetened cocoa or cacao powder 
  • 1 tablespoon flax meal + 2 tablespoons water
  • 1 tablespoon unsweetened applesauce
  • 2 tablespoons maple syrup
  • 2 tablespoons nutritional yeast
  • 1/4 teaspoon baking powder
  • 1/4 teaspoon baking soda 
  • Pinch salt
  • 4 tablespoons peanut butter**
* I used JIF unsweetened peanut powder
** I recommend a stir peanut butter. I used my favorite Everland Organic Coconut Peanut Butter (pictured below).

Method . . .

  1. Preheat your oven to 350 degrees F. Spritz a round or square baking dish with a little coconut or canola oil and set aside.
  2. Combine all ingredients except the 4 tablespoons of peanut butter in a food processor.
  3. Spread into your baking dish evenly. Then drop the peanut butter in half tablespoon amounts throughout the top.
  4. Fold and swirl in peanut butter with a knife and bake in the oven for around 25 minutes. The brownies should start to pull away from the sides of your pan.
  5. Let cool almost completely before slicing and enjoying.

Related Recipes:

Read more...

Yummy Yogurt Breakfast Recipe

>> Wednesday, May 11, 2016

Today's post is short and (naturally) sweet. This is the breakfast I have been obsessed with for the last week or so. It makes me feel like I'm eating dessert . . . but it's also oh-so good for me (and baby)! I go in and out of my love for Greek yogurt, but right now -- it's on fire.

Yum!


GREEK YOGURT BOWL


What you'll need . . .

  • 1 cup nonfat plain Greek yogurt
  • 1 tablespoon natural peanut butter*
  • 1 tablespoon cacao or cocoa powder
  • 1 teaspoon honey or maple syrup (optional)
  • Chia seeds
  • Strawberries or other fruit
* I imagine sunflower butter would make an amazing substitute!

Method . . .

  1. Just mix everything together really well. Adjust with sweetener to your preference.
  2. Then slice strawberries and top with chia seeds.

Happy Hump Day!

Read more...

Oatmeal Peanut Butter Chippers

>> Monday, April 11, 2016

It's been far too long since I posted a recipe. I actually do have a few to share with you guys, so I thought I'd start off with something sweet today. We've been making these cookies for a while because they're simple to mix together and turn out perfectly every time.

Without further delay . . . 


OATMEAL PEANUT BUTTER CHIPPERS


What you'll need . . .

  • 1-1/4 cup all purpose flour
  • 2 cups rolled oats (uncooked)
  • 1 teaspoon baking powder
  • 1/2 teaspoon baking soda
  • Pinch coarse Kosher salt
  • 1/2 cup virgin/unrefined coconut oil (softened)
  • 1/2 cup smooth peanut butter
  • 1 cup cane sugar
  • 1/4 cup coconut sugar (or brown sugar)
  • 1/3 cup coconut milk (refrigerated kind or nondairy substitute)
  • Heaping tablespoon flax meal
  • 2 teaspoons vanilla extract
  • 1 cup your favorite chocolate chips

Method . . .

  1. Preheat your oven to 350 degrees F. Spritz a baking sheet with oil or line with parchment, whichever you have around.
  2. Put the coconut oil, peanut butter, and sugars in the bowl of a stand mixer and beat until fluffy. Then add the milk, flax meal, and vanilla and beat again until well incorporated and fluffy.
  3. In another bowl, whisk together the flour, oats, baking powder, baking soda, and salt. 
  4. Then add the dry ingredients to the wet in batches (I did it in four batches) and mix until everything is uniform. Fold in the chocolate chips.
  5. Scoop heaping tablespoons of dough and roll them into balls and place on your cookie sheet. Alternatively, if you want a flatter cookie, you can press them down with the palm of your hand.
  6. Bake for around 12 minutes -- until golden brown. Then let cool before putting them on a cooling rack. 
  7. Repeat the baking process with the remaining dough. Should make 24 large cookies.
  8. Store in an airtight container or they'll get crumbly.

HAPPY MONDAY!

Like what you just read? You can subscribe to the feed of these posts or follow us on Twitter or Facebook to be the first to know what the (never home)makers are up to. And we’ll love you forever!

Read more...

Vegan Chocolate Cake + Chocolate PB Ganache

>> Monday, February 8, 2016

If you follow me on Instagram, you've probably noticed that my cravings revolve around anything baked or sweet. It was this way with Ada, too. Oh, who am I kidding? It's this way all the time. I try to keep myself in check and not indulge constantly . . . but when you endure enough Northeast winters (even though this one isn't too bad), you learn to embrace the warmth of your oven on a blustery day.

This cake is light and fluffy. The ganache is nothing short of incredible. I made this recipe following the PPK's Just Chocolate Cake, but with a few modifications. And then I jazzed up the topping because, well, I felt like it.


VEGAN CHOCOLATE CAKE


What you'll need . . .
  • 1 cup coconut milk (or other non-dairy milk) 
  • 1 teaspoon apple cider vinegar 
  • 3/4 cup granulated sugar 
  • 1/3 cup olive oil 
  • 1 teaspoon vanilla extract 
  • 1/2 cup all-purpose flour 
  • 1/2 cup wheat pastry flour
  • 1/3 cup cocoa powder 
  • 3/4 teaspoon baking soda 
  • 1/2 teaspoon baking powder 
  • 1/4 teaspoon salt 
Method . . . 

  1. Preheat your oven to 350 degrees F. Combine your coconut milk and ACV in a small bowl. Let sit for a few minutes.
  2. Whisk together the flours, cocoa powder, baking soda, baking powder, and salt in a medium bowl and set aside. 
  3. Then mix the sugar, oil, and vanilla extract into the coconut milk mixture. Add the wet ingredients to the dry and whisk until everything is incorporated. 
  4. Grease an 8-inch cake pan and dust the inside with a little flour (to prevent sticking). Then pour the batter into the pan and bake for 30 minutes. Check center for done-ness. You may need up to five more minutes for a toothpick inserted in the center to come out clean.
  5. Let cake cool for a few minutes in the pan before gently turning out onto a cooling rack. I always run the dull end of a butter knife along the edge of the pan before flipping it over.


While your cake is cooling on a rack, make this ganache!

// You'll put 2/3 cup coconut milk over medium heat on the stovetop and add 1 cup semi-sweet or bittersweet chocolate chips to it (I may have used 1 cup and a few tablespoons because I was using up a bag) and 3 tablespoons of maple syrup. Whisk until smooth. Then take off the heat and let cool for 5 minutes before adding 1/2 to 3/4 cups peanut butter (depends on the texture you're after -- start with just 1/4 and go from there). 

// Whisk until smooth and cool enough to spread without spilling everywhere. Place your cake on a dinner plate, then pour ganache over cake and immediately move it to the refrigerator to cool and set. Serve after one or two hours of cooling.

Enjoy!

PS: And don't miss the Slow Cooker French Onion Soup recipe. I posted it over the weekend because it's a video (full instructions are also written out).

RELATED

Valentine's Day Gifts Under $20
Ada's V-Day in 2015
Chocolate Biscuits for Valentine's Day
Peanut Butter Hearts (aka Homemade Reece's)
Red Velvet Black Bean Brownies
Beeting Heart Veggie Burgers


Like what you just read? You can subscribe to the feed of these posts or follow us on Twitter or Facebook to be the first to know what the (never home)makers are up to. And we’ll love you forever!

Read more...

No-Bake Peanut Butter Pie

>> Friday, December 11, 2015

Another recipe! I’ll admit that my reprieve from sickness didn’t last long (maybe 1-1/2 days), but it was long enough for me to make this guy. A no-bake coconut cream peanut butter pie with a black bean chocolate ganache. Sounds so weird, but I assure you it’s delicious.

Also: All the cooking or baking I do lately is the cheater way.

For this dessert, I used a pre-made (gluten-free) graham cracker crust.

No regrets.


NO-BAKE PEANUT BUTTER PIE

*Vegan provided you use dairy-free chocolate.

What you’ll need . . . 

For the filling:
  • 1 can coconut cream, just the cream (save liquid)
  • 1/4 to 1/3 cup peanut butter
  • 1 to 2 tablespoons maple syrup
  • 1 teaspoon vanilla extract
  • pinch sea salt

For the ganache:
  • 1/2 cup black beans, rinsed
  • 1 tablespoon coconut liquid
  • 1/2 cup bittersweet chocolate
  • 1 tablespoon coconut oil


Method . . . 
  1. Place the filling ingredients in a bowl and beat together with a hand mixer (or use a stand mixer) until smooth. I used 2 tablespoons of maple syrup and it was actually quite sweet, so try 1 to start.
  2. Pour this mix into your pie crust and refrigerate for half an hour.
  3. In a food processor, blend together the black beans with the tablespoon of coconut liquid.
  4. Then on your stovetop, melt the coconut oil over low heat and add in the bittersweet chocolate (if you’re using a bar, cut it up into tiny pieces).
  5. Add the chocolate to the beans and blend in the processor until smooth.
  6. Then gently spread this “ganache” over the peanut butter layer. Then put everything in the fridge for an hour or so to firm up.
Like what you just read? You can subscribe to the feed of these posts or follow us on Twitter or Facebook to be the first to know what the (never home)makers are up to. And we’ll love you forever!

Read more...

Peanut Butter + Carob Crispy Treats

>> Tuesday, August 25, 2015

I love crispy rice treats. They were one of my favorites when I was a kid. But I don’t particularly enjoy the gooey marshmallow kind. My mom used to make amazing peanut butter rice crispy ice cream bars. I loved those bars! So, I decided to recreate them for a quick, gluten-free dessert.

I used carob on top because I picked up a bag at the store a few days ago. I used to be addicted to the stuff. Anyway, if you’d rather top them with chocolate, that’s good, too. Or you can keep them naked. Whatever you like best. You can also use honey or brown rice syrup in place of the maple syrup. Or almond butter, sunflower butter, etc.

So many delicious options.

Yum.


PEANUT BUTTER CRISPY RICE TREATS


What you’ll need . . .
  • 6 cups brown rice cereal
  • 3/4 to 1 cup smooth peanut butter
  • 3/4 cup maple syrup
  • 1 bag unsweetened carob chips*
  • 1/2 cup almond milk
  • Sea salt
* Vegans can choose Sunspire's vegan carob chips. And here’s more about carob versus chocolate.

Method . . . 
  1. Pour cereal into a large bowl.
  2. Heat maple syrup over medium heat until hot, but not boiling.
  3. Turn off heat and stir in peanut butter and a pinch or two of salt. Mix until well incorporated and smooth with a spatula.
  4. Pour peanut butter mixture into cereal and mix around with a spatula until everything is well coated.
  5. Press into a 9 x 13 baking dish lined with parchment. Press down well so it’s nice and compact.
  6. Then place in your freezer while you melt the carob.
  7. Back in your pot, pour in the half cup of almond milk and heat until hot. 
  8. Pour in chocolate chips and stir with a whisk. You might need to add more/less milk to achieve a good texture. You want to be able to pour it -- not a thick paste, but also not too runny.
  9. Once it’s all smooth, take your bars out of the freezer and pour the carob on top. Spread around until uniform and return to the freezer.
  10. Let cool until set and then slice with a sharp knife into bars.
  11. Top with additional salt (optional). 


I store mine in zip bags right in the freezer. That way, they last longer.

(At least in theory.)

What’s your favorite childhood dessert? 

I like these guys and I’m also a sucker for worms + dirt!

Like what you just read? You can subscribe to the feed of these posts or follow us on Twitter or Facebook to be the first to know what the (never home)makers are up to. And we’ll love you forever!

Read more...

Chunky Peanut Butter Chocolate Chippers

>> Wednesday, June 24, 2015

While I was home, my best friend had me over one morning and let me sample some delicious energy bars she had just made. She was also baking up a chickpea breakfast muffin, and it got me thinking about bean desserts again. They are seriously tasty . . . and surprisingly healthy. And they usually trick Ada into thinking they’re way more decedent than they actually are.

So, now we’re all hooked on these:


CHUNKY PEANUT BUTTER CHOCOLATE CHIPPERS


What you’ll need . . . 

  • 1 can black beans, drained + rinsed 
  • 1 teaspoon vanilla extract 
  • 1/2 cup (heaping +) crunchy peanut butter*
  • 1/4 cup maple syrup 
  • 1 teaspoon baking powder 
  • 1/4 to 1/2 cup chocolate chips 

* I don’t normally specify ingredients, but I highly (!!!) recommend using Earth Balance’s Crunchy Coconut Peanut Butter. Only two grams of sugar and so much good coconut flavor added to the cookies. I picked some up at Wegmans the other day and -- whoa -- it’s good. 

Method . . .

  1. Preheat to 350 degrees F. Lightly grease a baking sheet with coconut oil.
  2. Blend all ingredients (except chocolate chips!) together in food processor. It should get sticky but also sort of fluffy.
  3. Fold in the chocolate chips. Divide into 12-16 “cookies” and roll with your palm into rounds. Place onto your baking sheet and flatten slightly.
  4. Then -- and this is key -- press with fork tines for that classic pb cookie look. It makes them even more deceptively delicious.
  5. Bake for 10 minutes and let cool a bit before devouring.

RELATED POSTS


Like what you just read? You can subscribe to the feed of these posts or follow us on Twitter or Facebook to be the first to know what the (never home)makers are up to. And we’ll love you forever!

Read more...

5-Minute Picnic Pie

>> Tuesday, May 26, 2015

I think we’ve all been there. Either hosting a party or bringing something tasty to one at a friend’s house. And then we forget or run out of time. Yesterday we had our good friends over for Memorial Day, and I needed dessert -- in a flash. This pie is perfect for the summer season ahead.

It’s fast (5 minutes to make).
It’s semi-healthy (protein!).

And it’s delicious . . .


5-MINUTE PICNIC PIE


What you’ll need . . .

  • Graham cracker pie crust
  • 2 cups nonfat plain Greek yogurt
  • 1/2 cup natural peanut butter
  • 1/4 - 1/3 cup maple syrup
  • 1 teaspoon vanilla extract
  • 1 cup Cool Whip
  • Extra Cool Whip for topping
  • Strawberries + sugar and lemon juice (optional)

Method . . . 
  1. In a large bowl, whisk together the yogurt, peanut butter, maple syrup, vanilla extract, and cool whip.
  2. Pour mixture into your prepared crust. Spread evenly. 
  3. Then let chill in the fridge. If you don’t have time, it’s OK to skip this step.
  4. Top with Cool Whip and serve with the sliced fruit.

Notes:
  • I used a store-bought crust. But you can make a graham cracker crust easily at home if you have the right ingredients.
  • I used natural peanut butter, but the kind you don’t need to stir. I’m sure you could use any other nut butter or spread.
  • I’m sure honey or agave could substitute for the maple syrup -- just taste test for the right amount.
  • You don’t have to use Cool Whip. In fact, you can omit it from the pie if you’d rather a denser texture. Or you can use whipped cream or even whipped coconut cream. I’ve just always had a thing for Cool Whip at summer parties.
  • If you’re doing berries, try tossing halved strawberries in a couple tablespoons of sugar and lemon juice a few hours before serving.
Enjoy!

Like what you just read? You can subscribe to the feed of these posts or follow us on Twitter or Facebook to be the first to know what the (never home)makers are up to. And we’ll love you forever!

Read more...

Ultimate Vegan Brownies

>> Monday, May 11, 2015

It’s been almost five years since I last posted about the vegan Change-Your-Life Brownies. Yet, all this time has gone by . . . and it’s still my favorite brownie recipe ever. So, I thought I’d bring it up again. I’m sure some of you haven’t dug that deep into the archives, and you should be thanking me. I guess I should also note that this recipe isn’t my own, though over time I’ve definitely tweaked it to my family’s preferences.

By now I have a freaking black belt in vegan brownie baking. If I were to choose just one recipe to take to competition, this one would surely be my first pick. No contest. They’re moist, dense, chewy, and the perfect sweetness. I’ve even added some peanut butter to the mix, but if you’re allergic, try any other spread or nut butter.

Whatever you do: Try these!

You won’t be sorry.


ULTIMATE VEGAN BROWNIES 


Adapted from Mattie’s brownies on VeganBaking.net

What you’ll need . . .

  • 3 tablespoons water
  • 2 tablespoons flax meal
  • 1 cup whole wheat flour
  • 1/2 to 3/4 cup white flour
  • 1/4 teaspoon baking soda
  • Pinch sea salt
  • 3 tablespoons cocoa powder
  • 1/2 cup vegan chocolate chips
  • 1/3 cup smooth peanut butter
  • 1/4 to 1/3 cup boiling water
  • 1-1/4 cup packed brownie sugar
  • 6 tablespoons Earth Balance 
  • 1 teaspoon vanilla extract
  • Handful pecans, walnuts, or chocolate chips

Method . . .

  1. Preheat your oven to 350 degrees F. Whisk together the flours (all the WW + starting with just 1/2 white), baking soda, and salt. Also grease an 8x8 inch baking dish with coconut oil. Set aside.
  2. Mix together the flax egg by combining the 3 tablespoons water with the flax meal. Set aside.
  3. In a medium bowl, combing the cocoa powder, chocolate chips, peanut butter and boiling water. Whisk together until the mixture resembles a paste. I sometimes add the full 1/3 cup depending on how dry my peanut butter was to begin with.
  4. In a stand mixer, combine the flax egg, chocolate paste, brown sugar, Earth Balance, and vanilla extract. Beat on high for a minute or so until fully mixed.
  5. Then all in the flour mixture. Mix on slow . . . and until just combined. Fold in nuts or chocolate chips. 
  6. Transfer batter to your baking dish and press flat using your spatula. 
  7. Bake for 25 minutes and let cool completely before cutting into squares.

Enjoy!

Like what you just read? You can subscribe to the feed of these posts or follow us on Twitter or Facebook to be the first to know what the (never home)makers are up to. And we’ll love you forever!

Read more...

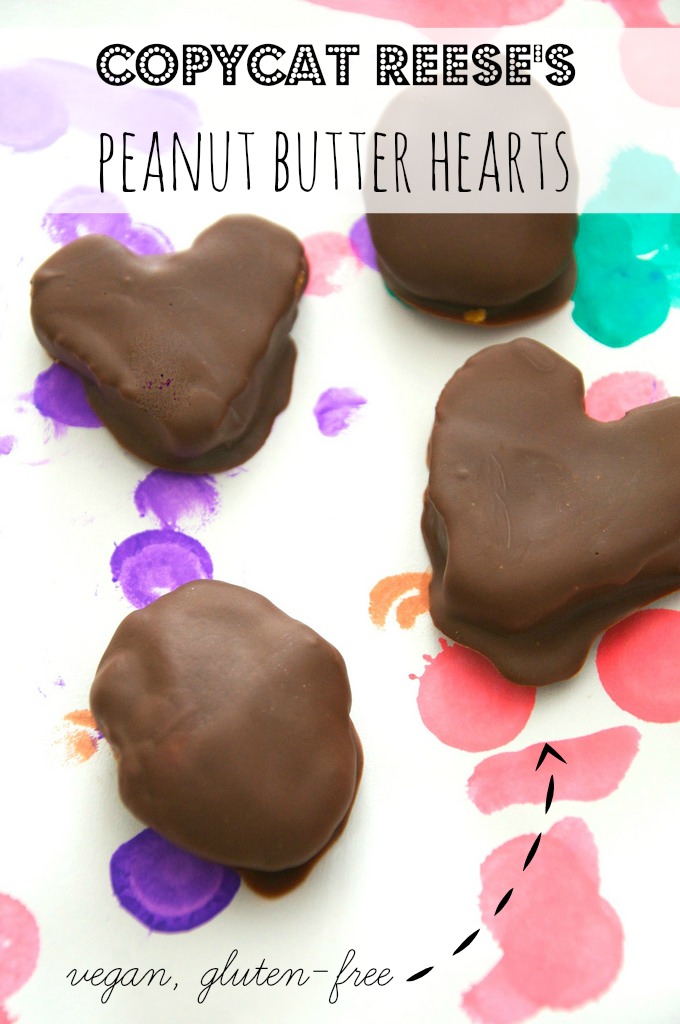
Peanut Butter Hearts

>> Monday, February 9, 2015

Happy Monday, friends. This “snow storm” is rather disappointing. Stephen has a two hour delay (update: school is now closed and Stephen’s jumping up and down like a little boy), which usually causes more stress than it’s worth. Anyway, I wanted to thank you guys for your thoughts, suggestions, and support with the next steps in our TTC process. It’s overwhelming, but I know we’re doing the right thing.

Now for something fun: My mainstream candy weakness? Reese’s Peanut Butter Cups. Not just the cups, though, I love this gigantic pumpkins, trees, hearts, and eggs that only come out on special occasions. The ratio of peanut butter to chocolate is optimal. And I’ve seen copycat recipes in the past, but most contain a load of confectioners sugar for sweetness.

So, I got to think about the flavors I like most in the candy. When they’re very fresh, there’s almost this hint of coconut I taste. It could be all in my head, but I taste coconut. Immediately, I knew what I needed to do. These guys are vegan, gluten-free, and contain more nutrients than the real deal.

#nom:


REESE’S COPYCAT PEANUT BUTTER HEARTS


What you’ll need . . .
  • 1/2 cup natural peanut butter
  • 2-3 tablespoons coconut sugar*
  • 2-3 tablespoons coconut flour*
  • 2-3 tablespoons maple syrup
  • 1/2 cup semi-sweet chocolate chips
  • 1 tablespoons coconut oil

Method . . .
  1. Combine your peanut butter, coconut sugar, coconut flour, and maple syrup in a food processor. I’ve made this recipe a few times now and have played with the ratios to suit my taste. For a slightly stiffer cup, I used 3 tablespoons of both coconut sugar and flour and just 2 tablespoons maple syrup. Another time, I used 2 tablespoons coconut sugar and flour and 3 tablespoons maple syrup. See what you like best for consistency and adjust as necessary.
  2. Then pulse to combine until mixture rolls into a ball. Take the ball out of your processor and place it on a piece of wax or parchment paper. Divide into 8-10 balls and roll.
  3. Then shape into whatever you like. I did some messy hearts and eggs. You can also just leave them as balls, but I think the coating part is easier when they’re a bit flattened out.
  4. Place hearts in your freezer for an hour or more. Before removing, make your chocolate coating.
  5. In a small saucepan, heat the chocolate chips and coconut oil on low, stirring constantly until melted together. Remove from heat.
  6. Take your hearts out of the freezer and then -- one by one -- place in the slightly cooled chocolate mixture. Coat all sides and then return to the wax or parchment. Repeat with all hearts.
  7. Return everything to the freezer (you can spoon any extra chocolate onto the tops of the hearts) and let rest until set.
  8. I store the eggs in my freezer to keep them fresh and also to deter me from eating ALL of them at once.

* Nutiva sent me samples of their Coconut Flour and Coconut Sugar to try. I’ve actually used their brand in the past with coconut oil, so it was neat to check out the other products in their line. I see they also carry hemp, chia, and red palm stuff -- but I’m all about the coconut.

Yum:


If you’ve never tried these ingredients, coconut sugar contains potassium, magnesium, zinc, iron, and B vitamins. It’s also reported to be lower GI than other sweeteners, which is why I’m favoring it these days. Coconut flour is much the same, with lower GI than standard flours and high fiber. Tip: When you’re using coconut flour in baking, use it for up to 1/3 of the flour. It tends to absorb a lot of liquid.

Have you made candy at home?

A while back, I had whipped up some Peanut Butter Twix, definitely time consuming but fun. I’ve also made Basic Peanut Butter Cups using a special blend of graham crackers + Homemade Peanut Butter.

Disclosure: Nutiva sent me the flour and sugar you see above, but I received no other compensation. My opinions are my own. And I hope you enjoy the peanut butter cup recipe! It’s a good one!

Like what you just read? You can subscribe to the feed of these posts or follow us on Twitter or Facebook to be the first to know what the (never home)makers are up to. And we’ll love you forever!

Read more...

Chocolate + Nut Butter Energy Chunks

>> Wednesday, January 28, 2015

It’s been a while since I posted a good energy chunk recipe. I’m actually working on one that’s GORP-based, so keep your eyes peeled for that soon. In the meantime, I needed something to snack on before my workouts. I love the instant jolt of energy I get from these little balls. Yet, I don’t experience a huge sugar crash because the sweetness is naturally derived.

These energy chunks are great for snacks and dessert. Especially when you’re doing a Weekends-Off Diet approach. Ada loves them, too. If you’d rather let the nut butter steal the show, leave out the cocoa powder. Toss in chocolate chips, nuts, seeds, and anything else your heart desires.

Whatever you do, enjoy!


CHOCOLATE + NUT BUTTER ENERGY CHUNKS

Makes 20-24 balls. Gluten-free and vegan.

What you’ll need . . . 
  • 12 pitted dates
  • 4 heaping tablespoons nut butter (I used PB)*
  • 4 tablespoons unsweetened cocoa powder
  • 1/4 cup maple syrup
  • 1 tablespoon vanilla extract
  • 2 cups GF rolled oats
  • pinch sea salt
* Would also work with sunflower butter, soy butter, etc. -- any kind of substitute you like!

Method . . . 
  1. Pulse dates in your food processor until they break up a bit. 
  2. Then add the rest of the ingredients minutes the maple syrup and vanilla extract and pulse. 
  3. Add in the maple syrup and vanilla extract until your mixes well incorporated and sticks together. You may wish to add more/less maple syrup depending on your sweetness and/or texture preference.
  4. Scoop out in heaping tablespoons onto wax paper. Then roll into balls.
  5. Keep refrigerated in an airtight container for up to a week.

// SIMILAR RECIPES

Like what you just read? You can subscribe to the feed of these posts or follow us on Twitter or Facebook to be the first to know what the (never home)makers are up to. And we’ll love you forever!

Read more...
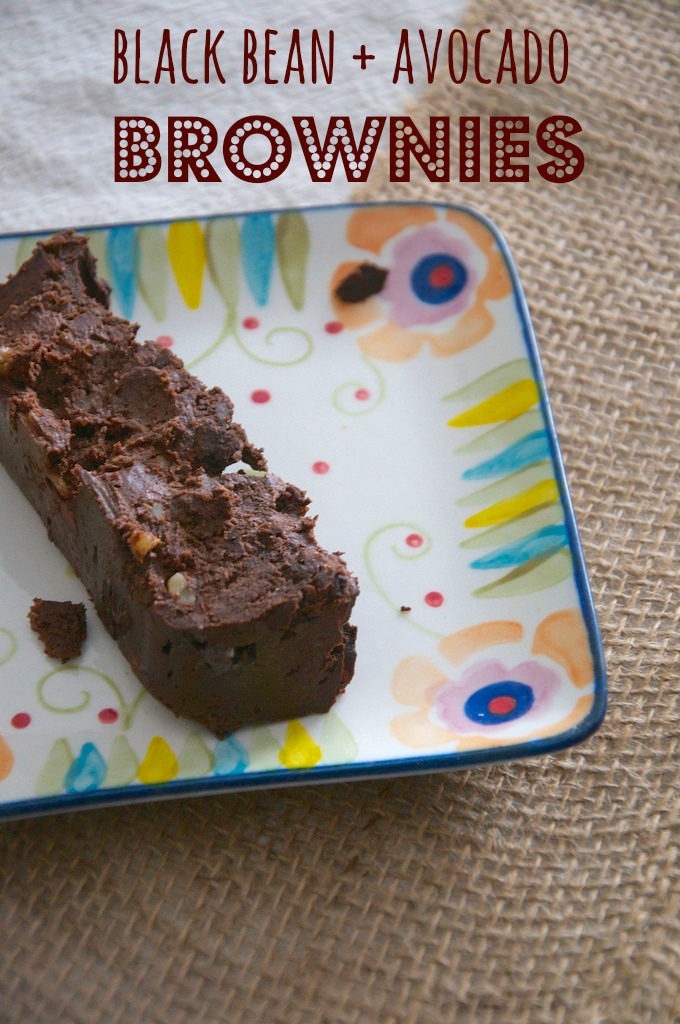
GF Black Bean Avocado Brownies

>> Wednesday, January 21, 2015

Here’s a sweet treat for your Wednesday. This recipe is a modification of the Healthy Chocolate + PB Brownies and Peanut Butter Blondies I posted last summer. What makes these guys different is that I used avocado in place of banana and made them super dark chocolate. Adding walnuts also made them taste even more legit. Please let me know if you try this recipe! The first ones were a huge hit, so I’m hoping this one’s a new favorite.

In pictures:


BLACK BEAN AVOCADO BROWNIES 

Flourless, gluten-free, vegan, etc.

What you’ll need . . .
  • 1 can black beans, drained and rinsed 
  • 1 medium-large avocado, ripe 
  • 1/3 cup pure maple syrup 
  • 1/3 cup smooth peanut butter 
  • 2 teaspoons vanilla extract 
  • 1/3 (heaping) cup unsweetened cocoa powder 
  • 1/4 teaspoon baking powder 
  • 1/4 teaspoon baking soda 
  • pinch sea salt 
  • 2 Moser Roth chocolate bars, 70% dark (from Aldi)
  • (or big handful dark chocolate chips)
  • 1/3 cup walnuts 

Method . . .
  1. Preheat oven to 350 degrees F. Grease a loaf or square baking pan with coconut oil and set aside.
  2. Place all ingredients except the chocolate and walnuts in a food processor and combined until smooth.
  3. Then pulse in the walnuts and chocolate until well incorporated but chunky.
  4. Pour mixture into your prepared pan and distribute evenly, flatten with a spatula.
  5. Bake for 20-25 minutes. Let cool before serving.

Enjoy!

Like what you just read? You can subscribe to the feed of these posts or follow us on Twitter or Facebook to be the first to know what the (never home)makers are up to. And we’ll love you forever!

Read more...

Vegan Chocolate + PB Whoopie Pies

>> Thursday, January 15, 2015

This is one of those make-it-again kind of recipes, 2009-style. I was browsing through the site the other day thinking of ways to improve navigation and Ada said: “What are THOSE?” when she saw the gigantic sandwich cookies glowing on the screen. Of course, I was like “Why don’t we go make them and find out?”

And that’s how this happened on a Monday night:


VEGAN CHOCOLATE + PB WHOOPIE PIES


I’ve changed my modifications of the original recipe (that appears in Martha Stewart’s COOKIES book). To get the original recipe, go here. This batch turned out incredibly moist and fluffy, exactly how you’d imagine they’d be!

For the pies . . .
  • 1-3/4 cups all-purpose flour
  • 3/4 cup unsweetened cocoa powder
  • 1-1/2 teaspoons baking soda
  • 1/2 teaspoon baking powder
  • 1/2 cup Earth Balance (or your favorite butter substitute)
  • 1/2 cup raw cane sugar
  • 1/2 cup packed dark brown sugar
  • 1 tablespoon flax meal plus 3 tablespoons warm water (flax “egg”)
  • 1 cup unsweetened coconut milk (or other nondairy milk)
  • 1 teaspoon pure vanilla extract
For the filling . . .
  • 2/3 cup natural, creamy peanut butter
  • 1/2 cup soft coconut oil
  • 3/4 cup confectioners’ sugar

Method . . .
  1. Make cookies: Preheat the oven to 400 degrees. Sift together flour, cocoa powder, baking soda, and baking powder into a small bowl; set aside.
  2. Put Earth Balance (butter sub.) and sugars into the bowl of an electric mixer fitted with the paddle attachment. Mix on high speed until smooth, about 3 minutes. Add the flax egg; mix until pale and fluffy, about 2 minutes. Mix in half the flour mixture, then the unsweetened coconut milk and vanilla. Mix in remaining flour mixture.
  3. Drop rounded tablespoons of dough onto baking sheets lined with parchment paper, spacing 2 inches apart. Alternatively, you can use a muffin top or whoopie pie pan to make perfect rounds!
  4. Bake until cookies spring back when lightly touched, 12 to 14 minutes. Let cool on sheets on wire racks 10 minutes. Transfer cookies to wire racks using a spatula; let cool completely.
  5. Make filling: Put peanut butter and coconut oil (it needs to be soft but not liquid) in the bowl of an electric mixer fitted with the paddle attachment. Mix on high speed until smooth. Reduce mixer speed to low. Add confectioners' sugar; mix until combined. Raise speed to high, and mix until fluffy and smooth, about 3 minutes. Season with salt, if desired. Place in refrigerator to help firm up a bit.
  6. Assemble cookies: Wait until cookies are completely cooled before proceeding. Then put a heaping tablespoon or so of the frosting atop one round. Top with another. Repeat until you’ve used all cookies and frosting. 
  7. Suggestion: You may want to store these guys in the refrigerator so the coconut oil doesn’t soften and make your cookies fall apart. Speaking from experience. If you do put them in the fridge, just take out 10 or so minutes before you plan to consume.

Enjoy!

Like what you just read? Browse more of our posts + recipes on Pinterest. You can subscribe to the feed of these posts or follow us on Twitter or Facebook to be the first to know what the (never home)makers are up to. And we’ll love you forever!

Read more...

Peanut Butter Blossoms

>> Friday, December 19, 2014

If you’ve been reading here for a long while, you know that my baking tradition at Christmas revolves around Peanut Butter Blossoms. This year, of course, is no different. I’m not picky when it comes to cookies (right?), but these guys are just my all-time favorite, and I only seem to make them this time of year.

I decided to try something different than my usual recipe this year because I am out of several key ingredients. Still, they turned out great! This recipe is for a large batch. If you stick to tablespoons of dough, you could get up to 48. I, however, go with the heaping approach, so I think I got 24. Halve the recipe if you’d like a smaller batch.


PEANUT BUTTER BLOSSOMS // 2014

Based off Jif’s classic recipe. Use different chocolate to make vegan.

What you’ll need . . . 
  • 1/2 cup peanut butter (consider homemade!)
  • 1/2 cup organic shortening
  • 1/2 cup dark brown sugar
  • 1/2 cup sugar
  • 2 teaspoons vanilla extract
  • 2-3 tablespoons coconut milk
  • 1 flax egg (1 tablespoon flax meal + 3 tablespoons hot water)
  • 1-1/2 cups all purpose flour
  • 1/4 cup whole wheat flour
  • 1 teaspoon baking soda
  • Pinch sea salt
  • Sugar In The Raw, for rolling
  • Hershey Kisses

Method . . . 
  1. Preheat your oven to 375 degrees F. 
  2. Put the peanut butter and shortening in the bowl of an electric mixer and blend together using the paddle attachment. Then add the sugars and cream until fluffy. Add the vanilla, milk, and flax egg and beat well.
  3. Add the flours, baking soda, and salt, and mix into a stiff dough. Adjust with more coconut milk if it’s crumbly.
  4. Then scoop by teaspoon or heaping teaspoon, roll into balls, and roll into sugar to coat lightly. Place onto increased cookie sheets. 
  5. Bake for 10-12 minutes until lightly golden.
  6. Right out of the oven push the kisses onto the tops of the cookies and transfer to a cooking rack.

HAPPY FRIDAY! 

We’re going to meet (another) Santa tonight! Oh, and if you like cookies, check out this (free) Holiday Cookie eBook I made back in 2009!

Like what you just read? Browse more of our posts + recipes on Pinterest. Chat with us on Twitter or Facebook. And you can always email us with your questions and comments.

Read more...

Another Homemade Almond Milk Trick

>> Tuesday, September 2, 2014

So, you want to make Homemade Almond Milk . . . and you're especially keen on the idea after seeing how easy it can be if you use a French press to do the heavy lifting. Your problem now: Having leftover milk you can't seem to finish before it gets sort of funky. Thankfully, I have a super easy solution for you!

Make a big batch. Perhaps a double.


And before you place it on your refrigerator shelves, take a 1-ounce ice cube tray and fill each cube about 3/4 of the way full, and place in your freezer for a couple hours. Yup -- you can easily freeze your almond milk into cubes.

I love the perfect cube silicone trays made by Tovolo. I use them for foods and even for body care recipes, like my Natural Lotion Cubes.

Anyway, freeze like so:


Plop these cubes into your hot morning coffee or thaw overnight in the fridge for use in baking (8 ounces = 8 cubes = 1 cup of liquid). I don't usually thaw to drink straight because you will notice some separation, but the milk works great in stuff. Like SMOOTHIES! Indeed: I also like to use mine in place of ice in smoothie recipes. I just add a little water to the mix to help things get blending.

All the nutrition is there -- minus the crap that's in store-bought almond milk.


PEANUT BUTTER CUP GREEN SMOOTHIE
A delicious, protein-packed way to start your day.

Blend the following ingredients together . . .
  • 1 ripe banana
  • 2 handfuls of kale
  • 6 almond milk ice cubes
  • 1/2 cup water (or more to achieve preferred texture)
  • 1 scoop chocolate protein powder*
  • 1 tablespoon peanut butter (perhaps homemade?)
* I use PlantFusion Chocolate, but you can also use 1 tablespoon cocoa powder if you don't want the added protein or have any powder on hand. A green smoothie is still a good smoothie.

// Oh, and if you missed yesterday's recipe -- be sure to check it out! It's my new favorite cookie. Plus, it's a great fall twist on your usual dessert favorite: Oatmeal Raisin Peanut Butter Chocolate Chippers. Vegan, gluten-free.

Like what you just read? You can subscribe to the feed of these posts or follow us on Twitter or Facebook to be the first to know what the (never home)makers are up to. And we’ll love you forever!

Read more...

GF Oatmeal Raisin PB Chocolate Chippers

>> Monday, September 1, 2014

The folks at Peanut Butter + Co. contacted me to see if I'd like to try some of their peanut butter spreads after I posted my birthday Cookie Dough Stuffed Cupcakes with peanut butter frosting. Boy would I ever, I wrote them. I've been a huge fan of their brand for years on end, especially the Dark Chocolate Dreams mix.

So, I wanted to craft a recipe using a spread I had never tried before. And along with the White Chocolate Wonderful and Mighty Maple flavors, I got hooked on one that gave me this great idea for a cookie-hybrid. It's a chewy, soft cookie that's perfect for fall snacking. The best part? You only need one bowl to make them -- and cleanup is a breeze!


OATMEAL RAISIN + PB CHOCOLATE CHIPPERS
Gluten free, vegan, and simple to make.

What you'll need . . . 
  • 1 cup GF rolled oats, uncooked
  • 1 teaspoon baking soda
  • 1 tablespoon flax meal + 3 tablespoons hot water (flax egg)
  • 1 cup peanut butter*
  • 1/3 cup brown sugar
  • 1 teaspoon vanilla extract
  • 1/2 cup chocolate chips
  • Pinch salt for topping cookies
* Obviously, I used Peanut Butter + Co's Cinnamon Raisin Swirl in this recipe. If you don't have it, just use 1 cup peanut butter, but add 1/3 cup raisins and 1/2 to 1 teaspoon cinnamon to this recipe.

Method . . . 
  1. Preheat your oven to 350 degrees F. Lightly grease a baking sheet and set aside.
  2. In a large bowl, combine the flax egg with the peanut butter, brown sugar, and vanilla extract by stirring vigorously with a spatula.
  3. Then toss in the oats and baking soda and mix until well incorporated. Fold in the chocolate chips.
  4. Then let the mixture chill for 30 minutes or so, just to firm up and let oats soak in flavor a bit.
  5. Scoop out in heaping tablespoons (almost double size) and arrange on your baking sheet (makes around 12 to 14 large cookies). 
  6. Flatten each with the palm of your hand slightly before baking for 9-11 minutes. Done when lightly golden on edges. 

Just a note on all these gluten-free recipes you've been seeing (like last week's Sweet Pumpkin Bread -- as a quick note on that recipe, I used FINE GRIND cornmeal -- if you use a coarser meal, it's likely to crumble). I simply ran out of flour last week and decided to get creative with the ingredients I DID have on my kitchen shelves. Many of you have written me because you appreciate the GF recipes, so I will try to provide more in the future.

Please let me know if you try this cookie!

Thanks to Peanut Butter + Co. for sending me the different peanut butters to try. I was not compensated or required to post about their products, but I've been a fan of this brand for honestly years and enjoy it tremendously. My opinions are 100% my own.

Like what you just read? You can subscribe to the feed of these posts or follow us on Twitter or Facebook to be the first to know what the (never home)makers are up to. And we’ll love you forever!

Read more...

Cookie Dough Stuffed Cupcakes

>> Wednesday, August 13, 2014

You see . . . Pinterest wasn't a thing when I started blogging many (many) years ago. I get aggravated at how food blogging (and everything else, it seems) has become this ever-escalating let's-see-who-can-come-up-with-the-craziest X, Y, or Z. In other ways, however, I get struck by genius at every turn. Yeah, as much as I hate to admit it, Pinterest gives me inspiration, even for the foods I share on my own blog because sometimes I like to push the limits.

So, I'm two weeks too late for this to officially be a birthday cake. Still, I wanted to whisk up something delicious for dessert to celebrate the big 3-1. And I took two existing recipes on this site and used this stuffed cupcake recipe (thanks for sharing, Tyler + Pinterest gods) as my inspiration.

Sprinkles = optional, but highly recommended.


(VEGAN) COOKIE DOUGH STUFFED CUPCAKES
with a chunky peanut butter + coconut "fudge" frosting

What you'll need . . . 
* These peanut butter + chocolate + banana stuffed cupcakes are delicious too! You should try them! As a note: I used CHUNKY peanut butter in the frosting this time around.

Method . . .
  1. Make your cookie dough and then spoon out into 12 equal sized balls. Freeze for a couple hours until hardened.
  2. In the meantime, make your cupcake batter. If you're waiting for everything to freeze, place it in the fridge while you wait. Just be sure to take it out 20 minutes or so before baking.
  3. Preheat your oven to 350 degrees F. Line a standard cupcake pan with paper liners, then fill each 2/3 full + otherwise evenly distribute cupcake batter.
  4. Place one frozen cookie dough ball into each cupcake, then place in the oven for 10 minutes. Then rotate 180 degrees and bake for another 20-25 minutes. Until toothpick inserted into the cupcake (not the cookie dough) comes out clean.
  5. Take cupcakes out of the oven to cool completely before frosting.
  6. Then spread frosting and decorate however you wish. I like to keep my cupcakes in the refrigerator, which makes the frosting turn into that refrigerator fudge consistency. Do whatever you like. It's your party!
// YUM

This recipe makes 12 large cupcakes for a fraction of the cost they'd be at the bakery. No, really. I can't believe how much a good cupcake costs these days. I'd much rather make my own. And if you really strip this recipe/process down, you'll see it's is far less daunting than it seems.

I promise.

What sweet or savory treat did you eat to celebrate your birthday this year?

And be sure to check out another amazingly fun (never)homemaker hybrid recipe -- Half Dozen Chocolate + Peanut Butter Swirl Cookies. Might be one of my favorites . . . ever.

Like what you just read? Browse more of our posts + recipes on Pinterest. You can subscribe to the feed of these posts or follow us on Twitter or Facebook to be the first to know what the (never home)makers are up to. And we’ll love you forever!

Read more...
Related Posts Plugin for WordPress, Blogger...

About This Blog

MyFreeCopyright.com Registered & Protected

© 2009-2014 by the (never home)makers
All content on this blog is copyrighted.

Want to publish our pics, tips, or tricks?
Contact us! [neverhomemaker@gmail.com]

We value transparency. Links on this page may contain affiliates. In addition, please see our disclosure policy regarding sponsored posts.

  © Blogger template Simple n' Sweet by Ourblogtemplates.com 2009

Back to TOP  

Blogging tips