Showing posts with label valentines day. Show all posts

Vegan Chocolate Cake + Chocolate PB Ganache

>> Monday, February 8, 2016

If you follow me on Instagram, you've probably noticed that my cravings revolve around anything baked or sweet. It was this way with Ada, too. Oh, who am I kidding? It's this way all the time. I try to keep myself in check and not indulge constantly . . . but when you endure enough Northeast winters (even though this one isn't too bad), you learn to embrace the warmth of your oven on a blustery day.

This cake is light and fluffy. The ganache is nothing short of incredible. I made this recipe following the PPK's Just Chocolate Cake, but with a few modifications. And then I jazzed up the topping because, well, I felt like it.


VEGAN CHOCOLATE CAKE


What you'll need . . .
  • 1 cup coconut milk (or other non-dairy milk) 
  • 1 teaspoon apple cider vinegar 
  • 3/4 cup granulated sugar 
  • 1/3 cup olive oil 
  • 1 teaspoon vanilla extract 
  • 1/2 cup all-purpose flour 
  • 1/2 cup wheat pastry flour
  • 1/3 cup cocoa powder 
  • 3/4 teaspoon baking soda 
  • 1/2 teaspoon baking powder 
  • 1/4 teaspoon salt 
Method . . . 

  1. Preheat your oven to 350 degrees F. Combine your coconut milk and ACV in a small bowl. Let sit for a few minutes.
  2. Whisk together the flours, cocoa powder, baking soda, baking powder, and salt in a medium bowl and set aside. 
  3. Then mix the sugar, oil, and vanilla extract into the coconut milk mixture. Add the wet ingredients to the dry and whisk until everything is incorporated. 
  4. Grease an 8-inch cake pan and dust the inside with a little flour (to prevent sticking). Then pour the batter into the pan and bake for 30 minutes. Check center for done-ness. You may need up to five more minutes for a toothpick inserted in the center to come out clean.
  5. Let cake cool for a few minutes in the pan before gently turning out onto a cooling rack. I always run the dull end of a butter knife along the edge of the pan before flipping it over.


While your cake is cooling on a rack, make this ganache!

// You'll put 2/3 cup coconut milk over medium heat on the stovetop and add 1 cup semi-sweet or bittersweet chocolate chips to it (I may have used 1 cup and a few tablespoons because I was using up a bag) and 3 tablespoons of maple syrup. Whisk until smooth. Then take off the heat and let cool for 5 minutes before adding 1/2 to 3/4 cups peanut butter (depends on the texture you're after -- start with just 1/4 and go from there). 

// Whisk until smooth and cool enough to spread without spilling everywhere. Place your cake on a dinner plate, then pour ganache over cake and immediately move it to the refrigerator to cool and set. Serve after one or two hours of cooling.

Enjoy!

PS: And don't miss the Slow Cooker French Onion Soup recipe. I posted it over the weekend because it's a video (full instructions are also written out).

RELATED

Valentine's Day Gifts Under $20
Ada's V-Day in 2015
Chocolate Biscuits for Valentine's Day
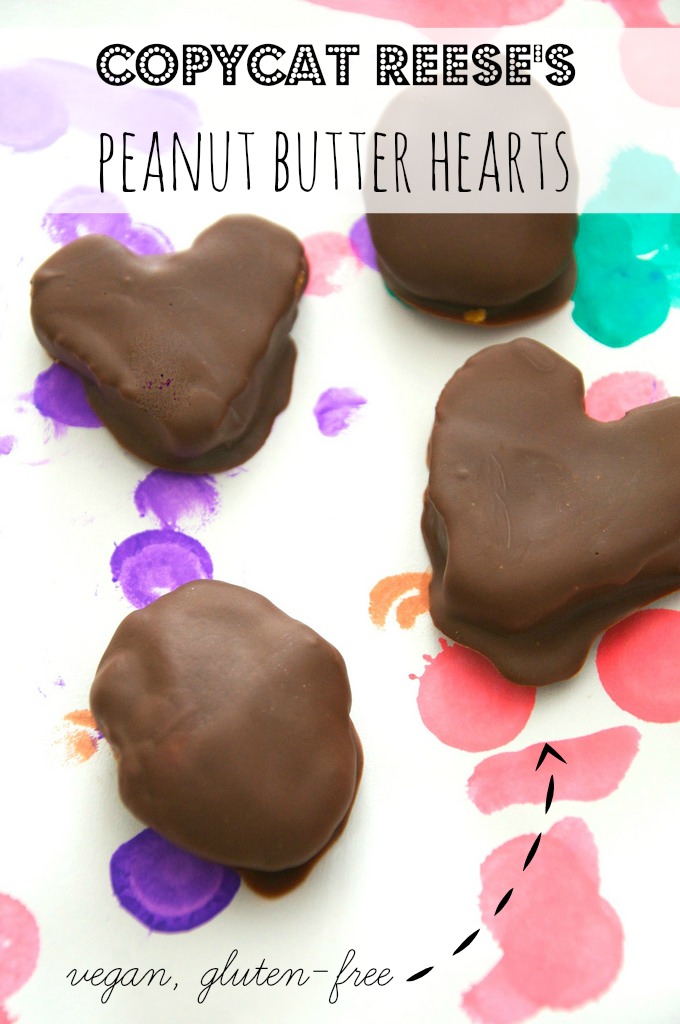
Peanut Butter Hearts (aka Homemade Reece's)
Red Velvet Black Bean Brownies
Beeting Heart Veggie Burgers


Like what you just read? You can subscribe to the feed of these posts or follow us on Twitter or Facebook to be the first to know what the (never home)makers are up to. And we’ll love you forever!

Read more...

Peanut Butter Hearts

>> Monday, February 9, 2015

Happy Monday, friends. This “snow storm” is rather disappointing. Stephen has a two hour delay (update: school is now closed and Stephen’s jumping up and down like a little boy), which usually causes more stress than it’s worth. Anyway, I wanted to thank you guys for your thoughts, suggestions, and support with the next steps in our TTC process. It’s overwhelming, but I know we’re doing the right thing.

Now for something fun: My mainstream candy weakness? Reese’s Peanut Butter Cups. Not just the cups, though, I love this gigantic pumpkins, trees, hearts, and eggs that only come out on special occasions. The ratio of peanut butter to chocolate is optimal. And I’ve seen copycat recipes in the past, but most contain a load of confectioners sugar for sweetness.

So, I got to think about the flavors I like most in the candy. When they’re very fresh, there’s almost this hint of coconut I taste. It could be all in my head, but I taste coconut. Immediately, I knew what I needed to do. These guys are vegan, gluten-free, and contain more nutrients than the real deal.

#nom:


REESE’S COPYCAT PEANUT BUTTER HEARTS


What you’ll need . . .
  • 1/2 cup natural peanut butter
  • 2-3 tablespoons coconut sugar*
  • 2-3 tablespoons coconut flour*
  • 2-3 tablespoons maple syrup
  • 1/2 cup semi-sweet chocolate chips
  • 1 tablespoons coconut oil

Method . . .
  1. Combine your peanut butter, coconut sugar, coconut flour, and maple syrup in a food processor. I’ve made this recipe a few times now and have played with the ratios to suit my taste. For a slightly stiffer cup, I used 3 tablespoons of both coconut sugar and flour and just 2 tablespoons maple syrup. Another time, I used 2 tablespoons coconut sugar and flour and 3 tablespoons maple syrup. See what you like best for consistency and adjust as necessary.
  2. Then pulse to combine until mixture rolls into a ball. Take the ball out of your processor and place it on a piece of wax or parchment paper. Divide into 8-10 balls and roll.
  3. Then shape into whatever you like. I did some messy hearts and eggs. You can also just leave them as balls, but I think the coating part is easier when they’re a bit flattened out.
  4. Place hearts in your freezer for an hour or more. Before removing, make your chocolate coating.
  5. In a small saucepan, heat the chocolate chips and coconut oil on low, stirring constantly until melted together. Remove from heat.
  6. Take your hearts out of the freezer and then -- one by one -- place in the slightly cooled chocolate mixture. Coat all sides and then return to the wax or parchment. Repeat with all hearts.
  7. Return everything to the freezer (you can spoon any extra chocolate onto the tops of the hearts) and let rest until set.
  8. I store the eggs in my freezer to keep them fresh and also to deter me from eating ALL of them at once.

* Nutiva sent me samples of their Coconut Flour and Coconut Sugar to try. I’ve actually used their brand in the past with coconut oil, so it was neat to check out the other products in their line. I see they also carry hemp, chia, and red palm stuff -- but I’m all about the coconut.

Yum:


If you’ve never tried these ingredients, coconut sugar contains potassium, magnesium, zinc, iron, and B vitamins. It’s also reported to be lower GI than other sweeteners, which is why I’m favoring it these days. Coconut flour is much the same, with lower GI than standard flours and high fiber. Tip: When you’re using coconut flour in baking, use it for up to 1/3 of the flour. It tends to absorb a lot of liquid.

Have you made candy at home?

A while back, I had whipped up some Peanut Butter Twix, definitely time consuming but fun. I’ve also made Basic Peanut Butter Cups using a special blend of graham crackers + Homemade Peanut Butter.

Disclosure: Nutiva sent me the flour and sugar you see above, but I received no other compensation. My opinions are my own. And I hope you enjoy the peanut butter cup recipe! It’s a good one!

Like what you just read? You can subscribe to the feed of these posts or follow us on Twitter or Facebook to be the first to know what the (never home)makers are up to. And we’ll love you forever!

Read more...

Valentine Gifts Under $20

>> Thursday, February 5, 2015

Stephen and I started dating 10 years ago on Valentine’s Day. We had been on a bunch of half-dates, but planned out dinner, dessert, and board games for that snowy February night. This year, we’re not sure what we’re doing yet. We might trek to Ithaca to see Ira Glass speak at the State Theater and have dinner at Moosewood. We might just stay home. Whatever the case, we celebrate every year.

Here are sweets for your sweetheart -- or yourself -- 99% of them under $20.

HER


Sox Box XOXO Socks
Turkish Towel (for beach, yoga, gym, etc.)
Love Shirt (Assorted Colors)
Organic Face Red Lipstick

HIM


Nike Gymsack (Assorted Colors)
Me Without You comic book
Beard Jealousy Beard Wash

KIDS


Children’s Place Heart Sweatshirt


* Links are Amazon affiliate links. Thanks for your continued support of (never)homemaker. And happy shopping! For previous frugal gift lists, click here.

Like what you just read? You can subscribe to the feed of these posts or follow us on Twitter or Facebook to be the first to know what the (never home)makers are up to. And we’ll love you forever!

Read more...

Chocolate Biscuits // Vegan for V-Day

>> Wednesday, February 12, 2014

Think those Black Pepper + Basil Biscuits look good?

It gets better . . .


CHOCOLATE BISCUITS
Perfect for Valentine's Day breakfast!

What you'll need . . .
  • 2-1/2 cups bread flour
  • 1/2 cup cocoa powder
  • 1/2 cup pure cane sugar
  • 1-1/2 tablespoons baking powder
  • pinch salt
  • 1/2 cup olive oil
  • 1 cup soy or almond milk
  • 1 teaspoon vanilla extract

Method . . .
  1. Preheat your oven to 425 degrees F. Lightly grease a baking sheet or line with parchment.
  2. Whisk together the flour, cocoa powder, sugar, baking powder, and salt.
  3. Then pour in the wet ingredients and mix until dough forms. Knead a few times until everything is moistened. 
  4. If dough is too wet/sticky, add more flour 1 tablespoon at a time. Sometimes measurements don't work perfectly, especially this time of year. It all depends on your flour (I used King Arthur), cocoa powder (I used Nestle), and the humidity.
  5. Lightly flour a work surface (or use a layer of plastic wrap above/below dough) and roll with a pin or flatten with your palm the dough until it is around 1 inch thick. 
  6. Using a round cookie cutter (I used a Ball jar lid ring), cut dough into 12 biscuits.
  7. Bake for 12-14 minutes, until biscuits are lightly browned. Be careful not to over-bake or they will get dry.
  8. Let cool a few minutes before serving warm.

Have I convinced you to bake biscuits yet?

Or perhaps another one of our many Valentine's Day recipes?

// MORE BISCUITS


ALSO: Don't forget to enter our Taste of Nature snack bar #giveaway!

Like what you just read? Browse more of our posts + recipes on Pinterest. You can subscribe to the feed of these posts or follow us on Twitter or Facebook to be the first to know what the (never home)makers are up to. And we’ll love you forever!

Read more...

Red Velvet Black Bean Brownies

>> Wednesday, February 13, 2013


When you roast a whole 5.6 quart dutch oven full of beets, you are in for some kitchen gymnastics trying to use them all up. We did well -- Beet Burgers, smoothies, baby food, muffins, and even eating them plain out of the fridge.

After all those recipes, I still had a honking one leftover. So, I took a chance -- pureed it up with some black beans.

And . . .


This recipe sounds -- and is, at least in theory -- a lot healthier than it actually is in reality. However, I'm a big believer that adding the healthy stuff is better than not getting it in my diet at all.

RED VELVET BLACK BEAN BROWNIES
vegan recipe

What you'll need . . .

  • 3/4 cup black bean/beet puree, instructions below
  • 1/2 cup organic sugar
  • 1/4 cup olive oil
  • 1 tablespoon vanilla extract
  • 1 cup semi-sweet chocolate chips
  • 3/4 cup unbleached flour
  • 1 tablespoon cocoa
  • 1/2 teaspoon salt
  • 1 teaspoon baking powder
// To make the puree:

  • I drained/rinsed a can of black beans and placed them in my food processor.
  • I also chopped up a very large roasted beet (skinned and everything) and I estimate it was about 3/4 cup to 1 cup of beet. 
  • Ultimately, I feel the ratio in the puree is about 1:1, if that helps.
  • I also added 2 tablespoons of water. 
  • Then I pureed until there were no lumps + bumps. 
  • I had some leftover, about a half cup.
NOTE: I used a pie plate for this recipe because I cannot find my 8x8 baking dish -- but this brownie batter doesn't spill out like some others I've made, so I imagine if it fits in the dish with an inch of headroom, it will be fine.


Method . . .

  1. Grease a pie plate with Earth Balance or olive oil and set aside. 
  2. In a large mixing bowl, whisk together the puree, sugar, oil, and vanilla extract.
  3. Over very low heat, place the chocolate in a small pot on the stove -- stirring constantly until melted. Then scrape this into the bowl and whisk with the other wet ingredients.
  4. Add the dry ingredients and whisk together until just combined. The mixture will be very thick, almost frosting-like.
  5. Pour into your prepared dish and smooth out so it's evenly distributed. Refrigerate for half an hour.
  6. In the meantime, preheat your oven to 350 degrees F. 
  7. Then bake for 25 to 30 minutes, until the middle is set, but not dry.
  8. Let cool completely before serving.

V for Valentine's Day!

Errr. Actually, I tried carving the wedge into a heart and failed miserably. I love to cook + bake and NOT style food. It's definitely not my forte. It's definitely not something I enjoy because when I made things, the kitchen gets messy. The food tastes good. I don't like to pause, wipe up a mess, and fuss too much.

But I do enjoy pretty photos, so it's something I need to work on.


// Now, if you're wondering "is that 30 minute chill time really necessary, Ashley?"

Be sure to check out Tip #9 on Bon Appetit's 10 Ways to Make Better Brownies list. I cut the time in half for you -- and I definitely think it makes a difference. That being written out, I am sure you can get away without the added wait.

Have you made black bean brownies before? Or maybe sweet potato brownies?

How would you say they compare to your favorite brownie recipe? I was very pleased with this most recent experimentation. I think the beets added an earthy sweetness and the texture was fantastic compared to other vegan brownies I've made in the past.

Like what you just read? You can subscribe to the feed of these posts or follow us on Twitter or Facebook to be the first to know what the (never home)makers are up to. And we’ll love you forever!

Read more...

We Heart Beet Burgers

>> Monday, February 11, 2013


I have a couple recipes for you this that feature a special ingredient: B-E-E-T-S. I figure since it's Valentine's Day and all, why not make everything bleed red to add color to the festivities? Well, there's that. AND we often roast large batches of beets and -- besides eating them plain/whole -- don't know what to do with them.

Problem solved.

Now, if you need instructions for how to roast beets, check out this post. They taste much better than the canned variety. 


BEET BURGERS

What you'll need . . .

  • 1/2 onion
  • 2 to 3 cloves garlic
  • 1 can canelli or kidney beans, drained + rinsed
  • 1 large beet (roasted, skinned, chopped -- a solid half cup or more)
  • 1/4 to 1/2 cup chopped red peppers
  • 2/3 cup rolled oats
  • Spices of choice. I used 1 teaspoon curry powder, thyme, paprika, salt + pepper
  • 1/3+ cup cornmeal

Method . . . 

  1. In a food processor, chop the onion and garlic until minced.
  2. Then add the beans, beets, oats, and spices. Pulse 5 to 6 times, scrape down sides, and pulse another few times until chunky, but better incorporated. Season more as necessary.
  3. Place container in the fridge for a half hour or so. Then when you're ready to cook, take out of the fridge and mix with 1/3 cup (or more -- add 1 tablespoon at a time) or cornmeal. You want the mixture to be soft, but not wet. It will firm while cooking.
  4. Place a pan over medium heat with some olive oil inside of it. Shape the mixture into patties.
  5. You can make two gigantic burgers, 4 sensibly sized ones, or 8 sliders. Depending on how many Valentines you have in your life this year, I guess.
  6. Cook on both sides until golden brown.
  7. Serve on buns or between two mini rounds of our new favorite naan.

Not only do these beet burgers look gorgeous (and perhaps freaky to meat-eaters who might think you're chewing on a very rare meal), they taste great, too. The earthy sweetness of the beets really shines through. We've made these three times already with different variations on beans and spices -- so feel free to play around.

Stay tuned for a beet muffin (vegan + gluten free) recipe later in the week as we continue to celebrate Valentine's Day. And tomorrow I'll post more grocery savings tips!

xoxo

Like what you just read? You can subscribe to the feed of these posts or follow us on Twitter or Facebook to be the first to know what the (never home)makers are up to. And we’ll love you forever!

Read more...

Homemade Peanut Butter Cups

>> Wednesday, January 16, 2013


I thought about holding off on posting this recipe. You know, Valentine's Day is nearing, but we've still got several weeks to go. But then I figured you might want to practice your technique with these peanut butter cups.

Make several batches.
To try for yourself . . .
Before giving to others.

(Cute candy wrappers = optional, but highly recommended.)


GRAHAM PEANUT BUTTER
Of course, you can use store-bought, but homemade is best + far tastier.

What you'll need . . . 

  • 2 cups dry roasted peanuts
  • 1 tablespoon virgin coconut oil
  • 3 tablespoons organic powdered sugar
  • 1 teaspoon salt
  • 3 graham cracker rectangles (or more, it's up to you)

Method . . .

  1. Put peanuts in a food processor (I use this one for all my peanut butter-making) and blend until they turn into peanut butter. It takes a few minutes. Using dry-roasted peanuts is the key. 
  2. Then add in the coconut oil, powdered sugar, and salt. Combine for another minute. Then add in the graham crackers a square at a time. 
  3. Process until completely blended. Alternatively, though, you can opt for a crunchier peanut butter. Just remember you're going to need to cover with chocolate, so you don't want it too chunky.
  4. For more information on making homemade peanut butter, see this post + this post.

The CHOCOLATE COATING is just a bag of semi-sweet chocolate chips melted on the stove-top with a tablespoon of coconut oil. Be careful to melt chocolate with only low heat, stirring continually with a rubber spatula so it doesn't burn.

PEANUT BUTTER CUPS

Putting it all together . . .

  • Line a mini muffin tin with candy wrappers. You can find them in most grocery store in the bulk candy aisle. If you like the wrappers I used specifically, you can find them on Amazon.
  • I put my chocolate in a large plastic zip-lock bag. I put my peanut butter in another zip-lock bag. I did this instead of spooning the chocolate, which I've done in the past, and I think it made the process a lot faster + easier.
  • Start with a layer of chocolate. Cut a very small hole in the corner of the plastic bag -- just big enough to let the chocolate flow out slowly.
  • Just a dollop in each wrapper will do. Pipe one into each candy wrapper. When you've finished, tap the pan to let the chocolate settle flat in the cup.

  • Do the same this time with the peanut butter. I found I put a thicker layer on peanut butter into the cup. You just need to leave enough room for a layer of chocolate on top. 
  • I also tried my best to get the PB in the center so the chocolate would wrap around. Tap down the pan again when you're done to let the peanut butter settle.
  • Then do your last layer of chocolate. Honestly, I made my top layer too thick. Think of a store-bought peanut butter cup -- that top layer is thin. So, test it out, try to go light on it.
  • Tap down again and then cover with plastic wrap and place tin in the freezer for around 20 minutes.
  • Peanut butter cups are done when they are set. I keep mine refrigerated after that initial hardening.
  • You will likely have ingredients left over, but not too terribly much. 

I wasn't just being cute when I said you should make several batches. The peanut butter cups will go fast because they are so good BUT it may take several tries before you get them just how you like them.

I didn't mention in my yearly goals that I'm trying my best to avoid mass produced chocolates/candy in 2013. OK. Reese's peanut butter cups, specifically. I could eat a whole bag in 2 seconds. So, I guess I found a loophole. But really, with all the time + effort required to make these, my consumption of candy will definitely be less.

Maybe.

These candies are i.n.c.r.e.d.i.b.l.e. and would make a great Valentine's gift for your sweetheart. Especially if he/she likes chocolate + peanut butter. My favorite.

x.o.x.o.

Like what you just read? You can subscribe to the feed of these posts or follow us on Twitter or Facebook to be the first to know what the (never home)makers are up to. And we’ll love you forever!

Read more...

Chocolate Love Bars

>> Monday, February 13, 2012

I don't have much success making vegan brownies unless I follow recipes written by other bloggers and bakers. My all-time, absolute favorite recipe recently disappeared from the internet for some odd reason. Depressing.

So, this isn't a brownie recipe at all. It's more of a chocolate cookie bar. Sort of. It doesn't need a label because it's just plain good, especially with fruit on top. A great way to treat your sweet without being too sugary.


CHOCOLATE LOVE BARS

What you'll need . . .
  • 1 cup rolled oats
  • 1 cup whole wheat flour
  • 1/4 cup cocoa powder
  • 1/4 cup sugar
  • 1/2 teaspoon baking soda
  • 1 teaspoon Kosher salt
  • 1-1/2 tablespoons flax meal mixed with 1/3 cup warm almond milk
  • 1 tablespoon maple syrup
  • 1/2 cup olive oil
  • 1/2 cup chocolate chips

Method . . .
  1. Preheat your oven to 350 degrees F. Line an 8" x 8" baking pan with parchment (or grease lightly).
  2. In a small bowl, heat up almond milk in your microwave (or stove) until it's wrist temperature. Mix in the flax meal with a fork and let sit for a couple minutes until thickened. Set aside momentarily.
  3. In a large bowl, whisk together the oats, flour, cocoa powder, sugar, baking powder, baking soda, and salt. Set aside.
  4. In another bowl, combine the flax mixture with the honey/maple syrup, and olive oil. Add this wet mixture to the dry ingredients and mix until well moistened.
  5. Fold in the chocolate chips. Then pour mixture into your baking pan and flatten.
  6. SEE OPTIONAL STEP BELOW . . .
  7. Bake for 30 minutes. Then check to make sure the center is done. You may need to continue baking for another 5 or 10 minutes so it isn't gooey.

OPTIONAL:

You can add a thin layer of fruit topping, like we did, by simply taking 1 cup of frozen fruit (raspberries, strawberries, blueberries, etc.) and heating it over medium heat in a small pot. Sweeten with a teaspoon or two of sugar, honey, or maple syrup, if you like. Five minutes should do it with constant mixing. Just spread mixture atop your bars before putting them in the oven.

And today on (never home)maker, baby! it's all about being 12 weeks postpartum.

Like what you just read? You can subscribe to the feed of these posts or follow us on Twitter or Facebook to be the first to know what the (never home)makers are up to. And we’ll love you forever!

Read more...

i [heart] you

>> Monday, February 14, 2011

Happy Valentine's Day! Foremost on my mind this holiday? Desserts! Last year, I layered together a no-bake, Chocolate-Peanut Butter Fudge-Tart for the two of us to enjoy. The year before that, I chilled our favorite Chocolate-Coconut Pie. This year, I wanted to bake something.

So, that's exactly what I did.


I picked up a set of three spring-form pans this weekend for $4.00. I suggest using a springform for this recipe if you want to display your cake in a pretty way. However, if all you're interested in is gobbling it up, any 9-incher will do. (TWSS?! Ah. No! OK. That's a really, really bad one.)

Note: Our cake only lasted a day and a half.


CHOCOLATE-CHERRY CAKE
(Print This Recipe!)

What you'll need . . .
  • 1-1/4 cup whole wheat flour
  • 1/2 cup hazelnut (or other nut) meal
  • 1/4 cup golden flax meal
  • 1 teaspoon baking powder
  • 1/2 cup Earth Balance (or butter)
  • 3/4 cup sugar (I use Florida Crystals)
  • 1/2 cup semi-sweet or bittersweet chocolate chips
  • 1 teaspoon vanilla extract
  • 1/4 cup almond milk (or regular milk)
  • 3 tablespoons Bob's Red Mill egg replacer mixed with 9 tablespoons water (or 3 eggs)
  • 3/4 pound pitted, frozen black cherries
  • 1 to 2 tablespoons extra sugar

Method . . .
  1. Preheat your oven to 350 degrees F. Butter the sides and bottom of your 9-inch springform cake pan. Add a pinch of flour to the pan to lightly coat where you buttered. Or you can also cut a circle of parchment for the bottom.
  2. In the bowl of an electric mixer, cream together the 1/2 cup butter and 3/4 cup sugar. Then add in the egg replacer (mix it first with the water) and vanilla extract. Beat well until fluffy and well combined.
  3. In your microwave (or on your stove-top) melt the chocolate and then add it to the wet ingredients along with the almond milk. Mix until well combined.
  4. In another bowl, whisk together the flour, hazelnut meal, flax meal, and baking powder. Then add the dry ingredients to the wet -- one half at a time. Stir until there are no lumps.
  5. Batter will be relatively stiff. Put it in your cake pan and press down evenly (I used a piece of plastic wrap so it wouldn't stick to my hands).
  6. Then press a single layer of frozen cherries into the top of the cake (I left 1/4" or so on the sides). Sprinkle with the 1 to 2 tablespoons of sugar.
  7. Bake for 45 to 50 minutes -- checking halfway through to pour out a bit of the cherry juice that will accumulate (it's OK if it seeps into the cake a bit). Cake is done when a toothpick inserted comes out with only a few crumbles on it.
  8. Let cool for 15 minutes before cutting/removing from pan. Store in your fridge for up to 3 days, if it lasts that long.
I could have baked our cake for a few more minutes, which is why I suggest up to 50 minutes for a bake time. It was pretty gooey in the middle. I bet if you use fresh cherries, that would help. Frozen give off quite a bit of juice.

Either way, it tasted and looked incredible.


How will you celebrate/have you celebrated V-day? We still haven't made any plans. I imagine we'll do a work-night dinner date at some point this week. Not tonight, though. I have chorus!

Just leave a comment or email us at neverhomemaker [at] gmail [dot] com.

Like what you just read? You can subscribe to the feed of these posts or follow us on Twitter or Facebook to be the first to know what the (never home)makers are up to. And we’ll love you forever!

Read more...

Chocolate-Peanut Butter Fudge-Tart -- No Baking Required

>> Monday, February 15, 2010


Hey, everyone! Hope you all had a fabulous weekend. So far, mine's been relatively uneventful, which is good because I chose to take off the holiday. Need some quiet time before heading back to work (possibly through yet another snowstorm) tomorrow. Enough about work. This chocolate-peanut butter confection is one of my latest creations specifically for Stephen. I made it as an early Valentine's Day gift on Friday . . .

It's special because it's as healthy as I could possibly make it. Stephen isn't a huge fan of sweets -- so I had my work cut out for me. I didn't want to hear again how he'd rather not "waste [his] calories" on another cookie or cake of mine. But don't get me wrong -- though this vegan treat is rather "healthy" -- it's still packed with fierce chocolate-peanut butter flavor and an intensely rich texture. Almost like fudge, but with slightly less pudge.


The ingredients are simple: vegan chocolate chips, coconut oil, date "sugar" . . . natural creamy peanut butter, soy milk, and a special coconut-oat mixture that makes the bottom layer oh-so fantastic. Here's the story of how I tried to make the (what I'm calling a) fudge-tart personal. Stephen got me these dinosaur cookie cutters sometime within the first month of when we were dating. His all-time favorite is the velociraptor -- but I can't easily make cookies with it because the tail is too thin and the cookies burn.

I thought I'd make a design on the treat in sesame seeds to show my love . . .


But it fail miserably -- for when I went to remove the cookie cutter, I found it had sunk in too deeply, and all the seeds were either rolling away or sticking to the cutter. Boo.


Let's get back to the positives, though. Stephen LOVED the fudge-tart. His favorite part was the texture of the peanut butter layer, which as I mention above is a creative little oat-mixture I created just for him. Here's everything you need to make enough for this recipe -- as well as have some left over for whatever else you'd like to use it in . . .
  • 2/3 cup rolled oats
  • 1 cup raw walnuts
  • 1/3 cup coconut flakes
And your easy method for creating it . . . 
  1. Place everything in a food processor and pulse until well combined.


CHOCOLATE-PEANUT BUTTER FUDGE-TART (it's vegan!)

What you'll need . . .
  • 1/2 cup coconut oil
  • 3/4 cup creamy natural peanut butter (one that isn't oily -- we used Skippy Natural, but I would have liked to have used something with even less sugar)
  • 3/4 cup oat mixture (see above -- uncooked)
  • 2 tablespoons flax meal
  • 2/3 cup WHOLE rolled oats (uncooked)
  • 1/4 cup date "sugar" (or honey or agave or whatever sugar substitute you want to use)
  • 1 tablespoon vanilla extract
  • 1-1/2 cups vegan chocolate chips
  • 1/2 cup soy milk (or other milk substitute)
  • Sesame seeds (to garnish)


Method . . .
  1. Melt the coconut oil over medium heat in a medium saucepan on your stove. Once melted, add the peanut butter, oat mixture, whole rolled oats, flax meal, date sugar, and vanilla extract. Mix until well incorporated.
  2. Remove from heat, pour into a tart pan (or line a pie pan with plastic wrap and use that -- it's just easier to use the tart pan because the bottom is removable, and this thing sticks like the DICKENS!) and continue on to the chocolate mixture . . . 
  3. Put the chocolate chips and soy milk (or other substitute) into a small saucepan over medium heat and stir until all chocolate is melted. Pour gently in a circular motion over the peanut butter layer and then use a spatula to evenly spread it across the top. This part seems difficult, but if you go slow, your layers will stay intact.
  4. Sprinkle with sesame seeds if you like . . . and carefully transfer tart pan to your refrigerator and chill for at least two hours.
  5. Cut and serve -- just note that, again, it sticks like crazy. You'll need a spatula or other serving device so it won't break when you portion it out to your loved ones.
Like what you just read? You can subscribe to the feed of these posts or follow us on Twitter or Facebook to be the first to know what the (never home)makers are up to. And we’ll love you forever!

Read more...

Happy Weekend, Everyone!

>> Saturday, February 13, 2010


So, I doubt anyone is reading this post today . . . you're all out enjoying the snow and the weekend. But I thought I'd hop on here to show you guys what we did for Valentine's Day last year -- you know, if you're still itching for something to do.

We took one of my budget-friendly Valentine's Day stay IN ideas and made a lavish dinner for two.


The meal included the following . . .
The best part is that we have the recipes for everything except the toast/brie already on (never home)maker. Just click on the links in the list . . . it's not too late to cook up something unique, healthy, and romantic :) PS: If you're unfamiliar, the mimosas are as easy as pop, pour, and mix.


What you'll need . . .
  • 1 wheel of brie (we used President)
  • 2 scoop-fulls of jam (we used Wegmans Triple Fruit)
  • A sourdough round cut into slices


Method . . .
  1. Set your oven to the broil setting. It's best to use a pizza stone, so make sure that's in there, too. But you may just use a regular cookie sheet.
  2. Gather all ingredients and use a sharp knife to cut the rind off the brie. Be careful to just cut off the rind, you want to keep all the gooey stuff.
  3. Place all cheese and jam (we used two heaping spoonfuls) in a bowl and mash together using a fork until well combined . . . but also kind of chunky (can you tell this recipe is really just thrown together? yes!)
  4. Spread the cheese mixture on your bread, place slices on cookie sheet or on pizza stone, and broil until cheese is bubbly and golden brown. We checked ours every few minutes.
And enjoy! We'd love to hear what you're doing tomorrow for v-day. And that doesn't mean couples-only! I had many fun v-days on the single with friends. Anyway, let us know. What are we doing to celebrate? WE DON'T KNOW YET! Oh, the pressure is ON! But, of course, you'll hear all about it on Monday. In the meantime, if you're looking for some romance, check out photos from our wedding . . .


ALSO: We're gearing up to do another FAQ post in the near future . . . so if you have anything you're dying to know, just leave a comment or email us at neverhomemaker@gmail.com. For ideas, or if you simply just missed it -- here's our last FAQ post, Part #1: Who ARE the (never home)makers?.

Like what you just read? You can subscribe to the feed of these posts or follow us on Twitter or Facebook to be the first to know what the (never home)makers are up to. And we’ll love you forever!

Read more...
Related Posts Plugin for WordPress, Blogger...

About This Blog

MyFreeCopyright.com Registered & Protected

© 2009-2014 by the (never home)makers
All content on this blog is copyrighted.

Want to publish our pics, tips, or tricks?
Contact us! [neverhomemaker@gmail.com]

We value transparency. Links on this page may contain affiliates. In addition, please see our disclosure policy regarding sponsored posts.

  © Blogger template Simple n' Sweet by Ourblogtemplates.com 2009

Back to TOP  

Blogging tips