Showing posts with label biscuit. Show all posts

Spinach + Cheddar “Buttermilk” Biscuits

>> Thursday, April 16, 2015

You guys know I’m a biscuit fiend. (What gave it away? These 10,000 biscuit recipes?) I made this delicious slow cooker soup yesterday (I’ll post that recipe soon, too), and I always serve soup with biscuits, cornbread, or some other bready bread bread on the side. It’s just, like, a requirement. An essential part of the meal. Not to be skipped. Ever.

Especially now!


SPINACH + CHEDDAR “BUTTERMILK” BISCUITS


What you’ll need . . . 
  • 2 cups white whole wheat flour
  • 1 cup bread flour
  • 1 tablespoon baking powder
  • 1 teaspoon baking soda 
  • 4 tablespoons Earth Balance (or salted butter)
  • 1-1/4 cup Greek yogurt
  • 1-3 tablespoons water
  • 1 cup finely chopped spinach (I used baby spinach)*
  • 1/2 cup shredded sharp cheddar cheese
* I think basil or any other “soft” greens would work great too!


Method . . . 
  1. Preheat your oven to 450 degrees F.
  2. Whisk together the flours, baking powder, and baking soda in a large bowl.
  3. Cut in your Earth Balance or butter -- I simply used my hands to blend until the mixture resembled coarse meal.
  4. Toss in the Greek yogurt, spinach, and cheddar cheese. Mix with a spatula (or your hands) until everything is moistened. You may need to add another couple tablespoons of water so everything sticks together (but isn’t sticky).
  5. Then flour a work surface and take your ball of dough and flatten it with the palm of your hand. It should be around 1/4 to 1/2 inch thick.
  6. Take the ring of a Ball jar (standard size) and cut out your biscuits. Place them on an ungreased cookie sheet.
  7. Bake for 8-10 minutes, until edges are golden brown. Let cool a few minutes before serving. Store in an airtight container in your fridge for several days.
FYI: This recipe makes 12-15 of these guys.


RELATED RECIPES

Like what you just read? Browse more of our posts + recipes on Pinterest. You can subscribe to the feed of these posts or follow us on Twitter or Facebook to be the first to know what the (never home)makers are up to. And we’ll love you forever!

Read more...

Back Pocket Biscuits

>> Friday, August 1, 2014

Happy Friday, friends! Thanks for all your insightful comments on the Garbage Bowl post -- part II about our composting process will be coming next week. On another homesteading note: I had no idea so many of you have backyard chickens. I'm not sure what the rules + regulations are in our new area, but I'd love to learn more about your process and experiences raising and caring for chickens in more urban and suburban settings.

Onto today's post. I'd like to s art giving some of my fall meal tips as the summer -- sadly -- draws to a close. This way, you'll be armed with all my secrets when school is back in session, vacations are only memories, and the weather starts getting nippy. First on that list? Having some quick and easy "back pocket" biscuit recipes in your memory bank.


// BACK POCKET BISCUITS
  • Biscuits go with a wide variety of meals. Most notably soups and stews benefit from a little side bread action. In fact, one of my most frequently cooked meals involved Pumpkin Chili and basic "buttermilk" biscuits. I write that in quotes because I make ours with Earth Balance or olive oil and usually (homemade) almond milk.
  • They're also incredibly versatile and can be made sweet or savory, cheesy or veggie, etc. Baking powder is what gives them a quick and powerful rise, which is why there's no need to wait long hours from mixing to baking.
  • As for tools of the trade, it's quite simple. I use a bowl, a spatula, some dusting flour, and -- the KEY -- a standard Ball jar lid ring to do the cutting. If you'd like to make jumbo biscuits, the larger rings work well, too. But of all my tools, it's the most important.
  • As for toppings, I often go with standard butter or Earth Balance. For breakfast I sometimes toast biscuits and top with peanut butter or broil with cheese. Biscuits are so adaptable, they can turn into anything you want them to be pretty quickly.

// RECIPES

What you see in the photos are the Yogurt Drop Biscuits. I'd say I make those most often with the Whole Wheat "Buttermilk" being a close second. Whatever you do, feel free to explore these recipes. Add in your own ingredients from cheeses to different purees (for example, the Applesauce Biscuits could easily be made savory by substituting the applesauce with sweet potato or other veggie puree).
And today on Writing Chapter Three, I'm telling you guys all about turning 31 (plus how my first year in the 30s went). I have fewer friends these days, my baby fever has reached new heights, and all sorts of other things are running around in this mind of mine. If you're in the same boat, be sure to check it out!

Speaking of boats, this is our last day at the shore! Ahhh!
    Like what you just read? Browse more of our posts + recipes on Pinterest. You can subscribe to the feed of these posts or follow us on Twitter or Facebook to be the first to know what the (never home)makers are up to. And we’ll love you forever!

    Read more...

    Whole Wheat "Buttermilk" Biscuits

    >> Tuesday, April 22, 2014

    So, I emailed Aldi about the carrageenan conundrum and soon got a call from our local distributor of almond milk. The milk in our stores locally does contain the ingredient and there are no plans of taking it out. I don't really understand why it's in my milk and some of you said it isn't in yours.

    But there you have it!


    Not thrilled at this inconsistency, since there's so much good to say about the store and their products. I'll have add that as another thing I don't love about Aldi. But at least I know that I should take that item off my list for the time being, if not indefinitely.

    // MORE INFO

    I wrote more about carrageenan back when Ada was transitioning from breastmilk to hemp milk. Then we decided on organic cow's milk for this same reason. Basically, I found a handy website with comprehensive lists by food for which brands contain this carcinogen. I'm just super surprised it's in so many "healthy" and "natural" foods.

    Anyway, I made the following recipe with my Aldi milk . . . but for those of you who are curious about carrageenan, you can find brands that don't contain this ingredient. We used Silk and Wegmans brands for years with no issues.


    WHOLE WHEAT "BUTTERMILK" BISCUITS
    Vegan. Quick to make. Sweet or savory.

    What you'll need . . .
    • 2-1/2 cups whole wheat flour
    • 1/2 cup stone ground cornmeal
    • 1-1/2 tablespoons baking powder
    • pinch sea salt
    • 1/2 cup cold Earth Balance, chopped into pieces
    • 1/4 cup maple syrup
    • 1/4 cup water
    • 1/2 cup unsweetened almond milk*
    * Or whatever "milk" you prefer to use. Just do an equal ratio + you're golden!
    Method . . .
    1. Preheat your oven to 425 degrees F.
    2. Mix together the flour, cornmeal baking powder, and sea salt.
    3. Cut in the "vegan butter" with your fingers -- I simply dropped bits of the Earth Balance into the flour mixture and crumbled it together with my fingers until it formed a coarse meal texture.
    4. Then pour in your maple syrup, water, and almond milk. Mix until everything is moistened, but don't over-mix!
    5. Then turn onto a well floured (or I used more cornmeal) surface and flatten until around 1-inch thick.
    6. Using a round cookie cutter (I used a Ball jar lid ring), cut dough into 10-12 biscuits.
    7. Place biscuits on an ungreased cookie sheet and bake for 12-14 minutes, until golden brown.
    8. Let cool before serving warm with Earth Balance or sliced strawberries, etc.

    // HOMEMADE ALMOND MILK

    For the immediate future, I'm going to make some batches of homemade almond milk to tide us over. We somehow have like 5 gigantic bags of raw almonds that we need to use up before they expire. I just need to pick up some cheesecloth or maybe one of these nut-milk bags -- as they are less than $10 and I could see one getting good use in our kitchen.

    // MORE BISCUITS
    Like what you just read? Browse more of our posts + recipes on Pinterest. You can subscribe to the feed of these posts or follow us on Twitter or Facebook to be the first to know what the (never home)makers are up to. And we’ll love you forever!

    Read more...

    Chocolate Biscuits // Vegan for V-Day

    >> Wednesday, February 12, 2014

    Think those 
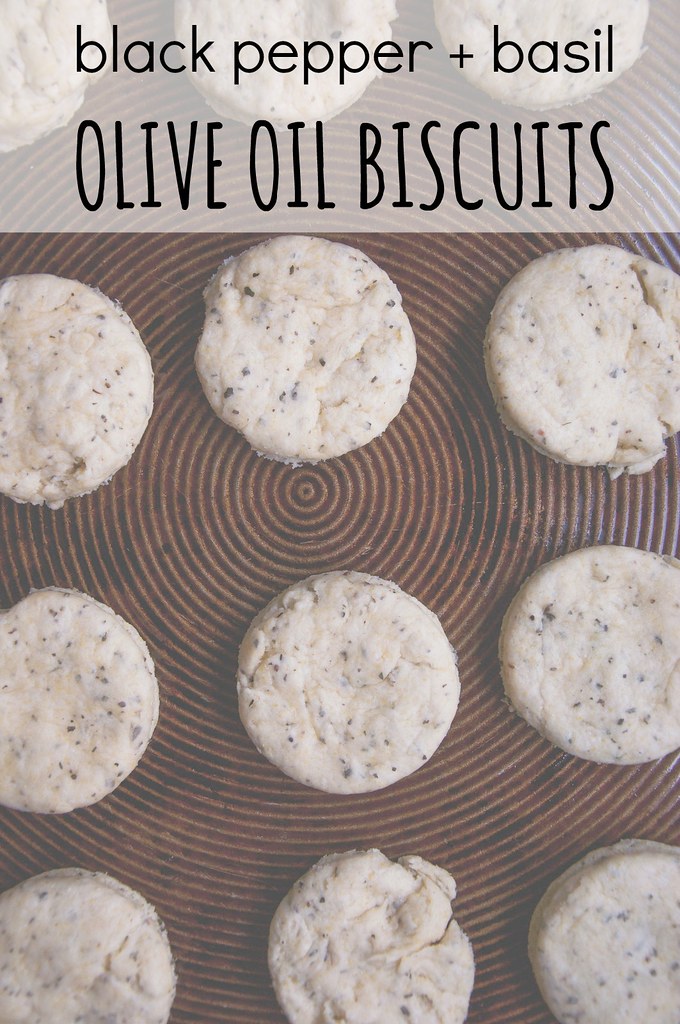
Black Pepper + Basil Biscuits look good?

    It gets better . . .


    CHOCOLATE BISCUITS
    Perfect for Valentine's Day breakfast!

    What you'll need . . .
    • 2-1/2 cups bread flour
    • 1/2 cup cocoa powder
    • 1/2 cup pure cane sugar
    • 1-1/2 tablespoons baking powder
    • pinch salt
    • 1/2 cup olive oil
    • 1 cup soy or almond milk
    • 1 teaspoon vanilla extract

    Method . . .
    1. Preheat your oven to 425 degrees F. Lightly grease a baking sheet or line with parchment.
    2. Whisk together the flour, cocoa powder, sugar, baking powder, and salt.
    3. Then pour in the wet ingredients and mix until dough forms. Knead a few times until everything is moistened. 
    4. If dough is too wet/sticky, add more flour 1 tablespoon at a time. Sometimes measurements don't work perfectly, especially this time of year. It all depends on your flour (I used King Arthur), cocoa powder (I used Nestle), and the humidity.
    5. Lightly flour a work surface (or use a layer of plastic wrap above/below dough) and roll with a pin or flatten with your palm the dough until it is around 1 inch thick. 
    6. Using a round cookie cutter (I used a Ball jar lid ring), cut dough into 12 biscuits.
    7. Bake for 12-14 minutes, until biscuits are lightly browned. Be careful not to over-bake or they will get dry.
    8. Let cool a few minutes before serving warm.

    Have I convinced you to bake biscuits yet?

    Or perhaps another one of our many Valentine's Day recipes?

    // MORE BISCUITS


    ALSO: Don't forget to enter our Taste of Nature snack bar #giveaway!

    Like what you just read? Browse more of our posts + recipes on Pinterest. You can subscribe to the feed of these posts or follow us on Twitter or Facebook to be the first to know what the (never home)makers are up to. And we’ll love you forever!

    Read more...

    Black Pepper + Basil Olive Oil Biscuits

    >> Tuesday, February 11, 2014

    I've tweaked my biscuit recipe, and now I can't get enough! I've made variations of this batch three times in the past week, one of which is  sweet chocolate dessert biscuit -- so get ready for that recipe tomorrow! I love biscuits because they are simple enough to make and require only a few, inexpensive ingredients.

    Plus, they go great with breakfast, lunch, and a Miso Split Pea Soup dinner. 


    BLACK PEPPER + BASIL OLIVE OIL BISCUITS 

    What you'll need . . . 
    • 2-1/2 cups bread flour
    • 1/2 cup cornmeal
    • 1-1/2 tablespoons baking powder
    • 1/2 teaspoon salt
    • 2 teaspoons black pepper
    • 1-2 tablespoons dried basil
    • 1/2 cup olive oil
    • 1/2 cup water
    • 1/2 cup soy or almond milk
    Method . . . 
    1. Preheat your oven to 425 degrees F. Lightly grease a baking sheet or line with parchment.
    2. Whisk together the flour, cornmeal, baking powder, salt, pepper, and dried basil.
    3. Then pour in the wet ingredients and mix until dough forms. Knead a few times until everything is moistened.
    4. Lightly flour a work surface and roll with a pin or flatten with your palm the dough until it is around 1 inch thick. 
    5. Using a round cookie cutter (I used a Ball jar lid ring), cut dough into 12 biscuits.
    6. Bake for 11-12 minutes, until biscuits are lightly browned. Be careful not to over-bake or they will get dry.
    7. Let cool a few minutes before serving warm.

    // MORE BISCUITS


    // HENNA HAIR COLOR

    I know some of you who don't normally read Writing Chapter Three said you are interested: I colored my hair with Henna and made a little video documenting the experience. I doubt I'll go back to chemical box dyes again. I love how it turned out!


    And a big thanks to RedEnvelope for sending me this gorgeous monogrammed birthstone pendant necklace (in Ada's November birthstone -- maybe someday I'll pass it along to her!). I've been smitten with RE since I first got a catalog way back in college, and I now have several pieces of their jewelry in my collection. Whether you're shopping for a friend or yourself, their Favorites for Her is a great place to scope out pretty gifts. 

    RedEnvelope sent me this necklace. I was not compensated otherwise. My opinions are my own.

    ALSO: Don't forget to enter our Taste of Nature snack bar #giveaway!

    Like what you just read? Browse more of our posts + recipes on Pinterest. You can subscribe to the feed of these posts or follow us on Twitter or Facebook to be the first to know what the (never home)makers are up to. And we’ll love you forever!

    Read more...

    Cheesy Old Bay Biscuits

    >> Thursday, May 23, 2013

    I struggle with my identity as a "food photographer" -- which sounds like a ridiculous statement to make at all (because who really cares?), but it's true.

    Do I want my photos to be fun + brightly colored?
    Do I want to make quirky doodles all over the place because I'm feeling insecure?
    Or how about some simple + moody shots. Food. Is. Serious. Business.

    I honestly think it has more to do with the cloud cover on any given day than it does with my mastery of any sort of tone. Or use of props. Or editing. We'll see what things look like tomorrow, next week, etc.


    Nothing new here. Just cut up Brussels sprouts, an onion or two, and a couple portabellas. Drizzle with olive oil, sprinkle salt and pepper. Preheat your oven to 400 degrees F. Roast for about a half hour, stirring every once and again.

    Set aside and drop the oven temperature to 350 degrees F to make these!


    CHEESY OLD BAY BISCUITS
    Just like the ones at Red Lobster, except not at all. Makes 12.

    What you'll need . . . 

    • 1-1/2 cups white + whole wheat flour 
    • 1 tablespoon olive oil 
    • 1 tablespoon baking powder 
    • 1 tablespoon Old Bay seasoning 
    • Heaping half cup shredded Colby-Jack cheese
    • 1 cup almond milk


    Method . . .

    1. Preheat your oven to 350 degrees F. Lightly grease a standard size muffin tin and set aside. Alternatively, you can just make these drop biscuits and bake on a lightly greased baking sheet.
    2. Pour your flour into a large bowl, then add the olive oil in the center and mix around with your hands + fingertips. You want the texture to become crumbly, almost as if you're cutting in butter. I just didn't have butter, but this worked well.
    3. Then add the baking powder, Old Bay, and cheese and mix. 
    4. Stir in the almond milk until everything is juice moistened. Do not over-stir.
    5. Divide evenly into muffin tins. I found heaping tablespoons worked well as a measure.
    6. Then bake for between 15 - 18 minutes. Or until the tops are golden brown on the edges. The centers may feel a bit soft, but that's OK. There's CHEESE!

    We'll definitely be making these again. Baking powder biscuits in general are so easy to throw together. And you can improvise. I usually just stick with around 1 to 1-1/2 cups flour with 1 tablespoon baking powder, and the rest can be fun to play with.

    Like even sweet ones! I made Strawberry Shortcake Biscuits for breakfast yesterday. I didn't get good photos and our strawberries are now long gone, but I will share the recipe soon. Ada helped!

    Like what you just read? Browse more of our posts + recipes on Pinterest. You can subscribe to the feed of these posts or follow us on Twitter or Facebook to be the first to know what the (never home)makers are up to. And we’ll love you forever!

    Read more...

    Breakfast Quiche + Rosemary Crust

    >> Wednesday, April 24, 2013

    I've tacked the word "breakfast" onto this tasty quiche recipe, but it's really appropriate no matter the time of day. Or year, for that matter. I have some more spring-like recipes coming up, it's just been a tough transition from all the comfort dishes I've been making.

    Let's dive right in . . .


    BREAKFAST QUICHE + ROSEMARY BISCUIT CRUST
    individual servings made easy using a muffin tin!

    What you'll need for the crust . . . 

    • 2 cups whole wheat flour
    • 1 tablespoon baking powder
    • 1 teaspoon salt
    • 1 teaspoon fresh or dried rosemary
    • 1/2 cup cold Earth Balance
    • 2/3 cup almond milk 

    What you'll need for the egg mixture . . .

    • 5 large eggs
    • 1/2 cup shredded cheddar
    • 1/2 cup red or green peppers, chopped 
    • 1/2 cup onions, diced
    • Salt and pepper to taste
    • 2 tablespoons almond milk 

    Method . . .

    1. Preheat your oven to 425 degrees F. Lightly grease the cups of your muffin tin and set aside.
    2. In a food processor, pulse together the flour, baking powder, salt, and butter/Earth Balance until it becomes coarse meal.
    3. In a bowl, mix with the almond milk until just combined. Do not over-mix.
    4. On a lightly floured work surface, divide into 12 equal pieces of dough. Roll into balls and then flatten or roll flat. Press into the muffin tin cups as you would pie crust.
    5. Gently whisk together all ingredients for the egg filling. Then distribute into the cups, making sure to leave some space at the top for expansion (if you fill them too much, they will spill out and make a mess of your oven, I know this from experience!)
    6. Bake for 20 to 25 minutes, until eggs are set and lightly browned. Let cool before serving.
    7. Serve immediately or can be refrigerated for a few days and eaten warm or cold.

    If you'd like to freeze these guys for a convenient grab + go, simply:
    • Let quiches cool completely. This part is important when freezing most things. I even place mine in the refrigerator to make the process faster. 
    • Wrap individually in plastic wrap and then place in a large freezer bag. Choose your freezer spot carefully so they aren't crushed. 
    • Consider defrosting first in your refrigerator when it's time to re-heat -- though they can be reheated from a frozen state. 
    • Also consider topping with aluminum (if reheating in the oven) so they don't brown too much. Choose microwave setting carefully to avoid hot spots.
    Oh, and please top liberally with hot sauce. My favorite lately always is Sriracha Hot Chili Sauce. It goes especially well with eggs fried in coconut oil. And on pizza. Anything, really.

    Any suggestions? Hot sauce is my favorite condiment!

    Like what you just read? You can subscribe to the feed of these posts or follow us on Twitter or Facebook to be the first to know what the (never home)makers are up to. And we’ll love you forever!

    Read more...

    Spiced Applesauce Biscuits

    >> Wednesday, August 29, 2012


    Generally speaking, most items stored in a deep freezer stay fresh for about 12 months. (New to freezing? Here's how to do it.) When I found this guy -- a batch of 15-minute Applesauce -- hanging out behind some chili I made last October, I remembered it was nearing it's 1-year birthday.

    What to do?


    I love applesauce, but my favorite texture is smooth. This jar was extra chunky, likely made for Stephen. Not that I couldn't deal. However, we also had a guy over doing some routine maintenance on our furnace. When he told us we'd need to buy a new one before the chilly temps set in, I needed a distraction.

    So, I mixed together these delicious biscuits. The house smelled "like breakfast" (words of the heating/cooling tech, not mine) in no time at all.


    SPICED APPLESAUCE BISCUITS

    What you'll need . . .

    • 2 cups whole wheat flour 
    • 1 cup bread flour 
    • 1/4 cup maple syrup 
    • 1 heaping tablespoon baking powder 
    • 1 teaspoon cinnamon 
    • 1/4 teaspoon cloves 
    • 1/4 teaspoon nutmeg 
    • Pinch tsp salt 
    • 3/4 cup chunky applesauce 
    • 1/2 cup olive oil 
    • 1/2 to 3/4 cup almond milk or water


    Method . . .

    1. Preheat your oven to 400 degrees F. Spritz olive oil onto a baking sheet and set aside.
    2. In a large bowl, whisk together the dry ingredients. 
    3. Add all the wet ingredients into that bowl, then mix with a spoon or spatula until just combined.
    4. Scoop onto baking sheet in heaping 1/4-cup-fuls. 
    5. Bake for 18 to 20 minutes. Inhale the spices as they fill your kitchen. Biscuits done when they're lightly browned. 
    6. Let cool before serving with Earth Balance or extra applesauce . . . or just on their own.

    Yeah. Baking is my coping mechanism. This batch did the trick. (Though, I think Stephen ate most of them already.) And on the bright side, a new furnace means a toasty winter. Right?

    Check out today's post on Writing Chapter Three. Some tips on saving where we can on baby (toddler?!) clothes.

    Like what you just read? You can subscribe to the feed of these posts or follow us on Twitter or Facebook to be the first to know what the (never home)makers are up to. And we’ll love you forever!

    Read more...

    Yogurt Biscuits

    >> Thursday, March 29, 2012

    Quick post today, but it's a good one. I mentioned these yogurt biscuits briefly on Writing Chapter Three yesterday. Ada helped me make them. They mix together in a snap and are even easy to make with a baby strapped to your chest.


    I found the recipe on Culinate, adapted from Mark Bittman's original, which didn't use whole wheat flour and had more butter.

    They're flaky, gorgeous, and way better than my Cornmeal Drop Biscuits.


    Here's that recipe again. And here's how we made it ours:
    • Used 2 cups whole wheat flour 
    • Used 1 cup bread flour
    • Omitted salt
    • Used Earth Balance in place of butter
    • Used 5 tablespoons Earth Balance versus 6 to 8
    • Used Greek yogurt
    • Cut the Earth Balance in with my fingers/mixed with spoon -- no mixer necessary
    • Didn't knead on floured surface, just mixed in bowl
    • Divided into 9 rounds by hand -- no cutting necessary
    • Use just one baking sheet versus the suggested two -- no burned bottoms
    Like what you just read? You can subscribe to the feed of these posts or follow us on Twitter or Facebook to be the first to know what the (never home)makers are up to. And we’ll love you forever!

    Read more...

    Roasted Sweet Potato Stew

    >> Friday, January 13, 2012

    You're in luck. Today, you get TWO recipes all for reading ONE post. These days, I don't often get time to roast veggies. Taking the time was totally worth it in this case. The oven temperature made our kitchen warm and cozy. The time those sweet potatoes, onions, and peppers spent in the oven gave them tons of flavor.

    This hearty winter stew lasted two nights in our household. That's a lot of delicious dinner.


    ROASTED SWEET POTATO STEW

    What you'll need . . .
    • 2 medium sweet potatoes, peeled and chopped into 1 inch cubes
    • 1 green/yellow/orange/OR red pepper, chopped (I used a frozen bag mix of all -- about 1/2 cup)
    • 1/2 large white onion, sliced
    • 3 large cloves of garlic, minced
    • 3 tablespoons olive oil
    • 1 teaspoon coarse Kosher salt
    • 1/2 teaspoon ground black pepper
    • 1 teaspoon Fenugreek
    • 1 can (15 ounces) Canelli beans, drained and rinsed
    • 1 can (15 ounces) low sodium veggie broth
    • 1 large can (32 ounces) whole tomatoes, drained and rinsed
    • 1 tablespoon cilantro (I only had dried on hand, I would have preferred fresh)

    Method . . .
    1. Preheat your oven to 450 degrees F. Line a large cookie sheet with aluminum foil. Set aside.
    2. In a large bowl, pour in your olive oil, salt, pepper, and Fenugreek.
    3. Once you have your sweet potatoes and peppers chopped, your onions sliced, and your garlic minced, toss all these ingredients into the bowl with the oil mixture. Toss to coat well.
    4. Pour veggies onto your prepared baking sheet. Put in your preheated oven for about 10 minutes. Then take out, stir around a bit, and return to the oven for another 15 to 20 minutes. Until well roasted.
    5. In a food processor or blender, blend together the tomatoes, vegetable broth, and cilantro. Make sure to drain and rinse the tomatoes first. If you use the juice, the dish will be too tomato-y.
    6. Place the broth in a large, oven-safe stock pot. When the veggies are done roasting, turn off the oven heat. Mix them -- AND the Canelli beans -- into the broth and place in the oven for 15 minutes. (This allows the flavors to mix without making the roasted stuff bloated and soggy.)
    7. Serve with buttermilk biscuits (recipe below).

    VEGAN BUTTERMILK BISCUITS

    What you'll need . . .
    • 1/2 cup whole wheat flour
    • 1/2 cup bread flour
    • 1 teaspoon baking powder
    • 1/2 teaspoon baking soda
    • 1 teaspoon honey or maple syrup
    • 1/2 teaspoon salt
    • 1/4 cup Earth Balance
    • 1 tablespoon golden flax meal
    • 1/2 cup almond milk
    Method . . .
    1. Preheat your oven to 450 degrees F. Line a cookie sheet with parchment and set aside. (I made the stew and biscuits at different times of the day -- but you could easily make these first and have the oven all preheated for the stew!).
    2. Toss all your ingredients -- EXCEPT the almond milk -- into a food processor. Pulse until well incorporated and mealy.
    3. Pour into a medium bowl and then add the almond milk. Fold with a spatula a few times. Don't over-mix. Just fold until everything is moistened.
    4. Scoop 1/4 cup amounts of the mix onto your baking sheet. Should make 6 biscuits.
    5. Bake for 10 to 12 minutes. Then let cool before serving.

    Read all about Ada's 8th week of life today on (never home)maker, baby! We're amazed at how she's grown in just two short months. Very much looking forward to her well baby checkup next week!

    Like what you just read? You can subscribe to the feed of these posts or follow us on Twitter or Facebook to be the first to know what the (never home)makers are up to. And we’ll love you forever!

    Read more...

    Our Recipes: Breads, Biscuits, and Knots

    >> Saturday, February 26, 2011


    BREADS, BISCUITS, and KNOTS:
    * means VEGAN

    BACK TO ALL RECIPES >>>

    OR BROWSE BY CATEGORY:
    GRANOLA & OATS PANCAKES, ETC. SMOOTHIES
    SPREAD, SAUCES, DIPS SALADS SOUPS & STEWS
    SNACKS & STARTERS SANDWICHES & BURGERS PIZZA, ETC.
    STIR-FRIES, ETC. OTHER MEALS BREADS
    CAKES & CUPCAKES COOKIES & BROWNIES PIES & TARTS
    ICE CREAM & PUDDING DRINKS CONVERSIONS
    Like what you just read? You can subscribe to the feed of these posts or follow us on Twitter or Facebook to be the first to know what the (never home)makers are up to. And we’ll love you forever!

    Read more...

    Cornmeal Drop Biscuits

    >> Wednesday, March 24, 2010


    In our efforts to slash our grocery bills, we've been eating vegan chili two nights a week. Chili is a quick, cheap, and easy way to get great nutrition -- as well as flavor -- for dinner. But sometimes it's just not enough for us. After all, we're both running between 30 and 40 miles a week in preparation for the Lehigh Valley Half Marathon in April. We need more carbs!

    However, we don't typically take sandwiches to work for lunches. So, we don't routinely buy loaves of bread. We found when we did, almost half was going to waste. Biscuits are a simple and fast way to create a side carbohydrate. How fast exactly? This particular recipe takes only about 25 minutes (max) total from start to finish.

    And if you're curious about how we're doing with our grocery bills, don't worry. I'm posting an update later today.

    CORNMEAL DROP BISCUITS
    (modified from a recipe in Martha Stewart's Baking Handbook)

    What you'll need . . . for 10 healthy biscuits (we halved this recipe so we'd have just enough for two dinners)
    • 1-1/2 cups wheat pastry flour
    • 3/4 cup fine yellow cornmeal
    • 2 teaspoons baking powder
    • 1/2 teaspoon baking soda
    • 1 teaspoon kosher salt
    • 2 tablespoons agave nectar
    • 1/2 cup canola oil
    • 1 cup soy milk

    Method . . .
    1. Preheat your oven to 375 degrees F. Line a baking sheet with parchment paper.
    2. In a large bowl, whisk together the dry ingredients (wheat pastry flour, cornmeal, baking powder, baking soda, and salt).
    3. In another, smaller bowl, combine the wet ingredients.
    4. Pour the wet ingredients into the dry and mix until JUST combined. Dough will be sticky, do not over mix.
    5. With a large spoon, drop mounds of dough (about 1/3 cup each) onto your baking sheet -- 1-1/2 inches apart .
    6. Bake, rotating the sheet halfway through, until biscuits are golden (about 15 to 20 minutes).
    7. Transfer to wire rack to cool.
    Like what you just read? You can subscribe to the feed of these posts or follow us on Twitter or Facebook to be the first to know what the (never home)makers are up to. And we’ll love you forever!

    Read more...
    Related Posts Plugin for WordPress, Blogger...

    About This Blog

    MyFreeCopyright.com Registered & Protected

    © 2009-2014 by the (never home)makers
    All content on this blog is copyrighted.

    Want to publish our pics, tips, or tricks?
    Contact us! [neverhomemaker@gmail.com]

    We value transparency. Links on this page may contain affiliates. In addition, please see our disclosure policy regarding sponsored posts.

      © Blogger template Simple n' Sweet by Ourblogtemplates.com 2009

    Back to TOP  

    Blogging tips