Showing posts with label ginger. Show all posts

January Foods + Carrot Boost Soup

>> Thursday, January 5, 2017

If you click over to the website, you'll see that I'm playing around with some new design. I also want to make things easier to find. With limited time, this might be a long process. So, please be patient! If there's a feature you'd like to see on neverhomemaker, let me know! If there's something that isn't working for you, please let me know that as well.

Let's jump in with my favorite foods for January. I'm hoping to make this a monthly video feature where I rummage through my cupboards and refrigerator and share with you the stuff I'm loving to eat that particular month. As mentioned yesterday, I'm doing Weight Watchers -- so some of these foods are particularly friendly for that program.

JANUARY FAVE FOODS


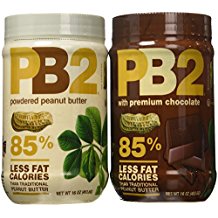
// If you aren't watching the video: PB2 Premium Chocolate, Kodiak Cakes in PB Protein, Grillo's Pickles, Republic of Tea Gingerbread, carrot soup (below), and Poor Gal's Kombucha.

Our family has r.e.a.l.l.y taken to this carrot soup. It's full of immune-boosting ingredients. Stephen has been making a carrot soup for quite some time, actually. In a way, this is his recipe. Ada and I keep getting sick. And I decided I wanted to see what I could add to the mix that might help matters.


Immunity-boosting ingredients, according to Healthline:

  • Ginger
  • Garlic
  • Lemon
  • Turmeric  
We actually made a TRIPLE batch of this soup recently. Feel free to play with the recipe and make more if you want to stock up. Though I'm still new at it, I'm thinking this soup has only 1 point for WW people who are tracking. We ate the first bit for dinner and then packed the rest for lunches. It's easy to sip down soup even when you have a Velcro-baby.

See?


CARROT BOOST SOUP


What you'll need . . . 

  • 1 medium onion, chopped
  • 2 pounds organic carrots, scrubbed and chopped into 1-inch coins
  • 2 tablespoons olive oil
  • 3 large cloves garlic, chopped
  • 1-2 inch piece of ginger, peeled and grated
  • 1 teaspoon ground turmeric
  • 1/2 teaspoon ground cinnamon
  • 5-6 cups water, depending on how runny you like your soup
  • Juice of one lemon 
  • Pinch salt and pepper
Method . . . 

  1. Heat oil in a large stock pot over medium-high heat. Add in onions and cook until softened.
  2. Add in the garlic, ginger, and spices. Cook for a minute or so. 
  3. Then add your carrots and water. Increase heat and bring to a boil.
  4. Lower to a simmer and cook for 30 minutes. 
  5. Then let cool for a little while before blending until smooth. Feel free to add more water, if necessary.
  6. Return to stove to season with the salt and pepper + stir in lemon juice.
Enjoy!

Read more...

Miso + Peanut Noodles

>> Monday, April 6, 2015

When I lived in Ithaca, there was this awesome shop at the farmers market that sold these delicious peanut lime noodles. And I was absolutely hooked. Saturday morning would come, we’d hop on our bikes to go shopping by the shore of Cayuga lake, and I’d always get those noodles.

It’s funny how when you go through something difficult in life, you resort back to your comforts from old times. Food is a big one for me. I finally got my appetite back (I feel like a new person), I wanted to create something similar in my kitchen. I used to eat these noodles a decade ago, but the flavors are still on the tip of my tongue.


MISO + PEANUT SAUCE


What you’ll need . . .
  • 1 large clove garlic
  • 1/2 cup smooth peanut butter
  • 1 heaping tablespoon white miso paste
  • 1/2 cup hot water
  • 2 tablespoons lemon or lime juice
  • 1 tablespoon apple cider vinegar
  • 1 tablespoon low sodium soy sauce
  • dash ginger powder
  • dash red pepper flakes

Method . . .
  1. Pulse the garlic to mince in your food processor. Then add the peanut butter, miso paste, and hot water and blend until smooth.
  2. Add the rest of the ingredients and blend until well incorporated.
  3. Alternatively, you can mince the garlic and then whisk together the peanut butter, hot water, and miso paste. Then whisk the rest of the ingredients in until smooth.
  4. Store in an air-tight container for up to one week.

// To make the noodle dish:

I simply boiled half a package of Ezekiel 4:9 spaghetti (you can use similar noodles -- even soba would be great -- at around 8 ounces) and shredded a couple carrots and half a small onion. I mixed those tougher and then dumped 5 big spoonfuls of the sauce on top. Eat hot or cold. I even like my noodles super al dente.

Peas, cubed tofu, even raisins would be good add-ins as well.

Serves 2-4, depending on appetite.

Like what you just read? You can subscribe to the feed of these posts or follow us on Twitter or Facebook to be the first to know what the (never home)makers are up to. And we’ll love you forever!

Read more...

12 Cookies of X-Mas: Sparkled Ginger Cookies

>> Thursday, December 23, 2010

Ryan (from Ryan's Baking Blog) writes:

I hold vegan recipes to the same standards as non-vegan recipes because I know they can be just as delicious, or even more delicious, depending on how they're made and the right flavors and ingredients, etc. People think vegan baked goods are dry, dense, inedible, but that just isn't true.

These cookies are delicious, you don't have to wait for anything to get to room temperature, and you can eat the dough without any health risk. What's not to love about vegan baking?


This recipe does actually call for this specific kind of sugar, you can use turbinado or demerara sugar, it's used for the "sparkle" and for some added molasses flavor. It's kind of like brown sugar but much more coarse.

If you don't have it, you can just use plain white sugar, but if you have this kind or any kind of coarse sugar, I really recommend it.


These cookies come together pretty easily and pack a lot of ginger flavor. It is a soft, chewy cookie (my favorite) with a slightly crisp outside and sparkles on top.

Surprise your vegan AND non-vegan friends with these treats -- they'll be a hit.

SPARKLED GINGER COOKIES
Adapted from Vegan With A Vengeance
(Makes about 2 dozen cookies.)

What you'll need . . .

  • 4 tablespoons turbinado or demerara sugar (regular sugar works if you don't have either of these, but coarse sugar is best)
  • 2 cups all-purpose flour
  • 1 teaspoon baking soda
  • 1/4 teaspoon salt
  • 2 1/2 teaspoons ground ginger
  • 1/2 teaspoon ground cinnamon
  • 1/2 teaspoon ground cloves
  • 1/2 cup canola oil
  • 1/4 cup molasses
  • 1/4 cup soy milk
  • 1 cup sugar
  • 1 teaspoon vanilla extract

Method . . .
  1. Preheat oven to 350°F. Lightly grease two cookie sheets. Place the turbinado (or demerara) sugar in a small bowl and set aside.
  2. Sift together flour, baking soda, salt, and spices. In a separate large bowl, mix together oil, molasses, soy milk, sugar, and vanilla.
  3. Beat the dry ingredients into the wet ingredients in three additions, mixing until just combined after each addition. Do not overmix.
  4. Roll dough into 1-inch balls, flatten each ball into a 1 1/2-inch-diameter disk (use the bottom of a drinking glass). Press one side of the cookie into the turbinado sugar and place on a baking sheet, sugar side up, about 1 inch from other cookies. Bake 10 to 12 minutes, or until the edges are starting to firm up, let cool on sheets for about 3 minutes before transferring to a wire rack to cool completely.
Thanks so much to Ryan (Ryan's Baking Blog) for this awesome holiday recipe!!! Be sure to check out his site for more great stuff. One of my recent favorites is -- surprise, surprise -- his Nutella-Filled Thumbprint Cookies!

12 COOKIES OF X-MAS
Like what you just read? You can subscribe to the feed of these posts or follow us on Twitter or Facebook to be the first to know what the (never home)makers are up to. And we’ll love you forever!

Read more...

Portabellas with Peanut Sauce

>> Wednesday, June 30, 2010


My favorite Thai restaurant is in Ithaca, NY -- Thai Cuisine. It boasts the "best Thai food in New York State, including New York City," according to Getaways For Gourmets. Every Sunday, there's this amazing dim sum brunch. Basically, the staff members carry around a couple trays of freshly prepared items. Then, they allow you to choose what you'd like to munch on, leave you alone for a short while, and return again with yet another selection of small dishes.

The process goes on for as long as you'd like it to. The best part is the price -- each plate costs less than $5 (and typically less than that!).

Of all selections, I most enjoy the portabellas with peanut sauce. And now that we don't live in Ithaca, I often crave the mushrooms like crazy. So, last night I set out to create a similar dish in our own kitchen. Though I didn't have coconut milk, the results are remarkably similar to the real deal.


PORTABELLAS WITH PEANUT SAUCE (for 4)

What you'll need . . .
  • 4 large portabella mushrooms, scrub and remove stems
  • 2 tablespoons peanut butter (I used Justin's with honey)
  • 1 tablespoons low sodium soy sauce
  • 1 tablespoon sunflower or canola oil
  • 1 tablespoon almond milk (or more, depending on your preferred taste)
  • Sesame seeds
  • 1/4 teaspoon cayenne pepper
  • 1/2 teaspoon ginger powder

Method . . .
  1. Slice mushrooms into 1/4-ish inch slices.
  2. In a large pan, spray with a bit of olive oil (or just lightly oil) and set over medium-high heat.
  3. Lay out mushroom slices on the pan and reduce heat to medium. Cook and gently stir until both sides are lightly browned (mostly, the shrooms will get soft and juicy). Set aside.
  4. In a small bowl, use a fork to whisk together the peanut butter, soy sauce, and oil. Then add the almond milk and whisk until smooth. Add the cayenne, ginger, and sesame seeds. Stir until well incorporated.
  5. Lay out mushroom slices on a plate and drizzle/top with a generous helping of the peanut sauce. Garnish with basil for extra tastiness.

Truth time: We didn't eat ours displayed this beautifully. Nope. That's all for show. Instead, we dumped a ton of the sauce onto the mushrooms and dug in immediately.


We've been on a quest to recreate many of our beloved weekend meals at home (because we go out to eat far more than I'd like to admit). We're getting pretty good at it, too -- enough that we're starting to prefer our twist on the dishes to the real thing.

So, here's my question for you: Have you cooked up any of your restaurant favorites at home? Were you extremely satisfied or horribly unhappy with the results? Leave a comment or email us at neverhomemaker [at] gmail [dot] com.

Like what you just read? You can subscribe to the feed of these posts or follow us on Twitter or Facebook to be the first to know what the (never home)makers are up to. And we’ll love you forever!!

Read more...

Hello, Avocado Green Smoothie!

>> Friday, February 5, 2010


Tastespotting would reject this photo for bad lighting (and rightly so!). But if I'm up early and feel like posting, I'm not going to be too picky with the photos I take. Anyway, this morning it's all about the green smoothie. The temps are low . . . and I decided to postpone my run until after work. Gave me time to dig my knife and spoon into a ripe avocado and experiment with some flavorful combinations.

Like I said, the avocado slicer is a useless gadget . . . so, I carved mine up using the basics. Why a green smoothie? I'm looking for some extra energy this morning. I'm feeling a cold coming on (you'll hear my stuffy nose in the video below). Green smoothies are freakin' amazing. It's something in the blending of the greens that helps all the nutrition pour out of the cell walls and right into your bloodstream. Better yet, you'll find they're a super easy way to add more greens and whole fruits to your diet. What's not to like?

NOTE: Those of you who are familiar with green smoothies might know a little something about the 40:60 ratio. This smoothie doesn't abide by those rules, since avocado is a "fruit" -- but usually, you'd try to have 40% greens and 60% fruit. Anyone know if avocado is an exception to this "rule"?


Again, this smoothie special because it's the first I've made with avocado. And after drinking it, I'm a convert. Everything is so rich and smooth. So, we've got the texture covered . . . but how does this green monster taste?

I put it to the test . . . (PS: You'll hear me say "bruschetta" in a weird way. Too many years of taking Italian has made me pause between the US and Italian pronunciations of the word. So, it's strange, I know.)


What you'll need (for a HUGE smoothie -- but, hey -- you're supposed to drink 1 quart) . . .
  • 1 avocado, taken out of its shell, etc.
  • 1 pear (or apple), skinned and chopped
  • Handful kale, stems taken off (you can use more if you like, just increase water if it's difficult to blend)
  • Handful frozen pineapple (about 10 chunks)
  • 1/2 teaspoon ginger powder (or use real ginger, if you have any)
  • 1-1/2 cups water


Method . . .
  1. Blend everything until smooth.
  2. Add a bit of agave nectar if it isn't sweet enough for you.
  3. Enjoy.
Like what you just read? You can subscribe to the feed of these posts or follow us on Twitter or Facebook to be the first to know what the (never home)makers are up to. And we’ll love you forever!

Read more...

DETOX: Day 3 -- Smoothies

>> Wednesday, December 30, 2009


The detox is going OK . . . wow is it hard! (Missed the beginning? Read about Day 2 and Day 1.) One of my favorite parts of the day is the morning smoothie. This one's got raspberries, bananas, pineapple, fresh ginger, and soy milk in it. Blended together, it's tangy and makes us forget it's below zero outside (which was the case yesterday . . . BRRR!). Last spring I even tried green smoothies for a while. If you haven't heard about the nutritional powerhouse that is the green smoothie, you can read all about it at the Green Monster Movement site maintained by Angela at Oh She Glows.

So how am I feeling after three days of eating more fruits and veggies? Staying away from refined carbohydrates? Eating far fewer cookies? What do you think? I feel GREAT. But I am starting to miss "real" baking. I found this recipe for a chocolate-peanut butter layer cake on Smitten Kitchen I'm just dying to try! Like I said, this new diet is hard. And I write diet in the true sense of the word . . . it is in no way a calorie restriction. That just doesn't work for me. Or anyone, really. A diet needs to be a lifestyle change. So, I'll need to adapt my baking accordingly. Don't fret, though. This means more exciting recipes for all you (never home)makers!

Last rambling thought: I'm even thinking about going vegan again . . . at least 80% of the time. I already eat a primarily-vegan diet. Pizza and my favorite sandwich often get in the way, however . . . filling my stomach with so much cheese and white bread. I just need to find a healthier way to get my fix. Hmmmm.

By now I can hear you begging me to stop talking about all this stuff and give you the smoothie recipe already. OK!


What you'll need (to make two smoothies)
  • 1 large banana
  • 1 cup frozen raspberries
  • 1/2 cup frozen pineapple
  • Fresh ginger -- to taste and minced
  • 1 cup soy milk

Method . . .
  1. Throw everything in a blender.
  2. Blend until fully incorporated. Check for clumps of frozen fruit.
  3. Serve and enjoy right away. Though, I imagine you can refrigerate for later, too.
  4. Want to make it a green smoothie? Throw in a handful of kale! No joke: It doesn't impact the flavor too terribly much . . . and kale is SUPER healthy. The green bugger pictured below is made exactly the same way . . . however, I used water instead of soy milk. And added that lush handful of kale.


Like what you just read? You can subscribe to the feed of these posts or follow us on Twitter to be the first to know what the (never home)makers are up to. And we’ll love you forever <3

Read more...

Vegan Stuffing: It's Not Just for Thanksgiving Anymore

>> Wednesday, December 2, 2009


I'll be honest. This stuffing is far from traditional. And if you're not into trying new things, you likely won't enjoy it. Now that we have that out of the way, if you're up for an adventure: try this recipe. Not only does it look impressive (full of color and texture) atop your holiday spread . . . it tastes good, too!

What I like best about stuffing is how easy it is to make. You throw a bunch of stuff in a bowl, bake it, and -- here's the best part -- you can adjust easily to meet your taste. Keep this whole adjusting thing in mind when giving this one a try. If you don't like cranberries, don't add them . . . or add less of them. If ginger doesn't thrill you, consider another spice. Etc.



Be creative. After all, it's your stomach.


What you'll need . . .

  • 1 package whole wheat stuffing crumbs (the kind you just buy at the store -- it's easy)
  • 1/2 medium onion, chopped
  • 2 to 3 celery stalks, chopped
  • Fresh ginger, finely chopped (to taste -- a little goes a long way)
  • 1/2 to 1 cup shiitake mushrooms, chopped
  • 1 to 2 medium apples, skinned and chopped (Granny Smith works best)
  • 1 cup fresh cranberries
  • 8 large basil leaves, chopped (I ripped mine and thew them in)
  • 1/2 to 1 cup pine nuts
  • 2 to 3 (or 4, depending on how soft you like your stuffing) cans vegetable broth


Method . . .

  1. Preheat oven to 350 degrees F.
  2. In a medium pan over medium heat, saute the onion, celery, and ginger in a bit of vegetable broth until glassy.
  3. Add in the mushrooms, apples, and cranberries (also add a bit more vegetable broth, if necessary) and cook until just soft.
  4. In a large bowl, toss in your stuffing crumbs. Then add the onion-celery-ginger-apple-mushroom-cranberry mixture. Toss in the pine nuts and basil . . . and mix with your hands.
  5. Transfer to-be stuffing to a 9 by 13 inch glass pan.
  6. Pour your veggie broth over the mixture one can at a time. You can always add more -- even after you've started baking it -- so do this part with some restraint.
  7. Cover with foil and bake for 1 hour. I checked mine every 15 to 20 minutes or so and adjusted the moisture level to our taste (not too soft, not too stiff).

Like what you just read? You can subscribe to the feed of these posts and be the first to know what the (never home)makers are up to. And we’ll love you forever <3

Read more...

a twist on apple crisp

>> Thursday, November 12, 2009


Apple crisp is one of the lonely only fruit desserts I enjoy. Of course, health-nut Stephen loves (and typically will only eat) fruit desserts. This crisp was definitely a win-win in our household. But what's the "twist"? Basil! Yeah. It may sound strange at first, but I took a cue from various cookbooks (salads and other more savory dishes that make use of both ingredients) and paired the two. Note that ginger was key . . . so if you're skeptical about this dish and want to try it out, you won't want to use the traditional cinnamon.


What you'll need . . .

  • 3 pounds tart apples
  • 2 tablespoons lemon juice
  • 1/2 cup light brown sugar, packed
  • 1/2 teaspoon ground ginger
  • 1/4 teaspoon ground cloves
  • Handful or two chopped basil
  • 1/3 cup all-purpose flour
  • 1/3 cup raw sugar
  • 1/3 cup rolled oats
  • 4 tablespoons cold butter or Earth Balance
  • 1/2 cup chopped walnuts


Method . . .
  1. Preheat oven to 375 degrees F.
  2. Peel, core and chop the apples; toss in a bowl with lemon juice and basil. In a separate bowl, combine the brown sugar, ginger, and cloves; add to the apples and toss to combine.
  3. In another bowl combine flour, sugar and oats. Cut butter into 8 small pieces, and cut butter into flour with a pastry blender or two forks until mixture is crumbly. Or just use your hands like I did. Stir in the chopped nuts.
  4. Butter a 9-inch square baking dish. Spread apple mixture in bottom of baking dish then sprinkle with flour mixture. Bake for 30 to 45 minutes, or until apples are tender and topping is lightly browned.
  5. Enjoy as often as you please. In fact, make a quick half-batch before heading off to work some chilly morning. I did. Just don't forget to turn the oven off!

Like what you just read? You can subscribe to the feed of these posts and be the first to know what the (never home)makers are up to. And we’ll love you forever <3 b="">

Read more...
Related Posts Plugin for WordPress, Blogger...

About This Blog

MyFreeCopyright.com Registered & Protected

© 2009-2014 by the (never home)makers
All content on this blog is copyrighted.

Want to publish our pics, tips, or tricks?
Contact us! [neverhomemaker@gmail.com]

We value transparency. Links on this page may contain affiliates. In addition, please see our disclosure policy regarding sponsored posts.

  © Blogger template Simple n' Sweet by Ourblogtemplates.com 2009

Back to TOP  

Blogging tips