Showing posts with label frozen. Show all posts

Single-Serve Chocolate Banana Shake

>> Wednesday, June 3, 2015

We've been going crazy with ice cream and frozen yogurt places over the last several weeks. Or maybe months. I can’t remember. But once the weather got nice, the question we’ve found ourselves asking each night is: “Want to get ice cream!?”

The answer is always “YES!!!"

Well, I don’t know about you -- but for us, it gets expensive. It’s almost $10 for us to each get something small (WHAT!). And all that ice cream probably isn’t the best to eat on the daily. So, I’ve started making this simple banana “milk”shake at home to curb my cravings. It’s a great substitute for the real thing. Of course, you can always make Ultimate Banana Ice Cream or even Chocolate Covered Banana Bites if you’re in for a frozen treat.

They’re all delicious.


CHOCOLATE BANANA SHAKE (for 1)


Blend together until smooth:
  • 1 heaping cup frozen banana slices
  • 1/2 cup coconut milk
  • 1/2 cup water
  • 1 heaping tablespoonful cocoa powder
  • Maple syrup to sweeten (optional)
Speaking of snacking, I’ve gotten back in the habit of doing most of my weekly shopping at Aldi. It leaves me questioning why I ever switched stores. Oh, that’s right -- I got completely sucked back to Wegmans. And really, Wegmans has some good prices on family pack stuff like eggs and bread. So, I’ve decided I’ll shop both stores.

Anyway, here’s my latest haul for $70. 


Including two cases of La Croix! I know it’s all the rage, but honestly -- my favorite is still Polar. It keeps its carbonation longer. But you can’t deny all the flavors of Croix are enticing. Overall, I got a bunch of stuff, but I didn’t make a list this week, so it was kind of crazy and meals have been annoying to put together. What I have always loved about Aldi is that when I fill my cart to just about full, I know it’ll still come in well under $100. Score.

One of my other new favorites is packaged popcorn. I feel like it’s the epitome of laziness to not even pop my popcorn, but I love having a handful to grab between meals versus other high-calorie stuff. This tastes just like Boom Chicka Pop.


Tomorrow I’ll be back with an outdoor craft project you can do with your kids!

Like what you just read? You can subscribe to the feed of these posts or follow us on Twitter or Facebook to be the first to know what the (never home)makers are up to. And we’ll love you forever!

Read more...

Breakfast Beans // Chocolate Smoothie

>> Wednesday, July 16, 2014

You guys have so many questions about beans! I'm not really the queen of beans, but I do eat my fair share. As some of you pointed out in my post about soaking/cooking them, beans that have been frozen do tend to lose their original form. If you're making foods where texture doesn't matter much, it's all good. So, I thought I'd share the types of recipes I make with my beans after they've been frozen, starting with this delicious smoothie!

There's some CSA spinach in there, too:


I usually thaw my beans in the refrigerator since I'm using them for other things like quesadillas, soups, burgers, etc. -- which I'll get into in another post -- but I imagine you could also use the beans frozen if you have a talented enough blender. As I've mentioned before, we have a Ninja Blender. It does the trick without the huge price tag.

Behold!


CHOCOLATE + BLACK BEAN SMOOTHIE
Makes 24 ounces -- or two 12 ounce servings.

Blend together the following:
  • 2/3 cup black beans
  • 1-1/3 cup almond milk, unsweetened
  • 1 teaspoon vanilla extract
  • 1 tablespoon peanut butter
  • 2 gigantic handfuls spinach
  • 1 cup frozen banana coins*
  • 2 tablespoons cocoa powder
* What the heck? Well, I just use the bananas that I freeze for Frozen Banana Bites and Banana Ice Cream and Banana Ice Cream Sandwiches, etc, etc, etc,, since they are convenient and blend well.


More chocolatey bean recipes:
More breakfast proteins:


And don't miss our 90 healthiest recipes of 2013! Lots of delicious, wholesome foods for breakfast, lunch, dinner, and beyond. Includes both vegan and vegetarian recipes to please the entire family -- even toddlers!


Like what you just read? Browse more of our posts + recipes on Pinterest. You can subscribe to the feed of these posts or follow us on Twitter or Facebook to be the first to know what the (never home)makers are up to. And we’ll love you forever!

Read more...

Oatmeal Cookie "Ice Cream" Sandwiches

>> Monday, April 28, 2014

It's been eons since I made Frozen Banana Bites or whipped up Peanut Butter + Banana Ice Cream. Still, those are two of the most popular recipes on this entire blog -- so, a couple weeks ago I figured I'd get back to basics.

I broke apart some bananas and placed them in a freezer bag to chill.


Somewhere along the way, I forgot about them. Of course I did! I ate lots of other desserts, too. But it didn't click until I made Ada a batch of our Half Dozen Gluten-Free Chocolate Chippers.


As they cooled on the countertop, I got this crazy-good idea about the bananas. And I wanted to share it with you immediately. Too bad I can't find my big camera charger.

iPhone photos for the win!


OATMEAL COOKIES
Two ways -- using the same ingredients. Vegan, gluten-free, and no refined sugar!

Chocolate Chip Cookies
  • 1-1/4 cups rolled oats (processed into flour)
  • 2 tablespoons coconut flour
  • 1 tablespoon flaxmeal
  • 1/4 cup Earth Balance
  • 3 tablespoons maple syrup
  • 1 teaspoon vanilla extract
  • 1/2 teaspoon baking powder
  • Handful or two chocolate chips
Double Chocolate Cookies
  • 1-1/4 cups rolled oats (processed into flour)
  • 1 tablespoon coconut flour
  • 1 tablespoon cocoa powder
  • 1 tablespoon flaxmeal
  • 1/4 cup Earth Balance
  • 3 tablespoons maple syrup
  • 1 teaspoon vanilla extract
  • 1/2 teaspoon baking powder
  • Handful or two chocolate chips
Method . . . 
  1. Preheat your oven to 350 degrees F.
  2. In the bowl of an electric mixer, combine the Earth Balance, maple syrup, and vanilla extract until well incorporated together.
  3. Then pour the other ingredients into the bowl and mix well. Fold in the chocolate chips.
  4. Using a tablespoon measure, scoop out 8 (heaping) to 12 (flat) spoonfuls and then flatten with your palm onto a cookie sheet. You don't need to grease the sheet either.
  5. Bake for 10-12 minutes, until golden brown. Let cool completely. Set aside.

VEGAN BANANA "ICE CREAM"
Feel free to sub in any nut butter you like best!

Chocolate Peanut Butter
  • 1 cup frozen banana coins/slices
  • 1 tablespoon natural peanut butter
  • 2 tablespoons cocoa powder
  • couple tablespoons water, for consistency
Peanut Butter
  • 1 cup frozen banana coins/slices
  • 1 tablespoon natural peanut butter
  • couple tablespoons water, for consistency
Method . . . 
  1. Pour frozen bananas into food processor and then pulse/blend with other ingredients.
  2. Add water a tablespoon at a time until you reach your desired consistency. You don't need much to do the trick.
  3. Then scoop in heaping tablespoonfuls onto your cookies and top with another to make a sandwich.
  4. You'll want to either eat or freeze immediately.
  5. If you decide to freeze, just store in an air-tight container and let sit out for a few minutes before eating to allow "ice cream" to soften.

Whatever combination you choose, you'll get a great small batch (4 to 6 sandwiches total) of this delicious summer treat. And it's relatively healthy, too! No refined sugar. Vegan. Gluten-Free (if you use GF oats). I have already made a couple batches that are in our big freezer . . . right now.

We'll see how long they last!

Like what you just read? You can subscribe to the feed of these posts or follow us on Twitter or Facebook to be the first to know what the (never home)makers are up to. And we’ll love you forever!

Read more...

Tart Cherry Frozen Yogurt

>> Tuesday, July 2, 2013

This recipe needs little introduction.
I've been teasing you with photos for a week.
Sorry about that.


It all started with a generous offer from my friend Aynsley. She and her family were going away for the week and their backyard cherry tree was ripe for the picking. Of course, I couldn't turn up the awesome opportunity to grab my step-ladder and head over there straight away.

Free (super, 1-mile away) local + organic cherries? Yes, please!

But what to make?


I think we picked about 5 cups in all. I tooled with baking a pie or making muffins. I forgot my bag in the car and stepped outside for a few minutes. Quickly I realized I didn't want to bake at all. Nope, nope. It was hot, muggy, and gross.

Perfect weather to continue my frozen treat trend.

I pitted the cherries one by one, probably not in the most efficient way. Still, it went much faster than I had expected. I licked my drippy, sticky juice-covered fingers off. After some cooking, mixing, and chilling -- this happened:


TART CHERRY FROZEN YOGURT

What you'll need . . . 
  • 3 cups fresh (preferably tart) cherries
  • 3 tablespoons cane sugar
  • 32 ounces low-fat yogurt
  • 1 cup full fat coconut milk*

* I imagine if you want to stay with the low-fat theme, you could use reduced fat coconut milk. All we had was the real stuff. And I'm not talking the kind in the refrigerated section -- use the canned kind that's nice + thick.


Method . . .

  1. Pit your cherries, then place them in a small saucepan -- along with the sugar -- over medium-high heat. Bring to a boil (stay nearby, as it might boil over if you're not careful!). Lower the heat to a strong simmer and continue stirring + mashing nearly constantly until mixture has reduced to a jam-like consistency. 15 minutes or so. 
  2. Let cool until just warm, not hot. Then, in a large bowl, mix (I used a whisk) together all the ingredients. Chill for 3 hours -- covered, in the refrigerator. 
  3. Then prepare according to your ice cream maker's instructions. Ours instructed us to pour in the mixture and let churn for 30 minutes. Then we let it freeze in an airtight shallow container for another 6 hours. 
  4. Let sit out of the freezer for around 10 minutes before scooping. Sometimes, depending on the temperature of your freezer, the frozen yogurt is hard as a rock. Don't worry, it softens.

I could hardly wait for the entire settling process before I dipped my ice cream scoop into the dish. (Which, by the way, some of you were asking what we use to freeze our frozen yogurt. I've been using a 8 x 8 glass baking dish covered with tin foil.)

If you don't have an ice cream maker, there are a few kinds to choose from. You can get one that hooks right onto your KitchenAid mixer -- the Ice Cream Maker Attachment makes up to 2 quarts at a time. If you don't have a mixer, check out this economical Cuisinart Frozen Dessert Maker.

Again -- even if you don't have a fancy machine, you can enjoy frozen desserts of your own making. Try out our Frozen Banana Bites (and the new FAQs about them) or even my favorite Ultimate Vegan Banana Ice Cream recipe.

Have I convinced you to make your own ice cream yet?

Like what you just read? Browse more of our posts + recipes on Pinterest. You can subscribe to the feed of these posts or follow us on Twitter or Facebook to be the first to know what the (never home)makers are up to. And we’ll love you forever!

Read more...

Chocolate + Coconut Frozen Yogurt

>> Sunday, June 23, 2013

In the past year, our area has gained two frozen yogurt places + an ice cream joint within walking distance of our home. So, I don't know why-oh-why it's taken me eons to make a frozen treat in our ice cream maker. Maybe it's rebellion. After all, I'm sort of anti-Pinterest food trends.

But guys, this is so worth jumping on the bandwagon.


What kept me from mixing up a batch at home was -- in part -- my own impatience. After all, you need to freeze that mixing drum for a good 15 hours. I never plan ahead. If I want dessert, I want it in the moment, which is probably why I make so many cookies.

Saturday afternoon, we realized we had an entirely uneaten container of low-fat yogurt that we needed to use. Fast. So, I crept into the basement, blew the dust off the ice cream maker box, and let the thing chill overnight. Today, I hastily mixed together what I had on hand.

I think it might be impossible to mess up frozen yogurt.
This recipe is great for beginners that want a chocolatey, yet distinctly tart.
Go!


CHOCOLATE + COCONUT FROZEN YOGURT 
nothing fancy here, just delicious homemade goodness

What you'll need . . . 

  • 32 ounces low-fat yogurt
  • 1 cup full fat coconut milk*
  • 1/2 cup cocoa powder
  • 3/4 cup raw sugar**
  • 1 tablespoon vanilla extract
* I imagine if you want to stay with the low-fat theme, you could use reduced fat coconut milk. All we had was the real stuff. And I'm not talking the kind in the refrigerated section -- use the canned kind that's nice + thick.
** Feel free to also experiment with other sweeteners and using less, which is what I'm going to try later in the week. Yup -- more frozen recipes soon!


Method . . . 
  1. In a large bowl, mix together all the ingredients. Then chill for 3 hours -- covered, in the refrigerator.
  2. Then prepare according to your ice cream maker's instructions. Ours instructed us to pour in the mixture and let churn for 30 minutes. 
  3. Then we let it freeze in an airtight shallow container for another 6 hours.

If you don't have an ice cream maker, there are a few kinds to choose from. You can get one that hooks right onto your KitchenAid mixer -- the Ice Cream Maker Attachment makes up to 2 quarts at a time. If you don't have a mixer, check out this economical Cuisinart Frozen Dessert Maker.

I'm sure ours will pay for itself if we can resist all the goodies $$$ on our evening walk.

Have you made your own ice cream?

Even if you don't have a fancy machine, you can enjoy frozen desserts of your own making. Try out our Frozen Banana Bites (and the new FAQs about them) or even my favorite Ultimate Vegan Banana Ice Cream recipe.

Now to go clean the drips off my camera strap!

Like what you just read? Browse more of our posts + recipes on Pinterest. You can subscribe to the feed of these posts or follow us on Twitter or Facebook to be the first to know what the (never home)makers are up to. And we’ll love you forever!

Read more...

FREEZE!

>> Wednesday, November 2, 2011

After we posted about our goal to freeze meals before Baby A is born, we got a lot of email/comment questions regarding our methods -- especially related to our use of glass containers. We're new to freezing, so our tips aren't our own, and -- at this point -- they aren't even well tested.

H.O.W.E.V.E.R. I bought a book a couple months ago called Put 'Em Up: A Comprehensive Home Preserving Guide for the Creative Cook, from Drying and Freezing to Canning and Pickling. We've followed the guidelines they prescribe and also added some of our own along the way.

Here's the process:


We first gather our quart-sized glass jars (our favorite are wide-mouth, but we've used all of those already) and rinse them with super-hot water. Let air dry.


While the jars dry, we prepare whatever we want to fill the jars with. So far, we've made Pumpkin Chili, 15-Minute Applesauce, and Thai Jambalaya.


Then, we fill the jars. It isn't absolutely necessary, but we purchased one of those canning funnels to aid with transporting our food to the jars. It was less than two dollars, and I'd say well worth it. Far less mess to clean up afterward.


This part is important: We leave 2 to 3 inches of space for expansion from the top of the food to the top of the jar. The reason glass jars explode in the freezer is because, as with anytime a liquid freezes, the liquid WILL expand. If there isn't any place for it to go: BOOM.

Also important: We let everything cool to room temperature before putting on the lids. To speed up the process, I've placed the jars in the refrigerator for an hour or two with good success.


To be extra safe . . . we then take a square of plastic wrap and fold it into a smaller square (that's either double or quadrupled over) to serve as a temporary lid. We secure the plastic wrap with the medal jar top, but not too tightly. This way, if something expands like CRAZY, it'll have at least some room to escape.


We gather all the jars and head to our lovely basement where our new upright freezer is located.

Note: You don't need a fancy upright freezer to freeze foods. We bought one because we're participating in a frozen farm share program this winter and wanted more space for storage. The thing set us back around $300.


If you don't have a dedicated freezer or you have a chest freezer, simply stack your jars inside and let chill overnight. You can then replace the tops of the jars with the metal inserts the following day, once everything is solid.


If you do have a freezer, chances are it may have coiled shelves that are incredibly cold. We never set our to-be frozen jars on these coils. Instead, we stack 'em in the door shelves to avoid the bottom freezing much faster than the top. Again, it's one of our weird, made-up methods . . . but we feel safer doing it this way.

We wait a good 24 hours before returning to the jars to replace the temporary tops with the metal lids. And at that point, we move the jars to the coiled shelves.


Oh, and don't forget to use a Sharpie to write the date on the top of your food! Most frozen items last 6 full months. It's glorious. So far, we have 12 quarts of chili/jambalaya (which, for us, equals 12 meals) and 4 quarts of applesauce (so about 4 weeks' worth).


What should we freeze next?!

Veteran food-freezers: Are we missing anything? Any tips to add to this process? And do you have other methods you prefer over freezing in glass? We'd love to hear your thoughts. Just leave a comment or email us at neverhomemaker [at] gmail [dot] com.

Like what you just read? You can subscribe to the feed of these posts or follow us on Twitter or Facebook to be the first to know what the (never home)makers are up to. And we’ll love you forever!!

Read more...

Frozen Banana Bites

>> Wednesday, June 9, 2010


Planning to try this recipe? Be sure to check out the new Banana Bites FAQs post answering some of the most frequently asked questions for the best results and fun variations!

I'm the kind of person who cannot go through even one day without consuming at least two servings of chocolate. OK. Maybe I've survived before with just one (possibly zero if my peanut butter intake was high enough that day). The point is, I'm addicted to desserts. And in my efforts to eat more healthfully, I've been baking less and coming up with more creative ways to get my fix.

Last night, as per usual, I was craving my daily dose . . . with no treats to munch on. I hate chowing on chocolate chips because I eat too many (and plain chocolate isn't satisfying to me). Then I remembered the coconut-cookie dough ice cream we had in the freezer. I went to get some only to realize Stephen had eaten it all . . . apparently last week!

(Source)

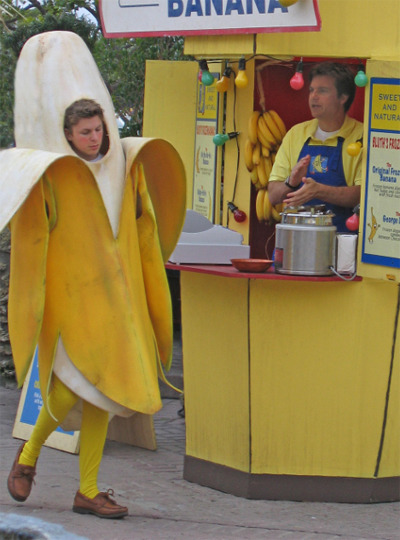
Truth time: It was like 9:30 PM, when I usually start turning in. It wasn't exactly the best time to break out my mixer and craft some vegan cookie masterpiece. So, to avoid this problem in the future, I made up this quick and easy frozen dessert that could most definitely be sold at George Michael's banana stand this summer (any Arrested Development fans out there?).


FROZEN BANANA BITES

What you'll need . . .
  • 2 large bananas
  • 1/4 to 1/3 cup vegan chocolate chips
  • 1/4 to 1/3 cup natural peanut butter
  • Unsweetened coconut flakes

Method . . .
  1. Set out a large plate or bowl with a piece of parchment or wax paper on it.
  2. Cut up the bananas into good-sized chunks. Each banana should give you around 5 to 6 pieces.
  3. Heat the peanut butter and chocolate chips in the microwave on high for about a minute. Then stir until smooth.
  4. Dip the banana pieces in the chocolate-peanut butter mixture. Lay them out leaving some space between them on the parchment/wax paper. Then when you've "covered" them all, use the remaining mixture to spoon over the tops (for even more chocolate-y goodness).
  5. Then sprinkle the unsweetened coconut flakes on top. Transfer to the freezer for about an hour until hardened.
  6. You can enjoy them like this (but they really aren't frozen yet -- and when they're frozen, the banana tastes like vanilla ice cream) . . . I suggest then covering with some plastic wrap (or really you can do all of this in some kind of Rubbermaid container) and let freeze overnight.
Again: Be sure to check out the new Banana Bites FAQs post answering some of the most frequently asked questions for the best results!

Want another way to enjoy frozen bananas, chocolate, and peanut butter?


Try the Ultimate Vegan Ice Cream! We got the idea for banana ice cream from The Kitchn and went with it. This tasty recipe utilizes all the same ingredients, but in a different way. And, as mentioned above, you can substitute in your favorite chocolates and nut butters or substitutes.

BROWSE OTHER TASTY RECIPES:
GRANOLA & OATS PANCAKES, ETC. SMOOTHIES
SPREAD, SAUCES, DIPS SALADS SOUPS & STEWS
SNACKS & STARTERS SANDWICHES & BURGERS PIZZA, ETC.
STIR-FRIES, ETC. OTHER MEALS BREADS
CAKES & CUPCAKES COOKIES & BROWNIES PIES & TARTS
ICE CREAM & PUDDING DRINKS CONVERSIONS
Like what you just read? You can subscribe to the feed of these posts or follow us on Twitter or Facebook to be the first to know what the (never home)makers are up to. And we’ll love you forever!!

Read more...
Related Posts Plugin for WordPress, Blogger...

About This Blog

MyFreeCopyright.com Registered & Protected

© 2009-2014 by the (never home)makers
All content on this blog is copyrighted.

Want to publish our pics, tips, or tricks?
Contact us! [neverhomemaker@gmail.com]

We value transparency. Links on this page may contain affiliates. In addition, please see our disclosure policy regarding sponsored posts.

  © Blogger template Simple n' Sweet by Ourblogtemplates.com 2009

Back to TOP  

Blogging tips