Showing posts with label sandwich. Show all posts

Grilled Blueberry + Brie Sandwich

>> Friday, August 8, 2014

Moving on . . . If I could ever open a restaurant, I'd definitely try my hand at a sandwich shop. Nothing fills my stomach better than crusty bread with lots of fillings, sauces, and cheeses. Remember the ultimate vegetarian behemoth, The Lover? Of course you do! Who can forget?

And if you're looking for a way to use that homemade Honey Whole Wheat + Flax Loaf, I've got you covered. With all those freshly picked blueberries hanging around and a forgotten wheel of Aldi brie, I melted together pure perfection. This sandwich is delicious for breakfast, brunch, or lunch. OK. Dinner and dessert, too.

Here's how you do it:


GRILLED BLUEBERRY + BRIE SANDWICHES
Makes 4 sandwiches total, but you can always cut ingredients down to make one!

What you'll need . . . 
  • 8 slices of Honey Whole Wheat + Flax Bread (or other bread)
  • 1 wheel of brie, I sliced the rind off mine
  • 1/2 cup of 10-Minute Chia Blueberry Jam, recipe below
  • Earth Balance or butter 
  • Honey, for drizzling (optional)

// BLUEBERRY CHIA JAM
  • 1 cup blueberries
  • 1 tablespoon brown sugar
  • 2 tablespoons chia seeds
  • Splash lemon juice
Combine all ingredients in a small sauce pot. Heat on medium until blueberries plump. Then squash them down with a spatula, lower heat, and keep stirring occasionally for 10 minutes. Let sit 5-10 minutes before using in the sandwich (or storing in the fridge). You will have extra jam to spread on toast or baked muffins.

Putting the sandwich together . . .
  1. Warm a grill pan* (or a regular pan can do in a pinch) on the stove over medium-high heat while you prepare the ingredients. Lower heat just before starting to grill to avoid burning. It's a lot like making grilled cheese, if that helps.
  2. Spread one side of bread slices with Earth Balance or butter. Then flip over and spread one side with jam and arrange sliced brie on other side. Sandwich together and place one on the griddle.
  3. You'll want to press down ever-so slightly to get those grill marks going. After a few minutes of cooking, arrange the sandwich in another direction to get the cross grill marks. Then flip and repeat on the other side. The brie should start to ooze -- that's when you know it's done!
  4. I like serving this sandwich with the jam side on the bottom and the brie on the top. It hits my palate better that way. But -- either way -- you can also choose to drizzle with a little honey for extra indulgence.
* I have a Le Creuset Grill Pan that I had won in a contest like 7 years ago or something like that. It's wonderful -- even for vegetarians -- with making sandwiches or grilling tofu with those characteristic marks. You can also find one for less $$$ made by Lodge for just under $20. And it's pre-seasoned!

Behold . . .


The best thing about this sandwich is that you can make it with whatever berries are seasonal. I've made quick chia jams using the exact method above with strawberries, blackberries, raspberries, etc. So, please make this sandwich SOON and let me know how you like it. It's a new favorite around these parts. So simple to make, yet so . . . I don't know . . . fancy.

Happy Friday!

Like what you just read? Browse more of our posts + recipes on Pinterest. You can subscribe to the feed of these posts or follow us on Twitter or Facebook to be the first to know what the (never home)makers are up to. And we’ll love you forever!

Read more...

Seasonal Veggie Wrap

>> Thursday, July 24, 2014

I've been eating this crunchy wrap for lunch often. I use whatever we have on hand from our CSA basket, whatever leftovers might be in the fridge, and a good dressing. I've actually become quite obsessed with dressings lately, but that's a topic for another day.

Let's take a look!


And now . . . the closeup!


SEASONAL VEGGIE WRAP

What you'll need . . .
  • A wrap -- I buy mine (multigrain) at Aldi
  • A green -- I used spinach
  • Something(s) crunchy -- I used carrots and bell peppers
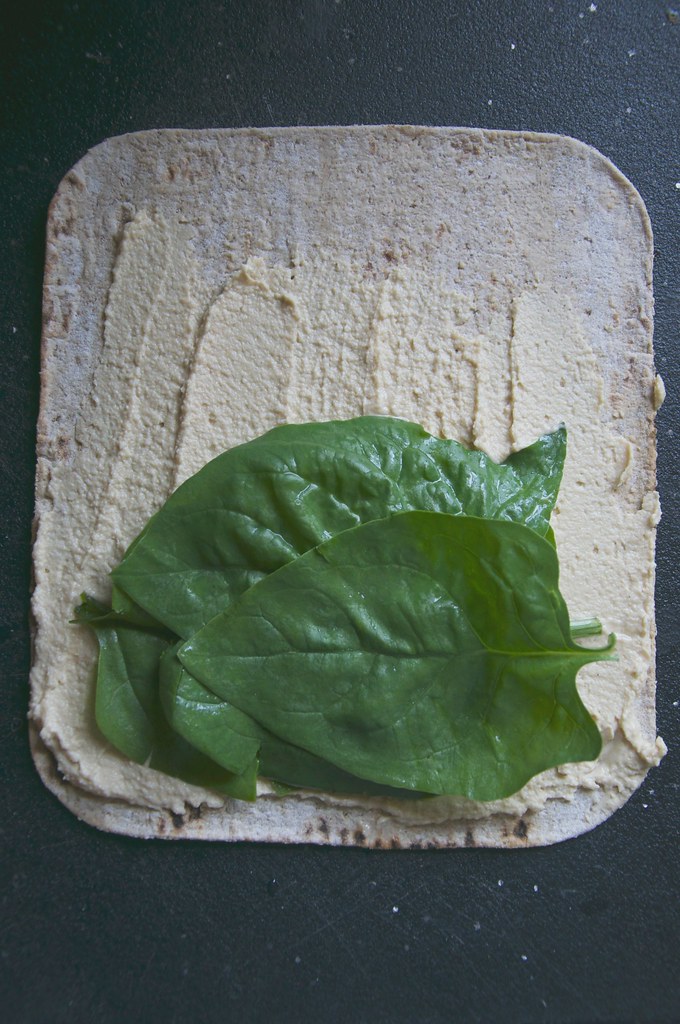
  • A spread -- I made some Tahini-Free Hummus*
  • A bean or grain -- I had some leftover farro
  • Cheese -- this is honey goat cheese**
  • Dressing -- this is Brianna's Poppy Seed Dressing
  • Drizzle -- I like to use hot sauce or even Inglehoffer Sriracha Mustard
* Tahini-Free Hummus is just 1 can of chickpeas -- drained + rinsed -- blended in your food processor with a clove of garlic, a couple tablespoons olive oil, and then 1/4 to 1/2 cup water (until you reach your desired consistency). Season with salt and pepper.

** Omit to make this "recipe" vegan.

Method . . . 
  1. Assemble the ingredients as I did above. There are no rules, so feel free to put them on your wrap in whatever order makes the most sense to you. I find it helpful to cut my crunchy veggies into thin strips for easy eating.
  2. Hunt in your refrigerator shelves for more leftovers (rogue beans make a good fit) to toss on. Really, this "recipe" is a great way to eliminate food waste.
  3. Dress and drizzle for flavor. Then roll into a loose wrap. Everything will be heaping, so you won't have an airtight seal by any means.
What's your favorite seasonal fruit or vegetable?

I'm most excited for TOMATOES to come into full bloom (here's why!). I love Caprese Salads, homemade BBQ Sauce, slow roasted tomatoes, and quick-to-prepare Pasta Sauces.

Like what you just read? Browse more of our posts + recipes on Pinterest. You can subscribe to the feed of these posts or follow us on Twitter or Facebook to be the first to know what the (never home)makers are up to. And we’ll love you forever!

Read more...

Roasted Asparagus + Hummus Toasts

>> Tuesday, June 3, 2014

Our most recent trip to Aldi was yet again $108. I'll get into the specifics in another post this week. Sort of strange how that worked out, as we didn't buy the same stuff the time around -- yet we had another huge cart for $108. Also figured into that number were some items we took to a cookout this weekend.

My favorite items this week? The hummus and italian bread!


We're sort of bread snobs and usually only make our own or buy from Wegmans or local bakeries. But when I saw this round, I figured we should give it a try. Ends up that it's absolutely perfect for grilling! It's hearty and GIGANTIC and taste great.

And so do these toasts/sandwiches. Everything you see if made from Aldi food!


// WHAT I USED:
  • 4 gigantic slices of Italian bread
  • Four flavors of hummus -- my favorite is the green (jalapeƱo)!
  • Some block Pepper Jack cheese, shredded
  • 4 sauces: Ranch dressing, hot sauce, BBQ sauce, and salsa
  • Roasted asparagus spears*
// HOW I ASSEMBLED:
  1. I roasted the asparagus spears using the directions below.
  2. I toasted the bread in a standard toaster first. This required having half the slice stick out the stop and rotating a couple times until lightly golden.
  3. Then I turned the oven to its broil setting, spread the hummus on the slices of bread and topped with some cheese. I let broil until browned and bubbly.
  4. Then I put the sauces on each -- there was no flavor matching. I just did it at random.
  5. Then I put the spears atop each slice and cut the toasts down the middle.

// ROASTED ASPARAGUS SPEARS

  • Preheat your oven to 375 degrees F. Get out a rimmed baking sheet.
  • Wash and cut ends off your asparagus spears. Then drizzle with a tablespoon or two of olive oil. Sprinkle with salt and pepper.
  • Place in the oven for 15-20 minutes, then flip around and cook another 15 minutes. You'll likely want to roast again until you start to see some deep brown marks. Possibly 45 minutes or more in all.
  • Asparagus should be somewhat limp and crisp (weird, but true) when you take them out of the oven.


So, another day -- another delicious sandwich (Stephen topped his with arugula). You could easily adapt this "recipe" to make the whole thing on the grill as well! Just grill your asparagus first, lay a bit of foil down so your bread doesn't burn and do everything as detailed above . . . just on an open flame.

Now I'm hungry!

More #unsponsored ALDI recipes/posts:
Like what you just read? Browse more of our posts + recipes on Pinterest. You can subscribe to the feed of these posts or follow us on Twitter or Facebook to be the first to know what the (never home)makers are up to. And we’ll love you forever!

Read more...

Some Assembly Required

>> Friday, May 30, 2014

Continuing with a sandwich theme this week, I thought I'd share my most recent bagel shop re-creation: The Mexican Bagel. There's been a variation of this "recipe" at almost every lunch spot with bagels I've ever been to. So, I figured making it at home would be easy and less expensive. Especially now that our house sale/purchase is actually moving forward!

YAY!

Anyway, I posted a poorly lit photo of this sandwich last night on Instagram. I had all the right ingredients to make it again today for lunch.


THE MEXICAN BAGEL

What you'll need . . .
  • Your favorite type of bagel
  • Your favorite type of cream cheese
  • Your favorite sliced cheese (cheddar, Jack, Colby-Jack, etc.)
  • Your favorite salsa
  • Avocado
  • Your Favorite hot sauce
Method . . .
  1. Slice the bagel and toast until lightly brown. 
  2. Spread a layer of cream cheese on both halves.
  3. Top with your sliced cheese and then broil until melted.
  4. Scoop on a couple spoonfuls of salsa. Then top with avocado slices.
  5. Dash liberally with the hot sauce + enjoy!

*     *     *     *     *

Tonight's plans include going to our mortgage bank and signing some papers. Then we're taking Ada to the park + both going to try to fit in a brief run.  (I'll share more of my marathon training plans next week.) Then we're making these sandwiches for dinner and drinking some trail mix beer from Saranac. I think we'll also indulge in renting the movie Her because I've been dying to see it.

Do you have any fun weekend plans? I'd love to fit in a yard sale one of these weeks!

Like what you just read? You can subscribe to the feed of these posts or follow us on Twitter or Facebook to be the first to know what the (never home)makers are up to. And we’ll love you forever!

Read more...

An Ode to Sandwiches

>> Tuesday, May 27, 2014

Oh man, oh man. We were not expecting what we found in the house inspection last week. The place we had our hearts set on ended up being way more than we could handle with regard to DIY. In fact, it ended up being somewhat of an unsafe environment. So, we're waiting on pins and needles to hear the results of the inspection on our home to see if everything is going to run smoothly now that we've found yet another house we love.

Anyway, I have so much I want to share about food these days. But I also realize I'm going to have to buy a new camera charger because mine is long gone! Enough apologies. I have a goal.

By the end of the summer, I'd like to be able to make my favorite sandwich -- tomato, pesto, mozzarella on sourdough -- from scratch. I know I could likely do it sooner, but with everything going on right now, I'll wait to earn my badge in cheese-making.


Well, I also likely won't have tomatoes from my own garden this year, so maybe I'll use one from a friend's garden. But I'd say we eat this simple sandwich once a week. It's sort of our weekend treat. The one time we go to Wegmans.

And I'll tell you what -- after shopping (and saving!) at Aldi for so long, going to Wegmans is an out-of-this-world experience. With some time away, I can totally, TOTALLY see why I always over-spend there.

This sandwich will require:

#1. // Some simple sourdough bread, and I'll need to begin from scratch with a new starter. This time around, I'd like to use the wild grapes method.

#2. // A ball of homemade mozzarella cheese. I've been wanting to make my own cheese for quite some time. It's one of my favorite foods, and I've read that mozzarella is a great gateway cheese.

#3. // A batch of one of my many pesto sauces. Though for this sandwich, I'd probably go with a classic basil pesto. I can't wait to start getting all that basil in our farm share. I'm going to promptly make pesto and freeze. I swear we eat some every single day!


I guess I'll get bonus points if we can also make a batch of beer and some black and white cookies. Right? Stephen is itching to brew again -- especially now that we might potentially have more space to sprawl out and store his creations. (Have you checked out our homebrewing section yet?)

// SANDWICHES = AMAZING

Regardless, sandwiches are my favorite food:

* means VEGAN

Like what you just read? You can subscribe to the feed of these posts or follow us on Twitter or Facebook to be the first to know what the (never home)makers are up to. And we’ll love you forever!

Read more...
Brunch Sandwich

>> Monday, May 27, 2013

If I ever open a restaurant, it will be called Brunch.

And I will serve only brunch.

And this sandwich will be the signature item on the menu.


It sounds a lot more complicated than it actually is.

Let's break it down:

  • First you'll need to roast one large portabella per sandwich you intend to make. (You can find some handy instructions in this post all about the merits of mushrooms for runners.)
  • You'll need slices of tomato and avocado, too. As well as some cream cheese or Tofutti, which is what we had in the fridge.
  • The french toast is just slices of sourdough bread soaked in an egg mixture and then cooked over medium-high heat on both sides until browned.
  • = 2 whole eggs + 1 tablespoons Chipotle Vegenaise + 1-3 tablespoons almond milk. Whisked.
  • (That should be enough to soak 6 to 8 slices of bread or make 3 to 4 sandwiches.) 

Sandwich assembly is quite easy.

Slice everything up nice + thin, then pile on to your liking.

Fold into a sandwich and cut.

You may remember back in my last waffle post that I had intended to give you a waffle sandwich recipe that was of the savory variety. Well, yes. But I never took photos. Anyway, this is pretty much THAT sandwich.

But there's more sandwich deliciousness where this came from.

Stay tuned . . .

Like what you just read? Browse more of our posts + recipes on Pinterest. You can subscribe to the feed of these posts or follow us on Twitter or Facebook to be the first to know what the (never home)makers are up to. And we’ll love you forever!

Read more...

Chilly Afternoon

>> Thursday, December 27, 2012


If you have a a chilly afternoon like this, the best way to warm up and recharge is with tomato soup + grilled cheese. We've been making a lot of our Roasted Tomato Soup lately. After posting that recipe several of you mentioned the roasting isn't really necessary.

So, I played around a bit.


The recipe is easy.

  • Mince 3 large cloves of garlic. Then, in a large stock pot, saute the garlic some olive oil for a few minutes. 
  • Crack open two 28 ounce cans of whole peeled tomatoes. In a food processor, completely blend one of the cans -- tomatoes, water, all -- with the garlic. Then add the other can and coarsely combine (so it's chunky)
  • Return mixture to the stock pot. Season with salt, pepper, thyme, oregano, basil, and paprika. To taste. Add a splash of balsamic vinegar (about a tablespoon) if you like. 
  • Let flavors mingle (heat on medium-low) for 25 minutes. 
  • Then add in 1/2 to 1 full cup of sour cream. Cook another 10 minutes. 
  • Serve with toasted cheese.

I opted for a slightly more grown up version of grilled cheese. Open-faced with cheddar broiled to a perfect brown. Covered with avocado slices and then sliced into great shapes for dipping.

A new take on comfort food.


If you'd like to check out Ada's big X-mas gift this year (a play kitchen), check out Writing Chapter Three.

Like what you just read? You can subscribe to the feed of these posts or follow us on Twitter or Facebook to be the first to know what the (never home)makers are up to. And we’ll love you forever!

Read more...

Vegan Spiedie Wrap

>> Thursday, July 12, 2012


We're at that point where we're again deciding whether or not to ditch cable. It happens every year around this time. But when we watched more TV, we were quite hooked on Adam Richman's Man vs. Food. I link to it often, but if you haven't already -- you can check our sandwich tribute here.

Oh, and I found this goodie -- El Chubacabra -- lurking in our video archives -- all the way from 2009!


I guess I'm glad we didn't pull the plug just yet, because we caught the tail-end of his newer series Best Sandwich in America last night. The episode got me thinking about local and regional food specialties. Like Rochester, NY's garbage plate or Philly's cheesesteak, for example.

There's another upstate NY favorite called the Spiedie, which is a sandwich assembled with cubes of meat marinated in a special sauce, grilled over charcoal, and slapped into a submarine roll. Our favorite local brewery makes a vegan version, but we can't afford to go out to eat much these days.

So, we now make it at home!


VEGAN SPIEDIE WRAP FOR 2

#1: The sauce is sold at local grocery stores in the area. But we made ours with a recipe we found online, subbing olive oil for canola. It comes together quickly, and is basically just oil, vinegar, lemon juice, garlic, and lots of Italian spices.

#2: The wrap/bread? Pieces of basic 5-minute naan -- but with two teaspoons baking powder instead of just 1/2. One batch made two large pieces perfect for stuffing.


#3: Other ingredients needed:
  • One package of 7-grain (or your favorite) tempeh
  • 1 large, ripe avocado
  • 2 to 4 tablespoons Vegenaise
  • 2 tablespoons horseradish
  • Handful spinach or mixed greens


Method . . .
  • Cut tempeh into triangles. Set aside.
  • In a fry pan over medium heat, pour in 1/4 to 1/2 cup Spiedie sauce (keep the rest in your fridge for a rainy day) and add tempeh. Cook, turning over several times, until both sides are browned.
  • Make your naan -- again, instructions are here. You just need two large pieces.
  • Mix together the Vegenaise and horseradish. Spread into your bread. Then top with the cooked tempeh.
  • Slice an avocado and distribute evenly between wraps. Top with spinach/greens. Fold or roll over and enjoy!
Maybe not 100% traditional, but amazingly good. Pairs well with a summer shandy (mixture of 1/2 beer, 1/2 lemonade)!


What's a dish that's indigenous to your part of the world? Have you tried making it at home?

Yesterday I wrote about some random Wednesday Stuff over on Writing Chapter Three -- including my new glasses. It's day #2 with them, and I'm still smitten.

Like what you just read? You can subscribe to the feed of these posts or follow us on Twitter or Facebook to be the first to know what the (never home)makers are up to. And we’ll love you forever!.

Read more...

Good, Hefty Eats

>> Thursday, July 5, 2012


A lot of what we've been eating lately has been recipe-free. It's quite liberating, actually. Once we got the hang of the basic cooking methods, it made our lives much easier. Most of what we eat during the week is made up of stir-fries, sandwiches and pizzas.

Yes. Multiple pizzas. I've been meaning to write about this for a while. We got a question in our inbox about why we eat so much pizza. The answer is quite simple: Pizza can be an extremely healthy dinner option if it's done right.

Think a thin, homemade whole wheat (often made with puree, like pumpkin or carrot) crust topped with tons of roasted veggies. Go easy on the cheese. You get a lot of food groups packed into tasty bites . . . of delicious pizza. I think we eat it at least twice a week.


Tonight's featured roasted kohlrabi (thanks for my Tweeps for identifying it for me!), garlic scapes, and leeks. We each polished off half of this bad boy.

To make it at home: Just preheat your oven to 400 degrees F, slice veggies, drizzle with olive oil, sprinkle with salt/pepper/crushed red pepper, and bake in 15-minute intervals -- stirring between -- until golden brown. Top pizza with as many veggies as you can pack on and bake as you would any pizza at home.

You can find more of our favorites on the pizza page!


Our feeling about complete, action-packed nutrition is the same with our insane sandwiches. They may look crazy and indulgent, but when you break 'em down, it's really just everything you'd put on a plate for dinner . . . between two crusty slices of bread.

This new one is affectionately called the "Smothered Mother" because it's slathered in sauces. (And FYI: You have to say it like Fred Armisen on the "I am YOUR MOTHER" skit on SNL.)


What's on it:

Your favorite bread (this is Rosemary Salt from Wegmans)
Seitan, slices (homemade or store-bought)
Colby cheese, slices
Chipotle Vegenaise
Pesto
Sweet potato fries
Salad greens (this is a local mix -- baby spinach or arugula would be great, too)

I eat enough to fuel breastfeeding and training between 20 and 30 miles a week. That means I typically match what's on Stephen's plate these days. (It's been like that since before I was pregnant, actually.) There's no "perfect" or "ideal" in the way to eat. If I'm hungry, I don't suffer. I've had enough of that in my life.

These hefty meals keep me satisfied and satiated. They are fun and incredibly delicious. They're packed full of calories that I need without the bulk of countless plates of salads and other low calorie fare.

What are your weeknight go-to meals? If you're an athlete or need more calories for good stuff like pregnancy or breastfeeding, how do you get it all in? I'd love to get some new ideas!


Today on Writing Chapter Three you can read all about our least exciting 4th of July EVER. OK. It wasn't that bad, but it's hard to compete with last year's babymoon.

Like what you just read? You can subscribe to the feed of these posts or follow us on Twitter or Facebook to be the first to know what the (never home)makers are up to. And we’ll love you forever!

Read more...
Related Posts Plugin for WordPress, Blogger...

About This Blog

MyFreeCopyright.com Registered & Protected

© 2009-2014 by the (never home)makers
All content on this blog is copyrighted.

Want to publish our pics, tips, or tricks?
Contact us! [neverhomemaker@gmail.com]

We value transparency. Links on this page may contain affiliates. In addition, please see our disclosure policy regarding sponsored posts.

  © Blogger template Simple n' Sweet by Ourblogtemplates.com 2009

Back to TOP  

Blogging tips















